- Cover
- Introduction
- 1 Hello, Android
- 2 Getting Started
- 3 Applications and Activities and Fragments, Oh My!
- 4 Defining the Android Manifest and Gradle Build Files, and Externalizing Resources
- 5 Building User Interfaces
- 6 Intents and Broadcast Receivers
- 7 Using Internet Resources
-
8 Files, Saving State, and User Preferences
- SAVING FILES, STATES, AND PREFERENCES
- SAVING AND RESTORING ACTIVITY AND FRAGMENT INSTANCE STATE USING THE LIFECYCLE HANDLERS
- RETAINING INSTANCE STATE WITH HEADLESS FRAGMENTS AND VIEW MODELS
- CREATING AND SAVING SHARED PREFERENCES
- RETRIEVING SHARED PREFERENCES
- INTRODUCING ON SHARED PREFERENCE CHANGE LISTENERS
- CONFIGURING AUTO BACKUP OF APPLICATION FILES AND SHARED PREFERENCES
- BUILDING A PREFERENCE UI
- CREATING A SETTINGS ACTIVITY FOR THE EARTHQUAKE MONITOR
- INCLUDING STATIC FILES AS RESOURCES
- WORKING WITH THE FILESYSTEM
- SHARING FILES USING FILE PROVIDER
- ACCESSING FILES FROM OTHER APPLICATIONS USING THE STORAGE ACCESS FRAMEWORK
- USING URI-BASED PERMISSIONS
- 9 Creating and Using Databases
- 10 Content Providers and Search
- 11 Working in the Background
- 12 Implementing the Android Design Philosophy
-
13 Implementing a Modern Android User Experience
- THE MODERN ANDROID UI
- CREATING CONSISTENT, MODERN USER INTERFACES USING APPCOMPAT
- ADDING A MENU AND ACTIONS TO THE APP BAR
- GOING BEYOND THE DEFAULT APP BAR
- IMPROVING THE EARTHQUAKE MONITOR’S APP BAR
- APP NAVIGATION PATTERNS
- ADDING TABS TO THE EARTHQUAKE MONITOR
- CHOOSING THE RIGHT LEVEL OF INTERRUPTION
- 14 Advanced Customization of Your User Interface
-
15 Location, Contextual Awareness, and Mapping
- ADDING LOCATION, MAPS, AND CONTEXTUAL AWARENESS TO YOUR APPLICATIONS
- INTRODUCING GOOGLE PLAY SERVICES
- FINDING DEVICE LOCATION USING GOOGLE LOCATION SERVICES
- SETTING AND MANAGING GEOFENCES
- USING THE LEGACY PLATFORM LOCATION-BASED SERVICES
- USING THE GEOCODER
- CREATING MAP-BASED ACTIVITIES
- MAPPING THE EARTHQUAKE EXAMPLE
- ADDING CONTEXTUAL AWARENESS
- 16 Hardware Sensors
- 17 Audio, Video, and Using the Camera
- 18 Communicating with Bluetooth, NFC, and Wi-Fi Peer-to-Peer
- 19 Invading the Home Screen
- 20 Advanced Android Development
-
21 Releasing, Distributing, and Monitoring Applications
- PREPARING FOR RELEASE
- UPDATING APPLICATION METADATA IN YOUR APPLICATION MANIFEST
- SIGNING PRODUCTION BUILDS OF YOUR APPLICATION
- DISTRIBUTING YOUR APPLICATION ON THE GOOGLE PLAY STORE
- AN INTRODUCTION TO MONETIZING APPLICATIONS
- APPLICATION MARKETING, PROMOTION, AND DISTRIBUTION STRATEGIES
- USING FIREBASE TO MONITOR YOUR APPLICATION
- Index
- End User License Agreement

PROFESSIONAL Android®
Fourth Edition
INTRODUCTION
For many people, smartphones have become an extension of themselves. Now running on over 2 billion monthly-active devices, Android is the most common smartphone operating system in use world-wide, with users installing an average of 50 apps each, resulting in over 94 billion apps downloaded from the Play app store in 2017 alone.
Ubiquitous and indispensable, smartphones are so advanced and personal that studies have shown people become anxious if they misplace their device, lose connectivity, or run low on battery.
In the 10 years since launching in 2008, Android has expanded beyond mobile phones to become a development platform for a wide range of hardware, with 24,000 devices from over 1,300 brands, including everything from tablets to televisions, watches, cars, and Internet of Things (IoT) devices. Over the same period, there have been 28 platform and SDK releases.
These innovations, combined with the size of the ecosystem, provide unparalleled opportunities for developers to create innovative new applications for a global audience of users.
Android offers an open platform for mobile application development. Without artificial barriers, Android developers are free to write apps that take full advantage of an incredible range of devices. Using Google Play for distribution, developers can distribute free and paid applications to compatible Android devices globally.
This book is a hands-on guide to building Android applications for all Android devices. It’s written based on version 8.1 of the Android SDK, using Android Studio 3.1. Chapter by chapter, it takes you through a series of sample projects, each introducing new features and techniques to get the most out of Android. It covers all the basic functionality to get started, as well as the information for experienced mobile developers to take full advantage of the features of Android, to enhance existing products or create innovative new ones.
The Android team releases a new major platform every year, a new version of Android Studio every few months, and incremental changes to Jetpack, such as the support library and Android Architecture Components, many times each year. With such rapid release cycles, there are regular changes, additions, and improvements to the tools, platform APIs, and development libraries you’ll use—and which are described in this book. To minimize the impact of these changes, the Android engineering team works hard to ensure backward compatibility.
However, future releases will date some of the information provided in this book, and not all active Android devices will be running the latest platform release. To mitigate this, wherever possible, we have used backward-compatible support libraries, and included details on which platform releases support the functionality described—and which alternatives may exist to provide support for users of devices running earlier platforms.
Further, the explanations and examples included will give you the grounding and knowledge needed to write compelling mobile applications using the current SDK, along with the flexibility to quickly adapt to future enhancements.
WHO THIS BOOK IS FOR
This book is for anyone interested in creating applications for the Android platform. It includes information that will be valuable, whether you’re an experienced mobile developer on other platforms, making your first foray into writing mobile apps, and if you have some Android development experience.
It will help if you’ve used a smartphone (particularly an Android device), but it’s not necessary, nor is prior experience in mobile application development.
It’s expected that you’ll have experience in software development and be familiar with basic object-oriented paradigms. An understanding of Java syntax is expected, though not a strict necessity.
Chapters 1 and 2 introduce mobile development and the Android development platform, and contain instructions to get you started. Beyond that, there’s no requirement to read the chapters in order, although a good understanding of the core components described in Chapters 3 – 7 is important before you venture into the remaining chapters. Chapter 11 covers important details on how to ensure your apps are responsive and efficient, while Chapters 12 – 14 describe how to provide a rich and consistent user experience. The remaining chapters cover a variety of functionality whose relevance will vary based on your application, and can be read in whatever order interest or need dictates.
WHAT THIS BOOK COVERS
Chapter 1 introduces Android, including what it is and how it fits into the mobile development ecosystem. What Android offers as a development platform and why it’s an exciting opportunity for creating mobile phone applications are then examined in greater detail.
Chapter 2 covers some best practices for mobile development and explains how to download and install Android Studio and the Android SDK. It then introduces some of the tools and features included with Android Studio, and demonstrates how they can be used to create and debug new applications.
Chapters 3 – 7 take an in-depth look at the fundamental Android application components—starting by examining the components that make up an Android application, and then moving on to “Activities” and “Fragments,” and their associated lifetimes and lifecycles.
You’ll then be introduced to the application manifest and the Gradle build system, before learning more about the external resource framework used to support devices used in different counties, with different languages, and in a variety of shapes and sizes.
You’ll learn how to create basic user interfaces with layouts, Views, and Fragments, before being introduced to the Intent and Broadcast Receiver mechanisms used to perform actions and send messages between application components. Accessing Internet resources is then covered, followed by a detailed look at data storage, retrieval, and sharing. You’ll start with the preference-saving mechanism and then move on to file handling, databases, and Content Providers—including accessing data from the native databases.
This section finishes with an examination of how to ensure your app is always responsive, and is efficient in its use of battery when running in the background. You’ll be introduced to threading APIs that enable asynchronous execution, and mechanisms that support efficient scheduling of background work. You’ll also learn how to create and display interactive Notifications.
Chapters 12 – 14 build on the UI framework introduced in Chapter 5 . You’ll learn to enhance the user experience through the principles of material design and to make your applications accessible and optimized for a variety of screen sizes and resolutions. You’ll further improve the user experience by understanding the variety of navigation options available, adding movement through animations, and the use of Toolbars and Menus.
Chapters 15 – 19 look at more advanced topics. You’ll learn how to use Google Play services to add interactive maps, find the user’s location, and how to create geo- and awareness-fences. Using movement and environmental Sensors—including the compass, accelerometers, and the barometer—you’ll make your applications react to their environment.
After looking at how to play and record multimedia, as well as how to use the camera to take pictures and record video, you’ll be introduced to Android’s communication capabilities, including Bluetooth, NFC, and Wi-Fi Direct. Next, you’ll learn how your applications can interact with users directly from the home screen using dynamic Widgets, Live Wallpaper, and the Application Shortcuts.
Chapter 20 discusses several advanced development topics, including security, using the fingerprint sensor, and Strict Mode, followed by the telephony APIs and the APIs used to send and receive SMS messages.
Finally, Chapter 21 examines the process for building, releasing, monitoring, and monetizing your applications. In particular, it includes details for publishing and distributing your applications within Google Play.
HOW THIS BOOK IS STRUCTURED
This book is structured in a logical sequence to help readers of different development backgrounds learn how to write advanced Android applications. There’s no requirement to read each chapter sequentially, but several of the sample projects are developed over the course of multiple chapters, adding new functionality and other enhancements at each stage.
Experienced mobile developers who have already installed Android Studio, and those with a working knowledge of Android development, can skim the first two chapters—which are an introduction to mobile development and instructions for creating your development environment—and then dive in at Chapters 3 – 7 . These chapters cover the fundamentals of Android development, so it’s important to have a solid understanding of the concepts they describe.
With this covered, you can move on to the remaining chapters, which look at material design, maps, location-based services, background applications, and more advanced topics, such as hardware interaction and networking.
WHAT YOU NEED TO USE THIS BOOK
To use the code samples in this book, you will need to create an Android development environment by downloading Android Studio and the Android SDK. It’s also possible to use other IDEs, or even to build your apps from the command-line. We’ll assume, however, you’re using Android Studio.
Android development is supported on Windows, macOS, and Linux, with Android Studio and the SDK available from the Android website.
You do not need an Android device to use this book or develop Android applications—though it can be useful, particularly when testing.
CONVENTIONS
To help you get the most from the text and keep track of what’s happening, we’ve used a number of conventions throughout the book.
As for styles in the text:
-
We show file names, URLs, and code within the text like so:
persistence.properties. - To help readability, class names in text are often represented using a regular font but capitalized like so: Content Provider.
-
We present code in two different ways:
We use a monofont type with no highlighting for most code examples.We use bold to indicate changes or additions from a similar previous code snippet. -
In some code samples, you’ll see lines marked as follows:
[… Existing code …]or
[… Implement something here …]These represent instructions to replace the entire line (including the square brackets) with actual code, either from a previous code snippet (in the former case) or with your own implementation (in the latter).
-
To keep the code samples reasonably concise, we have not always included every
packagedefinition orimportstatement required in the code snippets. The downloadable code samples described below include all the requiredimportstatements. Additionally, if you are developing using Android Studio, you can enable auto-import or use the keyboard shortcut Ctrl+Space (Cmd+Space) to add the requiredimportstatements.
SOURCE CODE
As you work through the examples in this book, you may choose either to type in all the code manually, or to use the source code files that accompany the book. All the source code used in this book is available for download at
www.wrox.com
. When at the site, simply locate the book’s title (use the Search box or one of the title lists) and click the Download Code link on the book’s detail page to obtain all the source code for the book.
Once you download the code, just decompress it with your favorite compression tool. Alternately, you can go to the main Wrox code download page at
www.wrox.com/dynamic/books/download.aspx
to see the code available for this book and all other Wrox books.
ERRATA
We make every effort to ensure that there are no errors in the text or in the code. However, no one is perfect, and mistakes do occur. If you find an error in one of our books, like a spelling mistake or faulty piece of code, we would be very grateful for your feedback. By sending in errata, you may save another reader hours of frustration, and at the same time, you will be helping us provide even higher quality information.
To find the errata page for this book, go to
www.wrox.com
and locate the title using the Search box or one of the title lists. Then, on the book details page, click the Book Errata link. On this page, you can view all errata that has been submitted for this book and posted by Wrox editors. A complete
book list, including links to each book’s errata, is also available at
www.wrox.com/misc-pages/booklist.shtml
.
If you don’t spot “your” error on the Book Errata page, go to
www.wrox.com/contact/techsupport.shtml
and complete the form there to send us the error you have found. We’ll check the information and, if appropriate, post a message to the book’s errata page and fix the problem in subsequent editions of the book.
1
Hello, Android
ANDROID APPLICATION DEVELOPMENT
Whether you’re an experienced mobile engineer, a desktop or web developer, or a complete programming novice, Android represents an exciting opportunity to write applications for an audience of over two billion Android device users.
You’re probably already familiar with Android, the most common software powering mobile phones. If not, and you purchased this book in the hope that Android development would help you create an unstoppable army of emotionless robot warriors on a relentless quest to cleanse the earth of the scourge of humanity, you should reconsider this book purchase (and your life choices.)
When announcing Android at its launch in 2007, Andy Rubin described it as follows:
The first truly open and comprehensive platform for mobile devices. It includes an operating system, user-interface and applications—all of the software to run a mobile phone but without the proprietary obstacles that have hindered mobile innovation.
—WHERE’S MY GPHONE?
( http://googleblog.blogspot.com/2007/11/wheres-my-gphone.html )
Since then, Android has expanded beyond mobile phones to provide a development platform for an increasingly wide range of hardware, including tablets, televisions, watches, cars, and Internet-of-Things (IoT) devices.
Android is an open source software stack that includes an operating system, middleware, and key applications for mobile and embedded devices.
Critically, for us as developers, it also includes a rich set of API libraries that make it possible to write applications that can shape the look, feel, and function of the Android devices on which they run.
In Android, system, bundled, and all third-party applications are written with the same APIs and executed on the same run time. These APIs feature hardware access, video recording, location-based services, support for background services, maps, notifications, sensors, relational databases, inter-application communication, Bluetooth, NFC, and 2D and 3D graphics.
This book describes how to use these APIs to create your own Android applications. In this chapter you learn some guidelines for mobile and embedded hardware development, and are introduced to some of the platform features available to Android developers.
Android has powerful APIs, a huge and diverse ecosystem of users, excellent documentation, a thriving developer community, and has no required costs for development or distribution. As the Android device ecosystem continues to grow, you have the opportunity to create innovative applications for users, no matter what your development experience.
A LITTLE BACKGROUND
In the days before Instagram, Snapchat, and Pokémon Go, when Google was still a twinkle in its founders’ eyes and dinosaurs roamed the earth, mobile phones were just that—portable phones small enough to fit inside a briefcase, featuring batteries that could last up to several hours. They did, however, offer the freedom to make calls without being physically connected to a landline.
In the 10 years since the first Android device was launched, smart phones have become ubiquitous and indispensable. Hardware advancements have made devices more powerful, featuring bigger, brighter screens and featuring advanced hardware including accelerometers, fingerprint scanners, and ultra-high-resolution cameras.
These same advances have more recently resulted in a proliferation of additional form factors for Android devices, including a large variety of smart-phones, tablets, watches, and televisions.
These hardware innovations offer fertile ground for software development, providing many opportunities to create innovative new applications.
The Not-So-Distant Past
In the early days of native phone application development, developers, generally coding in low-level C or C++, needed to understand the specific hardware they were coding for, typically a single device or possibly a range of devices from a single manufacturer. The complexity inherent in this approach meant the applications written for these devices often lagged behind their hardware counterparts. As hardware technology and mobile Internet access have advanced, this closed approach has become outmoded.
The next significant advancement in mobile phone application development was the introduction of Java-hosted MIDlets. MIDlets were executed on a Java virtual machine (JVM), a process that abstracted the underlying hardware and let developers create applications that ran on many devices that supported the Java run time.
Unfortunately, this convenience came at the price of more heavily restricted access to the device hardware. Similarly, it was considered normal for third-party applications to receive different hardware access and execution rights from those given to native applications written by the phone manufacturers, with MIDlets often receiving few of either.
The introduction of Java MIDlets expanded developers’ audiences, but the lack of low-level hardware access and sandboxed execution meant that most mobile applications were regular desktop programs or websites designed to render on a smaller screen, and didn’t take advantage of the inherent mobility of the handheld platform.
Living in the Future
At its introduction, Android was part of a new wave of modern mobile operating systems designed specifically to support application development on increasingly powerful mobile hardware.
Android offers an open development platform built on an open source Linux kernel. Hardware access is available to all applications through a series of API libraries, and application interaction, while carefully controlled, is fully supported.
In Android, all applications have equal standing. Third-party and native Android applications are written with the same APIs and are executed on the same run time. Users can replace most system application with a third-party developer’s alternative; indeed, even the dialer and home screens can be replaced.
THE ANDROID ECOSYSTEM
The Android ecosystem is made up of a combination of three components:
- A free, open source operating system for embedded devices
- An open source development platform for creating applications
- Devices that run the Android operating system (and the applications created for it)
More specifically, Android is made up of several necessary and dependent parts, including the following:
- A Compatibility Definition Document (CDD) and Compatibility Test Suite (CTS) that describe the capabilities required for a device to support the Android software stack.
- A Linux operating system kernel that provides a low-level interface with the hardware, memory management, and process control, all optimized for mobile and embedded devices.
- Open source libraries for application development, including SQLite, WebKit, OpenGL, and a media manager.
- A run time used to execute and host Android applications, including the Android Run Time (ART) and the core libraries that provide Android-specific functionality. The run time is designed to be small and efficient for use on embedded devices.
- An application framework that agnostically exposes system services to the application layer, including the Window Manager and Location Manager, databases, telephony, and sensors.
- A user interface framework used to host and launch applications.
- A set of core preinstalled applications.
- A software development kit (SDK) used to create applications, including the related tools, IDE, sample code, and documentation.
What really makes Android compelling is its open philosophy, which ensures that you can fix any deficiencies in user interface or native application design by writing an extension or replacement. Android provides you, as a developer, with the opportunity to create applications designed to look, feel, and function exactly as you imagine them.
With more than 2 billion monthly active users of devices running the Android operating system, installing over 82 billion apps and games in from Google Play in 2016 alone, the Android ecosystem represents an unparalleled chance to create apps that can affect and improve billions of people’s lives.
PRE-INSTALLED ANDROID APPLICATIONS
Android devices typically come with a suite of preinstalled applications that users expect. On smart phones these typically include:
- A phone dialer
- An SMS management application
- A web browser
- An e-mail client
- A calendar
- A contacts list
- A music player and picture gallery
- A camera and video recording application
- A calculator
- A home screen
- An alarm clock
In many cases Android devices also ship with the following proprietary Google mobile applications:
- The Google Play Store for downloading third-party Android applications
- The Google Maps application, including StreetView, driving directions, and turn-by-turn navigation, satellite views, and traffic conditions
- The Gmail email client
- The YouTube video player
- The Google Chrome browser
- The Google home screen and Google Assistant
The data stored and used by many of these native applications—such as contact details—are also available to third-party applications.
The exact makeup of the applications available on new Android devices is likely to vary based on the hardware manufacturer, the carrier or distributor, and the type of device.
The open source nature of Android means that carriers and OEMs can customize the user interface and the applications bundled with each Android device.
It’s important to note that for compatible devices, the underlying platform and SDK remains consistent across OEM and carrier variations. The look and feel of the user interface may vary, but your applications will function in the same way across all compatible Android devices.
ANDROID SDK FEATURES
For us developers, the true appeal of Android lies in its APIs.
As an application-neutral platform, Android gives you the opportunity to create applications that are as much a part of the phone as anything provided out-of-the-box. The following list highlights some of the most noteworthy Android features:
- Transparent access to telephony and Internet resources through GSM, EDGE, 3G, 4G, LTE, and Wi-Fi network support, enabling your app to send and retrieve data across mobile and Wi-Fi networks
- Comprehensive APIs for location-based services such as GPS and network-based location detection
- Full support for integrating maps within the user interface
- Full multimedia hardware control, including playback and recording with the camera and microphone
- Media libraries for playing and recording a variety of audio/video or still-image formats
- APIs for using sensor hardware, including accelerometers, compasses, barometers, and fingerprint sensors
- Libraries for using Wi-Fi, Bluetooth, and NFC hardware
- Shared data stores and APIs for contacts, calendar, and multi-media
- Background services and an advanced notification system
- An integrated web browser
- Mobile-optimized, hardware-accelerated graphics, including a path-based 2D graphics library and support for 3D graphics using OpenGL ES 2.0
- Localization through a dynamic resource framework
WHAT DOES ANDROID RUN ON?
The first Android mobile handset, the T-Mobile G1, was released in the United States in October 2008. By the end of 2017 there are more than 2 billion monthly active Android devices globally, making it the most common smart phone operating system in use world-wide.
Rather than being a mobile OS created for a single hardware implementation, Android is designed to support a large variety of hardware platforms, from smart phones to tablets, televisions, watches, and IoT devices.
With no licensing fees or proprietary software, the cost to handset manufacturers for providing Android devices is comparatively low, which, combined with a massive ecosystem of powerful applications, has encouraged device manufacturers to produce increasingly diverse and tailored hardware.
As a result, hundreds of manufacturers, including Samsung, LG, HTC, and Motorola, are creating Android devices. These devices are distributed to users via hundreds of carriers world-wide.
WHY DEVELOP FOR MOBILE?
Smart phones have become so advanced and personal to us that for many people they’ve become an extension of themselves. Studies have shown that many mobile phone users become anxious if they misplace their device, lose connectivity, or their battery runs out.
The ubiquity of mobile phones, and our attachment to them, makes them a fundamentally different platform for development from PCs. With a microphone, camera, touchscreen, location detection, and environmental sensors, a phone can effectively become an extra-sensory perception device.
Smart phone ownership easily surpasses computer ownership in many countries, with more than 3 billion mobile phone users worldwide. 2009 marked the year that more people accessed the Internet for the first time from a mobile phone rather than a PC.
The increasing popularity of smart phones, combined with the increasing availability of high-speed mobile data and Wi-Fi hotspots, has created a huge opportunity for advanced mobile applications.
Smartphone applications have changed the way people use their phones. This gives you, the application developer, a unique opportunity to create dynamic, compelling new applications that become a vital part of people’s lives.
WHY DEVELOP FOR ANDROID?
In addition to providing access to the largest ecosystem of smart phone users, Android represents a dynamic framework for app development based on the reality of modern mobile devices designed by developers, for developers.
With a simple, powerful, and open SDK, no licensing fees, excellent documentation, a diverse range of devices and form-factors, and a thriving developer community, Android represents an opportunity to create software that can change people’s lives.
The barrier to entry for new Android developers is minimal:
- No certification is required to become an Android developer.
- The Google Play Store provides free, up-front purchase, in-app billing, and subscription options for distribution and monetization of your applications.
- There is no approval process for application distribution.
- Developers have total control over their brands.
From a commercial perspective, Android represents the most common smart phone operating system, and provides access to over 2 billion monthly active Android devices globally, offering unparalleled reach to make your applications available to users around the world.
INTRODUCING THE DEVELOPMENT FRAMEWORK
Android applications normally are written using the Java or Kotlin programming languages, and are executed by means of the Android Run Time (ART).
Each Android application runs in a separate process, relinquishing all responsibility for memory and process management to the Android Run Time, which stops and kills processes as necessary to manage resources.
ART sits on top of a Linux kernel that handles low-level hardware interaction, including drivers and memory management, while a set of APIs provides access to all the underlying services, features, and hardware.
What Comes in the Box
The Android SDK includes everything you need to start developing, testing, and debugging Android applications:
- The Android API Libraries —The core of the SDK is the Android API libraries that provide developer access to the Android stack. These are the same libraries that Google uses to create native Android applications.
- Development tools —The SDK includes the Android Studio IDE and several other development tools that let you compile and debug your applications to turn Android source code into executable applications. You learn more about the developer tools in Chapter 2 , “Getting Started.”
- The Android Virtual Device Manager and Emulator —The Android Emulator is a fully interactive mobile device emulator featuring several alternative skins. The Emulator runs within an Android Virtual Device (AVD) that simulates a device hardware configuration. Using the Emulator you can see how your applications will look and behave on a real Android device. All Android applications run within ART, so the software emulator is an excellent development environment—in fact, because it’s hardware-neutral, it provides a better independent test environment than any single hardware implementation.
- Full documentation —The SDK includes extensive code-level reference information detailing exactly what’s included in each package and class and how to use them. In addition to the code documentation, Android’s reference documentation and developer guides explain how to get started, give detailed explanations of the fundamentals behind Android development, highlight best practices, and provide deep-dives into framework topics.
- Sample code —The Android SDK includes a selection of sample applications that demonstrate some of the possibilities available with Android, as well as simple programs that highlight how to use individual API features.
-
Online support
—Android has vibrant developer communities on most online social networks, Slack, and many developer forums. Stack Overflow (
www.stackoverflow.com/questions/tagged/android) is a hugely popular destination for Android questions and a great place to find answers to beginner questions. Many Android engineers from Google are active on Stack Overflow and Twitter.
Understanding the Android Software Stack
The Android software stack is a Linux kernel and a collection of C/C++ libraries exposed through an application framework that provides services for, and management of, the run time and applications, as shown in Figure 1-1 .

- Linux kernel —Core services (including hardware drivers, process and memory management, security, network, and power management) are handled by a Linux kernel (the specific kernel version depends on the Android platform version and hardware platform).
- Hardware Application Layer (HAL) —The HAL provides an abstraction layer between the underlying physical device hardware and the remainder of the stack.
-
Libraries
—Running on top of the kernel and HAL, Android includes various C/C++ core libraries such as libc and SSL, as well as the following:
- A media library for playback of audio and video media
- A surface manager to provide display management
- Graphics libraries that include SGL and OpenGL for 2D and 3D graphics
- SQLite for native database support
- SSL and WebKit for integrated web browser and Internet security
- Android Run Time —The run time is what makes an Android phone an Android phone rather than a mobile Linux implementation. Including the core libraries, the Android Run Time is the engine that powers your applications and forms the basis for the application framework.
- Core libraries —Although most Android application development is written using the Java or Kotlin JVM languages, ART is not a Java VM. The core Android libraries provide most of the functionality available in the core Java libraries, as well as the Android-specific libraries.
- Application framework —The application framework provides the classes used to create Android applications. It also provides a generic abstraction for hardware access and manages the user interface and application resources.
- Application layer —All applications, both native and third-party, are built on the application layer by means of the same API libraries. The application layer runs within the Android Run Time, using the classes and services made available from the application framework.
The Android Run Time
One of the key elements of Android is the Android Run Time (ART). Rather than using a traditional Java VM such as Java ME, Android uses its own custom run time designed to ensure that multiple instances run efficiently on a single device.
ART uses the device’s underlying Linux kernel to handle low-level functionality, including security, threading, and process and memory management. It’s also possible to write C/C++ applications that run closer to the underlying Linux OS. Although you can do this, in most cases there’s no reason you should need to.
If the speed and efficiency of C/C++ is required for your application, Android provides a native development kit (NDK). The NDK is designed to enable you to create C++ libraries using the libc and libm libraries, along with native access to OpenGL.
All Android hardware and system service access is managed using ART as a middle tier. By using this run time to host application execution, developers have an abstraction layer that ensures they should never have to worry about a particular hardware implementation.
ART executes Dalvik executable files (
.dex
)—named after an earlier virtual machine implementation named “Dalvik”—a format optimized to ensure minimal memory footprint. You create
.dex
executables by transforming Java or Kotlin language compiled classes using the tools supplied within the SDK.
Android Application Architecture
Android’s architecture encourages component reuse, enabling you to publish and share Activities, Services, and data with other applications, with access managed by the security restrictions you define.
The same mechanism that enables you to produce a replacement contact manager or phone dialer can let you expose your application’s components in order to let other developers build on them by creating new UI front ends or functionality extensions.
The following application services are the architectural cornerstones of all Android applications, providing the framework you’ll be using for your own software:
- Activity Manager and Fragment Manager —Activities and Fragments are used to define the user interface of your apps. The Activity and Fragment Managers control the life cycle of your Activities and Fragments, respectively, including management of the Activity stack (described in Chapters 3 and 5 ).
- Views —Used to construct the user interfaces controls within your Activities and Fragments, as described in Chapter 5 .
- Notification Manager —Provides a consistent and nonintrusive mechanism for signaling your users, as described in Chapter 11 .
- Content Providers —Lets your applications share data, as described in Chapter 10 .
- Resource Manager —Enables non-code resources, such as strings and graphics, to be externalized, as shown in Chapter 4 .
- Intents —Provides a mechanism for transferring data between applications and their components, as described in Chapter 6 .
Android Libraries
Android offers a number of APIs for developing your applications. Rather than list them all here, check out the documentation at
developer.android.com/reference/packages.html
, which gives a complete list of packages included in the Android SDK.
Android is intended to target a wide range of mobile hardware, so be aware that the suitability and implementation of some of the advanced or optional APIs may vary depending on the host device.
2
Getting Started
GETTING STARTED DEVELOPING ANDROID APPS
All you need to start writing your own Android applications is a copy of the Android SDK and a Java Development Kit (JDK). Unless you’re a masochist, you’ll also want to use an integrated development environment (IDE)—we strongly recommend using Android Studio, Google’s officially supported IDE for Android app development that includes an integrated JDK and manages the installation of the Android SDK and associated tools.
Android Studio, the Android SDK, and a JDK are each available for Windows, MacOS, and Linux, so you can explore Android from the comfort of whatever operating system (OS) you favor. Android applications themselves are run within the ART managed runtime, optimized for resource-constrained mobile devices, so there’s no advantage to developing on any particular OS.
Traditionally, Android code is written using Java language syntax—until 2017 Android app development required the use of Java. Android Studio 3.0 added Kotlin as a fully supported language alternative, allowing you to write Android app in part, or entirely, using Kotlin.
Kotlin is a statically typed language that is fully interoperable with Java source files and the Android runtime. It’s considered expressive and concise and introduces improvements including reduced language verbosity, null-pointer safety, extension functions, and infix notation.
The core Android libraries include most of the features from the core Java APIs in addition to the rich suite of Android-specific APIs. You can access all these libraries using either Java or Kotlin when writing your apps.
Although it’s possible to download and install the Android SDK and JDK separately, installing and using Android Studio simplifies the process of getting started. Android Studio includes an integrated OpenJDK and manages the installation of the Android SDK components and tools using the integrated Android SDK Manager.
The SDK Manager is used to download Android framework SDK libraries and optional add-ons (including the Google APIs and support libraries). It also includes the platform and development tools you will use to write and debug your applications, such as the Android Emulator to run your projects and the Android Profiler to profile CPU, memory, and network use. All these tools are integrated directly into Android Studio for your convenience.
By the end of this chapter, you’ll have installed Android Studio, the Android SDK and its add-ons, and the development tools. You’ll have set up your development environment, built your first Hello World application in Java and Kotlin, and run and debugged it using the DDMS and Emulator running on an Android Virtual Device (AVD).
If you’ve developed for mobile devices before, you already know that their small form factor, limited battery life, and restricted processing power and memory create some unique design challenges. Even if you’re new to the game, it’s obvious that some of the things you can take for granted on the desktop, web, or server—such as always-on Internet and power—aren’t applicable when writing apps for mobile or embedded devices.
The user environment brings its own challenges in addition to those introduced by hardware limitations. Many Android devices are used on the move and are often a distraction rather than the focus of attention, so your application needs to be fast, responsive, and easy to learn. Even if your application is designed for devices more conducive to an immersive experience, such as tablets or televisions, the same design principles can be critical for delivering a high-quality user experience.
DEVELOPING FOR ANDROID
The Android SDK includes all the tools and APIs you need to write compelling and powerful mobile applications. The biggest challenge with Android, as with any new development toolkit, is learning the features and limitations of those APIs.
Since Android Studio 3.0, it’s possible to write Android apps using Java, Kotlin, or a combination of both languages. If you have experience in Java or Kotlin development, you’ll find that the syntax and grammar you’ve been using will translate directly into Android. If you don’t have experience with Java, but have used other object-oriented languages (such as C#), you should find the transition to either Java or Kotlin syntax straightforward.
The power of Android comes from its APIs, not the language being used, so being unfamiliar with Java or Kotlin syntax and/or Java-specific classes won’t present a meaningful disadvantage.
There’s no cost to download or use the SDK, and Google doesn’t require your application to pass a review to distribute your finished apps on the Google Play Store. Although Google Play requires a small one-time fee to publish applications, if you choose not to distribute via the Google Play Store, you can do so at no cost.
What You Need to Begin
Because Android applications run within the Android Run Time, you can write them on any platform that supports the developer tools. Throughout this book we’ll be using Android Studio, which currently supports:
- Microsoft Windows 7/8/10 (32- or 64-bit)
- Mac OS X 10.8.5 or later
- GNOME or KDE Linux desktop (including GNU C Library 2.11 or later)
On all platforms, Android Studio requires at least 2 GB of RAM (with 8 GB strongly recommended), and 1280 x 800 minimum screen resolution.
Developing with Android Studio
The examples and step-by-step instructions in this book are targeted at developers using Android Studio. Android Studio is Android’s official IDE, built on top of IntelliJ IDEA, a popular IDE for Java development that also supports Android development using Kotlin.
Android Studio is purpose-built by the Android team at Google to accelerate your development and help you build high-quality apps. It supports all Android form factors including phones, tablets, TV, Wear, and Auto—and offers tools tailored specifically for Android developers, including rich code editing, debugging, testing, and profiling.
Some of Android Studio’s features include:
- Intelligent code editing with advanced code completion, refactoring, and code analysis.
- Version control integration including GitHub and Subversion.
- Robust static analysis framework with over 280 different Lint checks along with quick fixes.
- Extensive testing tools and frameworks including JUnit 4 and functional UI tests. You can run your tests on a device, an emulator, a continuous integration environment, or in the Firebase Test Lab.
In addition to these IDE features, using Android Studio for your Android development offers some significant advantages through the tight integration of many of the Android build and debug tools, as well as ensured support for the latest Android platform releases.
Android Studio includes the following features:
- The Android Project Wizard, which simplifies creating new projects and includes several application and Activity templates
- Editors to help create, edit, and validate your XML resources
-
Automated building of Android projects, conversion to Android executables (
.dex), packaging to package files (.apk), and installation of packages onto Android Run Times (running both within the Emulator or on physical devices) - The Android Virtual Device manager, which lets you create and manage virtual devices to host Emulators that run a specific release of the Android OS and with set hardware and memory constraints
- The Android Emulator, including the ability to control the Emulator’s appearance and network connection settings, and the ability to simulate incoming calls, SMS messages, and sensor values
- The Android Profiler, which lets you monitor CPU, memory, and network performance
- Access to the device or Emulator’s filesystem, enabling you to navigate the folder tree and transfer files
- Runtime debugging, which enables you to set breakpoints and view call stacks
- All Android logging and console outputs
Installing Android Studio and the Android SDK
You can download the latest version of Android Studio for your chosen development platform from the Android Studio homepage at
developer.android.com/studio
.
When you have initiated the download for your platform, you will be shown detailed installation instructions that can be summarized as follows:
- Windows —Run the downloaded installation executable. The Windows installer download includes OpenJDK and the Android SDK.
-
MacOS
—Open the downloaded Android Studio
DMGfile, and then drag Android Studio into your “Applications”folder. Double-click to open Android Studio, and the Setup Wizard will guide you through the rest of the setup, which includes downloading the Android SDK. -
Linux
—Unzip the downloaded
.zipfile to an appropriate location for your applications, such as within/usr/local/for your user profile, or/opt/for shared users. Open a terminal, navigate to theandroid-studio/bin/directory, and executestudio.sh. The Setup Wizard will then guide you through the rest of the setup, which includes downloading the Android SDK.
Since Android Studio 2.2, OpenJDK has been integrated with Android Studio, ensuring you don’t need to download and install the JDK separately.
Once the installation wizard is completed, the latest Android platform SDK; SDK, platform, and build tools; and support library will have been downloaded and installed.
You can download older platform versions, as well as additional SDK components using the SDK Manager as described in the following section.
Installing Additional Android SDK Components Using the SDK Manager
The SDK Manager (
Figure 2-1
) is available through a shortcut on the toolbar, the Android SDK settings option, or from within the Tools
![]() Android
Android
![]() SDK Manager menu item. It offers tabs for SDK Platforms, SDK Tools, and SDK Update Sites.
SDK Manager menu item. It offers tabs for SDK Platforms, SDK Tools, and SDK Update Sites.

The SDK Platforms tab shows which platform SDKs you have downloaded. By default, this will include the newest Android platform SDK—in this case, Android 8.1 Oreo (API Level 27).
The SDK Tools tab shows which tools and support libraries you have installed, including the SDK, platform, and build tools—as well as the support repository, which is required to use the Android Support Library (described later in this chapter.)
By selecting the Show Package Contents Details checkbox, you can find additional details on which versions each tool have been installed.
Downloading and Installing Updates to Android Studio, the Android SDK, and Tools
Android Studio receives frequent updates that improve stability and add new features. You will be prompted with an alert tip when a new version of Android Studio is available for download, as shown in Figure 2-2 .

You will similarly be prompted when new revisions of the Android SDK, developer tools, support library, Kotlin, and other SDK packages become available.
You can force a check for a new version of Android Studio by opening the Settings dialog box and navigating to Settings
![]() Updates and clicking the “Check Now” button, as shown in
Figure 2-3
, or by selecting the Help
Updates and clicking the “Check Now” button, as shown in
Figure 2-3
, or by selecting the Help
![]() Check For Updates menu item.
Check For Updates menu item.

Creating Your First Android Application
With Android Studio installed and the SDK downloaded you’re ready to start developing apps for Android. You’ll begin by creating a new Android project, configuring the Android Emulator, and setting up your Android Studio run and debug configurations, as described in the following sections.
Creating a New Android Project
To create a new Android project using Android Studio’s New Project Wizard, do the following:
-
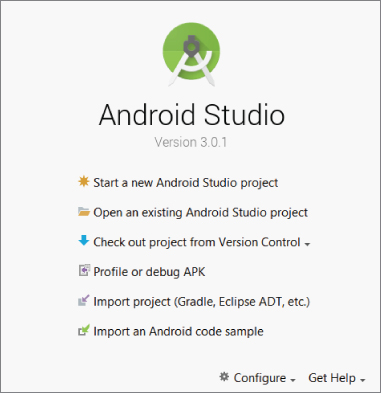
The first time you start Android Studio you are presented with the welcome screen shown in
Figure 2-4
. You can return to this screen by selecting the File
 Close menu item to close any open projects. From the welcome screen, select the “Start a new Android Studio project” option. Alternatively, within Android Studio select the File
New
New Project… menu item.
Close menu item to close any open projects. From the welcome screen, select the “Start a new Android Studio project” option. Alternatively, within Android Studio select the File
New
New Project… menu item.
-
In the wizard that appears, enter the details for your new project. On the first page (
Figure 2-5
) enter an Application Name and your Company Domain. These will be combined to create a unique Package Name as displayed on the wizard.

Each Android application must have a unique package name, so it’s good practice to use a domain you own to minimize the chance of a collision. That said, owning the domain you use isn’t required or enforced, so you can use almost any domain you want provided the resulting package name is unique.
Finally, select the directory location to which your project will be saved.
-
The next page (
Figure 2-6
) lets you select the form factors you wish to support within this project, as well as the minimum Android platform version on which your application will run. To get started, we’ll target just phones and tablets and use the default minimum SDK.

-
The next page (
Figure 2-7
) lets you select a template for your app’s main Activity (user interface screen). Select the Empty Activity.

-
The final page (
Figure 2-8
) allows you to specify the class name for your initial Activity, and specify the name for the XML file that will be used to provide the Activity’s UI layout. In the case of the empty Activity template, you can also choose if you wish the wizard to generate a layout file at all. You also have the option to make your Activity backward compatible by selecting the Backwards Compatibility check box, which is highly recommended. Marking this box checked will result in the new Activity inheriting from the Android Support Library’s
AppCompatActivityclass rather than the framework’sActivityclass, which will allow your Activity to take advantage of new API features in a way that’s backward compatible.
- When you’ve entered these details, click Finish.
Android Studio will now create a new project that includes a class that extends
AppCompatActivity
. Rather than being completely empty, the default template implements “Hello World.”
Before modifying the project, take this opportunity to create an Android Virtual Device, enable debugging on a physical device, and run our new Hello World project.
Creating an Android Virtual Device
Android Virtual Devices (AVDs) are used to simulate the hardware and software configurations of physical Android devices. The Android Emulator runs within AVDs, allowing you test your applications on a variety of different hardware and software platforms.
There are no prebuilt AVDs included in the Android Studio or Android SDK downloads so, if you don’t have a physical device, you’ll need to create at least one before you can run and debug your applications:
-
Select Tools
Android
AVD Manager (or select the AVD Manager icon on the Android Studio toolbar).
-
Click the “Create Virtual Device…” button.
The resulting Virtual Device Configuration dialog box ( Figure 2-9 ) allows you to select a device definition from a list of Pixel and Nexus hardware and standard device configurations—each with its own physical size, resolution, and pixel density.

-
You’ll then be asked to select a device system image corresponding to a particular Android platform release, as shown in
Figure 2-10
. If you have not already done so, you will need to download the desired system image before it can be used.

Notice that for each platform release you can choose system images for different ABIs (application binary interfaces)—typically x86 or ARM. Consider using a system image using the same architecture as your host computer to maximize Emulator performance.
You can also decide if you want a system image that includes the Google APIs. These are necessary if your app includes Google Play Services features such as maps and Location Based Services, as described in Chapter 15 .
-
Specify a descriptive device name, and then hit Finish to create a new AVD, as shown in
Figure 2-11
. Note that by clicking Show Advanced Settings you can reveal additional options to assign your webcam to the front or rear camera, adjust the emulated network speed and latency, and customize the number of emulated cores, system memory, and storage.

- Starting a new AVD can take some time, so start it now by clicking the green arrow in the right-most column. This will ensure the emulator is prepared and running when you’re ready to run your app on it.
Configuring a Physical Device for Testing and Debugging
There’s nothing quite like making software run on real hardware, so if you have an Android device, it’s simple to run and debug your applications on it directly:
-
Start by enabling developer mode on your device. Open the phone’s Settings and find and select System
“About phone.” Scroll to the bottom of the resulting list until “Build number” is visible, as shown in
Figure 2-12
.

- Touch “Build number” seven times, until a message is displayed congratulating you on becoming a developer. If you embarked on your journey to become an Android developer to win a bet, you can now safely collect. Congratulations!
-
If not, navigate back, and you’ll find a new settings category labeled “Developer options.” Select it, and scroll until you see the option for “USB debugging,” as shown in
Figure 2-13
.

- Enable “USB debugging.”
-
Now connect your device to your development host computer using a USB cable. Your device will display the dialog box shown in
Figure 2-14
, asking if you wish to allow USB debugging when connected to the current computer. Select OK.

- When connected, this device will now be available as a target when launching your app for running or debugging within Android Studio.
Running and Debugging Your Android Application
You’ve created your first project and created an Android Virtual Device (or connected a physical device) on which to run it. Before making any changes, let’s try running and debugging the Hello World project.
From the Run menu, select “Run app” (or “Debug app”). If you haven’t already selected a default, you’ll be presented with the dialog box shown in Figure 2-15 , asking you to select your deployment target—a connected device, a running AVD, or a defined (but not yet running) AVD.

Running or debugging your application does the following behind the scenes:
-
Compiles the current project source to bytecode, and converts that to an Android executable (
.dex) -
Packages the executable and your project’s resources and manifest into an Android package (
.apk) - Starts the virtual device (if you’ve targeted one and it’s not already running)
- Deploys your APK to the target device and installs it
- Starts your application
If you’re debugging, the Android Studio debugger will then be attached, allowing you to set breakpoints and debug your code.
If everything is working correctly, you’ll see a new Activity running on the device or in the Emulator, as shown in Figure 2-16 .

Understanding Hello World
Take a step back and have a look at the source code for your first Android application, starting with the
MainActivity.java
file.
In Android,
Activity
is the base class for the visual, interactive screens within your application; it is roughly equivalent to a Form in traditional desktop development (and is described in detail in
Chapter 3
, “Applications and Activities and Fragments, Oh My!”).
AppCompatActivity
is a variation of the
Activity
class supplied by the Android Support Library, which provides backward compatibility. Using
AppCompatActivity
in preference to the
Activity
class is considered best practice, and we’ll be doing so throughout this book. Note that by convention we still refer to classes that extend
AppCompatActivity
as
Activities
.
Listing 2-1
shows the skeleton code for an Activity; note that it extends
AppCompatActivity
and overrides the
onCreate
method.
Visual components within Activities are called
Views
, which are similar to controls or widgets in traditional desktop and web development. The Hello World template created by the wizard overrides
the
onCreate
method to call
setContentView
, which lays out the UI by inflating a layout resource, as highlighted in bold in the following snippet:
@Overrideprotected void onCreate(Bundle savedInstanceState) {super.onCreate(savedInstanceState);setContentView(R.layout.activity_main);}
The resources for an Android project are stored in the
res
folder of your project hierarchy, which includes
layout
,
values
,
drawable
, and
mipmap
subfolders. Android Studio interprets these resources and provides design-time access to them through the
R
variable, as described in
Chapter 4
.
Listing 2-2
shows the UI layout as defined in the
activity_main.xml
file, created by the Android project template and stored in the project’s
res/layout
folder.
Defining your UI in XML and inflating it is the preferred way of implementing your user interfaces (UIs), because it neatly decouples your application logic from your UI design.
To get access to your UI elements in code, you can add identifier attributes to them in the XML definition:
<TextViewandroid:id="@+id/myTextView"android:layout_width="wrap_content"android:layout_height="wrap_content"android:text="Hello World!"app:layout_constraintBottom_toBottomOf="parent"app:layout_constraintLeft_toLeftOf="parent"app:layout_constraintRight_toRightOf="parent"app:layout_constraintTop_toTopOf="parent"/>
You can then use the
findViewById
method to return a reference to each named item at run time:
TextView myTextView = findViewById(R.id.myTextView);
Alternatively (although it’s not generally considered good practice), you can create your layout directly in code, as shown in Listing 2-3 .
Note that all the properties available in code can also be set with attributes in the XML layout.
More generally, keeping the visual design decoupled from the application code helps keep the code concise. With Android available on hundreds of different devices of varying screen sizes, defining your layouts as XML resources makes it easier for you to include multiple layouts optimized for different screens.
You learn how to build your user interface by creating layouts and building your own custom Views in Chapter 5 , “Building User Interfaces.”
Opening Android Sample Projects
Android includes a number of well-documented sample projects that are an excellent source for full, working examples of applications written for Android. When you finish setting up your development environment, it’s worth going through some of them.
The Android sample projects are stored on GitHub, and Android Studio provides a simple mechanism for cloning them:
-
From within Android Studio, select File
New
Import Sample… to open the Import Sample Wizard, as shown in
Figure 2-17
. You can also select “Import an Android code sample” from the Welcome to Android Studio Wizard if you have no projects currently open.
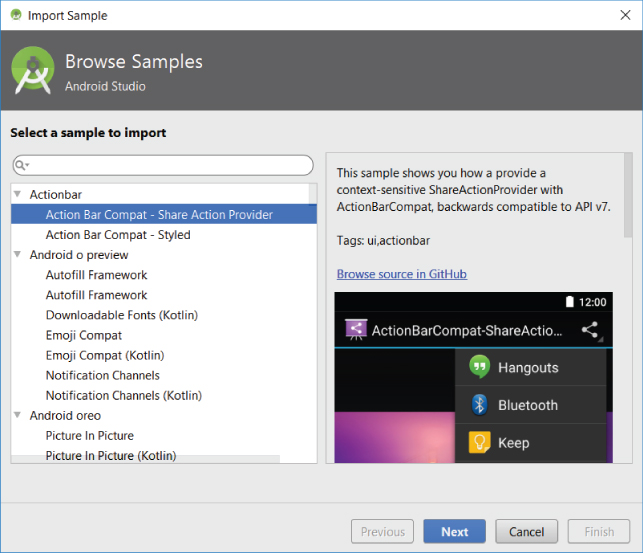
- Select the sample you wish to import and click Next.
- Specify an application name and location on your host machine and click Finish to download and open the sample.
The selected sample project will be cloned from GitHub and be opened as a new Android Studio project.
Getting Started Writing Android Apps Using Kotlin
Until 2017, Android app development required the use of the Java language syntax. Android Studio 3.0 added Kotlin as a fully supported language alternative.
Kotlin is a statically typed language that is fully interoperable with the existing Java language syntax and runtime used with Android. It’s considered expressive and concise, and introduces improvements including reduced language verbosity, null-pointer safety, extension functions, and infix notation.
Since Android Studio 3.0, Kotlin is an officially supported Android development language; however, at the time of this book’s writing, Java was still the default for new projects—and most existing Android projects were still written predominantly using Java syntax. It’s also very easy to convert Java syntax into Kotlin, simply by pasting Java syntax into a Kotlin source file. As a result, we have used Java syntax within the code snippets and sample projects featured within this book.
Given the advantages of Kotlin in terms of improved development time and code readability, we expect the proportion of apps written primarily in Kotlin to increase quickly, and we highly recommend that you familiarize yourself with the Kotlin language for writing Android apps. To assist, each of the code snippets and sample projects are also available in Kotlin, downloadable from the Wrox site alongside the Java syntax versions.
Your Android projects can be written from scratch in Kotlin, can include interoperable Kotlin and Java source files, or can be converted from Java source files to Kotlin during development.
To begin a new project in Kotlin, select the File
![]() New
New
![]() New Project… menu item, as previously described, but on the first page of the wizard, select the “Include Kotlin support” checkbox, as shown in
Figure 2-18
.
New Project… menu item, as previously described, but on the first page of the wizard, select the “Include Kotlin support” checkbox, as shown in
Figure 2-18
.

Proceed through the wizard as described in the earlier section. When complete, take a look at the Kotlin source code for your Activity in the
MainActivity.kt
file. Kotlin files are stored alongside Java source files and can be found in the Java folder when using the Android project view:
package com.professionalandroid.apps.myapplicationimport android.support.v7.app.AppCompatActivityimport android.os.Bundleclass MainActivity : AppCompatActivity() {override fun onCreate(savedInstanceState: Bundle?) {super.onCreate(savedInstanceState)setContentView(R.layout.activity_main)}}
Note that while the code is somewhat more concise, the syntactic changes at this point are minimal. The package and import statements are the same, the
MainActivity
class still extends
AppCompatActivity
, and the override of the
onCreate
method remains the same.
To add a new Kotlin file to your project, select Kotlin from the Source Language dropdown list when adding a new application component from the File
![]() New menu. Alternatively, you can select the File
New menu. Alternatively, you can select the File
![]() New
New
![]() Kotlin File/Class menu item to create a basic file.
Kotlin File/Class menu item to create a basic file.
Because Kotlin and Java files can coexist in the same project, it’s possible to add Kotlin source files to a project you started without ticking the Kotlin support checkbox or to add Java source files to a project started with Kotlin support.
It’s also possible to convert existing Java syntax source files into Kotlin. You can do this by opening an existing Java source file and selecting the Code
![]() Convert Java File to Kotlin File menu item. Alternatively, you can create a new Kotlin file and paste Java syntax source code into it. You will be prompted to convert the pasted code into Kotlin, as shown in
Figure 2-19
.
Convert Java File to Kotlin File menu item. Alternatively, you can create a new Kotlin file and paste Java syntax source code into it. You will be prompted to convert the pasted code into Kotlin, as shown in
Figure 2-19
.

Note that these automatic conversions may not always use idiomatic Kotlin, so the resulting code might not use Kotlin’s best language features.
Using the Android Support Library Package
The Android Support Library package (also referred to as the compatibility library or AppCompat) is a set of libraries you can include as part of your projects, to gain either convenience APIs that aren’t packaged as part of the framework (such as the View Pager), or useful APIs that are not available on all platform releases (such as Fragments).
The Support Library enables you to use framework API features that were introduced in newer Android platform releases on devices running earlier platform versions. This helps you provide a consistent user experience and greatly simplifies your development process by reducing the burden of supporting older platform versions, while taking advantage of newer features.
The Android Support Library package contains several individual libraries, each of which offers support for a specific range of Android platform versions and features.
We will introduce new libraries as required in the following chapters. To begin with, it’s good practice to include the v7 appcompat library in all new projects because it supports a wide range of Android versions—back to Android 2.3 Gingerbread (API Level 9)—and provides APIs for many recommended user interface patterns.
The application templates provided by Android Studio—including the Hello World example we created earlier—include a dependency on the v7 appcompat library by default.
To incorporate an Android Support Library package into your project, perform the following steps:
- Use the SDK Manager to ensure you have downloaded the Android Support Repository.
-
Add a dependency to your Gradle build for the desired library, either by:
-
2.1 Opening your
module:app build.gradlefile and adding a reference to the library name and version you wish to include, within the dependency node:dependencies {[… Existing dependencies …]implementation 'com.android.support:appcompat-v7:27.1.1'} -
2.2 Or using Android Studio’s Project Structure UI, as shown in
Figure 2-20
. Select the File
Project Structure…, menu item and then select your app module from the list on the left before choosing the Dependencies tab. Add a new library by selecting the green “plus” symbol on the right-side toolbar and selecting the desired library.

-
2.1 Opening your
Notice that we’re adding a dependency to a specific version of the support library. By design, the Android Support Library package will be updated more regularly than the Android framework SDK. By downloading new versions of the Support Libraries, and updating your dependencies to reference the newest releases, you can continue to incorporate bug fixes and improvements to your app as the Support Libraries are updated.
DEVELOPING FOR MOBILE AND EMBEDDED DEVICES
Android does a lot to simplify mobile- or embedded-device software development, but to build high-quality apps you need to understand the reasons behind the conventions. You have several factors to consider when writing software for mobile and embedded devices, and when developing for Android in particular.
Hardware-Imposed Design Considerations
Small and portable, mobile devices offer exciting opportunities for software development. Their limited screen size and reduced memory, storage, and processor power are far less exciting, and instead present some unique challenges.
Compared to desktop or notebook computers, mobile devices have relatively:
- Low processing power
- Limited RAM
- Limited storage capacity
- Small screens
- High costs associated with data transfers
- Intermittent connectivity, slow data transfer rates, and high latency
- Limited battery life
Each new generation of devices improves on many of these restrictions, but the device ecosystem also caters for a wide variety of prices—which results in significant variety in hardware capabilities. This is amplified by the huge growth in smart phone adoption in emerging markets, which are significantly more price sensitive, and that in turn results in large numbers of new devices with lower specification hardware.
The expansion of Android into an increasingly diverse variety of form factors—including tablets, TVs, automotive head-units, and wearable devices further expands the range of devices on which your application may be running.
In some cases you may find your app running on hardware significantly more powerful than you expected; however it’s always good practice to design to accommodate the worst-case scenario to ensure you’re providing a great user experience to all users, no matter what their hardware platform.
Performance Matters
Manufacturers of embedded devices, particularly mobile devices, often value thinner form factors and bigger (and higher resolution) screens over significant improvements to processor speeds. For us as developers, that means losing the head start traditionally afforded thanks to Moore’s law (the doubling of the number of transistors placed on an integrated circuit every two years). In desktop and server hardware, Moore’s Law typically results directly in processor performance improvements; for mobile devices, it instead means thinner devices, with brighter, higher-resolution screens. By comparison, improvements in processor power take a back seat.
In practice, this means that you always need to optimize your code so that it runs quickly and responsively, assuming that hardware improvements over the lifetime of your software are unlikely to do you any favors.
Code efficiency is a big topic in software engineering, so I’m not going to try to cover it extensively here. Later in this chapter you learn some Android-specific efficiency tips, but for now note that efficiency is particularly important for resource-constrained platforms.
Expect Limited Storage Capacity
Advances in flash memory and solid-state disks have led to a dramatic increase in mobile-device storage capacities. Although devices with 64, 128, or even 256 GB of storage are no longer uncommon, many popular lower-end devices have significantly less available space. Given that most of the available storage on a mobile device is likely to be used to store photos, music, and movies, users are likely to uninstall apps that are taking a disproportionate amount of storage space relative to their perceived value.
As a result, the install size of your application is an important consideration, though even more important is ensuring that your application is polite in its use of system resources—so you must carefully consider how you store your application data.
To make life easier, you can use the Android databases to persist, reuse, and share large quantities of data, as described in Chapter 9 , “Creating and Using Databases.” For files, preferences, and state information, Android provides optimized frameworks, as described in Chapter 8 , “Files, Saving State, and User Preferences.”
Part of being polite is cleaning up after yourself. Techniques such as caching, pre-fetching, and lazy loading are useful for limiting repetitive network lookups and improving application responsiveness, but don’t leave files on the filesystem or records in a database when they’re no longer needed.
Design for Different Screens and Form Factors
The small size and portability of mobiles are challenge for creating good interfaces, particularly when users are demanding an increasingly striking and information-rich graphical user experience. Combined with the wide range of screen sizes that make up the Android device ecosystem, creating consistent, intuitive, and delightful user interfaces can be a significant challenge.
Write your applications knowing that users will often only glance at the screen. Make your applications intuitive and easy to use by reducing the number of controls and putting the most important information front and center.
Graphical controls, such as the ones you’ll create in Chapter 5 , are an excellent means of displaying a lot of information in a way that’s easy to understand. Rather than a screen full of text with a lot of buttons and text-entry boxes, use colors, shapes, and graphics to convey information.
You’ll also need to consider how touch input is going to affect your interface design, and how you can support accessibility and non–touch screen devices such as TVs.
Android devices are now available in a huge variety of screen sizes, resolutions, and input mechanisms. With multi-window support included in Android 7.0, the screen size for your app may even change while running on a single device.
To ensure that your application looks good and behaves well on all the possible host devices, you need to create responsive designs and test your application on a variety of screens, optimizing for small screens and tablets, while also ensuring that your UIs scale well.
You learn some techniques for optimizing your UI for different screen sizes in Chapters 4 and 5 .
Expect Low Speeds, High Latency
The ability to connect to the Internet is a big part of what has made smart phones smart, and ubiquitous. Unfortunately, mobile Internet connectivity isn’t as fast, reliable, cheap, or readily available as we would like; when you’re developing your Internet-based applications, it’s best to assume that the network connection will be slow, intermittent, expensive, and unreliable.
This is especially true in emerging markets where relative data prices are significantly higher. By designing for the worst case you can ensure that you always deliver a high-standard user experience. This also means making sure that your applications can handle losing (or not finding) a data connection.
The Android Emulator enables you to control the speed and latency of your network connection. Figure 2-21 shows the Emulator’s network connection speed and signal strength, simulating a distinctly suboptimal EDGE connection.

Experiment to ensure seamlessness and responsiveness no matter what the speed, latency, and availability of network access. Some techniques include limiting the functionality of your application, or reducing network lookups to cached bursts, when the available network connection supports only limited data transfer capabilities.
In Chapter 7 , “Using Internet Resources,” you learn how to use Internet resources in your applications.
Save Battery Life
The more useful the apps on a device, the more that device is used—and the more quickly its battery is depleted. Combine this with larger, higher-resolution screens and thinner device form factors, and battery life quickly becomes a significant issue for device owners.
There’s no more effective way to have users uninstall your app than to have it quickly deplete the battery. You should always endeavor to create apps that limit their impact on battery life.
One of the most dramatic influencers of how your app affects battery life is its use of network data transfers—particularly when your app isn’t currently in the foreground. For your app to be a good citizen on the device, you must carefully consider if, and when, you choose to transfer data.
Android offers a number of APIs to help you minimize your impact on battery life, including Doze, App Standby, and Job Scheduler—each of which is designed to help you ensure your app adheres to best practices in conserving battery life when performing network transfers and operating in the background.
We explore these and other battery-saving best practices in Chapter 11 .
Considering the User’s Environment
Sadly, you can’t assume that your users will consider your application the most important feature of their device.
In the case of smart phones, they are typically first and foremost a communications device, secondly a camera, thirdly a music and video player, and fourthly a games platform. The applications you write will most likely be in the fifth category of “useful stuff.”
That’s not a bad thing—they’ll be in good company with others, including Google Maps and the web browser. That said, each user’s usage model will be different; some people will never use their device to listen to music, some devices don’t support telephony, and some don’t include cameras—but the multitasking principle inherent in a device as ubiquitous as it is indispensable is an important consideration for usability design.
It’s also important to consider when and how your users will use your application. People use their mobiles all the time—on the train, walking down the street, or even while driving. You can’t make people use their phones appropriately, but you can make sure that your applications don’t distract them any more than necessary.
What does this mean in terms of software design? Make sure that your application:
- Is predictable and well behaved —There’s a fine line between a delightful moment and an unpleasant surprise. The outcome of any user interaction should be predictable and reversible, making it easy for new users to understand how to perform tasks, and minimizing any risk from experimenting.
- Switches seamlessly from the background to the foreground —With the multitasking nature of mobile devices, it’s likely that your applications will regularly move into and out of the background. It’s important that they “come to life” quickly and seamlessly. Unless users have explicitly closed your app, they shouldn’t notice a difference between restarting and resuming it; switching should be seamless, with users being shown the UI and application state they last saw.
- Is polite —Never steal focus or interrupt a user’s current Activity. Use Notifications (detailed in Chapter 11 ) to request user attention, when and as appropriate, when your application isn’t in the foreground.
- Presents an attractive and intuitive UI —Spend the time and resources necessary to produce a UI that is as attractive as it is functional, and don’t force users to interpret and relearn your application every time they open it. Using your app should be simple, easy, obvious, and delightful.
- Is responsive —Responsiveness is one of the most critical design considerations on a mobile device. You’ve no doubt experienced the frustration of a “frozen” piece of software; the multifunctional nature of mobile devices makes this even more annoying. With the possibility of delays caused by slow and unreliable data connections, it’s important that your application always remains responsive.
Developing for Android
In addition to the preceding general guidelines, the Android design philosophy demands that high-quality applications be designed for:
- Performance
- Responsiveness
- Freshness
- Security
- Seamlessness
- Accessibility
Being Performant
One of the keys to writing efficient Android code is not to carry over assumptions from desktop and server environments into embedded devices. A lot of what you already know about writing efficient code will be applicable to Android, but the limitations of embedded systems and the use of the Android Run Time mean you can’t take things for granted.
There are two basic rules for writing efficient code:
- Don’t do work that you don’t need to do.
- Don’t allocate memory if you can avoid it.
System memory is a scarce commodity, so you need to take special care to use it efficiently. This means thinking about how you use the stack and heap, limiting object creation, and being aware of how variable scope affects memory use.
The Android team has published specific and detailed guidance on writing efficient code for Android, so rather than rehashing it here, visit
d.android.com/training/articles/perf-tips.html
for suggestions.
Being Responsive
Generally, 100 to 200ms is the threshold at which users perceive a delay or “jank” in an application, so you should always endeavor to respond to user input within that timeframe.
The Android Activity Manager and Window Manager also enforce a time limit beyond which the application is considered unresponsive, and the user will be given the opportunity to force-close the app. If either service detects an unresponsive application, it will display an “[Application] isn’t responding” (ANR) dialog box, as shown in Figure 2-22 .

Android monitors two conditions to determine responsiveness:
- An application must respond to any user action, such as a key press or screen touch, within 5 seconds.
-
A Broadcast Receiver must return from its
onReceivehandler within 10 seconds.
The ANR dialog box is a last resort of usability; the generous five-second limit is a worst-case scenario, not a target. You can ensure that your application doesn’t trigger an ANR, and is as responsive as possible, in a number of ways:
- Lengthy tasks such as network or database lookups, complex processing (such as calculating game moves), and file I/O should all be moved off the main UI thread and run asynchronously.
- Show progress within your UI if there are long-running tasks happening in the background.
- If your application has a time-consuming initial setup phase, render the main view as quickly as possible, indicate that loading is in progress, and fill the information asynchronously. You could also consider showing a splash screen—but in either case, indicate that progress is being made, to avoid the user perception that the application has frozen.
Ensuring Data Freshness
From a usability perspective, the right time to update your application is immediately before the user looks at it—in practice, you need to weigh the update frequency against its effect on battery life and data usage.
When designing your application, it’s critical that you consider how often you will update its data. You need to minimize the time users are waiting for refreshes or updates, while limiting the effect of these background updates on the battery life. You are introduced to the Job Scheduler to update your application in the background in Chapter 11 .
Developing Secure Applications
Android applications have access to networks and hardware, can be distributed independently, and are built on an open source platform featuring open communication, so it shouldn’t be surprising that security is a significant consideration.
The Android security model sandboxes each application and restricts access to services and functionality by requiring applications to declare the permissions they require, and allowing users to accept or reject those requests.
The framework also includes robust implementations of security functionality including cryptography and secure IPC, as well as technologies like ASLR, NX, ProPolice, safe_iop, OpenBSD dlmalloc, OpenBSD calloc, and Linux mmap_min_addr to mitigate risks associated with common memory management errors.
This doesn’t get you off the hook. You not only need to make sure your application is secure for its own sake, but you also need to ensure that it doesn’t “leak” permissions, data, and hardware access to compromise the device or user data. You can use several techniques to help maintain device security, and they are covered in more detail as you learn the technologies involved. In particular, you should do the following:
- Be security conscious when storing or transmitting data. By default, files that you create on internal storage are accessible only to your app, but you must be particularly careful if your app shares files or data with other applications—for example, through shared Services, Content Providers, or broadcast Intents. If you have access to user data and can avoid storing or transmitting the information, do not store or transmit the data. Take special care to ensure you aren’t sharing or transmitting sensitive information, such as PII (personally identifiable information) or location data.
- Always perform input validation. Insufficient input validation is one of the most common security problems affecting applications, regardless of what platform they run on. Take special care when accepting input to your application from user input or external sources, such as the Internet, Bluetooth, NFC, SMS messages, or instant messaging (IM).
- Be cautious when your application may expose access to lower-level hardware to third-party applications.
- Minimize the data your application uses and which permissions it requires.
Ensuring a Seamless User Experience
The idea of a seamless user experience is an important, if somewhat nebulous, concept. What do we mean by seamless ? The goal is a consistent user experience in which applications start, stop, and transition instantly and without perceptible delays or jarring transitions.
The speed and responsiveness of a mobile device shouldn’t degrade the longer it’s used. Android’s process management helps by acting as a silent assassin, killing background applications to free resources as required. Knowing this, your applications should always present a consistent interface, regardless of whether they’re being restarted or resumed.
Start by ensuring that your Activities are properly suspended when they’re not in the foreground. Android fires event handlers when your Activity is paused and resumed, so you can pause UI updates and network lookups when your application isn’t visible—and resume them as soon as it is.
Persist data between sessions, and when the application isn’t visible, suspend tasks that use processor cycles, network bandwidth, or battery life.
When your application is brought back to the front, or restarted, it should seamlessly return to its last visible state. As far as your users are concerned, each application should be sitting silently, ready to be used but just out of sight.
Use a consistent and intuitive approach to usability. You can create applications that are revolutionary and unfamiliar, but even these should integrate cleanly with the wider Android environment.
Use a consistent design language within your app—ideally following the material design principles discussed in more detail in
Chapter 12
and at
material.io/guidelines/
.
You can use many other techniques to ensure a seamless user experience, and you’ll be introduced to some of them as you discover more of the possibilities available in Android in the upcoming chapters.
Providing Accessibility
When designing and developing your applications, it’s important not to assume that every user will be exactly like you. This has implications for internationalization and usability but is critical for providing accessible support for users with disabilities that require them to interact with their Android devices in different ways.
Android provides facilities to help these users navigate their devices more easily using text-to-speech, haptic feedback, and trackball or D-pad navigation.
To provide a good user experience for everyone—including people with visual, physical, or age-related disabilities that prevent them from fully using or seeing a touch screen—you can leverage Android’s accessibility features.
As a bonus, the same steps required to help make your touch screen applications useful for users with disabilities will also make your applications easier to use on non–touch screen devices, such as TVs.
ANDROID DEVELOPMENT TOOLS
The Android SDK includes several tools and utilities to help you create, test, and debug your projects. We explore several of these in more detail throughout the remainder of this book, though a detailed examination of each developer tool is outside our scope. However, it is worth reviewing what’s available, and for additional details, check out the Android Studio documentation at
developer.android.com/studio
.
As mentioned earlier, Android Studio conveniently incorporates all of these tools, including the following:
- The Android Virtual Device Manager and Emulator —The AVD Manager is used to create and manage AVDs, virtual hardware that hosts an Emulator running a particular build of Android. Each AVD can specify a particular screen size and resolution, memory and storage capacities, and available hardware capabilities (such as touch screens and GPS). The Android Emulator is an implementation of the Android Run Time designed to run within an AVD on your host development computer.
- The Android SDK Manager —Used to download SDK packages including Android platform SDKs, support libraries, and the Google Play Services SDK.
- Android Profiler —Visualize the behavior and performance of your app. The Android Profiler can track memory and CPU use in real time, as well as analyze network traffic.
- Lint —A static analysis tool that analyzes your application and its resources to suggest improvements and optimizations.
- Gradle —An advanced build system and toolkit that manages the compilation, packaging, and deployment of your applications.
- Vector Asset Studio —Generates bitmap files for each screen density to support older versions of Android that don’t support the Android vector drawable format.
- APK Analyzer —Provides insight into the composition of your built APK files.
The following additional tools are also available:
-
Android Debug Bridge (ADB)
—A client-server application that provides a link between your host computer and virtual and physical Android devices. It lets you copy files, install compiled application packages (
.apk), and run shell commands. - Logcat —A utility used to view and filter the output of the Android logging system.
-
Android Asset Packaging Tool (AAPT)—Constructs the distributable Android package files (
.apk). - SQLite3 —A database tool that you can use to access the SQLite database files created and used by Android.
- Hprof-conv—A tool that converts HPROF profiling output files into a standard format to view in your preferred profiling tool.
-
Dx
—Converts Java
.classbytecode into Android.dexbytecode. - Draw9patch —A handy utility to simplify the creation of NinePatch graphics using a WYSIWYG editor.
- Monkey and Monkey Runner —Monkey runs within the Android Run Time, generating pseudorandom user and system events. Monkey Runner provides an API for writing programs to control the VM from outside your application.
- ProGuard —A tool to shrink and obfuscate your code by replacing class, variable, and method names with semantically meaningless alternatives. This is useful to make your code more difficult to reverse engineer.
Android Studio
As a developer, the Android Studio IDE is where you’ll be spending the majority of your time, so it pays to understand some of its nuances. The following sections introduce some tips for reducing build times—specifically through the use of Instant Run—as well as some shortcuts and advanced features you can use while writing and debugging your code.
Improving Build Performance
The simplest way to improve build performance is by ensuring you have allocated enough RAM to the build process. You can modify the amount of RAM allocated to the build system (the Gradle Daemon VM) by editing the
gradle.properties
file within your project.
For good performance, it’s recommended that you allocate a minimum of 2Gb, using the
org.gradle.jvmargs
property:
org.gradle.jvmargs=-Xmx2048m
The ideal value for each system will vary based on different hardware, so you should experiment to see what works best for you.
Additionally, if you’re on Windows, Windows Defender Real-Time Protection might cause build slowdowns. You can avoid this by adding your project folder to the list of Windows Defender exclusions.
Using Instant Run
Instant Run is an Android Studio feature that significantly reduces the build and deploy times for incremental code changes during your coding, testing, and debugging life cycles.
The first time you hit Run or Debug, the Gradle build system will compile your source code into bytecode and convert that to Android
.dex
files. Those are combined with your application’s manifest and resources into an APK, which is deployed to your target device where the app is installed and launched.
When Instant Run is enabled, the build process will inject some additional instrumentation and an App Server into your debug APK to support Instant Run.
From then on, a small yellow lightning bolt icon is available, indicating that Instant Run is active. Each time you make a change and hit Instant Run, Android Studio will attempt to improve the build and deploy speed by “swapping” code and resource changes directly into your running debug app process.
The nature of the improvements varies based on the changes you make as follows:
- Hot Swap —Incremental code changes are applied and reflected in the app without needing to relaunch the app or even restart the current Activity. Can be used for most simple changes within method implementations.
- Warm Swap —The Activity needs to be restarted before changes can be seen and used. Typically required for changes to resources.
- Cold Swap —The app is restarted (but still not reinstalled). Required for any structural changes such as to inheritance or method signatures.
Instant Run is enabled by default, and is controlled by Android Studio, so only start/restart your debug instance from the IDE — don’t start/restart your app from the device or command line.
Tips for Using Android Studio
Hundreds of tips and tricks can make your Android Studio experience faster and more productive. The following are a small sampling of some not immediately obvious, but very helpful shortcuts to help you make every keystroke count.
Quick Search
The most useful shortcut to remember in Android Studio is action search, triggered by pressing Ctrl+Shift+A (Cmd+Shift+A on MacOS). After pressing that shortcut, you can start typing keywords, and any available actions or options containing those words will be available for your selection.
To specifically search for files within a project, you can press Shift twice to display the Search Everywhere dialog.
Alternatively, wherever there’s a long list—such as files in the project hierarchy or menu options in a large menu such as Refactor This…, just start typing and it’ll start filtering results.
Using Tab to Autocomplete Selections
Pressing Tab (instead of Enter) when selecting an autocomplete option replaces any existing methods and values, rather than inserting the new selection in front of it.
Postfix Code Completion
Postfix code completion lets you transform a simple, already typed, value or expression into a more complex one.
For example, you can create a for-loop over a List variable by typing
.fori
after the variable name, or turn a Boolean expression into an if statement by postfixing
.if
(or
.else
). You can see all the valid postfixes available for a given context by typing Ctrl+J (Cmd+J on MacOS).
Live Templates
Live Templates let you use shortcuts that are available as autocompletion options to insert templatized snippets into your code.
Dozens of generic and Android-specific Live Templates are available, including a selection of logging shortcuts — or you can create your own to simplify best-practice patterns or boilerplate within your own code. You can view the existing Live Templates (and create your own) by opening the settings window and navigating to Editor
![]() Live Templates.
Live Templates.
The Android Virtual Device Manager
The Android Virtual Device Manager is used to create and manage the virtual hardware devices that will host instances of the Emulator.
AVDs are used to simulate the hardware configurations of different physical devices. This lets you test your application on a variety of hardware platforms without needing to buy a variety of phones.
Each virtual device is configured with a name, physical device type, Android system image, screen size and resolution, ABI/CPU, memory and storage capacities, and hardware capabilities including camera and network speeds.
Different hardware settings and screen resolutions will present alternative UI skins to represent the different hardware configurations. This simulates a variety of device types including different phones and tablets, as well as TVs and Android Wear devices.
The Android Emulator
The Emulator runs within an AVD, and is available for testing and debugging your applications as an alternative to using a physical device.
The Emulator is an implementation of the Android Run Time, making it as valid a platform for running Android applications as any Android phone. Because it’s decoupled from any particular hardware, it’s an excellent baseline to use for testing your applications.
Full network connectivity is provided along with the ability to tweak the Internet connection speed and latency while debugging your applications. You can also simulate placing and receiving voice calls and SMS messages.
Android Studio integrates the Emulator so that it’s launched automatically within the selected AVD when you run or debug your projects.
Once running, you can use the toolbar shown in Figure 2-23 to emulate pressing the hardware power and volume buttons, software home, back, and recents buttons, rotate the display, or take screen shots. Pressing the “…” button opens the extended controls, which are also shown in Figure 2-23 , and that allow you to:

- Set the current GPS location, and simulate GPS track playback.
- Modify the simulated cellular network connectivity, including signal strength, speed, and data connection type.
- Set battery health, level, and charging status.
- Simulate incoming phone calls and SMS messages.
- Simulate the fingerprint sensor.
- Provide mock sensor data including results for accelerometer, ambient temperature, and magnetic field sensor.
Android Profiler
The Emulator enables you to see how your application will look, behave, and interact, but to actually see what’s happening under the surface, you need the Android Profiler.
The Android Profiler displays real-time profiling data for the CPU, memory, and network activity related to your app. You can perform sample-based method tracing to time your code execution, capture heap dumps, view memory allocations, and inspect the details of network-transmitted files.
To open the Android Profiler, click the Android Profiler icon in the toolbar, or navigate to the View
![]() Tool Windows
Tool Windows
![]() Android Profiler menu item. The shared timeline window will be displayed, as shown in
Figure 2-24
.
Android Profiler menu item. The shared timeline window will be displayed, as shown in
Figure 2-24
.

The Profiler window displays real-time graphs for CPU, memory, and network usage, as well as an event timeline that indicates changes in Activity state, user inputs, and screen rotations.
To access the detailed profiling tools for CPU, memory, or network use, click the associated graph. Depending on the resource being profiled, each detail view will allow you to do one of the following:
- Inspect CPU activity and method traces.
- Inspect the Java heap and memory allocations.
- Inspect incoming and outgoing network traffic.
The Android Debug Bridge
The Android Debug Bridge (ADB) is a client-service application that lets you connect with an Android device (virtual or actual). It’s made up of three components:
- A daemon running on the device or Emulator
- A service that runs on your development computer
- Client applications that communicate with the daemon through the service
As a communications conduit between your development hardware and the Android device/Emulator, the ADB lets you install applications, push and pull files, and run shell commands on the target device. Using the device shell, you can change logging settings and query or modify SQLite databases available on the device.
Android Studio automates and simplifies a lot of your usual interaction with the ADB, including application installation and updating, file logging, and debugging.
APK Analyzer
The APK Analyzer enables you to better understand the composition of your APK files by providing an interface to:
-
View the absolute and relative size of files stored within the APK, including
.DEXand resource files. -
View the final versions of
.DEXfiles stored within the APK. -
View the final version of the
AndroidManifest.xmlfile. - Perform a side-by-side comparison of two APKs.
To analyze your APK, you can drag and drop an APK file directly into the editor window of Android Studio, navigate to an APK in the build
![]() output
output
![]() apks directory using the Project perspective and double-click the desired APK, or click the Build
apks directory using the Project perspective and double-click the desired APK, or click the Build
![]() Analyze APK menu item and select an APK.
Analyze APK menu item and select an APK.
The APK Analyzer window, shown in Figure 2-25 , displays each file and folder stored within the APK, and allows you to navigate within each folder or to display additional details on each file.

The Raw File Size column represents the uncompressed size of each entity, while the Download Size indicates the estimated compressed size of the entity when delivered by Google Play.
By selecting the application manifest, you can view the XML form of the final manifest file packaged within your APK.
For more details on how to use the APK Analyzer, refer to
developer.android.com/studio/build/apk-analyzer.html
.
The Lint Tool
Android Studio provides a static code analysis tool called Lint, which helps identify and correct structural quality issues within your code, without having to run the app or write those specific tests.
The configured Lint and IDE inspections run automatically whenever you build your app, checking your source code and resource files for potential bugs and optimization improvements, including correctness, security, performance, usability, accessibility, and internationalization.
Potential problems are highlighted within the IDE with a description, severity level, and where possible a suggested remedy.
Using Lint to identify and rectify potential structural issues within your code can dramatically improve the readability, reliability, and efficiency of your code. It’s best practice to ensure all Lint warnings are dealt with as part of your development process.
Monkey, Monkey Runner, and Espresso UI Testing
UI testing helps to ensure that users don’t encounter unexpected results when interacting with your app. Android Studio includes a number of tools to assist you in creating user interface/user interaction tests.
Monkey works from within the ADB shell, sending a stream of pseudorandom, but repeatable, system and UI events to your application. It’s particularly useful to stress-test your applications to investigate edge cases you might not have anticipated through unconventional use of the UI.
Alternatively, Monkey Runner is a Python scripting API that lets you send specific UI commands to control an Emulator or device from outside the application. It’s extremely useful for performing UI, functional, and unit tests in a predictable, repeatable fashion.
The Espresso testing framework, provided through the Android Testing Support Library, provides APIs for writing UI tests to simulate specific user interactions for a specific app. Espresso detects when the main thread is idle, and runs your test commands at the appropriate time to improve test reliability. This capability also relieves you from needing to add timing workarounds, such as a sleep period, into your test code.
You can learn more about Espresso testing at
developer.android.com/training/testing/espresso
.
Gradle
Gradle is an advanced build system and toolkit, integrated into Android Studio, which makes it possible for you to perform custom build configurations without needing to modify your app’s source files.
The use of Gradle as Android’s build system is intended to make it easier to configure, extend and customize the build process, simplify code and resource reuse, and to more easily create multiple build variants of an application.
Gradle is plug-in–based, so integration with Android Studio is managed through the Android Plugin for Gradle, which works with the build toolkit to provide a UI within Android Studio for processes and configurable settings that are specific to building and testing Android applications.
Gradle itself, and the Android Plugin, are integrated with—but ultimately independent of—Android Studio. As a result, you can build your Android apps from within Android Studio, the command line on your machine, or on machines where Android Studio is not installed (such as continuous integration servers). The output of the build is the same whether you are building a project from the command line, on a remote machine, or using Android Studio.
Within this book, we will be building our applications within Android Studio using the Android Plugin for Gradle to manage our interactions with the build system. Full coverage of Gradle, custom builds, and Gradle build scripts is beyond the scope of this book, but you can learn more details at
developer.android.com/studio/build/
.
3
Applications and Activities and Fragments, Oh My!
APPLICATIONS, ACTIVITIES, AND FRAGMENTS
Android applications (or simply “apps”) are software programs that are installed and run natively on Android devices. To write high-quality applications, it’s important to understand the components they consist of, and how those components work together. This chapter introduces each of the application components, with special attention paid to Activities and Fragments—the visual components of your application.
In Chapter 2 , “Getting Started,” you learned that each Android application runs in a separate process, in its own instance of the Android Run Time. In this chapter, you learn how the Android Run Time manages your application, and the impact this has on the application life cycle. An application’s state determines its priority that, in turn, affects the likelihood of its being terminated when the system requires more resources. You are also introduced to the Activity and Fragment states, state transitions, and event handlers.
The
Activity
class forms the basis for all your user interface (UI) screens. You’ll learn how to create Activities and gain an understanding of their life cycles and how they affect the application lifetime and priority.
The range of screen sizes and display resolutions for the devices on which your application will be used has expanded with the range of Android devices now available. The Fragment API provides support for creating dynamic layouts that can be optimized for all devices including tablets and smartphones.
You’ll learn how to use Fragments to encapsulate state within your UI components, and to create layouts that scale and adapt to accommodate a variety of device types, screen sizes, and resolutions.
THE COMPONENTS OF AN ANDROID APPLICATION
Android applications consist of loosely coupled components, bound by an application manifest that describes each component and how they interact. The following components comprise the building blocks for all your Android applications:
-
Activities
—Your application’s presentation layer. The UI of your application is built around one or more extensions of the
Activityclass. Activities use Fragments and Views to lay out and display information, and to respond to user actions. Compared to desktop development, Activities are equivalent to Forms. You learn more about Activities later in this chapter. - Services —Service components run without a UI, updating your data sources, triggering Notifications, and broadcasting Intents. They’re used to perform long-running tasks, or those that require no user interaction (such as tasks that need to continue even when your application’s Activities aren’t active or visible). You learn more about how to create and use Services in Chapter 11 , “Working in the Background.”
- Intents —A powerful inter-application message-passing framework; Intents are used extensively throughout Android. You will use Intents to start and stop Activities and Services, to broadcast messages system-wide or to a specific Activity, Service, or Broadcast Receiver—or to request an action be performed on a particular piece of data. Explicit, implicit, and broadcast Intents are explored in more detail in Chapter 6 , “Intents and Broadcast Receivers.”
- Broadcast Receivers —Broadcast Receivers (or just “Receivers”) are used to receive broadcast Intents, enabling your application to listen for Intents that match the criteria you specify. Broadcast Receivers start your application to react to any received Intent, making them perfect for creating event-driven applications. Broadcast Receivers are covered alongside Intents in Chapter 6 .
- Content Providers —Content Providers are the preferred means to share data across application boundaries. You can configure your application’s Content Providers to allow access from other applications, and you can access the Content Providers exposed by others. Android devices include several native Content Providers that expose useful databases such as the media store and contacts. You learn how to create and use Content Providers in Chapter 10 , “Content Providers and Search.”
- Notifications —Notifications enable you to alert users to application events without stealing focus or interrupting their current Activity. They’re the preferred technique for getting a user’s attention when your application is not visible or active, typically triggered from within a Service or Broadcast Receiver. For example, when a device receives a text message or an e-mail, the messaging and Gmail applications use Notifications to alert you. You can trigger these notifications from your applications, as discussed in Chapter 11 .
By decoupling the dependencies between application components, you can share and use individual Content Providers, Services, and even Activities with other applications—both your own and those of third parties.
THE ANDROID APPLICATION LIFE CYCLE, PRIORITY, AND PROCESS STATES
Unlike many traditional application platforms, Android applications have limited control over their own life cycles. Instead, application components must listen for changes in the application state and react accordingly, taking particular care to be prepared for untimely termination.
By default, each Android application runs in its own process, each of which is running a separate instance of the Android Run Time (ART). Memory and process management is handled exclusively by the run time.
Android aggressively manages its resources, doing whatever is necessary to ensure a smooth and stable user experience. In practice, that means processes (and therefore applications) will be killed, in some cases without warning, to free resources if higher-priority applications require them.
The order in which processes are killed to reclaim resources is determined by the priority of their hosted applications. An application’s priority is equal to that of its highest-priority component.
If two applications have the same priority, the process that has been at that priority longest will typically be killed first. Process priority is also affected by interprocess dependencies; if an application has a dependency on a Service or Content Provider supplied by a second application, the secondary application is assigned at least as high a priority as the application it supports.
It’s important to structure your application to ensure that its priority is appropriate for the work it’s doing. If you don’t, your application could be killed while it’s in the middle of something important, or it could remain running when it could safely be terminated to free resources and maintain a smooth user experience.
Figure 3-1 shows the priority tree used to determine the order of application termination.

The following list details each of the application states shown in Figure 3-1 , explaining how the state is determined by the application components of which it comprises:
-
Active processes (Top Priority)
—Active (foreground) processes have application components the user is interacting with. These are the processes Android tries to keep running smoothly and responsively by reclaiming resources from other applications. There are generally very few of these processes.
Active processes include one or more of the following components:
- Activities in an active state—that is, those in the foreground responding to user events. You explore Activity states in greater detail later in this chapter.
-
Broadcast Receivers executing
onReceiveevent handlers as described in Chapter 6 . -
Services executing
onStart,onCreate, oronDestroyevent handlers as described in Chapter 11 .
- Visible processes (High Priority) —Visible but inactive processes are those hosting “visible” Activities or foreground Services. As the name suggests, visible Activities are visible but they aren’t in the foreground or responding to user input. This happens when an Activity is only partially obscured (by a non–full-screen or transparent Activity), or the non-active window in a multi-window environment. There are generally very few visible processes, and they’ll be killed only under extreme circumstances to allow active processes to continue. Since Android 6.0 Marshmallow (API Level 23), running Services that have been flagged to run in the foreground have a slightly lower priority than active processes, making it possible—though unlikely—for a foreground Service to be killed to allow an active Activity with significant memory requirements to continue running.
- Started background Service processes (Medium Priority) —Processes hosting background Services that have been started. Because these Services don’t interact directly with the user, they receive a slightly lower priority than visible Activities or foreground Services. You learn more about Services in Chapter 11 .
- Background processes (Low Priority) —Processes hosting Activities that aren’t visible and that don’t have any running Services. Every time you switch between applications by pressing the home key, or using the “recent apps” selector, the previously active application goes to the background. There will generally be a large number of background apps that Android will kill using a last-seen-first-killed pattern, giving some consideration to prioritize killing applications consuming more memory, in order to obtain resources for foreground processes.
INTRODUCING THE ANDROID APPLICATION CLASS
Your application’s
Application
object remains instantiated whenever your application is running—unlike Activities, the Application is not restarted as a result of configuration changes.
Extending the
Application
class with your own implementation enables you to respond to application-level events broadcast by the Android run time (such as low memory conditions.)
When your
Application
implementation is registered in the manifest, it will be instantiated when your application process is created. As a result, if you choose to create a custom
Application
class implementation, it is by nature a singleton and should be implemented as such.
A CLOSER LOOK AT ANDROID ACTIVITIES
Each Activity represents a screen that an application can present to your users. The more complicated your application, the more screens you are likely to need.
Typically, this includes at least a “main Activity”—the primary interface screen—that handles the main UI functionality of your application. This primary interface is generally supported by a set of secondary Activities. To move between screens, you start a new Activity (or return from one).
Creating Activities
To create a new Activity, extend the
Activity
class—or one of its subclasses (most commonly the
AppCompatActivity
, as described in the next section). Within your new class you must assign a UI and implement your functionality.
Listing 3-1
shows the basic skeleton code for a new
Activity
.
The base
Activity
class presents an empty screen that encapsulates the window display handling. An empty
Activity
isn’t particularly useful, so the first thing you’ll want to do is create the UI using Fragments, layouts, and Views.
Views are the UI widgets/controls that display data and provide user interaction. Android provides several layout classes, called View Groups , which can contain multiple Views to help you lay out your UI. Fragments—discussed later in this chapter—are also available to encapsulate segments of your UI, making it simple to create dynamic interfaces that can be rearranged to optimize your layouts for different screen sizes and orientations.
To assign a UI to an Activity, call
setContentView
from the
onCreate
method. In this next snippet, an instance of a
TextView
is used as the Activity’s UI:
@Overridepublic void onCreate(Bundle savedInstanceState) {super.onCreate(savedInstanceState);TextView textView = new TextView(this);setContentView(textView);}
There’s a good chance you’ll want to use a slightly more complex UI design. You can create a layout in code using layout View Groups, or you can use the standard Android convention of passing a resource ID for a layout defined in an external resource, as shown in the following snippet:
@Overridepublic void onCreate(Bundle savedInstanceState) {super.onCreate(savedInstanceState);setContentView(R.layout.main);}
To use an Activity in your application, you need to register it in the manifest. Add a new
activity
tag within the
application
node of the manifest; the
activity
tag includes attributes for metadata, such as the label, icon, required permissions, and themes used by the
Activity
.
<activity android:label="@string/app_name"android:name=".MyActivity"></activity>
An Activity without a corresponding
activity
tag can’t be used—attempting to start it will result in a runtime exception:
Within the
activity
tag you can add
intent-filter
nodes that specify the Intents that can be used to start your Activity. Each Intent Filter defines one or more actions and categories that your
Activity
supports. Intents and Intent Filters are covered in depth in
Chapter 6
, but it’s worth noting that for an
Activity
to be available from the application launcher, it must include an Intent Filter listening for the
MAIN
action and the
LAUNCHER
category, as highlighted in
Listing 3-2
.
Using the AppCompatActivity
As mentioned in
Chapter 2
, the
AppCompatActivity
class is an
Activity
subclass available from the Android Support Library. It provides ongoing, backward compatibility for features added to the
Activity
class in each new platform release.
As such, it’s considered best practice to use the
AppCompatActivity
in preference to the
Activity
class, and we’ll continue to do so throughout this book, generally referring to classes that extend
AppCompatActivity
as Activities.
Listing 3-3
updates the code from
Listing 3-1
showing the skeleton code for a new Activity that extends
AppCompatActivity
.
The Activity Life Cycle
A good understanding of the Activity life cycle is vital to ensure that your application provides a seamless user experience and properly manages its resources.
As explained earlier, Android applications do not control their own process lifetimes; the Android Run Time manages the process of each application, and by extension that of each Activity within it.
Although the run time handles the termination and management of an Activity’s process, the Activity’s state helps determine the priority of its parent application. The application priority, in turn, influences the likelihood that the run time will terminate it and the Activities running within it.
Activity Stacks and the Least-Recently Used (LRU) List
The state of each Activity is determined by its position on the Activity stack (or “back stack”), a last-in–first-out collection of all the currently running Activities. When a new Activity starts, it becomes active and is moved to the top of the stack. If the user navigates back using the Back button, or the foreground Activity is otherwise closed, the next Activity down on the stack moves up and becomes active. Figure 3-2 illustrates this process.

As described previously in this chapter, an application’s priority is influenced by its highest-priority Activity. When the Android memory manager is deciding which application to terminate to free resources, it uses this Activity stack to determine the priority of applications.
When none of an application’s Activities are visible, the application itself moves onto the least-recently used (LRU) list, which is used to determine the order in which applications will be terminated to free resources as described earlier.
Activity States
Throughout an application’s life cycle, its Activities move in and out of the Activity stack, as shown in Figure 3-2 . As they do so, they transition through four possible states:
- Active —When an Activity is at the top of the stack it is the visible, focused, foreground Activity that is receiving user input. Android will attempt to keep it alive at all costs, killing applications that own Activities further down the stack as needed, to ensure this Activity has the resources it needs. When another Activity becomes active, this one will be paused—and when it is no longer visible, it will be stopped, as described in the following points.
- Paused —In some cases your Activity will be visible but will not have focus; at this point it’s paused. This state may also be reached in which your application is being used in a multi-window environment—where multiple applications may be visible, but only the Activity with which the user last interacted is considered active. Similarly, if your Activity has a transparent or non–full-screen Activity active in front of it, it will remain in a paused state. When paused, an Activity is treated as if it were active; however, it doesn’t receive user input events. In extreme cases Android will kill a paused Activity to recover resources for the active Activity. When an Activity becomes totally obscured, it is stopped; all Activities transition through the paused state before becoming stopped.
- Stopped —When an Activity isn’t visible, it “stops.” The Activity will remain in memory, retaining all state information; however, it is now a likely candidate for termination when the system requires memory. When an Activity is in a stopped state, it’s important to save data and the current UI state, and to stop any non-critical operations. Once an Activity has exited or closed, it becomes inactive.
- Inactive —After an Activity has been killed, as well as before it’s been launched, it’s inactive. Inactive Activities have been removed from the Activity stack and need to be restarted before they can be displayed and used.
State transitions occur through user and system actions, meaning your application has no control over when they happen. Similarly, application termination is handled by the Android memory manager, which will start by closing applications that contain inactive Activities, followed by those that are stopped. In extreme cases, it will remove those that are paused.
Understanding Activity Lifetimes
To ensure that Activities can react to state changes, Android provides a series of event handlers that are fired as an Activity transitions through its full, visible, and active lifetimes. Figure 3-3 summarizes these lifetimes in terms of the Activity states described in the previous section.

Within an Activity’s full lifetime, between creation and destruction, it goes through one or more iterations of the active and visible lifetimes. Each transition triggers the method handlers previously described. The following sections provide a closer look at each of these lifetimes and the events that bracket them.
The Full Lifetime
The full lifetime of your Activity occurs between the first call to
onCreate
and when it is destroyed. It’s not uncommon for an Activity’s process to be terminated
without
the corresponding
onDestroy
handler being called.
Use the
onCreate
method to initialize your Activity: inflate the user interface, get references to Fragments, allocate references to class variables, bind data to controls, and start Services. If the Activity was terminated unexpectedly by the run time, the
onCreate
method is passed a
Bundle
object containing the state saved in the last call to
onSaveInstanceState
. You should use this
Bundle
to restore the UI to its previous state, either within the
onCreate
method or
onRestoreInstanceState
.
Override
onDestroy
to clean up any resources created in
onCreate
, and ensure that all external connections, such as network or database links, are closed.
As part of Android’s guidelines for writing efficient code, it’s recommended that you avoid repeated creation of short-term objects. The rapid creation and destruction of objects forces additional garbage collection, a process that can have a direct negative impact on the user experience. If your Activity creates the same set of objects regularly, consider creating them in the
onCreate
method, as it’s called only once during the Activity’s lifetime.
The Visible Lifetime
An Activity’s visible lifetimes are bounded between calls to
onStart
and
onStop
. Between these calls your Activity will be visible to the user, although it may not have focus and may be partially obscured. Activities are likely to go through several visible lifetimes during their full lifetime as they move between the foreground and background. Since Android 3.0 Honeycomb (API Level 11), you can safely assume
onStop
will be called before your application process is terminated.
The
onStop
method should be used to pause or stop animations, threads, Sensor listeners, GPS lookups, Timers, Services, or other processes that are used exclusively to update the UI. There’s little value in consuming resources (such as memory, CPU cycles, or network bandwidth) to update the
UI when it isn’t visible. Use the
onStart
method to resume or restart these processes when the UI is visible again.
The
onRestart
method is called immediately prior to all but the first call to
onStart
. Use it to implement special processing that you want done only when the Activity restarts within its full lifetime.
The
onStart
/
onStop
methods should also be used to register and unregister Broadcast Receivers used exclusively to update the UI.
The Active Lifetime
The active lifetime starts with a call to
onResume
and ends with a corresponding call to
onPause
.
An active Activity is in the foreground and is receiving user input events. Your Activity is likely to go through many active lifetimes before it’s destroyed, as the active lifetime will end when a new Activity is displayed, the device goes to sleep, or the Activity loses focus. Try to keep code in the
onPause
and
onResume
methods fast and lightweight to ensure that your application remains responsive when moving in and out of the foreground. You can safely assume that during the active lifetime
onPause
will be called before the process is terminated.
Since Android 3.0 Honeycomb (API Level 11), the completion of the
onStop
handler marks the point beyond which an Activity may be killed without warning. This allows you to move all time-consuming operations required to save state into
onStop
, keeping your
onPause
lightweight and focused on suspending memory- or CPU-intensive operations while the Activity isn’t active. Depending on your application architecture, that may include suspending threads, processes, or Broadcast Receivers while your Activity is not in the foreground.
The corresponding
onResume
method should also be lightweight. You do not need to reload the UI state here, because this should handled by the
onCreate
and
onRestoreInstanceState
methods as required. Use
onResume
to reverse actions performed within
onPause
—such as allocating released resources, initializing or registering removed or unregistered components, and resuming any suspended behavior.
Monitoring State Changes
The skeleton code in Listing 3-4 shows the stubs for the state change method handlers available in an Activity as described in the previous section. Comments within each stub describe the actions you should consider taking on each state change event.
As shown in the preceding code, you should always call back to the superclass when overriding these event handlers.
Responding to Memory Pressure
The Android system will terminate applications without warning in order to free resources required by any active and visible applications.
To provide the best possible user experience, Android must find a balance between killing applications to free resources and provide a responsive system, and retaining as many background apps as possible to improve the experience of switching between apps.
You can help by overriding the
onTrimMemory
handler, to respond to system requests that you reduce your memory usage. When killing application processes, the system will begin with empty processes before moving on to background applications—those hosting Activities that aren’t visible and that don’t have any running Services. In extreme cases, applications with visible Activities, or even foreground Services, may be terminated to free resources for the application hosting the active Activity.
The order in which applications are terminated is generally determined by the least-recently used (LRU) list—where the applications that have been unused the longest are the first killed. However, the run time does also consider the amount of memory potentially freed by killing each application, and is more likely to kill those that offer higher gains. So the less memory you consume, the less likely it is that your application will be terminated, and the better the overall system performance.
The
onTrimMemory
handler is available within each application component, including Activities and Services. It provides an opportunity for well-behaved applications to free additional memory when the system is running low on resources.
You should implement
onTrimMemory
to incrementally release memory based on current system constraints using the level parameter that provides context for the request. Note that the levels passed into
onTrimMemory
don’t represent a simple linear progression, but rather a series of contextual clues to help you decide how best to reduce overall system memory pressure:
-
TRIM_MEMORY_RUNNING_MODERATE—Your application is running and not being considered for termination, but the system is beginning to feel memory pressure. -
TRIM_MEMORY_RUNNING_LOW—Your application is running and not being considered for termination, but the system is beginning to run significantly low on memory. Releasing memory now will improve system (and therefore your application’s) performance. -
TRIM_MEMORY_RUNNING_CRITICAL—Your application is running and not being considered for termination, but the system is running extremely low on memory. The system will now begin killing background processes if apps don’t free resources, so by releasing non-critical resources now you can prevent performance degradation and reduce the chance of other apps being terminated. -
TRIM_MEMORY_UI_HIDDEN—Your application is no longer displaying a visible UI. This is a good opportunity to release large resources that are used only by your UI. It’s considered good practice to do this here, rather than within youronStophandler, as it will avoid purging/reloading UI resources if your UI quickly switches from hidden to visible. -
TRIM_MEMORY_BACKGROUND—Your application is no longer visible and has been added to the least-recently used (LRU) list—and is therefore a low-risk candidate for termination. However, the system is running low on memory and may already be killing other apps on the LRU list. Release resources that are easy to recover now, to reduce system pressure and make your application less likely to be terminated. -
TRIM_MEMORY_MODERATE—Your application is in the middle of the LRU list and the system is running low on memory. If the system becomes further constrained for memory, there’s a good chance your process will be killed. -
TRIM_MEMORY_COMPLETE—Your application is one of the, if not the , most likely candidates for termination if the system does not recover memory immediately. You should release absolutely everything that’s not critical to resuming your application state.
Rather than compare the current level to these exact values, you should check if the level value is greater or equal to a level you are interested in, allowing for future intermediate state, as shown in Listing 3-5 .
INTRODUCING FRAGMENTS
Fragments enable you to divide your Activities into fully encapsulated reusable components, each with its own life cycle and state.
Each Fragment is an independent module that is loosely coupled but tightly bound to the Activity into which it is added. Fragments can either contain a UI or not, and can be used within multiple Activities. Fragments that encapsulate a UI can be laid out in a variety of combinations to suit multi-pane UIs, and also added to, removed from, and exchanged within a running Activity to help build dynamic user interfaces.
Although it is not necessary to divide your Activities (and their corresponding layouts) into Fragments, doing so can drastically improve the flexibility of your UI and make it easier for you to adapt your user experience for new device configurations.
Creating New Fragments
Extend the
Fragment
class to create a new Fragment, (optionally) defining the UI and implementing the functionality it encapsulates.
In most circumstances you’ll want to assign a UI to your Fragment. It is possible to create a Fragment that doesn’t include a UI but instead provides background behavior for an Activity. This is explored in more detail later in this chapter.
If your Fragment does require a UI, override the
onCreateView
handler to inflate and return the required View hierarchy, as shown in the Fragment skeleton code in
Listing 3-6
.
You can create a layout in code using layout View Groups; however, as with Activities, the preferred way to design Fragment UI layouts is by inflating an XML resource.
Unlike Activities, Fragments don’t need to be registered in your manifest. This is because Fragments can exist only when embedded into an Activity, with their life cycles dependent on that of the Activity to which they’ve been added.
The Fragment Life Cycle
The life cycle events of a Fragment mirror those of its parent Activity; however, after the containing Activity is in its active—resumed—state, adding or removing a Fragment will affect its life cycle independently.
Fragments include a series of event handlers that mirror those in the
Activity
class. They are triggered as the Fragment is created, started, resumed, paused, stopped, and destroyed. Fragments also include a number of additional callbacks that indicate attaching and detaching the Fragment to and from its parent’s Context, creation (and destruction) of the Fragment’s View hierarchy, and the completion of the creation of the parent Activity.
Figure 3-4 summarizes the Fragment life cycle.

The skeleton code in Listing 3-7 shows the stubs for the life-cycle handlers available in a Fragment. Comments within each stub describe the actions you should consider taking on each state change event.
Fragment-Specific Life-Cycle Events
Most of the Fragment life-cycle events correspond to their equivalents in the
Activity
class, which were covered in detail earlier in this chapter. Those that remain are specific to Fragments and the way in which they’re added to their parent Activity.
Attaching and Detaching Fragments from the Parent Context
The full lifetime of your Fragment begins when it’s bound to its parent’s Context and ends when it’s been detached. These events are represented by the calls to
onAttach
and
onDetach
, respectively.
The
onAttach
event is triggered before the Fragment’s UI has been created, before the Fragment itself or its parent have finished their initialization. Typically, the
onAttach
event is used to gain a reference to the parent component’s Context in preparation for further initialization tasks.
The
onDetach
handler will be called if you remove a Fragment from its parents, as well as if the component containing your Fragment is destroyed. As with any handler called after a Fragment/Activity has become paused, it’s possible that
onDetach
will not be called if the parent component’s process is terminated
before
completing its full life cycle.
Creating and Destroying Fragments
The created lifetime of your Fragment occurs between the first call to
onCreate
and the final call to
onDestroy
. It’s not uncommon for an Activity’s process to be terminated
without
the corresponding
onDestroy
method being called, so a Fragment can’t rely on its
onDestroy
handler being triggered.
As with Activities, you should use the
onCreate
method to initialize your Fragment. It’s good practice to create any class-scoped objects here to ensure they’re created only once in the Fragment’s lifetime.
Note that unlike Activities, the Fragment UI is
not
inflated within the
onCreate
handler.
Creating and Destroying User Interfaces
A Fragment’s UI is initialized (and destroyed) within a new set of event handlers:
onCreateView
and
onDestroyView
, respectively.
Use the
onCreateView
method to initialize your Fragment: inflate the UI and get references (and bind data to) the Views it contains.
Once you have inflated your View hierarchy, it should be returned from the handler:
return inflater.inflate(R.layout.my_skeleton_fragment_layout,container, false);
If your Fragment needs to interact with the UI of a parent Activity, wait until the
onActivityCreated
event has been triggered. This signifies that the containing Activity has completed its initialization and its UI has been fully constructed.
Fragment States
The fate of a Fragment is inextricably bound to that of the component to which it belongs. As a result, Fragment state transitions are closely related to the corresponding Activity state transitions.
Like Activities, Fragments are “active” when they belong to an Activity that is focused and in the foreground. When an Activity is paused or stopped, the Fragments it contains are also paused and stopped, and the Fragments contained by an inactive Activity are also inactive. When an Activity is finally destroyed, each Fragment it contains is likewise destroyed.
As the Android memory manager regularly closes applications to free resources, the Fragments within those Activities are also destroyed.
While Activities and their Fragments are tightly bound, one of the advantages of using Fragments to compose your Activity’s UI is the flexibility to dynamically add or remove Fragments from an Activity. As a result, each Fragment can progress through its full, visible, and active life cycle several times within the active lifetime of its parent Activity.
Whatever the trigger for a Fragment’s transition through its life cycle, managing its state transitions is critical in ensuring a seamless user experience. There should be no difference in a Fragment moving from a detached, paused, stopped, or inactive state back to active, so it’s important to save all UI state and persist all data when a Fragment is paused or stopped. Like an Activity, when a Fragment becomes active again, it should restore that saved state.
Introducing the Fragment Manager
Each Activity includes a Fragment Manager to manage the Fragments it contains. As we’re using the support library, we’ll access the Fragment Manager using the
getSupportFragmentManager
method:
FragmentManager fragmentManager = getSupportFragmentManager();
The Fragment Manager provides the methods used to access the Fragments currently added to the Activity, and to perform Fragment Transactions to add, remove, and replace Fragments.
Adding Fragments to Activities
The simplest way to add a Fragment to an Activity is by including it within the Activity’s layout using the
fragment
tag, as shown in
Listing 3-8
.
Once the Fragment has been inflated, it becomes a View Group within the view hierarchy, laying out and managing its UI within the Activity.
This technique works well when you use Fragments to define a set of static layouts based on various screen sizes. If you plan to dynamically modify your layouts by adding, removing, and replacing Fragments at run time, a better approach is to create layouts that use container Views into which Fragments can be placed at run time, based on the current application state.
Listing 3-9 shows an XML snippet that you could use to support this approach.
You then need to create and add the corresponding Fragments to their appropriate parent containers within your Activity using Fragment Transactions, as described in the next section.
Using Fragment Transactions
Fragment Transactions are used to add, remove, and replace Fragments within an Activity at run time. Using Fragment Transactions, you can make your layouts dynamic—that is, they will adapt and change based on user interactions and application state.
Each Fragment Transaction can include any combination of supported actions, including adding, removing, or replacing Fragments. They also support the specification of the transition animations to display and whether to add a Transaction to the back stack.
A new Fragment Transaction is created using the
beginTransaction
method from the Fragment Manager. Modify the layout using the
add
,
remove
, and
replace
methods, as required, before setting the animations to display, and setting the appropriate back-stack behavior. When you are ready to execute the change, call
commit
to add the transaction to the UI queue asynchronously, or
commitNow
to block until the transaction is fully complete:
FragmentTransaction fragmentTransaction = fragmentManager.beginTransaction();// Add, remove, and/or replace Fragments.// Specify animations.// Add to back stack if required.fragmentTransaction.commitNow();
Using
commitNow
is the preferred alternative, but is only available if the current transaction is
not
being added to the back stack. This option, as well as each transaction type and related options, is explored in the following sections.
Adding, Removing, and Replacing Fragments
When adding a new UI Fragment, begin by creating it and pass the new Fragment instance, along with the container View into which the Fragment will be placed, to the
add
method of your Fragment Transaction. Optionally, you can specify a tag that can later be used to find the Fragment when using the
findFragmentByTag
method:
final static String MY_FRAGMENT_TAG = "detail_fragment";
With the tag defined, you can use the
add
method as follows:
FragmentTransaction fragmentTransaction = fragmentManager.beginTransaction();fragmentTransaction.add(R.id.details_container, new DetailFragment(),MY_FRAGMENT_TAG);fragmentTransaction.commitNow();
To remove a Fragment, you first need to find a reference to it, usually using either the Fragment Manager’s
findFragmentById
or
findFragmentByTag
methods. Then pass the found Fragment instance as a parameter to the
remove
method of a Fragment Transaction:
FragmentTransaction fragmentTransaction = fragmentManager.beginTransaction();Fragment fragment = fragmentManager.findFragmentByTag(MY_FRAGMENT_TAG);fragmentTransaction.remove(fragment);fragmentTransaction.commitNow();
You can also replace one Fragment with another. Using the
replace
method, specify the container ID containing the Fragment to be replaced, the Fragment with which to replace it, and (optionally) a tag to identify the newly inserted Fragment:
FragmentTransaction fragmentTransaction = fragmentManager.beginTransaction();fragmentTransaction.replace(R.id.details_container,new DetailFragment(selected_index),MY_FRAGMENT_TAG);fragmentTransaction.commitNow();
Fragments and Configuration Changes
In order to maintain a consistent UI state between configuration changes, all the Fragments added to your UI will automatically be restored when an Activity is re-created following an orientation change or unexpected termination.
This is particularly important if you are populating your Activity layout with Fragments within the
onCreate
handler—in which case you must check if the Fragments have already been added to avoid creating multiple copies.
You can do this either by checking for Fragments before adding them, or if this is an Activity restart by checking if the
savedInstanceState
is null:
protected void onCreate(Bundle savedInstanceState) {super.onCreate(savedInstanceState);setContentView(R.layout.activity_main);if (savedInstanceState == null) {// Create and add your Fragments.} else {// Get references to Fragments that have already been restored.}}
Using the Fragment Manager to Find Fragments
To find Fragments within your Activity, use the Fragment Manager’s
findFragmentById
method. If you have added your Fragment to the Activity layout in XML, you can use the Fragment’s resource identifier:
MyFragment myFragment =(MyFragment)fragmentManager.findFragmentById(R.id.MyFragment);
If you’ve added a Fragment using a Fragment Transaction, you can instead specify the resource identifier of the container View to which you added the Fragment you want to find:
DetailFragment detailFragment =(DetailFragment)fragmentManager.findFragmentById(R.id.details_container);
Alternatively, you can use the
findFragmentByTag
method to search for the Fragment using the tag you specified in the Fragment Transaction:
DetailFragment detailFragment =(DetailFragment)fragmentManager.findFragmentByTag(MY_FRAGMENT_TAG);
Later in this chapter you are introduced to Fragments that don’t include a UI. The
findFragmentByTag
method is essential for interacting with these Fragments. Because they’re not part of the Activity’s View hierarchy, they don’t have a resource identifier or a container resource identifier to pass in to the
findFragmentById
method.
Populating Dynamic Activity Layouts with Fragments
If you’re dynamically changing the composition and layout of your Fragments at run time, it’s good practice to define only the parent containers within your XML layout and populate it exclusively using Fragment Transactions at run time to ensure consistency when configuration changes (such as screen rotations) cause the UI to be re-created, as described earlier.
Listing 3-10 shows the skeleton code used to populate an Activity’s layout with Fragments at run time; in this case we test for the existence of a Fragment before creating and adding a new one.
To ensure a consistent user experience, Android persists the Fragment layout and associated back stack when an Activity is restarted due to a configuration change.
For the same reason, when creating alternative layouts for run time configuration changes, it’s considered good practice to include any view containers involved in any transactions in all the layout variations. Failing to do so may result in the Fragment Manager attempting to restore Fragments to containers that don’t exist in the new layout.
To remove a Fragment container in a given orientation layout, simply mark its
visibility
attribute as
gone
in your layout definition, as shown in
Listing 3-11
.
Fragments and the Back Stack
Earlier in this chapter we described the concept of Activity stacks—the logical stacking of Activities that are no longer visible—which allow users to navigate back to previous screens using the Back button.
Fragments enable you to create dynamic Activity layouts that can be modified to present significant changes in the UIs. In some cases these changes could be considered a new screen—in which case a user may reasonably expect the Back button to return to the previous layout. This involves reversing previously executed Fragment Transactions.
Android provides a convenient technique for providing this functionality. To add the Fragment Transaction to the back stack, call
addToBackStack
on a Fragment Transaction before calling
commit
. It’s important to note that
commitNow
cannot be used when applying Fragment Transactions that are added to the back stack.
In the following code snippet, we have a layout that displays either the list or the detail view. This transaction will remove the list Fragment and add the detail Fragment, and adds the change to the back stack:
FragmentTransaction fragmentTransaction = fragmentManager.beginTransaction();// Find and remove the list FragmentFragment fragment = fragmentManager.findFragmentById(R.id.ui_container);fragmentTransaction.remove(fragment);// Create and add the detail FragmentfragmentTransaction.add(R.id.ui_container, new DetailFragment());// Add the Fragment Transaction to the backstack and commit the change.fragmentTransaction.addToBackStack(BACKSTACK_TAG);fragmentTransaction.commit();
Pressing the Back button will then reverse the previous Fragment Transaction and return the UI to the earlier layout.
When the preceding Fragment Transaction is committed, the List Fragment is stopped, detached, and moved to the back stack, rather than simply destroyed. If the Transaction is reversed, the Detail Fragment is destroyed, and the List Fragment is restarted and reattached to the Activity.
Animating Fragment Transactions
To apply one of the default transition animations, use the
setTransition
method on any Fragment Transaction, passing in one of the
FragmentTransaction.TRANSIT_FRAGMENT_*
constants:
fragementTransaction.setTransition(FragmentTransaction.TRANSIT_FRAGMENT_OPEN);
You can also apply custom animations to Fragment Transactions by using the
setCustomAnimations
method, before calling the
add
or
remove
methods in your Fragment Transaction.
This method accepts two Object Animator XML resources: one for Fragments that are being added to the layout, and another for Fragments being removed:
fragmentTransaction.setCustomAnimations(android.R.anim.fade_in,android.R.anim.fade_out);
This is a particularly useful way to add seamless dynamic transitions when you are replacing Fragments within your layout. You can find more details on creating custom Animator and Animation resources in Chapter 14 , “Advanced Customization of Your User Interface.”
Communicating Between Fragments and Activities
When your Fragment needs to share events with its host Activity (such as signaling UI selections), it’s good practice to create a callback interface within the Fragment that a host Activity must implement.
Listing 3-12
shows a code snippet from within a Fragment class that defines a public event listener interface. The
onAttach
handler is overridden to obtain a reference to the host Activity, confirming that it implements the required interface. The
onDetach
handler sets our reference to null, and the
onButtonPressed
method is used as a placeholder example that calls the interface method on our parent Activity.
You can also use the
getContext
method within any Fragment to return a reference to the Context of the component within which it’s embedded.
Although it’s possible for Fragments to communicate with each other using the host Activity’s Fragment Manager, it’s generally considered better practice to use the Activity as an intermediary. This allows the Fragments to be as independent and loosely coupled as possible, with the responsibility for deciding how an event in one Fragment should affect the overall UI falling to the host Activity.
Fragments Without User Interfaces
In most circumstances, Fragments are used to encapsulate modular components of the UI; however, you can also create a Fragment without a UI to provide background behavior that persists across Activity restarts caused by configuration changes.
You can choose to have an active Fragment retain its current instance when its parent Activity is re-created using the
setRetainInstance
method. After you call this method, the Fragment’s life cycle will change.
Rather than being destroyed and re-created with its parent Activity, the same Fragment instance is retained when the Activity restarts. It will receive the
onDetach
event when the parent Activity is destroyed, followed by the
onAttach
,
onCreateView
, and
onActivityCreated
events as the new parent Activity is instantiated.
The following snippet shows the skeleton code for a Fragment without a UI:
public class WorkerFragment extends Fragment {public final static String MY_FRAGMENT_TAG = "my_fragment";@Overridepublic void onAttach(Context context) {super.onAttach(context);// Get a type-safe reference to the parent context.}@Overridepublic void onCreate(Bundle savedInstanceState) {super.onCreate(savedInstanceState);// Create ongoing threads and tasks.}@Overridepublic void onActivityCreated(Bundle savedInstanceState) {super.onActivityCreated(savedInstanceState);// Initiate worker threads and tasks.}}
To add this Fragment to your Activity, create a new Fragment Transaction, specifying a tag to use to identify it. Because the Fragment has no UI, it should not be associated with a container View and must not be added to the back stack:
FragmentTransaction fragmentTransaction = fragmentManager.beginTransaction();fragmentTransaction.add(new WorkerFragment(), WorkerFragment.MY_FRAGMENT_TAG);fragmentTransaction.commitNow();
Use the
findFragmentByTag
from the Fragment Manager to find a reference to it later:
WorkerFragment workerFragment= (WorkerFragment)fragmentManager.findFragmentByTag(WorkerFragment.MY_FRAGMENT_TAG);
BUILDING AN EARTHQUAKE VIEWER APPLICATION
In the following example you’ll start to create an app that will use a feed of earthquake data from the United States Geological Survey (USGS) to display a list (and eventually a map) of recent earthquakes.
In this chapter we’ll begin by creating the Activity UI for this application using Activities, layouts, and Fragments; you will return to this earthquake application several times in the following chapters, gradually adding more features and functionality.
Figure 3-5 shows the basic application architecture that we’ll construct using the following steps.


- Start by creating a new Earthquake project. It should support phones and tablets, with a minimum SDK of API 16. When prompted, name the primary Activity EarthquakeMainActivity using the Empty Activity template. It should also use the App Compatibility library, which is enabled by selecting the Backwards Compatibility (AppCompat) checkbox.
-
Create a new public
Earthquakeclass. This class will be used to store the details (id, date, details, location, magnitude, and link) of each earthquake. Override thetoStringmethod to provide the string that will be used to represent each earthquake in the earthquake list:import java.util.Date;import java.text.SimpleDateFormat;import java.util.Locale;import android.location.Location;public class Earthquake {private String mId;private Date mDate;private String mDetails;private Location mLocation;private double mMagnitude;private String mLink;public String getId() { return mId; }public Date getDate() { return mDate; }public String getDetails() { return mDetails; }public Location getLocation() { return mLocation; }public double getMagnitude() { return mMagnitude; }public String getLink() { return mLink; }public Earthquake(String id, Date date, String details,Location location,double magnitude, String link) {mId = id;mDate = date;mDetails = details;mLocation = location;mMagnitude = magnitude;mLink = link;}@Overridepublic String toString() {SimpleDateFormat sdf = new SimpleDateFormat("HH.mm", Locale.US);String dateString = sdf.format(mDate);return dateString + ": " + mMagnitude + " " + mDetails;}@Overridepublic boolean equals(Object obj) {if (obj instanceof Earthquake)return (((Earthquake)obj).getId().contentEquals(mId));elsereturn false;}} -
Create a new
dimens.xmlXML resource file in theres/valuesfolder to store dimension resource values. Create new dimensions for screen margins based on the 16dp recommended by the Android design guidelines.<?xml version="1.0" encoding="utf-8"?><resources><!-- Default screen margins, per the Android Design guidelines. --><dimen name="activity_horizontal_margin">16dp</dimen><dimen name="activity_vertical_margin">16dp</dimen><dimen name="text_margin">16dp</dimen></resources> -
Now create a new
list_item_earthquake.xmllayout resource in theres/layoutfolder. This will be used to display each earthquake in the list. For now, use a simpleTextViewthat displays a single line of text using the margin from Step 3, and the Android framework’s list item text appearance. We’ll return to this in Chapter 5 to create a richer, more complex layout:<?xml version="1.0" encoding="utf-8"?><FrameLayout xmlns_android="http://schemas.android.com/apk/res/android"android:layout_width="match_parent"android:layout_height="wrap_content"><TextViewandroid:id="@+id/list_item_earthquake_details"android:layout_width="match_parent"android:layout_height="wrap_content"android:layout_margin="@dimen/text_margin"android:textAppearance="?attr/textAppearanceListItem"/></FrameLayout> -
Create a new
EarthquakeListFragmentclass that extends Fragment and stores an array of Earthquakes:public class EarthquakeListFragment extends Fragment {private ArrayList<Earthquake> mEarthquakes =new ArrayList<Earthquake>();public EarthquakeListFragment() {}@Overridepublic void onCreate(Bundle savedInstanceState) {super.onCreate(savedInstanceState);}} -
Our list of Earthquakes will be displayed using a
RecyclerViewwithin the Fragment created in Step 5. A Recycler View is a visual component that displays a scrolling list of items, we explore the Recycler View in more detail in Chapter 5 . To begin, add a dependency to the Recycler View library in the app modulebuild.gradlefile:dependencies {[… Existing dependencies …]implementation 'com.android.support:recyclerview-v7:27.1.1'} -
Now create a new
fragment_earthquake_list.xmllayout file in theres/layoutfolder, which defines the layout for the Fragment class created in Step 5; it should include a singleRecyclerViewelement:<?xml version="1.0" encoding="utf-8"?><android.support.v7.widget.RecyclerViewxmlns_android="http://schemas.android.com/apk/res/android"xmlns_app="http://schemas.android.com/apk/res-auto"android:id="@+id/list"android:layout_width="match_parent"android:layout_height="match_parent"android:layout_marginLeft="16dp"android:layout_marginRight="16dp"app:layoutManager="LinearLayoutManager"/> -
Return to the Earthquake List Fragment class and override the
onCreateViewmethod to inflate the layout from Step 7:@Overridepublic View onCreateView(LayoutInflater inflater, ViewGroup container,Bundle savedInstanceState) {View view = inflater.inflate(R.layout.fragment_earthquake_list,container, false);return view;} -
Modify the
activity_earthquake_main.xml, replacing the default layout with aFrameLayoutthat will be used as the container for the Fragment you created in Step 5. Be sure to give it an ID so that you can reference it from the Activity code:<?xml version="1.0" encoding="utf-8"?><FrameLayout xmlns_android="http://schemas.android.com/apk/res/android"android:layout_width="match_parent"android:layout_height="match_parent"android:id="@+id/main_activity_frame"></FrameLayout> -
Return to the Earthquake Main Activity, and update the
onCreatemethod to use the Fragment Manager to add the Earthquake List Fragment from Step 5, to the Frame Layout we defined in Step 9. Note that if your Activity is re-created due to a device configuration change, any Fragments added using the Fragment Manager will automatically be re-added. As a result, we only add a new Fragment if this is not a configuration-change restart; otherwise, we can find it using its tag:private static final String TAG_LIST_FRAGMENT = "TAG_LIST_FRAGMENT";EarthquakeListFragmentmEarthquakeListFragment;@Overrideprotected void onCreate(Bundle savedInstanceState) {super.onCreate(savedInstanceState);setContentView(R.layout.activity_earthquake_main);FragmentManager fm = getSupportFragmentManager();// Android will automatically re-add any Fragments that// have previously been added after a configuration change,// so only add it if this isn't an automatic restart.if (savedInstanceState == null) {FragmentTransaction ft = fm.beginTransaction();mEarthquakeListFragment = new EarthquakeListFragment();ft.add(R.id.main_activity_frame,mEarthquakeListFragment, TAG_LIST_FRAGMENT);ft.commitNow();} else {mEarthquakeListFragment =(EarthquakeListFragment)fm.findFragmentByTag(TAG_LIST_FRAGMENT);}} -
Now create a new
EarthquakeRecyclerViewAdapterclass that extendsRecyclerView.Adapter, and within it create a newViewHolderclass that extendsRecyclerView.ViewHolder. The View Holder will be used to hold a reference to each View from the Earthquake item layout definition in Step 4, when you bind the earthquake values to it in theonBindViewHoldermethod of the Earthquake Recycler View Adapter. The role of the Earthquake Recycler View Adapter is to provide populated View layouts based on the list of Earthquakes it maintains. We’ll look at the Recycler View and its adapter in more detail in Chapter 5 .public class EarthquakeRecyclerViewAdapter extendsRecyclerView.Adapter<EarthquakeRecyclerViewAdapter.ViewHolder> {private final List<Earthquake> mEarthquakes;public EarthquakeRecyclerViewAdapter(List<Earthquake> earthquakes ) {mEarthquakes = earthquakes;}@Overridepublic ViewHolder onCreateViewHolder(ViewGroup parent, int viewType) {View view = LayoutInflater.from(parent.getContext()).inflate(R.layout.list_item_earthquake,parent, false);return new ViewHolder(view);}@Overridepublic void onBindViewHolder(final ViewHolder holder, int position) {holder.earthquake = mEarthquakes.get(position);holder.detailsView.setText(mEarthquakes.get(position).toString());}@Overridepublic int getItemCount() {return mEarthquakes.size();}public class ViewHolder extends RecyclerView.ViewHolder {public final View parentView;public final TextView detailsView;public Earthquake earthquake;public ViewHolder(View view) {super(view);parentView = view;detailsView = (TextView)view.findViewById(R.id.list_item_earthquake_details);}@Overridepublic String toString() {return super.toString() + " '" + detailsView.getText() + "'";}}} -
Return to the Earthquake List Fragment and update
onCreateViewto get a reference to the Recycler View, and override theonViewCreatedmethod to assign theEarthquakeRecyclerViewAdapterfrom Step 11 to the Recycler View:private RecyclerView mRecyclerView;private EarthquakeRecyclerViewAdapter mEarthquakeAdapter =new EarthquakeRecyclerViewAdapter(mEarthquakes);@Overridepublic View onCreateView(LayoutInflater inflater, ViewGroup container,Bundle savedInstanceState) {View view = inflater.inflate(R.layout.fragment_earthquake_list,container, false);mRecyclerView = (RecyclerView) view.findViewById(R.id.list);return view;}@Overridepublic void onViewCreated(View view, Bundle savedInstanceState) {super.onViewCreated(view, savedInstanceState);// Set the Recycler View adapterContext context = view.getContext();mRecyclerView.setLayoutManager(new LinearLayoutManager(context));mRecyclerView.setAdapter(mEarthquakeAdapter);} -
Still within the Earthquake List Fragment, add a
setEarthquakesmethod that takes a List of Earthquakes, checks for duplicates, and then adds each new Earthquake to the Array List. It should also notify the Recycler View Adapter that a new item has been inserted:public void setEarthquakes(List<Earthquake> earthquakes) {for (Earthquake earthquake: earthquakes) {if (!mEarthquakes.contains(earthquake)) {mEarthquakes.add(earthquake);mEarthquakeAdapter.notifyItemInserted(mEarthquakes.indexOf(earthquake));}}} -
In
Chapter 7
you’ll learn how to download and parse the USGS feed for earthquakes, but to confirm that your application is working, update your
onCreatemethod of the Earthquake Main Activity to create some dummy Earthquakes—ensuring that you’re importing thejava.util.Dateandjava.util.Calendarlibraries for the date/time functions. Once created, pass the new Earthquakes to your Earthquake List Fragment using itssetEarthquakesmethod:@Overrideprotected void onCreate(Bundle savedInstanceState) {super.onCreate(savedInstanceState);setContentView(R.layout.activity_earthquake_main);FragmentManager fm = getSupportFragmentManager();if (savedInstanceState == null) {FragmentTransaction ft = fm.beginTransaction();mEarthquakeListFragment = new EarthquakeListFragment();ft.add(R.id.main_activity_frame, mEarthquakeListFragment,TAG_LIST_FRAGMENT);ft.commitNow();} else {mEarthquakeListFragment =(EarthquakeListFragment)fm.findFragmentByTag(TAG_LIST_FRAGMENT);}Date now = Calendar.getInstance().getTime();List<Earthquake> dummyQuakes = new ArrayList<Earthquake>(0);dummyQuakes.add(new Earthquake("0", now, "San Jose", null, 7.3, null));dummyQuakes.add(new Earthquake("1", now, "LA", null, 6.5, null));mEarthquakeListFragment.setEarthquakes(dummyQuakes);} -
When you run your project, you should see a Recycler View that features the two dummy earthquakes, as shown in
Figure 3-7
.

4
Defining the Android Manifest and Gradle Build Files, and Externalizing Resources
THE MANIFEST, BUILD FILES, AND RESOURCES
Each Android project includes a manifest file that defines the structure and metadata of your application, its components, and its requirements.
In this chapter you learn how to configure your application manifest, as well as understand how to modify the Gradle build configuration files. These Gradle build files are used to define required dependencies, and define parameters when compiling and building your apps.
You should always provide the best possible experience for users, no matter which country they’re in or which of the wide variety of Android device types, form factors, and screen sizes they’re using. In this chapter, you learn how to externalize resources, and use the resource framework to provide optimized resources to ensure your applications run seamlessly on different hardware (particularly different screen resolutions and pixel densities), in different countries, and supporting multiple languages.
INTRODUCING THE ANDROID MANIFEST
Each Android project includes a manifest file,
AndroidManifest.xml
. Within Android Studio, you can access the application manifest from the
app/manifests
folder as shown in
Figure 4-1
.

The manifest defines the structure and metadata of your application, its components, and its requirements.
Your manifest includes nodes for each of the Activities, Services, Content Providers, and Broadcast Receivers that make up your application and, using Intent Filters and Permissions, determines how they interact with each other and with other applications.
The manifest is made up of a root
manifest
tag with a
package
attribute set to the project’s unique package name. It should also include an
xmlns_android
attribute that supplies several system attributes required within the file.
The following XML snippet shows a typical manifest root node:
<manifest xmlns_android="http://schemas.android.com/apk/res/android"package="com.professionalandroid.apps.helloworld" >[ … manifest nodes … ]</manifest>
The manifest specifies application metadata (such as its icon and theme) within the top-level
application
node. Additional top-level nodes can specify any required permissions, unit tests, and define hardware, screen, or platform requirements (as described in the following section).
The following list gives a summary of some of the available
manifest
sub-node tags and provides an XML snippet demonstrating how each tag is used:
-
uses-feature—Android is available on a wide variety of hardware platforms, you can useuses-featurenodes to specify hardware and software features your application requires in order to properly function.Note that this will prevent your application from being installed on a device that does not include a specified feature, such as NFC hardware in the following snippet:
<uses-feature android:name="android.hardware.nfc" />Use this node only if you want to prevent your application being installed on devices that don’t include certain features. Currently, supported required features include the following categories:
- Audio —For applications that require a low-latency or pro-level audio pipeline, or require microphone input.
- Bluetooth —Where a Bluetooth or BTLE radio is required.
- Camera —For applications that require a camera. You can also require (or set as optional) front- or rear-facing, autofocus, manual post-processing, manual sensor, flash, or RAW support.
- Device Hardware UI —Where the application is designed for a specific device user interface: such as automotive or watch.
- Fingerprint —Requires biometric hardware capable of reading fingerprints.
- Gamepad —For games (or apps) that require game controller input, either from the device itself or from a connected gamepad.
- Infrared —Indicates a requirement for infrared (IR) capabilities (typically to communicate with other consumer IR devices).
- Location —If you require location-based services. You can also specify either network or GPS support explicitly.
- NFC —Requires NFC (near-field communications) support.
- OpenGL ES hardware —The application requires the OpenGL ES Android Extension Pack installed on the device.
- Sensors —Enables you to specify a requirement for any of the potentially available hardware sensors, including a accelerometer, barometer, compass, gyroscope, sensors to detect ambient temperature, heart rate, light, proximity, humidity, and a step counter and step detector.
- Telephony —To specify that either telephony in general, or a specific telephony radio (GSM or CDMA) is required.
- Touchscreen —To specify the type of touch screen your application requires, including how many distinct input touches can be detected and tracked.
- USB —For applications that require either USB host or accessory mode support.
- Wi-Fi —Where Wi-Fi networking support is required.
- Communication software —The application requires support for Session Initiation Protocol (SIP) services or Voice Over Internet Protocol (VoIP) services.
- Device management software —Use these optional software features to specify that your application requires the device support device management features including backup service, device policy enforcement, managed users, user removal, and verified boot.
- Media software —If your application requires MIDI support, printing, a “lean back” (television) UI, live TV, or homescreen widgets.
As the variety of platforms on which Android is available increases, so too will the optional hardware and software. You can find a full list of
uses-featurehardware atdeveloper.android.com/guide/topics/manifest/uses-feature-element.html#features-reference.To ensure compatibility, specifying the requirement of some permissions, implies a feature requirement. Specifically, requesting permission to access Bluetooth, the camera, any of the location service permissions, audio recording, Wi-Fi, and telephony-related permissions implies the corresponding hardware feature. You can override these implied requirements by adding a
requiredattribute and setting it tofalse—for example, a note-taking application that supports (but does not require) recording an audio note may choose to make the microphone hardware optional:<uses-feature android:name="android.hardware.microphone"android:required="false" />The camera hardware also represents a special case. For compatibility reasons, requesting permission to use the camera, or adding a
uses-featurenode requiring it, implies a requirement for the camera to support autofocus. You can specify it as optional as necessary:<uses-feature android:name="android.hardware.camera" /><uses-feature android:name="android.hardware.camera.autofocus"android:required="false" /><uses-feature android:name="android.hardware.camera.flash"android:required="false" /> -
supports-screens—With the proliferation of hundreds of different screen sizes, resolutions, and densities—and the introduction of multi-window mode, you should create responsive UI designs for your application that provide a good experience for all users. While it is technically possible to use thesupports-screennode to limit your application’s availability to a subset of supported screen resolutions, this is considered bad practice and should be avoided. -
supports-gl-texture—Declares that the application is capable of providing texture assets that are compressed using a particular GL texture compression format. You must use multiplesupports-gl-textureelements if your application is capable of supporting multiple texture compression formats. You can find the most up-to-date list of supported GL texture compression format values atdeveloper.android.com/guide/topics/manifest/supports-gl-texture-element.html.<supports-gl-texture android:name="GL_OES_compressed_ETC1_RGB8_texture" /> -
uses-permission—As part of the security model,uses-permissiontags declare the user permissions your application requires. Each permission you specify will be presented to the user either before the application is installed (on devices running Android 5.1 or lower), or while the application is running (on devices running Android 6.0 and higher). Permissions are required for many APIs and method calls, generally those with an associated cost or security implication (such as dialing, receiving SMS, or using the location-based services). We introduce these throughout the rest of this book as required.<uses-permission android:name="android.permission.ACCESS_FINE_LOCATION"/> -
permission—Your shared application components can also create permissions to restrict access to them from other application components. You can use the existing platform permissions for this purpose, or define your own permissions in the manifest. To do this, use thepermissiontag to create a permission definition.You can specify the level of access the permission permits (
normal,dangerous,signature,signatureOrSystem), a label, and an external resource containing the description that explains the risks of granting the specified permission. You can find more details on creating and using your own permissions in Chapter 20 , “Advanced Android Development.”<permission android:name="com.professionalandroid.perm.DETONATE_DEVICE"android:protectionLevel="dangerous"android:label="Self Destruct"android:description="@string/detonate_description"></permission> -
application—A manifest can contain only one application node. It uses attributes to specify the metadata for your application including its name, icon, and theme. You can also indicate if you will allow data to be backed up automatically using Android Auto Backup (as described in Chapter 8 ), and if you support right-to-left UI layouts.If you are using a custom application class, you must specify it here using the
android:nameattribute.The
applicationnode also acts as a container for the Activity, Service, Content Provider, and Broadcast Receiver nodes that specify the application components.<applicationandroid:label="@string/app_name"android:icon="@mipmap/ic_launcher"android:theme="@style/AppTheme"android:allowBackup="true"android:supportsRtl="true"android:name=".MyApplicationClass">[ … application component nodes … ]</application>-
activity—Anactivitytag is required for every Activity within your application. Use theandroid:nameattribute to indicate theActivityclass name. You must include the main launch Activity and any other Activity that may be displayed. Trying to start an Activity that’s not included in the manifest will throw a runtime exception. Each Activity node supportsintent-filterchild tags that define the Intents that can be used to start the Activity.Note that a period is used as shorthand for the application’s package name when specifying the Activity’s class name:
<activity android:name=".MyActivity"><intent-filter><action android:name="android.intent.action.MAIN" /><category android:name="android.intent.category.LAUNCHER" /></intent-filter></activity> -
service—As with theactivitytag, add aservicetag for eachServiceclass (described in Chapter 11 ) used in your application.<service android:name=".MyService"/> -
provider—Provider tags specify each of your application’s Content Providers. Content Providers are used to manage database access and sharing as described in Chapter 10 .<providerandroid:name=".MyContentProvider"android:authorities="com.professionalandroid.myapp.MyContentProvider"/> -
receiver—By adding areceivertag, you can register a Broadcast Receiver without having to launch your application first. As you’ll see in Chapter 6 , Broadcast Receivers are like global event listeners that, when registered, will execute whenever a matching Intent is broadcast by the system. By registering a Broadcast Receiver in your manifest, you can make this process entirely autonomous.<receiver android:name=".MyIntentReceiver"></receiver>
-
The Android Studio New Project Wizard automatically creates a new manifest file when it creates a new project. You’ll return to the manifest as each of the application components is introduced and explored throughout this book.
CONFIGURING THE GRADLE BUILD
Each project contains a series of Gradle files used to define your build configuration, consisting of a:
-
Project-scoped
settings.gradlefile that defines which modules should be included when building your application. -
Project-scoped
build.gradlefile in which the repositories and dependencies for Gradle itself are specified, as well as any repositories and dependencies common to all your modules. -
Module-scoped
build.gradlefile(s) used to configure build settings for your application, including dependencies, minimum and targeted platform versions, your application’s version information, and multiple build types and product flavors.
For most applications the default settings and project-scoped build Gradle files won’t need to be changed. The default settings file specifies a single module (your application). The top-level Gradle build file includes JCenter and Google as repositories for Gradle to search for dependencies and includes the Android Plugin for Gradle as a project dependency.
In contrast, you will likely need to make ongoing changes to the module-level Gradle build file, which lets you define one or more build configurations for your application including dependencies on new support libraries, changes in version numbers, and which platform and SDK versions you support.
Gradle Settings File
The
settings.gradle
file is located in your project’s root folder and is used to tell Gradle which modules it should include when building your application. By default, your single application module is included:
include ':app'
If your project expands to use multiple modules, you would need to add them here.
Project Gradle Build File
The top-level project-scoped
build.gradle
file is located in the root project directory. It allows you to specify dependencies—and the repositories Gradle uses to search for and then download those dependencies—that apply to the project and all its modules.
The
buildscript
node is used to indicate the repositories and dependencies that are used by Gradle itself—not for your application.
For example, the default
dependencies
block includes the Android Plugin for Gradle, because that’s necessary for Gradle to build Android application modules, and the
repositories
block pre-configures JCenter and Google as repositories Gradle should use to look for it:
buildscript {repositories {google()jcenter()}dependencies {classpath 'com.android.tools.build:gradle:3.1.3'}}
Note that this is not where you indicate your application dependencies; they belong in the relevant module
build.gradle
file for your application module, as described in the next section.
Use the
allprojects
block to specify repositories and dependencies used by all modules in your project, though for projects with a single module it’s common practice to include its dependencies in the module-level
build.gradle
file.
For new projects, Android Studio adds JCenter and Google as default repositories.
allprojects {repositories {google()jcenter()}}
Android Studio also defines a new project task—
clean
—that deletes the contents of your project’s build folder:
task clean(type: Delete) {delete rootProject.buildDir}
Module Gradle Build Files
The module-level
build.gradle
file, located in each of your project’s module directories, is used to configure build settings for the corresponding module, including required dependencies, minimum and targeted platform versions, your application’s version information, and different build types and product flavors.
The first line in the build configuration applies the Android Plugin for Gradle to this build, which makes it possible to use the
android
block to specify Android-specific build options:
apply plugin: 'com.android.application'
Within the top level of the
android
block you specify the Android application configuration options, such as the version of the SDK with which to compile your application. Be sure to update these values when you download a new SDK release:
android {compileSdkVersion 27defaultConfig {…}buildTypes {…}productFlavors {…}splits {…}}
Default Configuration
The
defaultConfig
block (within the
android
block) specifies default settings that will be shared across all your different product flavors:
defaultConfig {applicationId 'com.professionalandroid.apps.helloworld'minSdkVersion 16targetSdkVersion 27versionCode 1versionName "1.0"}
As shown in the preceding code, you should specify the:
-
applicationId—To provide a unique “package name” that will be used to identify the built APK for publishing and distribution. By default, and requirement, this should use the same package name as defined within your manifest, and you application classes. -
minSdkVersion—To set the lowest version of the Android platform your application is compatible with. This lets you indicate the earliest Android platform release on which your application can be installed and run—the Android framework will prevent users from installing your application if the system’s API level is lower than this value. If you fail to specify a minimum version, it defaults to 1 and will be available on all devices, resulting in crashes if unavailable APIs are called. -
targetSdkVersion—To specify the Android platform version against which you did your development and testing. Setting a target SDK tells the system that there is no need to apply any forward- or backward-compatibility changes to support that particular platform. To take advantage of the newest platform UI improvements, it’s considered good practice to update the target SDK of your application to the latest platform release after you confirm it behaves as expected, even if you aren’t making use of any new APIs. -
versionCode—To define the current application version as an integer that increases with each version iteration you release. -
versionName—To specify a public version identifier that will be displayed to users. -
testInstrumentationRunner—To specify a test runner to use. By default, the Android support library AndroidJUnitRunner instrumentation will be included, and allows you to run JUnit3 and JUnit4 tests against your application.
Build Types
The
buildTypes
block is used to define multiple different build types—typically debug and release. When you create a new module, Android Studio automatically creates a release build type for you, and in most cases you won’t need to change it.
Note that the debug build type doesn’t need to be explicitly included in the Gradle build file, but by default Android Studio will configure your debug builds with
debuggable true
. As a result, these builds are signed with the debug keystore, and you can debug them on locked and signed Android devices.
The default release build type (shown in the following code) applies Proguard settings to shrink and obfuscate the compiled code, and does not use a default signing key:
buildTypes {release {minifyEnabled trueproguardFiles getDefaultProguardFile('proguard-android.txt'),'proguard-rules.pro'}}
Product Flavors and Flavor Dimensions
The
flavorDimensions
and
productFlavors
blocks are optional nodes, not included by default, which allows you to override any of the values you defined in the
defaultConfig
block to support different versions (flavors) of your application using the same codebase. Each product flavor should specify its own unique application ID so that each can be distributed and installed independently:
productFlavors {freeversion {applicationId 'com.professionalandroid.apps.helloworld.free'versionName "1.0 Free"}paidversion {applicationId 'com.professionalandroid.apps.helloworld.paid'versionName "1.0 Full"}}
Flavor dimensions allow you to create groups of product flavors that can be combined to create a final build variant. This allows you to specify build changes along multiple dimensions—for example, changes based on free versus paid builds—as well as changes based on minimum API level:
flavorDimensions "apilevel", "paylevel"productFlavors {freeversion {applicationId 'com.professionalandroid.apps.helloworld.free'versionName "1.0 Free"dimension "paylevel"}paidversion {applicationId 'com.professionalandroid.apps.helloworld.paid'versionName "1.0 Full"dimension "paylevel"}minApi24 {dimension "apilevel"minSdkVersion 24versionCode 24000 + android.defaultConfig.versionCodeversionNameSuffix "-minApi24"}minApi23 {dimension "apilevel"minSdkVersion 16versionCode 16000 + android.defaultConfig.versionCodeversionNameSuffix "-minApi23"}}}
When building your application, Gradle will combine the product flavors along each dimension, along with a build type configuration, to create the final build variant. Gradle does not combine product flavors that belong to the same flavor dimension.
Note that Gradle determines the priority of flavor dimensions based on the order in which they are specified, where the first dimension will override values assigned along the second dimension and so on.
Since Gradle 3.0.0, in order to define flavors, you must define at least one product dimension. Each flavor must have an associated product dimension, though if you have only one dimension defined, it will be used by default by each flavor.
You can detect the current product flavor at run time, and modify your product behavior accordingly, using this code snippet:
if (BuildConfig.FLAVOR == "orangesherbert") {// Do groovy things} else {// Enable paid features}
Alternatively, you can create a new set of classes and resources—a new source-set—for your application to use for each flavor, by creating an additional directory structure parallel to the default “main” source path.
For classes, you’ll need to create the folders manually, whereas for resources, you can choose the source-set a new resource should belong to, as shown in the New Resource File dialog box in Figure 4-2 .

Within Android Studio, you can select the build you wish to build and run using the Build
![]() Select Build Variant menu item and selecting it from the drop-down displayed in the Build Variant window.
Select Build Variant menu item and selecting it from the drop-down displayed in the Build Variant window.
Splits
You can use the optional
splits
block to configure different APK builds that contain only the code and resources for each supported screen density or ABI.
It’s generally best practice to create and distribute a single APK to support all your target devices, but in some cases (particularly games) this might result in a prohibitively large APK size.
Creating and distributing split APKs is outside the scope of this book, but you can find more details on configuring APK splits at
developer.android.com/studio/build/configure-apk-splits.html
.
Dependencies
The
dependencies
block specifies the dependencies required to build your application.
By default, a new project will include a local binary dependency that tells Gradle to include all
JAR
files located in the
apps/libs
folder, remote binary dependencies on the Android Support Library and JUnit, and a dependency on the Android Espresso testing library:
dependencies {implementation fileTree(dir: 'libs', include: ['*.jar'])implementation 'com.android.support:appcompat-v7:27.1.1'implementation 'com.android.support.constraint:constraint-layout:1.1.2'testImplementation 'junit:junit:4.12'androidTestImplementation 'com.android.support.test:runner:1.0.2'androidTestImplementation 'com.android.support.test.espresso:espresso-core:3.0.2'}
We’ll return to the dependency block throughout the book as new library dependencies are required.
EXTERNALIZING RESOURCES
It’s always good practice to keep non-code resources, such as images and string constants, external to your code. Android supports the externalization of resources, ranging from simple values such as strings and colors to more complex resources such as images, animations, themes, and UI layouts.
By externalizing resources, you make them easier to maintain, update, and manage. This also lets you create alternative resource values to support internationalization, and to include different resources to support variations in hardware—particularly screen size and resolution.
When an application starts, Android automatically selects the correct resources from the available alternatives without you having to write a line of code. Later in this section you see how Android dynamically selects resources from resource trees that contain different values for alternative hardware configurations, languages, and locations.
Among other things, this lets you change the layout based on the screen size and orientation, images based on screen density, and customize text based on a user’s language and country.
Creating Resources
Application resources are stored under the
res
folder in your project hierarchy. Each of the available resource types is stored in subfolders, grouped by resource type.
If you create a new project using the Android Studio New Project Wizard, it creates a
res
folder that contains subfolders for the
values
,
mipmap
, and
layout
resources that contain the default values for string, dimensions, color, and style resource, as well as an application icon and the default layout, as shown in
Figure 4-3
.

When your application is built, these resources will be compressed as efficiently as possible and packaged into your APK.
The build process also generates an
R
class file that contains references to each of the resources included in your project. This enables you to reference resources from your code, with the advantage of design-time syntax checking.
The following sections describe many of the specific resource types available and how to create them for your applications.
In all cases, the resource filenames should contain only lowercase letters, numbers, and the period (.) and underscore (
_
) symbols.
Simple Values
Supported simple values include strings, colors, dimensions, styles, Boolean or integer values, and string or typed arrays. All simple values are stored within XML files in the
res/values
folder.
Each values XML file allows you to describe multiple resources. You indicate the type of value being stored using tags, as shown in the sample XML file in Listing 4-1 .
This example includes many different simple value types. By convention, for clarity and readability, resources are typically stored in separate files, one for each type; for example,
res/values/strings.xml
would contain only string resources.
The following sections detail the options for defining some common simple resources.
Strings
Externalizing your strings helps maintain consistency within your application and makes it much easier to internationalize them.
String resources are specified with the
string
tag, as shown in the following XML snippet:
<string name="stop_message">Stop.</string>
Apostrophes (
'
) , double-quotes (
"
), and backslashes (\) must be escaped using a backslash, like this:
<string name="quoting_myself">Escape \"Apostrophes (\') and double-quotes (\") with a backslash (\\)\"</string>
Android supports simple text styling, so you can use the HTML tags
<b>
,
<i>
, and
<u>
to apply bold, italics, or underlining, respectively, to parts of your text strings, as shown in the following example:
<string name="stop_message"><b>Stop.</b></string>
You can also use resource strings as input parameters for the
String.format
method. However,
String.format
does not support the text styling previously described. To apply styling to a format string, you have to escape the HTML tags when creating your resource, as shown in the following snippet:
<string name="stop_message"><b>Stop</b>. %1$s</string>
Within your code, use the
Html.fromHtml
method to convert this back into a styled character sequence:
String rString = getString(R.string.stop_message);String fString = String.format(rString, "Collaborate and listen.");CharSequence styledString = Html.fromHtml(fString, FROM_HTML_MODE_LEGACY);
You can also define alternative plural forms for your strings. This enables you to define different strings based on the number of items you refer to. For example, in English you would refer to “one Android” but “seven Androids.”
By creating a plurals resource, you can specify an alternative string for any of zero, one, multiple, few, many, or other quantities. In English the singular is a special case, whereas some languages require finer detail and in others the singular is never used:
<plurals name="unicorn_count"><item quantity="one">One unicorn</item><item quantity="other">%d unicorns</item></plurals>
To access the correct plural in code, use the
getQuantityString
method on your application’s
Resources
object, passing in the resource ID of the plural resource, and specifying the number of objects you want to describe:
Resources resources = getResources();String unicornStr = resources.getQuantityString(R.plurals.unicorn_count, unicornCount, unicornCount);
Note that in this example the object count is passed in twice—once to return the correct plural string, and again as an input parameter to complete the sentence.
Colors
Use the
color
tag to define a new color resource. Specify the color value using a
#
symbol followed by the (optional) alpha channel, and then the red, green, and blue values using one or two hexadecimal numbers with any of the following notations:
- #RGB
- #RRGGBB
- #ARGB
- #AARRGGBB
The following example shows how to specify Android green and a partially transparent blue:
<color name="android_green">#A4C639</color><color name="transparent_blue">#770000FF</color>
Dimensions
Dimensions are most commonly referenced within style and layout resources. They’re useful for defining layout values, such as borders and font heights.
To specify a dimension resource, use the
dimen
tag, specifying the dimension value, followed by an identifier describing the scale of your dimension:
-
dp(density-independent pixels) -
sp(scalable pixels) -
px(screen pixels) -
in(physical inches) -
pt(physical points) -
mm(physical millimeters)
Although you can use any of these measurements to define a dimension, it’s best practice to use either density independent or scalable pixels. These alternatives let you define a dimension using relative scales that account for different screen resolutions and densities to simplify scaling on different hardware.
Scalable pixels are particularly well suited when defining font sizes because they automatically scale if the user changes the system font size.
The following XML snippet shows how to specify dimension values for a large font size and a standard border:
<dimen name="large_font_size">16sp</dimen><dimen name="activity_horizontal_margin">16dp</dimen>
Styles and Themes
Style resources let your applications maintain a consistent look and feel by enabling you to specify the attribute values used by Views—most commonly colors, borders, and font sizes for an application.
To create a style, use a
style
tag that includes a
name
attribute and contains one or more
item
tags. Each
item
tag should include a
name
attribute used to specify the attribute (such as font size or color) being defined. The tag itself should then contain the value, as shown in the following skeleton code:
<style name="base_text"><item name="android:textSize">14sp</item><item name="android:textColor">#111</item></style>
Styles support inheritance using the
parent
attribute on the
style
tag, making it easy to create simple variations:
<style name="AppTheme" parent="Theme.AppCompat.Light.DarkActionBar"><item name="colorPrimary">@color/colorPrimary</item><item name="colorPrimaryDark">@color/colorPrimaryDark</item><item name="colorAccent">@color/colorAccent</item></style>
In Chapter 13 you learn more about using the themes and styles provided by the Android Support Library to create applications that are consistent with the Android platform and the material design philosophy.
Drawables
Drawable resources include bitmaps, NinePatches (stretchable PNG images), and scalable Vector Drawables. They also include complex composite Drawables, such as
LevelListDrawable
s and
StateListDrawable
s, which are defined in XML.
All Drawables are stored as individual files in the
res/drawable
folder. Note that it’s good practice to store bitmap image assets in the appropriate
drawable-ldpi
,
-mdpi
,
-hdpi
, and
-xhdpi
folders, as described later in this chapter. The resource identifier for a Drawable resource is the lowercase filename without its extension.
MipMaps
It’s considered good practice to store your application’s launcher icon image within the MipMap folder group—one for each resolution size up to
xxxhdpi
(as seen in your Hello World application).
Different home screen launcher apps on different devices show application launcher icons at various resolutions—some devices scale-up the launcher icons by as much as 25%. Application resource optimization techniques can remove Drawable resources for unused screen densities; however, all MipMap resources are preserved—ensuring that launcher apps can pick icons with the best resolution for display.
Note that the
mipmap-xxxhdpi
qualifier is typically supplied only to ensure a suitably high-resolution launcher icon is available in the case of up-scaling on an
xxhdpi
device; you typically won’t need to supply
xxxhdpi
assets for the rest of your Drawable resources.
Layouts
Layout resources enable you to decouple your presentation layer from your business logic by designing UI layouts in XML, rather than constructing them in code.
You can use layouts to define the UI for any visual component, including Activities, Fragments, and Widgets. Once defined in XML, the layout must be “inflated” into the user interface. Within an Activity you do this using
setContentView
(usually within the
onCreate
method), whereas Fragments are inflated using the
inflate
method from the
Inflator
object passed in to the Fragment’s
onCreateView
handler.
For more detailed information on using and creating layouts in Activities and Fragments, see Chapter 5 , “Building User Interfaces.”
Using layouts to construct your screens in XML is best practice in Android. The decoupling of the layout from the code enables you to create optimized layouts for different hardware configurations, such as varying screen sizes, orientation, or the presence of keyboards and touch screens as described later in this chapter.
Each layout definition is stored in its own XML file, within the
res/layout
folder, with the filename becoming the resource identifier.
A thorough explanation of layout containers and View elements is included in the next chapter, but Listing 4-2 shows the layout created by the New Project Wizard. It uses a Constraint Layout container for a Text View that displays the “Hello World” greeting.
Animations
Android supports three types of animation that can be applied within a View or Activity, and is defined in XML:
- Property animations —A tweened animation that can be used to potentially animate any property on the target object by applying incremental changes between two values. This can be used for anything from changing the color or opacity of a View to gradually fade it in or out, to changing a font size, or increasing a character’s hit points.
- View animations —Tweened animations that can be applied to rotate, move, fade, and stretch a View.
- Frame animations —Frame-by-frame “cell” animations used to display a sequence of Drawable images.
Android also includes the scene transition framework, which you can use to animate from one layout to another at run time by interpolating and modifying each of their property values of the views in each layout hierarchy.
Defining property, view, and frame animations as external resources enables you to reuse the same sequence in multiple places and provides you with the opportunity to present different animations based on device hardware or orientation.
Defining Property Animations
Property animators are a powerful framework that can be used to create interpolated animation paths for almost any value or property.
Each property animation is stored in a separate XML file in the project’s
res/animator
folder. As with layouts and Drawable resources, the animation’s filename is used as its resource identifier.
You can use a property animator to animate most numeric properties on a target object. You can define animators that are tied to a specific property, or a generic value animator that can be allocated to any property and object.
The following simple XML snippet shows a property animator that changes the opacity of the target object by calling its
setAlpha
method (or modifying the
alpha
property) incrementally between 0 and 1 over the course of a second:
<?xml version="1.0" encoding="utf-8"?><objectAnimator xmlns_android="http://schemas.android.com/apk/res/android"android:propertyName="alpha"android:duration="1000"android:valueFrom="0f"android:valueTo="1f"/>
You can create more complex animations that modify multiple property values using the nestable
set
tag. Within each property animator set, you can choose to execute the grouped animations concurrently (the default option) or sequentially using the
ordering
tag as shown here:
<?xml version="1.0" encoding="utf-8"?><set xmlns_android="http://schemas.android.com/apk/res/android"android:ordering="sequentially"><set><objectAnimatorandroid:propertyName="x"android:duration="200"android:valueTo="0"android:valueType="intType"/><objectAnimatorandroid:propertyName="y"android:duration="200"android:valueTo="0"android:valueType="intType"/></set><objectAnimatorandroid:propertyName="alpha"android:duration="1000"android:valueTo="1f"/></set>
Note that property animations actually change the properties of the target object, and those modifications are persisted.
Defining View Animations
Each view animation is stored in a separate XML file in the project’s
res/anim
folder. As with layouts and Drawable resources, the animation’s filename is used as its resource identifier.
An animation can be defined for changes in
alpha
(fading),
scale
(scaling),
translate
(movement), or
rotate
(rotation).
Table 4-1 shows the valid attributes, and attribute values, supported by each animation type.
TABLE 4-1 : Animation Type Attributes
| ANIMATION TYPE | ATTRIBUTES | VALID VALUES |
| Alpha |
fromAlpha
/
toAlpha
|
Float from 0 to 1 |
| Scale |
fromXScale
/
toXScale
|
Float from 0 to 1 |
fromYScale
/
toYScale
|
Float from 0 to 1 | |
pivotX
/
pivotY
|
String of the percentage of graphic width/height from 0% to 100% | |
| Translate |
fromXDelta
/
toXDelta
|
One of either a float representing number of pixels relative to the normal position, a percentage relative to the element width (using “%” suffix), or a percentage relative to the parent width (using “%p” suffix). |
fromYDelta
/
toYDelta
|
One of either a float representing number of pixels relative to the normal position, a percentage relative to the element width (using “%” suffix), or a percentage relative to the parent width (using “%p” suffix). | |
| Rotate |
fromDegrees
/
toDegrees
|
Float from 0 to 360 |
pivotX
/
pivotY
|
String of the percentage of graphic width/height from 0% to 100%
String indicating the X and Ycoordinate (respectively) in pixels relative to the object’s left edge, or percentage relative to the object’s left edge (using “%”), or in percentage relative to the parent container’s left edge (using “%p”). |
You can create a combination of animations using the
set
tag. An animation set contains one or more animation transformations and supports various additional tags and attributes to customize when and how each animation within the set is run.
The following list shows some of the
set
tags available:
-
duration—Duration of the full animation in milliseconds. -
startOffset—Millisecond delay before the animation starts. -
fillBefore—Applies the animation transformation before it begins. -
fillAfter—Applies the animation transformation after it ends. -
interpolator—Sets how the speed of this effect varies over time. Chapter 14 explores the interpolators available. To specify one, reference the system animation resources atandroid:anim/interpolatorName.
The following example shows an animation set that spins the target 360 degrees while it shrinks and fades out:
<?xml version="1.0" encoding="utf-8"?><set xmlns_android="http://schemas.android.com/apk/res/android"android:interpolator="@android:anim/accelerate_interpolator"><rotateandroid:fromDegrees="0"android:toDegrees="360"android:pivotX="50%"android:pivotY="50%"android:startOffset="500"android:duration="1000" /><scaleandroid:fromXScale="1.0"android:toXScale="0.0"android:fromYScale="1.0"android:toYScale="0.0"android:pivotX="50%"android:pivotY="50%"android:startOffset="500"android:duration="500" /><alphaandroid:fromAlpha="1.0"android:toAlpha="0.0"android:startOffset="500"android:duration="500" /></set>
Defining Frame-by-Frame Animations
Frame-by-frame (cell) animations represent a sequence of Drawables, each of which is displayed for a specified duration.
Because frame-by-frame animations represent animated Drawables, they are stored in the
res/drawable
folder and use their filenames (without the
.xml
extension) as their resource IDs.
The following XML snippet shows a simple animation that cycles through a series of bitmap resources, displaying each one for half a second. To use this snippet, you will also need to create new image resources
android1
through
android3
:
<animation-listxmlns_android="http://schemas.android.com/apk/res/android"android:oneshot="false"><item android:drawable="@drawable/android1" android:duration="500" /><item android:drawable="@drawable/android2" android:duration="500" /><item android:drawable="@drawable/android3" android:duration="500" /></animation-list>
Note that in many cases you should include multiple resolutions of each of the Drawables used within the animation list.
To play the animation, start by assigning the resource to a host View before getting a reference to the Animation Drawable object and starting it:
ImageView androidIV = findViewById(R.id.iv_android);androidIV.setBackgroundResource(R.drawable.android_anim);AnimationDrawable androidAnimation =(AnimationDrawable)androidIV.getBackground();androidAnimation.start();
Typically, you do this in two steps; you assign the resource to the background within the
onCreate
handler.
Within this handler the animation is not fully attached to the window, so the animations can’t be started; instead, this is usually done as a result to user action (such as a button press) or within the
onWindowFocusChanged
handler.
Using Resources
In addition to the resources you supply, the Android platform includes several system resources that you can use in your applications. All resources can be used within your application code, and can also be referenced from within other resources. For example, a dimension or string resource might be referenced in a layout definition.
Later in this chapter you learn how to define alternative resource values for different languages, locations, and hardware. It’s important to note that when using resources, you don’t choose a particular alternative; Android automatically selects the correct value for a given resource identifier based on the current hardware, device, and language configurations.
Using Resources in Code
Within your application, you access resources in code using the static
R
class.
R
is a generated class, created when your project is built, that lets you reference any resource you’ve included to offer design-time syntax checking.
The
R
class contains static subclasses for each of the resources available, such as
R.string
and
R.drawable
subclasses.
Each of the subclasses within
R
exposes its associated resources as variables, with the variable names matching the resource identifiers—for example,
R.string.app_name
or
R.mipmap.ic_launcher
.
The value of these variables is an integer that represents each resource’s location in the resource table, not an instance of the resource itself.
Where a constructor or method, such as
setContentView
, accepts a resource identifier, you can pass in the resource variable, as shown in the following code snippet:
// Inflate a layout resource.setContentView(R.layout.main);// Display a transient dialog box that displays the// app name string resource.Toast.makeText(this, R.string.app_name, Toast.LENGTH_LONG).show();
When you need an instance of the resource itself, you need to use helper methods to extract them from the resource table. The resource table is represented within your application as an instance of the
Resources
class.
These methods perform lookups on the application’s current resource table, so these helper methods can’t be static. Use the
getResources
method on your application context, as shown in the following snippet, to access your application’s
Resources
instance:
Resources myRes = getResources();
The
Resources
class includes getters for each of the available resource types and generally works by passing in the resource ID you’d like an instance of.
The Android Support Library also includes a
ResourcesCompat
class that offers backward-compatible getter functions where a Framework class has been deprecated (such as
getDrawable
).
The following code snippet shows an example of using the helper methods to return a selection of resource values:
CharSequence styledText = myRes.getText(R.string.stop_message);float borderWidth = myRes.getDimension(R.dimen.standard_border);Animation tranOut;tranOut = AnimationUtils.loadAnimation(this, R.anim.spin_shrink_fade);ObjectAnimator animator =(ObjectAnimator)AnimatorInflater.loadAnimator(this,R.animator.my_animator);String[] stringArray;stringArray = myRes.getStringArray(R.array.string_array);int[] intArray = myRes.getIntArray(R.array.integer_array);
Android 5.0 Lollipop (API Level 21) added support for Drawable theming, so you should use the
ResourcesCompat
library to obtain both Drawable and Color resources as shown in the following snippet. Note that both methods accept
null
values for themes:
Drawable img = ResourcesCompat.getDrawable(myRes,R.drawable.an_image, myTheme);int opaqueBlue = ResourcesCompat.getColor(myRes,R.color.opaque_blue, myTheme);
Frame-by-frame animated resources are inflated into
AnimationResources
. You can return the value using
getDrawable
and casting the return value, as shown here:
AnimationDrawable androidAnimation;androidAnimation =(AnimationDrawable)ResourcesCompat.getDrawable(R.myRes,drawable.frame_by_frame,myTheme);
Referencing Resources Within Resources
You can also use resource references as attribute values in other XML resources.
This is particularly useful for layouts and styles, letting you create specialized variations on themes and localized strings and image assets. It’s also a useful way to support different images and spacing for a layout to ensure that it’s optimized for different screen sizes and resolutions.
To reference one resource from another, use the
@
notation, as shown in the following snippet:
attribute="@[packagename:]resourcetype/resourceidentifier" Listing 4-3 shows a layout that uses dimension, color, and string resources.
Using System Resources
The Android framework makes many native resources available, providing you with various strings, images, animations, styles, and layouts to use in your applications.
Accessing the system resources in code is similar to using your own resources. The difference is that you use the native Android resource classes available from
android.R
, rather than the application-specific
R
class. The following code snippet uses the
getString
method available in the application Context to retrieve an error message available from the system resources:
CharSequence httpError = getString(android.R.string.httpErrorBadUrl);
To access system resources in XML, specify
android
as the package name, as shown in this XML snippet:
<EditTextandroid:id="@+id/myEditText"android:layout_width="match_parent"android:layout_height="wrap_content"android:text="@android:string/httpErrorBadUrl"android:textColor="@android:color/darker_gray"/>
You can find the full list of available Android resources at
developer.android.com/reference/android/R.html
.
Referring to Styles in the Current Theme
Using themes is an excellent way to ensure consistency for your application’s UI. Rather than fully define each style, Android provides a shortcut to enable you to use styles from the currently applied theme.
To do this, use
?android:
rather than
@
as a prefix to the resource you want to use. The following example shows a snippet of the preceding code but uses the current theme’s text color rather than a system resource:
<EditTextandroid:id="@+id/myEditText"android:layout_width="match_parent"android:layout_height="wrap_content"android:text="@android:string/httpErrorBadUrl"android:textColor="?android:textColor"/>
This technique enables you to create styles that change if the current theme changes, without you modifying each individual style resource. Note that the
textColor
resource value must be defined in the current theme. You learn more about using Themes and Styles in
Chapter 13
.
Creating Resources for Different Languages and Hardware
You can create different resource values for specific languages, locations, and hardware configurations using a parallel directory structure within the
res
folder.
A hyphen (
-
) is used to separate qualifiers that specify the conditions for which you are providing alternatives. Android chooses from among these values dynamically at run time using its dynamic resource-selection mechanism.
The following example hierarchy shows a folder structure that features default string values, with French language and French Canadian location variations:
Project/res/values/strings.xmlvalues-fr/strings.xmlvalues-fr-rCA/strings.xml
If you’re using Android Studio, these parallel folders are represented as shown in Figure 4-4 —a folder with the name of the file, that contains each version, followed by the qualifier in parentheses.

You can construct these qualified folders manually or, using Android Studio, you can create new folders as required when creating the alternative files they’ll contain.
To do so, either right-click the parent folder (for example,
res/values
) and select “New [Values] resource file,” or select the parent folder and select File
![]() New
New
![]() [Values] resource file. This displays the New Resource File dialog box as shown in
Figure 4-5
, which provides all the optional qualifier categories, and available options, before creating the folder and placing your new file within it. Note that not every available qualifier is available in the Android Studio dialog; in this case you’ll have to create the folder manually.
[Values] resource file. This displays the New Resource File dialog box as shown in
Figure 4-5
, which provides all the optional qualifier categories, and available options, before creating the folder and placing your new file within it. Note that not every available qualifier is available in the Android Studio dialog; in this case you’ll have to create the folder manually.

The following list gives the qualifiers you can use to customize your resource values:
-
Mobile Country Code and Mobile Network Code (MCC/MNC)
—The country, and optionally the network, associated with the SIM currently used in the device. The MCC is specified by
mccfollowed by the three-digit country code. You can optionally add the MNC usingmncand the two- or three-digit network code (for example,mcc234-mnc20ormcc310). You can find a list of MCC/MNC codes on Wikipedia aten.wikipedia.org/wiki/Mobile_country_code. -
Language and Region
—Language specified by the lowercase two-letter ISO 639-1 language code, followed optionally by a region specified by a lowercase
rfollowed by the uppercase two-letter ISO 3166-1-alpha-2 language code (for example,en,en-rUS, oren-rGB). Available under “locale” within the Android Studio “New Resource File” dialog. -
Layout Direction
—The layout direction of your user interface where
ldrtlrepresents right-to-left, andldltrleft-to-right (the default value). Use this modifier to provide a different layout (or any other resource) to better support right-to-left languages. -
Smallest Screen Width
—The lowest of the device’s screen dimensions (height and width) specified in the form
sw<Dimension value>dp(for example,sw600dp,sw320dp, orsw720dp). This is generally used when providing multiple layouts, where the value specified should be the smallest screen width that your layout requires in order to render correctly. Where you supply multiple directories with different smallest screen width qualifiers, Android selects the largest value that doesn’t exceed the smallest dimension available on the device. -
Available Screen Width
—The minimum screen width required to use the contained resources, specified in the form
w<Dimension value>dp(for example,w600dp,w320dp, orw720dp). Also used to supply multiple layouts alternatives, but unlike smallest screen width, the available screen width changes to reflect the current screen width when the device orientation changes. Android selects the largest value that doesn’t exceed the currently available screen width. -
Available Screen Height
—The minimum screen height required to use the contained resources, specified in the form
h<Dimension value>dp(for example,h720dp,h480dp, orh1280dp). Like available screen width, the available screen height changes when the device orientation changes to reflect the current screen height. Android selects the largest value that doesn’t exceed the currently available screen height. -
Screen Size
—One of
small(smaller than HVGA),normal(at least HVGA and typically smaller than VGA),large(VGA or larger), orxlarge(significantly larger than HVGA). Because each of these screen categories can include devices with significantly different screen sizes (particularly tablets), it’s good practice to use the more specific smallest screen size, and available screen width and height whenever possible. Because they precede this screen size qualifier, where both are specified, the more specific qualifiers will be used in preference where supported. -
Screen Aspect Ratio
—Specify
longornotlongfor resources designed specifically for wide screen. (For example, WVGA islong; QVGA isnotlong.) -
Screen Shape
—Specify
roundornotroundfor resources designed specifically for round screens (such as watches) or rectangular screens (such as phones or tablets), respectively. -
Screen Color Gamut
—Specify
widecgfor resources designed for displays capable of displaying a wide color gamut such as Display P3 or AdobeRGB, ornowidecgfor displays with a narrow color gamut such as sRGB. -
Screen Dynamic Range
—Either
highdrfor displays that support a high-dynamic range (HDR) orlowdrfor displays with a normal dynamic range. -
Screen Orientation:
One of
port(portrait) orland(landscape). -
UI Mode
—Indicate resources (typically layouts) designed specifically for one of
car(car dock),desk(desk dock),television(10 foot lean-back experience),appliance(no visible UI),watch(wrist mounted display), orvrheadset(virtual reality headset. -
Night Mode
—One of
night(night mode) ornotnight(day mode). Used in combination with the UI mode qualifier, this provides a simple way to change the theme and/or color scheme of an application to make it more suitable for use at night. -
Screen Pixel Density
—Pixel density in dots per inch (dpi). Best practice is to supply
ldpi,mdpi,hdpi,xhdpi, andxxhdpiDrawable resources to include low (120 dpi), medium (160 dpi), high (240 dpi), extra high (320 dpi), and extra extra high (480 dpi) pixel density assets, to ensure crisp assets on all devices. For launcher icons, it’s good practice to also supply anxxxhdpiresource for launchers that may choose to display a larger icon. You can specifynodpifor bitmap resources you don’t want scaled to support an exact screen density, andanydpifor scalable vector graphics. To better support applications targeting televisions running Android, you can also use thetvdpiqualifier for assets of approximately 213dpi. This is generally unnecessary for most applications, where including medium- and high-resolution assets is sufficient for a good user experience. Unlike with other resource types, Android does not require an exact match to select a resource. When selecting the appropriate folder, it chooses the nearest match to the device’s pixel density and scales the resulting Drawables accordingly. -
Touchscreen Type
—Either
notouchorfinger, allowing you to provide layouts or dimensions optimized for the availability of touch screen input. -
Keyboard Availability
—One of
keysexposed,keyshidden, orkeyssoft, representing a device that currently has a hardware keyboard available, a hardware keyboard that’s not currently available, or uses a software keyboard (visible or not), respectively. -
Keyboard Input Type
—One of
nokeys,qwerty, or12keyrepresenting no physical keyboard, a full qwerty keyboard, or 12-key physical keyboard, respectively—whether the keyboard is currently available or not. -
Navigation Key Availability
—One of
navexposedornavhidden. -
UI Navigation Type
—One of
nonav,dpad,trackball, orwheel. -
Platform Version
—The target API level, specified in the form
v<API Level>(for example,v7). Used for resources restricted to devices running at the specified API level or higher.
You can specify multiple qualifiers for any resource type, separating each qualifier with a hyphen. Any combination is supported; however, they must be used in the order given in the preceding list, and no more than one value can be used per qualifier.
The following example shows valid and invalid directory names for alternative layout resources:
Validlayout-large-landlayout-xlarge-port-keyshiddenlayout-long-land-notouch-nokeys
Invalidvalues-rUS-en (out of order)values-rUS-rUK (multiple values for a single qualifier)
When Android retrieves a resource at run time, it finds the best match from the available alternatives. Starting with a list of all the folders in which the required value exists, it selects the one with the greatest number of matching qualifiers. If two folders are an equal match, the tiebreaker is based on the order of the matched qualifiers in the preceding list.
Runtime Configuration Changes
Android handles runtime changes to the language, location, and hardware by terminating and restarting the active Activity. This forces the resource resolution for the Activity to be reevaluated and the most appropriate resource values for the new configuration to be selected.
In some special cases this default behavior may be inconvenient, particularly for applications that don’t want to alter UI based on screen orientation changes. You can customize your application’s response to such changes by detecting and reacting to them yourself.
To have an Activity listen for runtime configuration changes, add an
android:configChanges
attribute to its manifest node, specifying the configuration changes you want to handle.
The following list describes some of the configuration changes you can specify:
-
mccandmnc—A SIM has been detected and the mobile country or network code (respectively) has changed. -
locale—The user has changed the device’s language settings. -
keyboardHidden—The keyboard, d-pad, or other input mechanism has been exposed or hidden. -
keyboard—The type of keyboard has changed; for example, the phone may have a 12-key keypad that flips out to reveal a full keyboard, or an external keyboard might have been plugged in. -
fontScale—The user has changed the preferred font size. -
uiMode—The global UI mode has changed. This typically occurs if you switch between car mode, day or night mode, and so on. -
orientation—The screen has been rotated between portrait and landscape. -
screenLayout—The screen layout has changed; typically occurs if a different screen has been activated. -
screenSize—Occurs when the available screen size has changed; for example, a change in orientation between landscape and portrait or with multi-window mode. -
smallestScreenSize—Occurs when the physical screen size has changed, such as when a device has been connected to an external display. -
layoutDirection—The screen/text layout direction has changed; for example, switching between left-to-right and right-to-left (RTL).
In certain circumstances multiple events will be triggered simultaneously. For example, when the user slides out a keyboard, most devices fire both the
keyboardHidden
and
orientation
events, and connecting an external display is likely to trigger
orientation
,
screenLayout
,
screenSize
, and
smallestScreenSize
events.
You can select multiple events you want to handle yourself by separating the values with a pipe (
|
), as shown in
Listing 4-4
, which shows an Activity node declaring that it will handle changes in screen size and orientation, and access to a physical keyboard.
Adding an
android:configChanges
attribute suppresses the restart for the specified configuration changes, instead triggering the
onConfigurationChanged
handler in the associated Activity. Override this method to handle the configuration changes yourself, using the passed-in
Configuration
object to determine the new configuration values, as shown in
Listing 4-5
. Be sure to call back to the superclass and reload any resource values that the Activity uses, in case they’ve changed.
When
onConfigurationChanged
is called, the Activity’s Resource variables have already been updated with the new values, so they’ll be safe to use.
Any configuration change that you don’t explicitly flag as being handled by your application will cause your Activity to restart, without a call to
onConfigurationChanged
.
5
Building User Interfaces
FUNDAMENTAL ANDROID DESIGN
At the beginning of the smart-phone era, Stephen Fry described the interplay of style and substance in the design of digital devices as follows:
As if a device can function if it has no style. As if a device can be called stylish that does not function superbly…. Yes, beauty matters. Boy, does it matter. It is not surface, it is not an extra, it is the thing itself.
—STEPHEN FRY, THE GUARDIAN (OCTOBER 27, 2007)
Although Fry was describing the style of the devices themselves, the same can be said of the applications that run on them.
That sentiment has only gained relevance since then—with design and user experience becoming increasingly important in the success of smart devices, and a significant focus for Android application developers.
Bigger, brighter, and higher resolution displays have made applications increasingly visual. As phones evolved beyond purely functional devices, and Android devices expanding past phone form factors, the user experience your application provides has become critically important.
For Android apps, this focus on design and user experience has most been apparent in the launch and adoption of the material design philosophy, which we’ll describe in more detail in later chapters.
In this chapter, we’ll focus on the Android components used to create UIs; you’ll learn how to use Views to create functional and intuitive UIs within your Activities and Fragments.
The individual elements of an Android UI are arranged on screen by means of a variety of Layout Managers derived from the
ViewGroup
class. This chapter introduces several native layout classes, demonstrates how to use them, and introduces techniques to ensure your use of layouts is as efficient as possible.
You’ll examine Android’s data binding framework, and how it can be used to dynamically bind data to your UI based on your layouts. With many user interfaces based on lists of content, you’ll learn how to use the
RecyclerView
to efficiently display lists connected to your underlying data sources.
Android also allows you to extend and customize the available Views and View Groups. Using View Groups, you’ll combine Views to create atomic, reusable UI elements made up of interacting sub-controls. You’ll also create your own Views to display data, and to interact with users in creative new ways.
DENSITY-INDEPENDENT DESIGN
User interface (UI) design, user experience (UX), human computer interaction (HCI), and usability are huge topics that can’t be covered in the depth they deserve within the confines of this book. Nonetheless, the importance of creating a UI that your users will understand and enjoy using can’t be overstated.
There is a huge variety of different Android devices, including a number of different sizes and form factors. From a UI perspective that means understanding that the number of pixels available to your application, and the underlying density of the display hardware, will vary significantly across devices.
You can abstract away the impact of different device densities by always thinking in terms of density-independent pixels (dp). Density-independent pixels represent physical sizes—two UI elements of the same size measured in dp, will appear to users as the same size on screen whether they are on a low-density device or newest super high-density screen. Knowing that users will physically interact with your UI (touching visual elements with their fingers) makes the importance and usefulness of this abstraction clear. Very few things are more frustrating than a button that is too small to tap!
For font sizes, we use the scalable pixel (sp). The sp shares the same base density independence as dp, but is also scaled independently based on the user’s preferred text size: an important consideration for accessibility, allowing users to increase the font size for all apps on their device.
Android 5.0 Lollipop (API Level 21) introduced support for device-independent Vector Drawables. Vector Drawables are defined in XML, and can be scaled to support any display density. Alternatively, where you have assets that can’t be described as vector graphics, the Android resource system will automatically down-scale graphics, or you can provide multiple resources in different resource folders, as described in Chapter 4 .
As a result of making your designs density independent, you can focus on optimizing and adapting your designs for different screen sizes. You’ll note that the UI elements throughout the book are written in terms of density-independent pixels (dp) and text sizes are written in terms of scalable pixels (sp).
ANDROID USER INTERFACE FUNDAMENTALS
All visual components in Android descend from the
View
class and are referred to generically as
Views
. You’ll often see Views referred to as
controls
or
widgets
(not to be confused with home-screen App Widgets described in
Chapter 19
, “Invading the Home Screen”)—terms you’re probably familiar with if you’ve previously done GUI development on other platforms.
The
ViewGroup
class is an extension of
View
that supports adding child Views (commonly referred to as children). View Groups are responsible for deciding how large each child View is, and determining their positions. View Groups that focus primarily on laying out child Views are referred to as
layouts
.
View Groups are Views, so—like any other View—they can also draw their own customized UI, and handle user interactions.
The Views and View Groups included in the Android SDK provide the components you need to build an effective and accessible UI. You can create and lay out your Views within your UI programmatically, but it’s strongly recommended to use XML layout resources to build and construct your UI. This approach makes it possible to specify different layouts optimized for different hardware configurations—particularly screen size variations—potentially even modifying them at run time based on hardware changes (such as orientation changes).
Each View contains a set of XML attributes that allow you to set its initial state from your layout resource. For example, to set the text on a
TextView
, you’d set the
android:text
attribute.
In the following sections you’ll learn how to put together increasingly complex UIs, before being introduced to Fragments, the Views available in the SDK, how to extend these Views, build your own compound controls, and create your own custom Views from scratch.
Assigning User Interfaces to Activities
A new Activity starts with an invitingly empty screen, onto which you can place your UI. To do so, call
setContentView
, passing in the View instance, or layout resource, to display.
An empty screen lacks the visceral appeal required by today’s savvy users, so you’ll almost always use
setContentView
to assign an Activity’s UI when overriding its
onCreate
handler. Because the
setContentView
method accepts either a layout’s resource ID or a single View instance at the root of your view hierarchy, you can define your UI either in code or using the best-practice technique of external layout resources:
@Overridepublic void onCreate(Bundle savedInstanceState) {super.onCreate(savedInstanceState);setContentView(R.layout.main);}
Using layout resources allows you to decouple the presentation layer from the application logic, providing the flexibility to change the presentation without changing code. This makes it possible to specify different layouts optimized for different hardware configurations, even changing them at run time based on hardware changes (such as screen orientation changes).
Once the layout has been set, you can obtain a reference to each of the Views within it using the
findViewById
method:
TextView myTextView = findViewById(R.id.myTextView);
If you’re using Fragments to encapsulate portions of your Activity’s UI, the View set within your Activity’s
onCreate
handler will be a layout that describes the relative position of each of your Fragments (or their containers). The UI used for each Fragment is defined in its own layout and inflated within the Fragment itself and should, in almost all cases, be handled solely by that Fragment.
INTRODUCING LAYOUTS
In most cases, building your UI will include many Views contained within one or more nested
layouts
—extensions of the
ViewGroup
class. By combining different layouts and Views, you can create arbitrarily complex UIs.
The Android SDK includes a number of layout classes. You will use these, modify them, or create your own to construct UI layouts for your Views, Fragments, and Activities. Your challenge, should you choose to accept it, is to find the right combination of layouts to make your UI aesthetically pleasing, easy to use, and efficient to display.
The following list includes some of the most commonly used layout classes available in the Android SDK, as illustrated in Figure 5-1 .

-
FrameLayout—The simplest of the Layout Managers, the Frame Layout pins each child View within its frame. The default position is the top-left corner, though you can use thelayout_gravityattribute on a child View to alter its location. Adding multiple children stacks each new child on top of the one before, with each new View potentially obscuring the previous ones. -
LinearLayout—The Linear Layout aligns its child Views in either a vertical or a horizontal line. A vertical layout has a column of Views, whereas a horizontal layout has a row of Views. The Linear Layout supports alayout_weightattribute for each child View that can control the relative size of each child View within the available space. -
RelativeLayout—One of the most flexible of the native layouts, though potentially expensive to render, the Relative Layout lets you define the positions of each child View relative to the others, and to the layout’s boundaries. -
ConstraintLayout—The newest (and recommended) layout, it’s designed to support large and complex layouts without the need to nest layouts. It’s similar to the Relative Layout but provides greater flexibility and is more efficient to lay out. The Constraint Layout positions its child Views through a series of constraints—requiring child Views be positioned according to a boundary, other child Views, or to custom guidelines. The Constraint Layout has its own Visual Layout Editor, used to position each control and define the constraints rather than relying on manually editing the XML. The Constraint Layout is available through the Constraint Layout package of the Android Support Library, making it backward compatible.
Each of these layouts can scale to fill the host device’s screen size by avoiding the use of absolute positions or predetermined pixel values. This makes them particularly useful when designing applications that work well on a diverse set of Android hardware.
Layouts use a variety of attributes assigned to the root node to modify the way in which all child nodes will be positioned (such as Linear Layout’s
android:orientation
attribute):
<LinearLayout xmlns_android="http://schemas.android.com/apk/res/android"android:layout_width="match_parent"android:layout_height="match_parent"android:orientation="vertical">[… Child Views …]</LinearLayout>
To change the measurement and positioning of specific child Views, you will use
layout_
attributes within the child nodes directly. These attributes are used to instruct the parent
ViewGroup
on how the child should be laid out:
<LinearLayout xmlns_android="http://schemas.android.com/apk/res/android"android:layout_width="match_parent"android:layout_height="match_parent"android:orientation="vertical"><TextViewandroid:layout_width="match_parent"android:layout_height="wrap_content"/></LinearLayout>
The most common
layout_
attributes are
layout_width
and
layout_height
—required attributes on all Views—but most layouts feature custom child View attributes to provide the majority of the layout-specific functionality they provide.
The Android documentation describes the features and properties of each layout class in detail; so, rather than repeat that information here, I’ll refer you to
developer.android.com/guide/topics/ui/declaring-layout.html#CommonLayouts
.
You’ll see practical example of how these layouts should be used as they’re introduced in the examples throughout this book. Later in this chapter you’ll also learn how to create compound controls by using and/or extending these layout classes.
Defining Layouts
The preferred way to define a layout is by using XML external resources, either by manually writing the XML or using the Constraint Layout’s visual layout editor to create it for you.
Each layout XML must contain a single root element, which can contain as many nested layouts and Views as necessary to construct an arbitrarily complex UI.
The following snippet shows a simple layout that places a
TextView
above an
EditText
control using a vertical
LinearLayout
that covers the full screen height and width:
<?xml version="1.0" encoding="utf-8"?><LinearLayout xmlns_android="http://schemas.android.com/apk/res/android"android:layout_width="match_parent"android:layout_height="match_parent"android:orientation="vertical"><TextViewandroid:layout_width="match_parent"android:layout_height="wrap_content"android:text="Enter Text Below" /><EditTextandroid:layout_width="match_parent"android:layout_height="wrap_content"android:text="Text Goes Here!" /></LinearLayout>
For each of the layout elements, the constants
wrap_content
and
match_parent
are used rather than specifying an exact height or width in pixels (or dp). These constants, combined with layouts that scale (such as the Linear Layout, Relative Layout, and Constraint Layout) offer the simplest, and most powerful, technique for ensuring your layouts are screen-size and resolution independent.
The
wrap_content
constant sets the size of a View to the minimum required to contain the contents it displays (such as the height required to display a wrapped text string). The
match_parent
constant expands the View to match the available space within the parent View, Fragment, or Activity.
Later in this chapter you’ll learn how these constants are used when creating your own controls, as well as further best practices for resolution independence.
Implementing layouts in XML decouples the presentation layer from the View, Fragment, and Activity controller code and business logic. It also lets you create hardware configuration–specific variations that are dynamically loaded without requiring code changes.
When preferred, or required, you can implement layouts in code. When assigning Views to layouts in code, it’s important to apply
LayoutParameters
using the
setLayoutParams
method, or by passing them into the
addView
call:
LinearLayout ll = new LinearLayout(this);ll.setOrientation(LinearLayout.VERTICAL);TextView myTextView = new TextView(this);EditText myEditText = new EditText(this);myTextView.setText("Enter Text Below");myEditText.setText("Text Goes Here!");int lHeight = LinearLayout.LayoutParams.MATCH_PARENT;int lWidth = LinearLayout.LayoutParams.WRAP_CONTENT;ll.addView(myTextView, new LinearLayout.LayoutParams(lWidth, lHeight));ll.addView(myEditText, new LinearLayout.LayoutParams(lWidth, lHeight));setContentView(ll);
Using Layouts to Create Device-Independent User Interfaces
A defining feature of the layout classes is their ability to scale and adapt to a range of screen sizes, resolutions, and orientations.
The variety of Android devices is a critical part of the platform’s success, but for us as application developers, it introduces a challenge in designing UIs that offer the best possible experience for users, regardless of which Android device they own.
Using a Linear Layout
The Linear Layout is one of the simplest layout classes. It allows you to create simple UIs (or UI elements) that align a sequence of child Views either vertically or horizontally.
The simplicity of the Linear Layout makes it easy to use, but limits its flexibility. In most cases you will use Linear Layouts to construct UI elements that will be nested within other layouts, such as the Relative or Constraint Layouts.
Listing 5-1 shows two nested Linear Layouts—a horizontal layout of two equally sized buttons within a vertical layout that places the buttons above a Recycler View.
If you find yourself creating increasingly complex nesting patterns of Linear Layouts, you will likely be better served using a more flexible Layout Manager such as the Constraint Layout.
Using a Relative Layout
The Relative Layout provides a great deal of flexibility for your layouts, allowing you to define the position of each element within the layout in terms of its parent and the other Views.
Listing 5-2 modifies the layout described in Listing 5-1 to move the buttons below the Recycler View.
Using a Constraint Layout
The Constraint Layout provides the most flexibility of any of the Layout Managers, offering the advantage of both a visual layout editor, and a flat view hierarchy without the nesting shown in the previous examples.
It’s available as part of the Android Support Library, and must be included as a dependency to your project’s module-level
build.gradle
file:
dependencies {[… Existing dependencies …]implementation 'com.android.support.constraint:constraint-layout:1.1.2'}
As the name suggests, the Constraint Layout positions its child Views through the specification of constraints that define the relationship between a View and elements such as boundaries, other views, and custom guidelines.
While it’s possible to define a Constraint Layout in XML manually, it’s much simpler (and less error prone) to use the visual layout editor. Figure 5-2 shows the Layout Editor used to create the same UI as the previous example using a Constraint Layout.
Listing 5-3 shows the XML produced by the visual editor in Figure 5-2 .
Notice in particular that this layout removes the need to nest a second layout within the parent Constraint Layout. Flattening our hierarchy reduces the number of measure and layout passes required to render it on screen, making it more efficient as described in more detail in the following section.
Optimizing Layouts
Inflating layouts is an expensive process; each additional nested layout and included View directly impacts on the performance and responsiveness of your application. This is one of the reasons why Constraint Layout, with its ability to flatten the View hierarchy, is strongly recommended.
To keep your applications smooth and responsive, it’s important to keep your layouts as simple as possible, and to avoid inflating entirely new layouts for relatively small UI changes.
Redundant Layout Containers Are Redundant
A Linear Layout within a Frame Layout, both of which are set to
MATCH_PARENT
, does nothing but add extra time to inflate. Look for redundant layouts, particularly if you’ve been making significant changes to an existing layout or are adding child layouts to an existing layout.
Layouts can be arbitrarily nested, so it’s easy to create complex, deeply nested hierarchies. Although there is no hard limit, it’s good practice to restrict nesting to fewer than 10 levels.
One common example of unnecessary nesting is a Frame Layout used to create the single root node required for a layout, as shown in the following snippet:
<?xml version="1.0" encoding="utf-8"?><FrameLayoutxmlns_android="http://schemas.android.com/apk/res/android"android:layout_width="match_parent"android:layout_height="match_parent"><ImageViewandroid:id="@+id/myImageView"android:layout_width="match_parent"android:layout_height="match_parent"android:src="@drawable/myimage"/><TextViewandroid:id="@+id/myTextView"android:layout_width="match_parent"android:layout_height="wrap_content"android:text="@string/hello"android:gravity="center_horizontal"android:layout_gravity="bottom"/></FrameLayout>
In this example, when the Frame Layout is added to a parent, it will become redundant. A better alternative is to use the
merge
tag:
<?xml version="1.0" encoding="utf-8"?><mergexmlns_android="http://schemas.android.com/apk/res/android"><ImageViewandroid:id="@+id/myImageView"android:layout_width="match_parent"android:layout_height="match_parent"android:src="@drawable/myimage"/><TextViewandroid:id="@+id/myTextView"android:layout_width="match_parent"android:layout_height="wrap_content"android:text="@string/hello"android:gravity="center_horizontal"android:layout_gravity="bottom"/></merge>
When a layout containing a
merge
tag is added to another layout, the
merge
node is removed and its child Views are added directly to the new parent.
The
merge
tag is particularly useful in conjunction with the
include
tag, which is used to insert the contents of one layout into another:
<?xml version="1.0" encoding="utf-8"?><LinearLayoutxmlns_android="http://schemas.android.com/apk/res/android"android:orientation="vertical"android:layout_width="match_parent"android:layout_height="match_parent"><include android:id="@+id/my_action_bar"layout="@layout/actionbar"/><include android:id="@+id/my_image_text_layout"layout="@layout/image_text_layout"/></LinearLayout>
Combining the
merge
and
include
tags enables you to create flexible, reusable layout definitions that don’t create deeply nested layout hierarchies. You’ll learn more about creating and using simple and reusable layouts later in this chapter.
Avoid Using Excessive Views
Each additional View takes time and resources to inflate. To maximize the speed and responsiveness of your application, none of its layouts should include more than 80 Views. When you exceed this limit, the time taken to inflate the layout can become significant.
To minimize the number of Views inflated within a complex layout, you can use a
ViewStub
.
A View Stub works like a lazy include—a stub that represents the specified child Views within the parent layout—but the stub is only inflated explicitly via the
inflate
method or when it’s made visible:
// Find the stubView stub = findViewById(R.id.download_progress_panel_stub);// Make it visible, causing it to inflate the child layoutstub.setVisibility(View.VISIBLE);// Find the root node of the inflated stub layoutView downloadProgressPanel = findViewById(R.id.download_progress_panel);
As a result, the Views contained within the child layout aren’t created until they are required—minimizing the time and resource cost of inflating complex UIs.
When adding a View Stub to your layout, you can override the
id
and
layout
parameters of the root View of the layout it represents:
<?xml version="1.0" encoding="utf-8"?><FrameLayout "xmlns_android=http://schemas.android.com/apk/res/android"android:layout_width="match_parent"android:layout_height="match_parent"><ListViewandroid:id="@+id/myListView"android:layout_width="match_parent"android:layout_height="match_parent"/><ViewStubandroid:id="@+id/download_progress_panel_stub"android:layout="@layout/progress_overlay_panel"android:inflatedId="@+id/download_progress_panel"android:layout_width="match_parent"android:layout_height="wrap_content"android:layout_gravity="bottom"/></FrameLayout>
This snippet modifies the width, height, and gravity of the imported layout to suit the requirements of the parent layout. This flexibility makes it possible to create and reuse the same generic child layouts in a variety of parent layouts.
An ID has been specified for both the stub and the View Group it will become when inflated using the
id
and
inflatedId
attribute, respectively.
Using Lint to Analyze Your Layouts
To assist you in optimizing your layout hierarchies, the Android SDK includes
lint
—a powerful tool that you can use to detect problems within your application, including layout performance issues.
The Lint tool is available within Android Studio through the Inspect Code option in the Analyze menu as shown in Figure 5-3 , or as a command-line tool.

In addition to using Lint to detect each optimization issue described previously in this section, you can also use Lint to detect missing translations, unused resources, inconsistent array sizes, accessibility and internationalization problems, missing or duplicated image assets, usability problems, and manifest errors.
Lint is a constantly evolving tool, with new rules added regularly. You can find a full list of the tests performed by the Lint tool at
http://tools.android.com/tips/lint-checks
.
THE ANDROID WIDGET TOOLBOX
Android supplies a toolbox of standard Views to help you create your UIs. By using these controls (and modifying or extending them, as necessary), you can simplify your development and provide consistency across applications and with the Android system UI.
The following list highlights some of the more familiar controls:
-
TextView—A standard read-only text label that supports multiline display, string formatting, and automatic word-wrapping. -
EditText—An editable text entry box that accepts multiline entry, word-wrapping, and hint text. -
ImageView—A View that shows a single image. -
Toolbar—A View that shows a title and common actions, often used as the main app bar at the top of an Activity. -
ProgressBar—A View that shows either an indeterminate progress indicator (a spinning circle) or a horizontal progress bar. -
RecyclerView—A View Group that manages displaying a large number of Views in a scrolling container. Supports a number of layout managers that allow you to lay out Views as a vertical and horizontal list or a grid. -
Button—A standard interactive push button. -
ImageButton—A push button for which you can specify a customized background image. -
CheckBox—A two-state button represented by a checked or unchecked box. -
RadioButton—A two-state grouped button. A group of these presents the user with a number of possible options, of which only one can be enabled at a time. -
VideoView—Handles all state management and display Surface configuration for playing videos more simply from within your Activity. -
ViewPager—Implements a horizontally scrolling set of Views. The View Pager allows users to swipe or drag left or right to switch between different Views.
This is only a selection of the widgets available. Android also supports several more advanced View implementations, including date-time pickers, and auto-complete input boxes.
WORKING WITH LISTS AND GRIDS
When you need to display a large dataset within your UI, it may be tempting to add hundreds of Views to your UI. This is almost always the wrong approach. Instead, the
RecyclerView
(available from the Android Support Library) offers a scrollable View Group specifically designed to efficiently display, and scroll through, a large number of items.
The Recycler View can be used in both vertical and horizontal orientations, configured using the
android:orientation
attribute:
<android.support.v7.widget.RecyclerViewxmlns_android:"http://schemas.android.com/apk/res/android"xmlns_app="http://schemas.android.com/apk/res-auto"android:id="@+id/recycler_view"android:layout_width="match_parent"android:layout_height="match_parent"android:orientation="vertical"[… Layout Manager Attributes …]/>
In a vertical orientation, items are laid out from top to bottom and the Recycler View scrolls vertically, while a horizontal orientation will lay out items from left to right and the Recycler View will scroll horizontally.
Recycler View and Layout Managers
The
RecyclerView
itself doesn’t control how each item is displayed; that responsibility belongs to the associated
RecyclerView.LayoutManager
. This separation of duties allows you to substitute Layout Manager classes, without affecting other parts of your application.
A number of Layout Managers are available, as shown in Figure 5-4 , and described here:

-
LinearLayoutManager—Lays out items in a single vertical or horizontal list. -
GridLayoutManager—Similar to the Linear Layout Manager, but displays a grid. When laid out vertically, each row can include multiple items, where each is the same height. For horizontal orientation each item in a given column must be the same width. -
StaggeredGridLayoutManager—Similar to the Grid Layout Manager but creates a “staggered” grid, where each grid cell can have a different height or width, with cells staggered to eliminate gaps.
The Layout Manager operates in the same way as a standard layout—responsible for laying out the Views representing each item in your dataset.
The Recycler View gets its name from the way it supports scrolling. Rather than creating a view for each item upfront, or continually creating them when they’re scrolled into view, the Recycler View is able to “recycle” existing Views that are no longer visible—changing their content and position to represent newly visible items.
To support this behavior, the Layout Manager is also responsible for determining when a View can safely be recycled. In most cases, this allows the Recycler View to support a nearly infinite (2 26 ) list of items, while creating just enough Views to fill a single screen.
The Layout Manager for a Recycler View can be set either in XML or programmatically.
For example, the following snippet lays out a vertically aligned Recycler View with a Grid Layout Manager that features two columns:
<android.support.v7.widget.RecyclerViewxmlns_android:"http://schemas.android.com/apk/res/android"xmlns_app="http://schemas.android.com/apk/res-auto"android:id="@+id/recycler_view"android:layout_width="match_parent"android:layout_height="match_parent"android:orientation="vertical"app:layoutManager="GridLayoutManager"app:spanCount="2"/>
To assign the same Layout Manager in code, for an existing Recycler View, you would use the following snippet:
RecyclerView recyclerView = findViewById(R.id.recycler_view);GridLayoutManager gridLayoutManager = new GridLayoutManager(2);recyclerView.setLayoutManager(gridLayoutManager);
Introducing Adapters
Layout Managers aren’t particularly useful until you have data for them to display; that data is provided by the
RecyclerView.Adapter
. The Adapter has two important roles:
- The initial creation of the Views to display, including inflating the appropriate layout
- The creation of the View Holders you’ll use to “bind” the View elements to the underlying data source
A View Holder stores the View to be displayed, and also allows the Adapter to store additional metadata and View references to simplify data binding, as shown later. This typically includes finding references to any child Views within an item layout (ensuring that work is only done once).
The Adapter’s
onCreateViewHolder
method is called to get a new
RecyclerView.ViewHolder
instance whenever the Layout Manager doesn’t have an unused View to reuse—typically only enough views to fill the screen.
Listing 5-4 shows a simple Adapter implementation that uses a single Text View to display a data stored in an array of strings.
Notice that the View Holder itself doesn’t assign values from the underlying data to the Views it contains—its role is to make the elements within the View’s layout available for the adapter to bind data to them.
Every time an item needs to be displayed, the Layout Manager will call the Adapter’s
onBindViewHolder
method, providing you a previously created
ViewHolder
and the position in the dataset requested. This binding phase runs very frequently when scrolling through a list (once for every element that scrolls into view) so it should be as lightweight as possible.
@Overridepublic void onBindViewHolder(ViewHolder holder, int position) {holder.textView.setText(mData[position]);}
To assign your Adapter to a Recycler View, use the
setAdapter
method:
RecyclerView recyclerView = findViewById(R.id.recycler_view);SimpleAdapter adapter =new SimpleAdapter(new String[] {"Sample", "Sample 2"});recyclerView.setAdapter(adapter);
Static datasets like this example are fun, but in reality we’re rarely that lucky. In most cases the underlying data will change when new data is loaded from the server, if the user adds or deletes an item, or even if the sort order is changed.
When you update an Adapter with new or changed data, you must call one of the Adapter’s
notify
methods to inform the Layout Manager that something has changed. The
RecyclerView
will then animate a transition between the previous and updated states (cross fading changed items, collapsing and removing removed items, and animating in new items).
You can customize the animations used for each state change by assigning a
RecyclerView.ItemAnimator
using the
setItemAnimator
method.
There are different methods for notifying the change, insertion, move, or removal of a single item, and for a range of items. You can use the
DiffUtil
class to understand which changes should be applied to transition from one dataset to another, as shown in
Listing 5-5
.
Returning to the Earthquake Viewer Application
With the newfound knowledge of layouts and Views, we can improve the Earthquake Viewer built in
Chapter 3
, replacing the simple
TextView
with a more complicated layout that better displays the data in the
Earthquake
class:
-
Replace the
list_item_earthquake.xmllayout resource with a new layout that uses a Constraint Layout to display the magnitude, date, and details in separate Text Views:<?xml version="1.0" encoding="utf-8"?><android.support.constraint.ConstraintLayoutxmlns_android="http://schemas.android.com/apk/res/android"xmlns_app="http://schemas.android.com/apk/res-auto"android:layout_width="match_parent"android:layout_height="wrap_content"android:paddingLeft="@dimen/activity_vertical_margin"android:paddingRight="@dimen/activity_vertical_margin"><TextViewandroid:id="@+id/magnitude"android:layout_width="wrap_content"android:layout_height="0dp"android:gravity="center_vertical"app:layout_constraintRight_toRightOf="parent"app:layout_constraintTop_toTopOf="parent"app:layout_constraintBottom_toBottomOf="parent"android:textAppearance="?attr/textAppearanceListItem"/><TextViewandroid:id="@+id/date"android:layout_width="0dp"android:layout_height="wrap_content"android:layout_marginTop="@dimen/text_margin"app:layout_constraintLeft_toLeftOf="parent"app:layout_constraintTop_toTopOf="parent"app:layout_constraintRight_toLeftOf="@id/magnitude"/><TextViewandroid:id="@+id/details"android:layout_width="0dp"android:layout_height="wrap_content"android:layout_marginBottom="@dimen/text_margin"app:layout_constraintLeft_toLeftOf="parent"app:layout_constraintBottom_toBottomOf="parent"app:layout_constraintRight_toLeftOf="@id/magnitude"app:layout_constraintTop_toBottomOf="@id/date"/></android.support.constraint.ConstraintLayout> -
Update the
EarthquakeRecyclerViewAdapterto cache the new Views elements added in Step 1 within the View Holder constructor, and then bind those Views to eachEarthquakeitem within theonBindViewHolderby usingjava.text.SimpleDateFormat:private static final SimpleDateFormat TIME_FORMAT =new SimpleDateFormat("HH:mm", Locale.US);private static final NumberFormat MAGNITUDE_FORMAT =new DecimalFormat("0.0");public static class ViewHolder extends RecyclerView.ViewHolder {public final TextView date;public final TextView details;public final TextView magnitude;public ViewHolder(View view) {super(view);date = (TextView) view.findViewById(R.id.date);details = (TextView) view.findViewById(R.id.details);magnitude = (TextView) view.findViewById(R.id.magnitude);}}@Overridepublic void onBindViewHolder(ViewHolder holder, int position) {Earthquake earthquake = mEarthquakes.get(position);holder.date.setText(TIME_FORMAT.format(earthquake.getDate()));holder.details.setText(earthquake.getDetails());holder.magnitude.setText(MAGNITUDE_FORMAT.format(earthquake.getMagnitude()));}
INTRODUCING DATA BINDING
The Data Binding library makes it possible to write declarative layouts that minimize the glue code needed to bind View elements to underlying data sources by generating that code for you at compile time.
Enabling Data Binding
Data Binding is an optional library, so before you can take advantage of it you must enable it in your application module’s
build.gradle
file:
android {[… Existing Android Node …]dataBinding.enabled = true}dependencies {[… Existing dependencies element …]implementation 'com.android.support:support-v4:27.1.1'}
Once enabled, you can apply Data Binding to any layout by wrapping the elements of a layout file in a new
<layout>
element, as seen in
Listing 5-6
:
This triggers Data Binding to generate a Binding class based on the name of the modified layout file. For example, for a layout defined in
profile_activity.xml
, the generated Binding class would be named
ProfileActivityBinding
.
You create an instance of a Binding class using
DataBindingUtil
, and use its
setContentView
method in place of the Activity’s
setContentView
:
ProfileActivityBinding binding =DataBindingUtil.setContentView(this, R.layout.profile_activity);
For inflating the View associated with a Fragment or Recycler View item, you would use the Binding class’s
inflate
method:
ProfileActivityBinding binding =ProfileActivityBinding.inflate(layoutInflater, viewGroup, false);
Alternatively, you can create a Data Binding class from an existing View:
ProfileActivityBinding binding =(ProfileActivityBinding) DataBindingUtil.bind(view);
The Binding class automatically calls
findViewById
on each View with an ID within the associated layout, so instead of keeping a reference to every View in your layout or having to call
findViewById
yourself, you can reference the View through the Binding class:
binding.userName.setText("professionalandroid");binding.email.setText("example@example.com");
Variables in Data Binding
The power of this fully operational Data Binding is its ability to simplify the process of dynamically binding your underlying data to the layout. You do this by adding a
<data>
element and declaring variables that can be used within the layout using the
@{name.classvariable}
syntax as shown in
Listing 5-7
.
By declaring a variable named
user
, of the class
User
, our Binding class will generate a
setUser
method.
Calling this method will set all of the properties referencing that class using the
@{}
syntax. Data Binding will look for public variables, getter methods of the style
get<Variable>
or
is<Variable>
(for example,
getEmail
or
isValid
), or the exact method name when resolving expressions:
User user = new User("professionalandroid", "example@example.com");binding.setUser(user);
This allows you to keep all of the View-specific logic in the layout file itself while your code can focus on only providing the appropriate data to the Binding class.
You’ll note that the
android:id
attributes were removed in the preceding example because Data Binding does not require IDs to evaluate variable expressions.
In addition to specifying variables, you can use almost all Java language syntax within these expressions. For example, you can use the null-coalescing operator
??
to shorten simple ternary expressions:
android:text='@{user.email ?? "No email"}'
By default, any variables binding you apply is done after the next frame redraw. This can cause a visible flicker when used in scrollable views such as Recycler View. To avoid this, call
executePendingBindings
after setting your variables, causing the binding to be done immediately:
User user = userList.get(position);binding.setUser(user);binding.executePendingBindings();
Data Binding for the Earthquake Viewer Application
Data Binding enables us to simplify the Earthquake Viewer’s
RecyclerView.Adapter
by binding each
Earthquake
to the layout for each row:
-
Update the
build.gradlefile to enable data binding:android {[… Existing android element …]dataBinding.enabled = true}dependencies {[… Existing dependencies element …]implementation 'com.android.support:support-v4:27.1.1'} -
Update the
list_item_earthquake.xmllayout resource to take advantage of Data Binding:<?xml version="1.0" encoding="utf-8"?><layoutxmlns_android="http://schemas.android.com/apk/res/android"xmlns_app="http://schemas.android.com/apk/res-auto"><data><variable name="timeformat" type="java.text.DateFormat" /><variable name="magnitudeformat" type="java.text.NumberFormat" /><variable name="earthquake"type="com.professionalandroid.apps.earthquake.Earthquake" /></data><android.support.constraint.ConstraintLayoutandroid:layout_width="match_parent"android:layout_height="wrap_content"android:paddingLeft="@dimen/activity_vertical_margin"android:paddingRight="@dimen/activity_vertical_margin"><TextViewandroid:id="@+id/magnitude"android:layout_width="wrap_content"android:layout_height="0dp"android:gravity="center_vertical"app:layout_constraintRight_toRightOf="parent"app:layout_constraintTop_toTopOf="parent"app:layout_constraintBottom_toBottomOf="parent"android:textAppearance="?attr/textAppearanceListItem"android:text="@{magnitudeformat.format(earthquake.magnitude)}"/><TextViewandroid:id="@+id/date"android:layout_width="0dp"android:layout_height="wrap_content"android:layout_marginTop="@dimen/text_margin"app:layout_constraintLeft_toLeftOf="parent"app:layout_constraintTop_toTopOf="parent"app:layout_constraintRight_toLeftOf="@id/magnitude"android:text="@{timeformat.format(earthquake.date)}"/><TextViewandroid:layout_width="0dp"android:layout_height="wrap_content"android:layout_marginBottom="@dimen/text_margin"app:layout_constraintLeft_toLeftOf="parent"app:layout_constraintBottom_toBottomOf="parent"app:layout_constraintRight_toLeftOf="@id/magnitude"app:layout_constraintTop_toBottomOf="@id/date"android:text="@{earthquake.details}"/></android.support.constraint.ConstraintLayout></layout> -
Generate the Binding class by rebuilding the project. You can trigger this manually via the Build
Make Project menu item.
-
Update the
EarthquakeRecyclerViewAdapter.ViewHolderto receive the Binding class as the input and do the one-time initialization of setting the time and magnitude format variables:public static class ViewHolder extends RecyclerView.ViewHolder {public final ListItemEarthquakeBinding binding;public ViewHolder(ListItemEarthquakeBinding binding) {super(binding.getRoot());this.binding = binding;binding.setTimeformat(TIME_FORMAT);binding.setMagnitudeformat(MAGNITUDE_FORMAT);}} -
Update the
EarthquakeRecyclerViewAdapterto create the Binding class inonCreateViewHolderand simplifyonBindViewHolder:@Overridepublic ViewHolder onCreateViewHolder(ViewGroup parent, int viewType) {ListItemEarthquakeBinding binding = ListItemEarthquakeBinding.inflate(LayoutInflater.from(parent.getContext()), parent, false);return new ViewHolder(binding);}@Overridepublic void onBindViewHolder(ViewHolder holder, int position) {Earthquake earthquake = mEarthquakes.get(position);holder.binding.setEarthquake(earthquake);holder.binding.executePendingBindings();}
CREATING NEW VIEWS
It’s only a matter of time before you, as an innovative developer, encounter a situation in which none of the built-in controls meets your needs.
The ability to extend existing Views, assemble composite controls, and create unique new Views makes it possible to implement beautiful UIs optimized for your application’s specific workflow. Android lets you subclass the existing View toolbox or implement your own View controls, giving you total freedom to tailor your UI to optimize the user experience.
The best approach to use when creating a new View depends on what you want to achieve:
-
Modify or extend the appearance and/or behavior of an existing View
when it supplies the basic functionality you want. By overriding the event handlers and/or
onDraw, but still calling back to the superclass’s methods, you can customize a View without having to re-implement its functionality. For example, you could customize aTextViewto display numbers using a set number of decimal points. -
Combine Views
to create atomic, reusable controls that leverage the functionality of several interconnected Views. For example, you could create a stopwatch timer by combining a
TextViewand aButtonthat resets the counter when clicked. - Create an entirely new control when you need a completely different interface that you can’t get by changing or combining existing controls.
Modifying Existing Views
The Android widget toolbox includes Views that provide many common UI requirements, but the controls are necessarily generic. By customizing these basic Views, you avoid re-implementing existing behavior while still tailoring the UI, and functionality, to your application’s needs.
To create a new View based on an existing control, create a new class that extends it, as shown with the
TextView
derived class shown in
Listing 5-8
. In this example you extend the Text View to customize its appearance and behavior.
If you are building a reusable View, it is strongly recommended to override all three of these constructors to ensure that your View can be created in code and inflated in XML files just like all of the Views included in the Android SDK.
To override the appearance or behavior of your new View, override and extend the event handlers associated with the behavior you want to change.
In the following extension of the
Listing 5-8
code, the
onDraw
method is overridden to modify the View’s appearance, and the
onKeyDown
handler is overridden to allow custom key-press handling:
public class MyTextView extends TextView {public MyTextView(Context context) {this(context, null);}public MyTextView(Context context, AttributeSet attrs) {this(context, attrs, 0);}public MyTextView(Context context, AttributeSet attrs, int defStyleAttr) {super(context, attrs, defStyleAttr);}@Overridepublic void onDraw(Canvas canvas) {[ … Draw things on the canvas under the text … ]// Render the text as usual using the TextView base class.super.onDraw(canvas);[ … Draw things on the canvas over the text … ]}@Overridepublic boolean onKeyDown(int keyCode, KeyEvent keyEvent) {[ … Perform some special processing … ][ … based on a particular key press … ]// Use the existing functionality implemented by// the base class to respond to a key press event.return super.onKeyDown(keyCode, keyEvent);}}
The event handlers available within Views are covered in more detail later in this chapter.
Defining Custom Attributes
As mentioned in the previous section, you have three primary constructors for Views, used to support creating a View in code as well as part of an XML file. This same duality applies to functionality you might add to your View—you’ll want to support changing added functionality via both code and via XML.
Adding functionality in code is no different for a View or any other class, and generally involves adding a set and get method:
public class PriceTextView extends TextView {private static NumberFormat CURRENCY_FORMAT =NumberFormat.getCurrencyInstance();private float mPrice;// These three constructors are required for all Viewspublic PriceTextView(Context context) {this(context, null);}public PriceTextView(Context context, AttributeSet attrs) {this(context, attrs, 0);}// Constructor used when inflating the View from XML when it has a// style attributepublic MyTextView(Context context, AttributeSet attrs, int defStyleAttr) {super(context, attrs, defStyleAttr);}public void setPrice(float price) {mPrice = price;setText(CURRENCY_FORMAT.format(price));}public float getPrice() {return mPrice;}}
However, this only allows changing the price in code. To set the displayed price as part of your XML files, you can create a custom attribute, generally in a
res/values/attrs.xml
file that contains one or more
<declare-styleable>
elements:
<resources><declare-styleable name="PriceTextView"><attr name="price" format="reference|float" /></declare-styleable></resources>
It is convention that the
<declare-styleable>
name matches the name of the class using the attribute, although it is not strictly required.
It is important to note that the names used are global—your application will not compile if the same attribute is declared more than once (such as in your application and in a library you use); consider adding a prefix to your attributes if they are likely to be common names.
The basic formats available for attributes include
color
,
boolean
,
dimension
,
float
,
integer
,
string
,
fraction
,
enum
, and
flag
. The
reference
format is particularly important and allows you to reference another resource when using your custom attribute (such as using
@string/app_name
). If you want to allow multiple formats, combine the formats with the
|
character.
Your View XML can then reference the custom attribute by adding a namespace declaration associated with all of the attributes declared by your application, usually using
xmlns_app
(although
app
can be any identifier you choose):
<PriceTextViewxmlns_android:"http://schemas.android.com/apk/res/android"xmlns_app="http://schemas.android.com/apk/res-auto"android:layout_width="wrap_content"android:layout_height="wrap_content"app:price="1999.99" />
You can then read the custom attributes in your class by using the
obtainStyledAttributes
method:
// Constructor used when inflating the View from XML when it has a// style attributepublic MyTextView(Context context, AttributeSet attrs, int defStyleAttr) {super(context, attrs, defStyleAttr);final TypedArray a = context.obtainStyledAttributes(attrs,R.styleable.PriceTextView, // The <declare-styleable> namedefStyleAttr,0); // An optional R.style to use for default valuesif (a.hasValue(R.styleable.PriceTextView_price)) {setPrice(a.getFloat(R.styleable.PriceTextView_price,0)); // default value}a.recycle();}
Creating Compound Controls
Compound controls are atomic, self-contained View Groups that contain multiple child Views laid out and connected together.
When you create a compound control, you define the layout, appearance, and interaction of the Views it contains. You create compound controls by extending a
ViewGroup
(usually a layout). To create a new compound control, choose the layout class that’s most suitable for positioning the child controls and extend it:
public class MyCompoundView extends LinearLayout {public MyCompoundView(Context context) {this(context, null);}public MyCompoundView(Context context, AttributeSet attrs) {this(context, attrs, 0);}public MyCompoundView(Context context, AttributeSet attrs,int defStyleAttr) {super(context, attrs, defStyleAttr);}}
As with Activities, the preferred way to design compound View UI layouts is by using an external resource.
Listing 5-9 shows the XML layout definition for a simple compound control consisting of an Edit Text for text entry, with a “Clear” Button beneath it.
To use this layout in your new compound View, override its constructor to inflate the layout resource using the
inflate
method from the
LayoutInflate
system service. The
inflate
method takes the layout resource and returns the inflated View.
For circumstances such as this, in which the returned View should be the class you’re creating, you can pass in the parent View and attach the result to it automatically.
Listing 5-10
demonstrates this using the
ClearableEditText
class. Within the constructor it inflates the layout resource from
Listing 5-9
and then finds a reference to the Edit Text and Button Views it contains. It also makes a call to
hookupButton
that will later be used to hook up the plumbing that will implement the
clear text
functionality.
If you prefer to construct your layout in code, you can do so just as you would for an Activity:
public ClearableEditText(Context context, AttributeSet attrs,int defStyleAttr) {super(context, attrs, defStyleAttr);// Set orientation of layout to verticalsetOrientation(LinearLayout.VERTICAL);// Create the child controls.editText = new EditText(getContext());clearButton = new Button(getContext());clearButton.setText("Clear");// Lay them out in the compound control.int lHeight = LinearLayout.LayoutParams.WRAP_CONTENT;int lWidth = LinearLayout.LayoutParams.MATCH_PARENT;addView(editText, new LinearLayout.LayoutParams(lWidth, lHeight));addView(clearButton, new LinearLayout.LayoutParams(lWidth, lHeight));// Hook up the functionalityhookupButton();}
After constructing the View layout, you can hook up the event handlers for each child control to provide the functionality you need. In
Listing 5-11
, the
hookupButton
method is filled in to clear the Edit Text when the button is pressed.
Creating Simple Compound Controls as a Layout
It’s often sufficient, and more flexible, to define the layout and appearance of a set of Views without hard-wiring their interactions.
You can create a reusable layout by creating an XML resource that encapsulates the UI pattern you want to reuse. You can then import these layout patterns when creating the UI for Activities or Fragments by using the
include
tag within their layout resource definitions:
<include layout="@layout/clearable_edit_text"/>
The
include
tag also enables you to override the
id
and
layout
parameters of the root node of the included layout:
<includelayout="@layout/clearable_edit_text"android:id="@+id/add_new_entry_input"android:layout_width="match_parent"android:layout_height="wrap_content"android:layout_gravity="top"/>
Creating Custom Views
Creating new Views gives you the power to fundamentally shape the way your applications look and feel. By creating your own controls, you can create UIs that are uniquely suited to your needs.
To create new controls from a blank canvas, you extend either the
View
or
SurfaceView
class. The
View
class provides a
Canvas
object with a series of
draw
methods and
Paint
classes. Use them to create a visual interface with bitmaps and raster graphics. You can then override user events, including screen touches or key presses to provide interactivity.
In situations in which extremely rapid repaints and 3D graphics aren’t required, the
View
base class offers a powerful lightweight solution.
The
SurfaceView
class provides a
Surface
object that supports drawing from a background thread and optionally using
OpenGL
to implement your graphics. This is an excellent option for graphics-heavy controls that are frequently updated (such as live video) or that display complex graphical information (particularly, games and 3D visualizations).
Creating a New Visual Interface
The base
View
class presents a distinctly empty 100-pixel-by-100-pixel square. To change the size of the control and display a more compelling visual interface, you need to override the
onMeasure
and
onDraw
methods.
Within
onMeasure
your View will determine the height and width it will occupy given a set of boundary conditions. The
onDraw
method is where you draw onto the Canvas.
Listing 5-12
shows the skeleton code for a new
View
class, which will be examined and developed further in the following sections.
Drawing Your Control
The
onDraw
method is where the magic happens. If you’re creating a new widget from scratch, it’s because you want to create a completely new visual interface. The Canvas parameter in the
onDraw
method is the surface you’ll use to bring your imagination to life.
The Android Canvas uses the painter’s algorithm , meaning that each time you draw on to the Canvas, it will cover anything previously drawn on the same area.
The drawing APIs provide a variety of tools to help draw your design on the Canvas using various
Paint
objects. The
Canvas
class includes helper methods for drawing primitive 2D objects, including circles, lines, rectangles, text, and Drawables (images). It also supports transformations that let you rotate, translate (move), and scale (resize) the Canvas while you draw on it.
When these tools are used in combination with
Drawables
and the
Paint
class (which offer a variety of customizable fills and pens), the complexity and detail that your control can render are limited only by the size of the screen and the power of the processor rendering it.
Listing 5-13
shows how to override the
onDraw
method to display a simple text string in the center of the View.
So that we don’t diverge too far from the current topic, a more detailed look at the Canvas and Paint classes, and the techniques available for drawing more complex visuals is included in Chapter 14 , “Advanced Customization of Your User Interface.”
Sizing Your Control
Unless you conveniently require a control that always occupies a space 100 pixels square, you will also need to override
onMeasure
.
The
onMeasure
method is called when the control’s parent is laying out its child controls. It asks the question, “How much space will you use?” and passes in two parameters:
widthMeasureSpec
and
heightMeasureSpec
. These parameters specify the space available for the control and some metadata to describe that space.
Rather than return a result, you pass the View’s height and width into the
setMeasuredDimension
method.
The following snippet shows how to override
onMeasure
. The calls to the local method stubs
measureHeight
and
measureWidth
are used to decode the
widthHeightSpec
and
heightMeasureSpec
values and calculate the preferred height and width values, respectively:
@Overrideprotected void onMeasure(int widthMeasureSpec, int heightMeasureSpec) {int measuredHeight = measureHeight(heightMeasureSpec);int measuredWidth = measureWidth(widthMeasureSpec);setMeasuredDimension(measuredHeight, measuredWidth);}private int measureHeight(int measureSpec) {// Return measured widget height.}private int measureWidth(int measureSpec) {// Return measured widget width.}
The boundary parameters,
widthMeasureSpec
and
heightMeasureSpec
, are passed in as integers for efficiency reasons. Before they can be used, they first need to be decoded using the static
getMode
and
getSize
methods from the
MeasureSpec
class:
int specMode = MeasureSpec.getMode(measureSpec);int specSize = MeasureSpec.getSize(measureSpec);
Depending on the
mode
value, the
size
represents either the maximum space available for the control (in the case of
AT_MOST
), or the exact size that your control will occupy (for
EXACTLY
). In the case of
UNSPECIFIED
, your control does not have any reference for what the size represents.
By marking a measurement size as
EXACT
, the parent is insisting that the View will be placed into an area of the exact size specified. The
AT_MOST
mode says the parent is asking what size the View would like to occupy, given an upper boundary. In many cases the value you return will either be the same, or the size required to appropriately wrap the UI you want to display.
In either case, you should treat these limits as absolute. In some circumstances it may still be appropriate to return a measurement outside these limits, in which case you can let the parent choose how to deal with the oversized View, using techniques such as clipping and scrolling.
Listing 5-14 shows a typical implementation for handling View measurements.
Handling User Interaction Events
For your new View to be interactive, it will need to respond to user-initiated events such as key presses, screen touches, and button clicks. Android exposes several virtual event handlers that you can use to react to user input:
-
onKeyDown—Called when any device key is pressed; includes the D-pad, keyboard, hang-up, call, back, and camera buttons -
onKeyUp—Called when a user releases a pressed key -
onTouchEvent—Called when the touch screen is pressed or released, or when it detects movement
Listing 5-15 shows a skeleton class that overrides each of the user interaction handlers in a View.
Further details on using each of these event handlers, including greater detail on the parameters received by each method and support for multitouch events, are available in Chapter 14 .
Supporting Accessibility in Custom Views
Creating a custom View with a beautiful interface is only half the story. It’s just as important to create accessible controls that can be used by users with disabilities that require them to interact with their devices in different ways.
The Accessibility APIs provide alternative interaction methods for users with visual, physical, or age-related disabilities that make it difficult to interact fully with a touch screen.
The first step is to ensure that your custom View is accessible and navigable using D-pad events, as described in the previous section. It’s also important to use the content description attribute within your layout definition to describe the input widgets. (This is described in more detail in Chapter 14 .)
To be accessible, custom Views must implement the
AccessibilityEventSource
interface and broadcast
AccessibilityEvents
using the
sendAccessibilityEvent
method.
The
View
class already implements the Accessibility Event Source interface, so you only need to customize the behavior to suit the functionality introduced by your custom View. Do this by passing the type of event that has occurred—usually one of clicks, long clicks, selection changes, focus changes, and text/content changes—to the
sendAccessibilityEvent
method. For custom Views that implement a completely new UI, this will typically include a broadcast whenever the displayed content changes, as shown in
Listing 5-16
.
Clicks, long clicks, and focus and selection changes typically will be broadcast by the underlying View implementation, although you should take care to broadcast any additional events not captured by the base View class.
The broadcast Accessibility Event includes a number of properties used by the accessibility service to augment the user experience. Several of these properties, including the View’s class name and
event timestamp, won’t need to be altered; however, by overriding the
dispatchPopulateAccessibilityEvent
handler, you can customize details such as the textual representation of the View’s contents, checked state, and selection state of your View, as shown in
Listing 5-17
.
Creating a Compass View Example
In the following example you’ll create a new Compass View by extending the
View
class. This View will display a traditional compass rose to indicate a heading/orientation. When complete, it should appear as in
Figure 5-5
.

A compass is an example of a UI control that requires a radically different visual display from the Text Views and Buttons available in the SDK toolbox, making it an excellent candidate for building from scratch.
Start by creating a new
Compass
project that will contain your new
CompassView
, and create an initially empty
CompassActivity
within which to display it:
-
Create a new
CompassViewclass that extendsViewand add constructors that will allow the View to be instantiated, either in code or through inflation from a resource layout. AddsetFocusable(true)to the final constructor to allow a user using a D-pad to select and focus the compass (this will allow them to receive accessibility events from the View):package com.professionalandroid.apps.compass;import android.content.Context;import android.content.res.Resources;import android.content.res.TypedArray;import android.graphics.Canvas;import android.graphics.Paint;import android.support.v4.content.ContextCompat;import android.util.AttributeSet;import android.view.View;import android.view.accessibility.AccessibilityEvent;public class CompassView extends View {public CompassView(Context context) {this(context, null);}public CompassView(Context context, AttributeSet attrs) {this(context, attrs, 0);}public CompassView(Context context, AttributeSet attrs, int defStyleAttr) {super(context, attrs, defStyleAttr);setFocusable(true);}} -
The Compass View should always be a perfect circle that takes up as much of the canvas as this restriction allows. Override the
onMeasuremethod to calculate the length of the shortest side, and usesetMeasuredDimensionto set the height and width using this value:@Overrideprotected void onMeasure(int widthMeasureSpec, int heightMeasureSpec) {// The compass is a circle that fills as much space as possible.// Set the measured dimensions by figuring out the shortest boundary,// height or width.int measuredWidth = measure(widthMeasureSpec);int measuredHeight = measure(heightMeasureSpec);int d = Math.min(measuredWidth, measuredHeight);setMeasuredDimension(d, d);}private int measure(int measureSpec) {int result = 0;// Decode the measurement specifications.int specMode = MeasureSpec.getMode(measureSpec);int specSize = MeasureSpec.getSize(measureSpec);if (specMode == MeasureSpec.UNSPECIFIED) {// Return a default size of 200 if no bounds are specified.result = 200;} else {// As you want to fill the available space// always return the full available bounds.result = specSize;}return result;} -
Modify the
activity_compass.xmllayout resource and replace it with a Frame Layout containing your newCompassView:<?xml version="1.0" encoding="utf-8"?><FrameLayout xmlns_android="http://schemas.android.com/apk/res/android"android:orientation="vertical"android:layout_width="match_parent"android:layout_height="match_parent"><com.professionalandroid.apps.compass.CompassViewandroid:id="@+id/compassView"android:layout_width="match_parent"android:layout_height="match_parent"/></FrameLayout> -
Use resource files to store the colors and text strings you’ll use to draw the compass.
-
4.1. Create the text string resources by replacing the
res/values/strings.xmlfile with the following:<?xml version="1.0" encoding="utf-8"?><resources><string name="app_name">Compass</string><string name="cardinal_north">N</string><string name="cardinal_east">E</string><string name="cardinal_south">S</string><string name="cardinal_west">W</string></resources> -
4.2. Add the following color resources to
res/values/colors.xml:<?xml version="1.0" encoding="utf-8"?><resources><color name="colorPrimary">#3F51B5</color><color name="colorPrimaryDark">#303F9F</color><color name="colorAccent">#FF4081</color><color name="background_color">#F555</color><color name="marker_color">#AFFF</color><color name="text_color">#AFFF</color></resources>
-
4.1. Create the text string resources by replacing the
-
Return to the
CompassViewclass. Add a new property to store the displayed bearing, and creategetandsetmethods for it. Callinvalidatein the set method to ensure that the View is repainted when the bearing changes:private float mBearing;public void setBearing(float bearing) {mBearing = bearing;invalidate();}public float getBearing() {return mBearing;} -
Create a custom attribute for setting the bearing in XML.
-
6.1. Create the custom attribute in the res/values/attrs.xml file:
<?xml version="1.0" encoding="utf-8"?><resources><declare-styleable name="CompassView"><attr name="bearing" format="reference|float" /></declare-styleable></resources> -
6.2. Update the constructor to read the bearing from the XML attribute:
public CompassView(Context context, AttributeSet attrs,int defStyleAttr) {super(context, attrs, defStyleAttr);setFocusable(true);final TypedArray a = context.obtainStyledAttributes(attrs,R.styleable.CompassView, defStyleAttr, 0);if (a.hasValue(R.styleable.CompassView_bearing)) {setBearing(a.getFloat(R.styleable.CompassView_bearing, 0));}a.recycle();}
-
6.1. Create the custom attribute in the res/values/attrs.xml file:
-
In the constructor, get references to each resource created in Step 4. Store the string values as instance variables, and use the color values to create new class-scoped
Paintobjects. You’ll use these objects in the next step to draw the compass face.private Paint markerPaint;private Paint textPaint;private Paint circlePaint;private String northString;private String eastString;private String southString;private String westString;private int textHeight;public CompassView(Context context, AttributeSet attrs, int defStyleAttr) {super(context, attrs, defStyleAttr);setFocusable(true);final TypedArray a = context.obtainStyledAttributes(attrs,R.styleable.CompassView, defStyleAttr, 0);if (a.hasValue(R.styleable.CompassView_bearing)) {setBearing(a.getFloat(R.styleable.CompassView_bearing, 0));}a.recycle();Context c = this.getContext();Resources r = this.getResources();circlePaint = new Paint(Paint.ANTI_ALIAS_FLAG);circlePaint.setColor(ContextCompat.getColor(c, R.color.background_color));circlePaint.setStrokeWidth(1);circlePaint.setStyle(Paint.Style.FILL_AND_STROKE);northString = r.getString(R.string.cardinal_north);eastString = r.getString(R.string.cardinal_east);southString = r.getString(R.string.cardinal_south);westString = r.getString(R.string.cardinal_west);textPaint = new Paint(Paint.ANTI_ALIAS_FLAG);textPaint.setColor(ContextCompat.getColor(c, R.color.text_color));textHeight = (int)textPaint.measureText("yY");markerPaint = new Paint(Paint.ANTI_ALIAS_FLAG);markerPaint.setColor(ContextCompat.getColor(c, R.color.marker_color));} -
The next step is to draw the compass face using the
StringandPaintobjects you created in Step 7. The following code snippet is presented with only limited commentary. You can find more detail about drawing on the Canvas and using advanced Paint effects in Chapter 14 .-
8.1. Start by overriding the
onDrawmethod in theCompassViewclass:@Overrideprotected void onDraw(Canvas canvas) { -
8.2. Find the center of the control, and store the length of the smallest side as the Compass’s radius:
int mMeasuredWidth = getMeasuredWidth();int mMeasuredHeight = getMeasuredHeight();int px = mMeasuredWidth / 2;int py = mMeasuredHeight / 2 ;int radius = Math.min(px, py); -
8.3. Draw the outer boundary, and color the background of the Compass face using the
drawCirclemethod. Use thecirclePaintobject you created in Step 7:// Draw the backgroundcanvas.drawCircle(px, py, radius, circlePaint);- 8.4. This Compass displays the current heading by rotating the face so that the current direction is always at the top of the device. To achieve this, rotate the canvas in the opposite direction to the current heading:
// Rotate our perspective so that the 'top' is// facing the current bearing.canvas.save();canvas.rotate(-mBearing, px, py); -
8.5. All that’s left is to draw the markings. Rotate the canvas through a full rotation, drawing markings every 15 degrees and the abbreviated direction string every 45 degrees:
int textWidth = (int)textPaint.measureText("W");int cardinalX = px-textWidth/2;int cardinalY = py-radius+textHeight;// Draw the marker every 15 degrees and text every 45.for (int i = 0; i < 24; i++) {// Draw a marker.canvas.drawLine(px, py-radius, px, py-radius+10, markerPaint);canvas.save();canvas.translate(0, textHeight);// Draw the cardinal pointsif (i % 6 == 0) {String dirString = "";switch (i) {case(0) : {dirString = northString;int arrowY = 2*textHeight;canvas.drawLine(px, arrowY, px-5, 3*textHeight,markerPaint);canvas.drawLine(px, arrowY, px+5, 3*textHeight,markerPaint);break;}case(6) : dirString = eastString; break;case(12) : dirString = southString; break;case(18) : dirString = westString; break;}canvas.drawText(dirString, cardinalX, cardinalY, textPaint);}else if (i % 3 == 0) {// Draw the text every alternate 45degString angle = String.valueOf(i*15);float angleTextWidth = textPaint.measureText(angle);int angleTextX = (int)(px-angleTextWidth/2);int angleTextY = py-radius+textHeight;canvas.drawText(angle, angleTextX, angleTextY, textPaint);}canvas.restore();canvas.rotate(15, px, py);}canvas.restore();}
-
8.1. Start by overriding the
-
The next step is to add accessibility support. The Compass View presents a heading visually, so to make it accessible you need to broadcast an Accessibility Event signifying that the “text” (in this case, content) has changed when the bearing changes. Do this by modifying the
setBearingmethod:public void setBearing(float bearing) {mBearing = bearing;invalidate();sendAccessibilityEvent(AccessibilityEvent.TYPE_VIEW_TEXT_CHANGED);} -
Override the
dispatchPopulateAccessibilityEventto use the current heading as the content value to be used for accessibility events:@Overridepublic boolean dispatchPopulateAccessibilityEvent(final AccessibilityEvent event) {super.dispatchPopulateAccessibilityEvent(event);if (isShown()) {String bearingStr = String.valueOf(mBearing);event.getText().add(bearingStr);return true;}elsereturn false;}
Run the Activity, and you should see the
CompassView
displayed. See
Chapter 16
, “Hardware Sensors,” to learn how to bind the
CompassView
to the device’s compass sensor.
Using Custom Controls
Having created your own custom Views, you can use them within code and layouts as you would any other View. Note that you must specify the fully qualified class name when you add a node for your new View in the layout definition:
<com.professionalandroid.apps.compass.CompassViewandroid:id="@+id/compassView"android:layout_width="match_parent"android:layout_height="match_parent"app:bearing="45" />
You can inflate the layout and get a reference to the
CompassView
, as usual, using the following code:
@Overridepublic void onCreate(Bundle savedInstanceState) {super.onCreate(savedInstanceState);setContentView(R.layout.main);CompassView cv = findViewById(R.id.compassView);// Update the bearing by calling setBearing as needed}
You can also add your new View to a layout in code:
@Overridepublic void onCreate(Bundle savedInstanceState) {super.onCreate(savedInstanceState);CompassView cv = new CompassView(this);setContentView(cv);cv.setBearing(45);}
Custom Views are a powerful way to provide distinct functionality to your application. Once created, they can be used in the same way as any Android framework View.
6
Intents and Broadcast Receivers
USING INTENTS AND BROADCAST RECEIVERS
Intents are a message-passing mechanism you can use within your application, between applications, and between the system and your application. Intents are used to do the following:
- Explicitly start a particular Service, Broadcast Receiver, Activity, or sub-Activity using its class name
- Start an Activity, sub-Activity, or Service to perform an action with (or on) a particular piece of data
- Return information from a sub-Activity
- Broadcast that an event has occurred
Intents are a fundamental part of the Android OS, they’re also quite unique to Android, and as such can be a confusing concept to master.
Intents can be used to send information among any application components installed on an Android device, no matter which application they’re a part of. This turns your device from a platform containing a collection of independent components into a single, interconnected system. Alternatively, for improved security and efficiency, you can use the Local Broadcast Manager to send Intents only to components within your application.
One of the most common uses for Intents is to launch (or “start”) Activities, either explicitly (by specifying the class to load) or implicitly (by creating an action Intent that requests a specific action be performed on a piece of data). In the latter case the action does not necessarily have to be performed by an Activity within the calling application.
Using Intents, rather than explicitly loading classes, to launch application components—even within the same application—is a fundamental Android design principle.
You can also use Intents to broadcast messages across the system; these are known as broadcast Intents. Applications can register Broadcast Receivers to listen for, and react to, these broadcast Intents. This enables you to create event-driven applications based on internal or system events.
The Android system uses broadcast Intents to announce system events, such as changes in Internet connectivity or battery charge levels. The native Android applications, such as the Phone Dialer and SMS Manager, register components that listen for specific broadcast Intents and react accordingly. As a result, you can replace many of the native applications by registering Broadcast Receivers that listen for the same Intents.
USING INTENTS TO LAUNCH ACTIVITIES
The most common use of Intents is to connect your application components, and to communicate between them. For example, Intents are used within Activities to start new Activities, allowing you to create a workflow made up of multiple screens.
To create and display an Activity, call
startActivity
, passing in an
Intent
, as follows:
startActivity(myIntent);
The
startActivity
method finds and starts the single Activity that best matches your Intent.
You can construct an Intent that explicitly specifies a particular Activity class to start, or it can include an action that the target Activity must be able to perform. In the latter case, the run time will dynamically choose an Activity to through intent resolution .
When you use
startActivity
, your application won’t receive any notification when the newly launched Activity finishes. To track feedback from a sub-Activity, use
startActivityForResult
, as described later in this chapter.
Explicitly Starting New Activities
You learned in Chapter 3 , “Applications and Activities and Fragments, Oh My!” that applications consist of a number of interrelated screens—Activities—that must be included in the application manifest.
To transition between them, you can explicitly indicate an Activity to start by creating a new Intent, specifying the current Activity’s Context and the class of the Activity to launch. Once defined, pass this Intent into
startActivity
as shown in
Listing 6-1
to launch the new Activity.
After
startActivity
is called, the new Activity (in this example,
MyOtherActivity
) will be created, started, and resumed—replacing
MyActivity
at the top of the Activity stack.
Calling
finish
on the new Activity, or pressing the hardware back button, closes it and removes it from the stack. Alternatively, you can continue to navigate to other Activities using
startActivity
.
Note that each time you call
startActivity
, a new Activity will be added to the stack. Pressing back (or calling
finish
) will remove each of these Activities, in turn; if an Activity is not closed in this way it will remain on the stack while the application is running. As a result, it’s possible to have multiple instances of the same Activity on your Activity stack.
Implicit Intents and Late Runtime Binding
An implicit Intent is used to ask the system to find and start an Activity that can perform a particular action , without you knowing exactly which application, or Activity, will be started.
For example, to let users make calls from your application, you could implement a new dialer, or (if you don’t hate yourself), you could use an implicit Intent that requests the action (dialing) be performed on a phone number (represented as a URI):
if (somethingWeird && itDontLookGood) {Intent intent =new Intent(Intent.ACTION_DIAL, Uri.parse("tel:555-2368"));startActivity(intent);}
Android resolves this Intent by finding, and then starting, an Activity that can perform the dial action on a telephone number URI—in this case, typically the bundled phone dialer application.
When constructing a new implicit Intent, you specify an action to perform and the URI of the data on which to perform that action. You can send additional data to the target Activity by adding extras to the Intent.
Extras are a mechanism used to attach primitive values to an Intent. You can use the overloaded
putExtra
method on any Intent to attach a new name/value pair (NVP):
intent.putExtra("STRING_EXTRA", "Beverly Hills");intent.putExtra("INT_EXTRA", 90210);
The extras are stored within the Intent as a Bundle object, available from within the started Activity using the
getExtras
method. You can extract each extra value directly from the Intent using the corresponding
get[type]Extra
method:
Intent intent = getIntent();String myStringExtra = intent.getStringExtra("STRING_EXTRA");int myIntExtra = intent.getIntExtra("INT_EXTRA", DEFAULT_INT_VALUE);
When you use an implicit Intent to start an Activity, Android will—at run time—resolve it into the Activity class best suited to performing the required action on the type of data specified. This means you can create projects that use functionality from other applications without knowing exactly which application you’re borrowing functionality from ahead of time.
In circumstances where multiple Activities can potentially perform a given action, the user is presented with a choice. The process of Intent resolution is determined through an analysis of the Activities’ Intent Filters, which are described in detail later in this chapter.
Various native applications provide Activities capable of performing actions against specific data. Third-party applications, including your own, can be registered to support new actions or to provide an alternative provider of native actions. You are introduced to some of the native actions, as well as how to register your own Activities to support them, later in this chapter.
Determining If an Intent Will Resolve
Incorporating the Activities and Services of a third-party application into your own is incredibly powerful; however, there is no guarantee that any particular application will be installed on a device, or even that any installed application is capable of handling your request.
As a result, it’s good practice to check if your implicit Intent will resolve to an Activity before passing it to
startActivity
.
You can use the Package Manager to query which, if any, Activity will be launched in response to a specific Intent by calling
resolveActivity
on your Intent object, passing in the Package Manager, as shown in
Listing 6-2
.
If no Activity is found, you can choose to either disable the related functionality (and associated user interface controls) or direct users to an appropriate application in the Google Play Store. Note that Google Play is not available on all devices, so it’s good practice to check for that as well.
Returning Results from Activities
An Activity started via
startActivity
is independent of the calling Activity, and will not provide any feedback when it closes.
Where feedback is required, you can start an Activity as a sub-Activity that can pass results back to its parent. Sub-Activities are really just Activities opened in a different way; as such, you must still register them in the application manifest in the same way as any other Activity.
Any manifest-registered Activity can be opened as a sub-Activity, including those provided by the system or third-party applications.
When a sub-Activity is finished, it triggers the
onActivityResult
event handler within the calling parent Activity. Sub-Activities are particularly useful in situations where one Activity is providing data input for another, such as a user filling in a form or selecting an item from a list.
Launching Sub-Activities
The
startActivityForResult
method works much like
startActivity
, but with one important difference. In addition to passing in the explicit or implicit Intent used to determine which Activity to launch, you also pass in a
request code
. This value will later be used to uniquely identify the sub-Activity that has returned a result.
Listing 6-3 shows the skeleton code for launching a sub-Activity explicitly.
Like regular Activities, you can start sub-Activities implicitly or explicitly. Listing 6-4 uses an implicit Intent to launch a new sub-Activity to pick a contact.
Returning Results from a Sub-Activity
When your sub-Activity is ready to return, call
setResult
before
finish
to return a result to the calling Activity.
The
setResult
method takes two parameters: the result code and the result data itself, represented as an Intent.
The result code indicates the success of running the sub-Activity—generally, either
Activity.RESULT_OK
or
Activity.RESULT_CANCELED
. In some circumstances, where neither OK nor canceled sufficiently or accurately describes the result, you’ll want to use your own response codes to handle application-specific choices;
setResult
supports any integer value.
The result Intent often includes a data URI that points to a piece of content (such as the selected contact, phone number, or media file) and a collection of extras used to return additional information.
Listing 6-5
, taken from a sub-Activity’s
onCreate
method, shows how OK and Cancel buttons might return different results to the calling Activity.
If the Activity is closed by the user pressing the hardware back key, or
finish
is called without a prior call to
setResult
, the result code will be set to
RESULT_CANCELED
and the result Intent set to
null
.
Handling Sub-Activity Results
When a sub-Activity closes, the
onActivityResult
event handler is fired within the calling Activity. Override this method to handle the results returned by sub-Activities.
The
onActivityResult
handler receives a number of parameters:
- Request code —The request code that was used to launch the returning sub-Activity.
-
Result code
—The result code set by the sub-Activity to indicate its result. It can be any integer value, but typically will be either
Activity.RESULT_OKorActivity.RESULT_CANCELED. - Data —An Intent used to package returned data. Depending on the purpose of the sub-Activity, it may include a URI that represents a selected piece of content. The sub-Activity can also return information as extras within the returned data Intent.
Listing 6-6
shows the skeleton code for implementing the
onActivityResult
event handler within an Activity.
Using Platform-Native Actions to Launch Activities
Applications distributed as part of the Android platform also use Intents to launch Activities and sub-Activities.
The following (non-comprehensive) list shows some of the native actions available as static string constants in the
Intent
class. When creating implicit Intents, you can use these actions, known as
Activity Intents
, to start Activities and sub-Activities within your own applications.
-
ACTION_DELETE—Starts an Activity that lets you delete the data specified at the Intent’s data URI. -
ACTION_DIAL—Brings up a dialer application with the number to dial pre-populated from the Intent’s data URI. By default, this is handled by the native Android phone dialer. The dialer can normalize most number schemas—for example,tel:555-1234andtel:(212) 555 1212are both valid numbers. -
ACTION_EDIT—Requests an Activity that can edit the data at the Intent’s data URI. -
ACTION_INSERT—Opens an Activity capable of inserting new items into the Cursor specified in the Intent’s data URI. When called as a sub-Activity, it should return a URI to the newly inserted item. -
ACTION_PICK—Launches a sub-Activity that lets you pick an item from the Content Provider specified by the Intent’s data URI. When closed, it should return a URI to the item that was picked. The Activity launched depends on the data being picked—for example, passingcontent://contacts/peoplewill invoke the native contacts list. -
ACTION_SEARCH—Typically used to launch a specific search Activity. When it’s fired without a specific Activity, the user will be prompted to select from all applications that support search. Supply the search term as a string in the Intent’s extras usingSearchManager.QUERYas the key. -
ACTION_SENDTO—Launches an Activity to send data to the contact specified by the Intent’s data URI. -
ACTION_SEND—Launches an Activity that sends the data specified in the Intent. The recipient contact needs to be selected by the resolved Activity. UsesetTypeto set the MIME type of the transmitted data. The data itself should be stored as an extra by means of the keyEXTRA_TEXTorEXTRA_STREAM, depending on the type. In the case of email, the native Android applications will also accept extras via theEXTRA_EMAIL,EXTRA_CC,EXTRA_BCC, andEXTRA_SUBJECTkeys. Use theACTION_SENDaction only to send data to a remote recipient (not to another application on the device). -
ACTION_VIEW—This is the most common generic action. View asks that the data supplied in the Intent’s data URI be viewed in the most reasonable manner. Different applications will handle view requests depending on the URI schema of the data supplied. Nativelyhttp:addresses will open in the browser;tel:addresses will open the dialer to call the number;geo:addresses will be displayed in the Google Maps application; and contact content will be displayed in the Contact Manager. -
ACTION_WEB_SEARCH—Opens the Browser to perform a web search based on the query supplied using theSearchManager.QUERYkey.
CREATING INTENT FILTERS TO RECEIVE IMPLICIT INTENTS
Where an Activity Intent is a request for an action to be performed on a set of data, an Intent Filter is the corresponding declaration that an Activity is capable of performing an action on a type of data.
As you see later in this chapter, Intent Filters are also used by Broadcast Receivers to indicate the broadcast actions they wish to receive.
Defining an Intent Filter
Using Intent Filters, Activities can declare the actions and data they are able to support.
To register an Activity as a potential Intent handler, add an
intent-filter
tag to its manifest node using the following tags (and associated attributes):
-
action—Uses theandroid:nameattribute to specify the name of the action that can be performed. Each Intent Filter must have at least one action tag, and actions should be unique strings that are self-describing. You can define your own actions (best practice is to use a naming system based on the Java package naming conventions) or use one of the system actions provided by Android. -
category—Uses theandroid:nameattribute to specify under which circumstances the action can be performed. Each Intent Filter tag can include multiple category tags. You can specify your own categories or use one of the standard values provided by Android. -
data—The data tag enables you to specify which data types your component can act on; you can include several data tags as appropriate. You can use any combination of the following attributes to specify the data your component supports:-
android:host—Specifies a valid hostname (for example,google.com). -
android:mimetype—Specifies the type of data your component is capable of handling. For example,vnd.android.cursor.dir/*would match any Android cursor. -
android:path—Specifies valid path values for the URI (for example,/transport/boats/). -
android:port—Specifies valid ports for the specified host. -
android:scheme—Requires a particular scheme (for example,contentorhttp).
-
The following snippet shows an Intent Filter for an Activity that can perform the
SHOW_DAMAGE
action as either a primary or an alternative action based on its Earthquake cursor mime type:
<intent-filter><actionandroid:name="com.paad.earthquake.intent.action.SHOW_DAMAGE"/><categoryandroid:name="android.intent.category.DEFAULT"/><categoryandroid:name="android.intent.category.SELECTED_ALTERNATIVE"/><data android:mimeType="vnd.android.cursor.item/vnd.com.professionalandroid.provider.earthquake"/></intent-filter>
You may have noticed that clicking a link to a YouTube video or Google Maps location on an Android device prompts you to use YouTube or Google Maps, respectively, rather than a web browser. This is achieved by specifying the scheme, host, and path attributes within the data tag of an Intent Filter, as shown in
Listing 6-7
. In this example, any link of the form that begins
http://blog.radioactiveyak.com
can be serviced by this Activity.
Note that you must include the browsable category in order for links clicked within the browser to trigger this behavior.
How Android Resolves Intents Using Intent Filters
The process of deciding which Activity to start when an implicit Intent is passed in to
startActivity
is called
Intent resolution
. The aim of intent resolution is to find the best Intent Filter match possible by means of the following process:
- Android puts together a list of all the Intent Filters available from the installed packages.
-
Intent Filters that do not match the action
or
category associated with the Intent being resolved are removed from the list.
- Action matches are made only if the Intent Filter includes the specified action. An Intent Filter will fail the action match check if none of its actions matches the one specified by the Intent.
- For category matching, Intent Filters must include all the categories defined in the resolving Intent, but can include additional categories not included in the Intent. An Intent Filter with no categories specified matches only Intents with no categories.
-
Each part of the Intent’s data URI is compared to the Intent Filter’s
datatag. If the Intent Filter specifies a scheme, host/authority, path, or MIME type, these values are compared to the Intent’s URI. Any mismatch will remove the Intent Filter from the list. Specifying no data values in an Intent Filter will result in a match with all Intent data values.- The MIME type is the data type of the data being matched. When matching data types, you can use wildcards to match subtypes. If the Intent Filter specifies a data type, it must match the Intent; specifying no data types results in a match with all of them.
-
The scheme is the “protocol” part of the URI (for example,
http:,mailto:, ortel:). -
The hostname or
data authority
is the section of the URI between the scheme and the path (for example,
developer.android.com). For a hostname to match, the Intent Filter’s scheme must also match. If no scheme is specified the hostname is ignored. -
The data path is what comes after the authority (for example,
/training). A path can match only if the scheme and hostname parts of the data tag also match.
- When you implicitly start an Activity, if more than one component is resolved from this process, all the matching possibilities are offered to the user.
Native Android application components are part of the Intent-resolution process in exactly the same way as third-party applications. They do not have a higher priority and can be completely replaced with new Activities that declare Intent Filters that service the same actions.
As a result, when defining an Intent Filter indicating your application can view URL links, the browser will still be offered (in addition to your application.)
Finding and Using Intents Within an Activity
When an Activity is started through an implicit Intent, it needs to find the action it’s been asked to perform, and the data it needs to perform it on.
To find the Intent used to start the Activity, call
getIntent
, as shown in
Listing 6-8
.
Use the
getData
and
getAction
methods to find the data and action, respectively, associated with the Intent. Use the type-safe
get<type>Extra
methods to extract additional information stored in its extras Bundle.
The
getIntent
method will always return the initial Intent used to create the Activity; in some circumstances your Activity may continue to receive Intents after it has been launched.
For example, if your application moves to the background, the user may click a Notification to return the running application to the foreground, resulting in a new Intent being delivered to the relevant Activity. If your Activity is configured such that when re-launched, instead of a new instance being created, the existing instance is moved to the top of the Activity stack a new Intent is delivered via the
onNewIntent
handler.
You can call
setIntent
to update the Intent returned when you call
getIntent
:
@Overridepublic void onNewIntent(Intent newIntent) {// TODO React to the new IntentsetIntent(newIntent);super.onNewIntent(newIntent);}
Selecting a Star Sign Example
In this example, you create a new Activity that services
ACTION_PICK
for a list of star signs. The picker application displays a list of star signs, and lets the user select one before closing and returning the selected sign to the calling Activity.
-
Create a new
StarSignPicker
project that includes a
StarSignPickerActivity based on the Empty Activity template and using the App Compatibility library. Add anEXTRA_SIGN_NAMEstring constant that will be used to store an extra in our return Intent to indicate the star sign selected by user:public class StarSignPicker extends AppCompatActivity {public static final String EXTRA_SIGN_NAME = "SIGN_NAME";@Overrideprotected void onCreate(Bundle savedInstanceState) {super.onCreate(savedInstanceState);setContentView(R.layout.activity_star_sign_picker);}} -
Modify the
activity_star_sign_picker.xmllayout resource to include a singleRecyclerViewcontrol. This control will be used to display the contacts:<?xml version="1.0" encoding="utf-8"?><android.support.v7.widget.RecyclerViewxmlns_android="http://schemas.android.com/apk/res/android"xmlns_app="http://schemas.android.com/apk/res-auto"android:id="@+id/recycler_view"android:layout_width="match_parent"android:layout_height="match_parent"android:orientation="vertical"app:layoutManager="LinearLayoutManager"/> -
Create a new
list_item_layout.xmllayout resource based on aFrameLayoutthat includes a singleTextViewcontrol. This control will be used to display each star sign in the Recycler View:<?xml version="1.0" encoding="utf-8"?><FrameLayout xmlns_android="http://schemas.android.com/apk/res/android"android:layout_width="match_parent"android:layout_height="wrap_content"><TextViewandroid:id="@+id/itemTextView"android:layout_width="match_parent"android:layout_height="wrap_content"android:layout_margin="8dp"android:textAppearance="?attr/textAppearanceListItem"/></FrameLayout> -
Add the Recycler View library to your app module Gradle build file:
dependencies {[… Existing dependencies …]implementation 'com.android.support:recyclerview-v7:27.1.1'} -
Create a new
StarSignPickerAdapterclass that extendsRecyclerView.Adapter, and which contains a string array of star signs:public classStarSignPickerAdapterextends RecyclerView.Adapter<StarSignPickerAdapter.ViewHolder> {private String[] mStarSigns = {"Aries", "Taurus", "Gemini", "Cancer","Leo", "Virgo", "Libra", "Scorpio","Sagittarius", "Capricorn", "Aquarius","Pisces" };publicStarSignPickerAdapter() {}@Overridepublic int getItemCount() {return mStarSigns == null ? 0 : mStarSigns.length;}}-
5.1 Within the Adapter created in Step 5, create a new
ViewHolderclass that extendsRecyclerView.ViewHolderand implements anOnClickListener. It should expose aTextViewand anOnClickListener:public static class ViewHolder extends RecyclerView.ViewHolderimplements View.OnClickListener {public TextView textView;public View.OnClickListener mListener;public ViewHolder(View v, View.OnClickListener listener) {super(v);mListener = listener;textView = v.findViewById(R.id.itemTextView);v.setOnClickListener(this);}@Overridepublic void onClick(View v) {if (mListener != null)mListener.onClick(v);}} -
5.2 Still within the Adapter, override
onCreateViewHolderusing theViewHoldercreated in Step 5.1, inflating thelist_item_layoutcreated in Step 3:@Overridepublic StarSignPickerAdapter.ViewHolderonCreateViewHolder(ViewGroup parent, int viewType) {// Create the new ViewView v = LayoutInflater.from(parent.getContext()).inflate(R.layout.list_item_layout, parent, false);return new ViewHolder(v, null);} -
5.3 Create a new Interface that contains an
onItemClickedmethod that takes a String argument; add asetOnAdapterItemClickmethod to the Adapter to store a reference to this event handler. We will use this handler notify the parent Activity which list item has been selected:public interface IAdapterItemClick {void onItemClicked(String selectedItem);}IAdapterItemClick mAdapterItemClickListener;public void setOnAdapterItemClick(IAdapterItemClick adapterItemClickHandler) {mAdapterItemClickListener = adapterItemClickHandler;} -
5.4 Finally, override the Adapter’s
onBindViewHoldermethod, assigning a star sign to the Text View defined in our View Holder. Take this opportunity to implement theonClickListenerfor each View Holder, which will call theIAdapterItemClickhandler from Step 5.3 if an item in our list is clicked:@Overridepublic void onBindViewHolder(ViewHolder holder, final int position) {holder.textView.setText(mStarSigns[position]);holder.mListener = new View.OnClickListener() {@Overridepublic void onClick(View v) {if (mAdapterItemClickListener != null)mAdapterItemClickListener.onItemClicked(mStarSigns[position]);}};}
-
5.1 Within the Adapter created in Step 5, create a new
-
Return to the
StarSignPickerActivity and modify theonCreatemethod. It currently begins like this:@Overrideprotected void onCreate(Bundle savedInstanceState) {super.onCreate(savedInstanceState);setContentView(R.layout.activity_starsign_picker);-
6.1 Now, still within
onCreate, instantiate theStarSignPickerAdapteryou created in Step 5:StarSignPickerAdapteradapter = newStarSignPickerAdapter(); -
6.2 Create a new
IAdapterItemClickhandler and assign it to the Adapter using thesetOnAdapterItemClickmethod. When an item is clicked, create a new result Intent and use theEXTRA_SIGN_NAMEstring to assign an extra that contains the selected star sign. Assign the new Intent as this Activity’s result usingsetResultand callfinishto close the Activity and return to the caller:adapter.setOnAdapterItemClick(new StarSignPickerAdapter.IAdapterItemClick() {@Overridepublic void onItemClicked(String selectedItem) {// Construct the result URI.Intent outData = new Intent();outData.putExtra(EXTRA_SIGN_NAME, selectedItem);setResult(Activity.RESULT_OK, outData);finish();}}); -
6.3 Assign the adapter to the Recycler View using
setAdapter:RecyclerView rv = findViewById(R.id.recycler_view);rv.setAdapter(adapter); -
6.4 Close off the
onCreatemethod:}
-
6.1 Now, still within
-
Modify the application manifest and replace the
intent-filtertag of the Activity to add support for theACTION_PICKaction on star signs:<activity android:name=".StarSignPicker"><intent-filter><action android:name="android.intent.action.PICK" /><category android:name="android.intent.category.DEFAULT"/><data android:scheme="starsigns" /></intent-filter></activity> -
This completes the sub-Activity. To test it, create a new test harness
StarSignPickerTesterlauncher Activity with anactivity_star_sign_picker_tester.xmllayout file. Update the layout to include aTextViewto display the selected star sign, and aButtonto start the sub-Activity:<?xml version="1.0" encoding="utf-8"?><LinearLayout xmlns_android="http://schemas.android.com/apk/res/android"android:orientation="vertical"android:layout_width="match_parent"android:layout_height="match_parent"><TextViewandroid:id="@+id/selected_starsign_textview"android:layout_width="match_parent"android:layout_height="wrap_content"android:textAppearance="?attr/textAppearanceListItem"android:layout_margin="8dp"/><Buttonandroid:id="@+id/pick_starsign_button"android:layout_width="match_parent"android:layout_height="wrap_content"android:text="Pick Star Sign"/></LinearLayout> -
Override the
onCreatemethod of theStarSignPickerTesterto add a click listener to the Button so that it implicitly starts a new sub-Activity by specifying theACTION_PICKandstarsignas the data scheme:public class StarSignPickerTester extends AppCompatActivity {public static final int PICK_STARSIGN = 1;@Overridepublic void onCreate(Bundle savedInstanceState) {super.onCreate(savedInstanceState);setContentView(R.layout.activity_star_sign_picker_tester);Button button = findViewById(R.id.pick_starsign_button);button.setOnClickListener(new View.OnClickListener() {@Overridepublic void onClick(View _view) {Intent intent = new Intent(Intent.ACTION_PICK,Uri.parse("starsigns://"));startActivityForResult(intent, PICK_STARSIGN);}1});}} -
When the sub-Activity returns, use the result to populate the Text View with the selected star sign:
@Overridepublic void onActivityResult(int reqCode, int resCode, Intent data) {super.onActivityResult(reqCode, resCode, data);switch(reqCode) {case (PICK_STARSIGN) : {if (resCode == Activity.RESULT_OK) {String selectedSign =data.getStringExtra(StarSignPicker.EXTRA_SIGN_NAME);TextView tv = findViewById(R.id.selected_starsign_textview);tv.setText(selectedSign);}break;}default: break;}}
When your test Activity is running, press the “pick star sign” button. The star sign picker Activity should appear, as shown in Figure 6-1 .

After you select
Figure 6-2 a star sign, the parent Activity should return to the foreground with the selection displayed (see Figure 6-2 ).
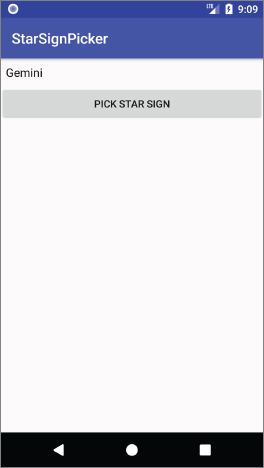
Using Intent Filters for Plug-Ins and Extensibility
Having used Intent Filters to declare the actions your Activities can perform on different types of data, it stands to reason that applications can also query to find which actions are available to be performed on a particular piece of data.
Android provides a plug-in model that lets your applications take advantage of functionality, provided anonymously from your own or third-party application components you haven’t yet conceived of, without your having to modify or recompile your projects.
Supplying Anonymous Actions to Applications
To use this mechanism to make your Activity’s actions available anonymously for existing applications, publish them using
intent-filter
tags within their manifest nodes, as described earlier.
The Intent Filter describes the
action
it performs and the
data
upon which it can be performed. The latter will be used during the Intent-resolution process to determine when this action should be available. The
category
tag must be either
ALTERNATIVE
or
SELECTED_ALTERNATIVE
, or both. The
android:label
attribute should be a human-readable label that describes the action.
Listing 6-9 shows an example of an Intent Filter used to advertise an Activity’s capability to nuke Moon bases from orbit.
Discovering New Actions from Third-Party Intent Receivers
Using the Package Manager, you can create an Intent that specifies a type of data and a category of action, and have the system return a list of Activities capable of performing an action on that data.
The elegance of this concept is best explained by an example. If the data your Activity displays is a list of places, you might include functionality to View them on a map or “Show directions to” each. Jump a few months ahead and you’ve created an application that interfaces with your car, allowing your phone to set the destination for self-driving. Thanks to the runtime menu generation, when a new Intent Filter—with a
DRIVE_CAR
action—is included within the new Activity’s node, Android will resolve this new action and make it available to your earlier application.
This provides you with the ability to retrofit functionality to your application when you create new components capable of performing actions on a given type of data.
The Intent you create will be used to resolve components with Intent Filters that supply actions for the data you specify. The Intent is being used to find actions, so don’t assign it one; it should specify only the data to perform actions on. You should also specify the category of the action, either
CATEGORY_ALTERNATIVE
or
CATEGORY_SELECTED_ALTERNATIVE
.
The skeleton code for creating an Intent for menu-action resolution is shown here:
Intent intent = new Intent();intent.setData(MyProvider.CONTENT_URI);intent.addCategory(Intent.CATEGORY_ALTERNATIVE);
Pass this Intent into the Package Manager method
queryIntentActivityOptions
, specifying any options flags.
Listing 6-10 shows how to generate a list of actions to make available within your application.
Incorporating Anonymous Actions as Menu Items
The most common way to incorporate actions from third-party applications is to include them within your Menu Items of your App Bar. Menus and the App Bar are described in more detail in Chapter 13 , “Implementing a Modern Android User Experience.”
The
addIntentOptions
method, available from the
Menu
class, lets you specify an Intent that describes the data acted upon within your Activity, as described previously; however, rather than simply returning a list of possible actions, a new Menu Item will be created for each, with the text populated from the matching Intent Filters’ labels.
To add Menu Items to your Menus dynamically at run time, use the
addIntentOptions
method on the
Menu
object in question: Pass in an Intent that specifies the data for which you want to provide actions. Generally, this will be handled within your Activities’ or Fragments’
onCreateOptionsMenu
handlers.
As in the previous section, the Intent you create will be used to resolve Activities with Intent Filters that can supply actions for the data you specify. The Intent is being used to find actions, so don’t assign it one; it should specify only the data to perform actions on. You should also specify the category of the action, either
CATEGORY_ALTERNATIVE
or
CATEGORY_SELECTED_ALTERNATIVE
.
The skeleton code for creating an Intent for menu-action resolution is shown here:
Intent intent = new Intent();intent.setData(MyProvider.CONTENT_URI);intent.addCategory(Intent.CATEGORY_ALTERNATIVE);
Pass this Intent in to
addIntentOptions
on the Menu you want to populate, as well as any options flags, the name of the calling class, the Menu group to use, and the Menu ID values. You can also specify an array of Intents you’d like to use to create additional Menu Items.
Listing 6-11 gives an idea of how to dynamically populate an Activity Menu.
INTRODUCING LINKIFY
Linkify
is a helper class that creates hyperlinks within Text View (and Text View-derived) classes through RegEx pattern matching. The hyperlinks work by creating new Intents that are used to start a new Activity when the link is clicked.
Text that matches a specified RegEx pattern will be converted into a clickable hyperlink that implicitly fires
startActivity(new Intent(Intent.ACTION_VIEW, uri))
, using the matched text as the target URI.
You can specify any string pattern to be treated as a clickable link; for convenience, the
Linkify
class provides presets for common content types.
Native Linkify Link Types
The
Linkify
class has presets that can detect and linkify web URLs, email addresses, map addresses, and phone numbers. To apply a preset, use the static
Linkify.addLinks
method, passing in a View to Linkify and a bitmask of one or more of the following self-describing
Linkify
class constants:
WEB_URLS
,
EMAIL_ADDRESSES
,
PHONE_NUMBERS
,
MAP_ADDRESSES
, and
ALL
.
TextView textView = findViewById(R.id.myTextView);Linkify.addLinks(textView, Linkify.WEB_URLS|Linkify.EMAIL_ADDRESSES);
You can also linkify Views directly within a layout using the
android:autoLink
attribute. It supports one or more of the following values:
none
,
web
,
email
,
phone
,
map
, and
all
.
<TextViewandroid:layout_width="match_parent"android:layout_height="match_parent"android:text="@string/linkify_me"android:autoLink="phone|email"/>
Creating Custom Link Strings
To linkify your own data, you need to define your own linkify strings. Do this by creating a new RegEx pattern that matches the text you want to display as hyperlinks.
As with the native types, you can linkify the target Text View by calling
Linkify.addLinks
; however, rather than passing in one of the preset constants, pass in your RegEx pattern. You can also pass in a prefix that will be prepended to the target URI when a link is clicked.
Listing 6-12 shows a View being linkified to support earthquake data provided by an Android Content Provider. Note that rather than include the entire schema, the specified RegEx matches any text that starts with “quake” and is followed by a number, with optional whitespace. The full schema is then prepended to the URI before the Intent is fired.
Note that in this example, including whitespace between “quake” and a number will return a match, but the resulting URI won’t be valid. You can implement and specify one or both of a
TransformFilter
and
MatchFilter
interface to resolve this problem. These interfaces, defined in detail in the following section, offer additional control over the target URI structure and the definition of matching strings, and are used as in the following skeleton code:
Linkify.addLinks(myTextView, p, baseUri,new MyMatchFilter(), new MyTransformFilter());
Using the Match Filter
To add additional conditions to RegEx pattern matches, implement the
acceptMatch
method in a Match Filter. When a potential match is found,
acceptMatch
is triggered, with the match start and end index (along with the full text being searched) passed in as parameters.
Listing 6-13
shows a
MatchFilter
implementation that cancels any match immediately preceded by an exclamation mark.
Using the Transform Filter
The Transform Filter lets you modify the implicit URI generated by matching link text. Decoupling the link text from the target URI gives you more freedom in how you display data strings to your users.
To use the Transform Filter, implement the
transformUrl
method in your Transform Filter. When Linkify finds a successful match, it calls
transformUrl
, passing in the RegEx pattern used and the matched text string (before the base URI is prepended). You can modify the matched string and return it such that it can be appended to the base string as the data for a View Intent.
As shown in
Listing 6-14
, the
TransformFilter
implementation transforms the matched text into a lowercase URI, having also removed any whitespace characters.
USING INTENTS TO BROADCAST EVENTS
So far, we’ve used Intents to start new application components, but you can also use Intents to broadcast messages
between
components using the
sendBroadcast
method.
As a system-level message-passing mechanism, Intents are capable of sending structured messages across process boundaries. As a result, you can implement Broadcast Receivers to listen for, and respond to, Broadcast Intents within your application for your own broadcasts as well as those from other apps or the system itself.
Android broadcasts Intents extensively, to announce system events, such as changes in network connectivity, docking state, and incoming calls.
Broadcasting Events with Intents
Within your application, construct the Intent you want to broadcast and use the
sendBroadcast
method to send it.
As with Intents used to start Activities, you can broadcast either an explicit or implicit Intent. Explicit Intents indicate the class of the Broadcast Receiver you want to trigger, whereas implicit Intents specify the action, data, and category of your Intent in a way that lets potential Broadcast Receivers accurately determine their interest.
Implicit Intent broadcasts are particularly useful where you have multiple Receivers that are potential targets for a broadcast.
For implicit Intents, the action string is used to identify the type of event being broadcast, so it should be a unique string that identifies the event type. By convention, action strings are constructed using the same form as Java package names:
public static final String NEW_LIFEFORM_ACTION ="com.professionalandroid.alien.action.NEW_LIFEFORM_ACTION";
If you want to include data within the Intent, you can specify a URI using the Intent’s
data
property. You can also include extras to add additional primitive values. Considered in terms of an event-driven paradigm, the extras equate to optional parameters passed into an event handler.
Listing 6-15 shows the basic creation of explicit and implicit broadcast Intents, the latter using the action defined previously with additional event information stored as extras.
The explicit Intent will be received only by the
MyBroadcastReceiver
class indicated, whereas the implicit Intent could potentially be received by multiple Receivers.
Listening for Intent Broadcasts with Broadcast Receivers
Broadcast Receivers (commonly referred to as Receivers ) are used to listen for broadcast Intents. For a Receiver to receive broadcasts, it must be registered, either in code or within the application manifest—the latter case is referred to as a manifest Receiver .
To create a new Broadcast Receiver, extend the
BroadcastReceiver
class and override the
onReceive
event handler:
import android.content.BroadcastReceiver;import android.content.Context;import android.content.Intent;public class MyBroadcastReceiver extends BroadcastReceiver {@Overridepublic void onReceive(Context context, Intent intent) {//TODO: React to the Intent received.}}
When a broadcast Intent is started, the
onReceive
method will be executed on the main application Thread. Any non-trivial work should be performed asynchronously after calling
goAsync
—as described in
Chapter 11
, “Working in the Background.”
In any case, all processing within the Broadcast Receiver must complete within 10 seconds or the system will consider it unresponsive, and attempt to terminate it.
To avoid this, Broadcast Receivers will typically schedule a background job or launch a bound Service to initiate potentially long-running tasks, or it can update the containing parent Activity UI or trigger a Notification to notify the user of received changes.
Listing 6-16 shows how to implement a Broadcast Receiver that extracts the data and several extras from the broadcast Intent and uses them to trigger a Notification. In the following sections you learn how to register it in code or in your application manifest.
Registering Broadcast Receivers in Code
Broadcast Receivers that respond to broadcasts sent from your own application, and those that alter the UI of an Activity, are typically registered dynamically in code. A Receiver registered programmatically can respond to broadcast Intents only when the application component it is registered within is running.
This is useful when the Receiver behavior is tightly bound to a particular component—for example, one that updates the UI elements of an Activity. In this case, it’s good practice to register the Receiver within the
onStart
handler and unregister it during
onStop
.
Listing 6-17
shows how to register and unregister a Broadcast Receiver in code using the
IntentFilter
class that defines an action associated with an implicit broadcast Intent the Receiver should respond to.
Registering Broadcast Receivers in Your Application Manifest
Broadcast Receivers registered statically in your application manifest are always active, and will receive Broadcast Intents even when your application has been killed or hasn’t been started; your application will be started automatically when a matching Intent is broadcast.
To include a Broadcast Receiver in the application manifest, add a
receiver
tag within the
application
node, specifying the class name of the Broadcast Receiver to register:
<receiver android:name=".LifeformDetectedReceiver"/>
Prior to Android 8.0 Oreo (API Level 26), it was possible for manifest Receivers to include an intent-filter tag that specified an action to support listening for implicit broadcasts:
<receiver android:name=".LifeformDetectedReceiver"><intent-filter><action android:name="com.professionalandroid.alien.action.NEW_LIFEFORM_ACTION"/></intent-filter></receiver>
Manifest Receivers let you create event-driven applications that will respond to broadcast events even after your application has been closed or killed—however, it also introduces associated resource use risks. If an Intent is broadcast frequently it could cause your application to wake repeatedly, potentially resulting in significant battery drain.
To minimize this risk, Android 8.0 no longer supports manifest Receivers for arbitrary implicit Intents.
Apps can continue to register for explicit broadcasts in their manifests, and you can register Receivers at runtime for any broadcast, both implicit or explicit—but only a limited number of broadcast system actions can be used to register an implicit Intent within your manifest. The supported actions are described later in this chapter in the section, “Monitoring Device State Changes through Broadcast Intents.”
Managing Manifest Receivers at Run Time
Using the Package Manager, you can enable and disable any of your application’s manifest Receivers at run time using the
setComponentEnabledSetting
method. You can use this technique to enable or disable any application component (including Activities and Services), but it is particularly useful for manifest Receivers.
To minimize the potential battery drain caused by your application, it’s good practice to disable manifest Receivers that listen for system events when your application doesn’t need to respond to those events.
Listing 6-18 shows how to enable and disable a manifest Receiver at run time.
Monitoring Device State Changes Through Broadcast Intents
Many of the system Services broadcast Intents to signal changes in device state. You can monitor these broadcasts to add functionality to your own projects based on events such as the completion of device booting, time-zone changes, changes in dock state, and battery status.
A comprehensive list of the broadcast actions used and transmitted natively by Android is available at
developer.android.com/reference/android/content/Intent.html
. Due to the restrictions on registering implicit manifest Broadcast Receivers introduced in Android 8.0, only a subset of the system broadcast Intents can be registered in the manifest. You can find the list of implicit broadcast exceptions at
developer.android.com/guide/components/broadcast-exceptions.html
.
The following sections examine how to create Intent Filters to register Broadcast Receivers that can react to some of these system events, and how to extract the device state information accordingly.
Listening for Docking Changes
Some Android devices can be docked in a car dock or desk dock, where the desk dock can be analog (low-end) or digital (high-end).
By registering a Receiver to listen for the
Intent.ACTION_DOCK_EVENT
(
android.intent.action.ACTION_DOCK_EVENT
), you can determine the docking status and type of dock on devices that support docks:
<action android:name="android.intent.action.ACTION_DOCK_EVENT"/>
The dock event Broadcast Intent is sticky, meaning you will receive the current dock status when calling
registerReciver
, even if no receiver is specified.
Listing 6-19
shows how to extract the current docking status from the Intent returned by calling
registerReceiver
, using the
Intent.ACTION_DOCK_EVENT
Intent. Note that if the device doesn’t include support for docking, the call to
registerReceiver
will return null.
Listening for Battery State and Data Connectivity Changes
Prior to the introduction of the Job Scheduler, the most common reason for listening for battery status and data connectivity changes was to delay large downloads or similarly time-consuming, battery draining processes until the device was connected to an appropriate data network and/or charging.
Chapter 11 , “Working in the Background,” describes how to use the Job Scheduler and Firebase Job Dispatcher to schedule jobs using criteria including network connectivity and battery charging state, as a more efficient and comprehensive solution than manually monitoring these state changes.
To monitor changes in the battery level and charging status within an Activity, you can register a Receiver using an Intent Filter that listens for the
Intent.ACTION_BATTERY_CHANGED
broadcast by the Battery Manager.
Listing 6-20 shows how to extract the current battery charge and charging status from the sticky battery status change Intent.
Note that you can’t register the battery changed action within a manifest Receiver; however, you can monitor connection and disconnection from a power source and a low battery level using the following action strings, each prefixed with
android.intent.action
:
-
ACTION_BATTERY_LOW -
ACTION_BATTERY_OKAY -
ACTION_POWER_CONNECTED -
ACTION_POWER_DISCONNECTED
Changes to the battery level and status occur regularly, so it’s generally considered good practice not to register receivers to listen for these broadcasts unless your application provides functionality specifically related to these changes.
To monitor changes in network connectivity, register a Broadcast Receiver within your application to listen for the
ConnectivityManager.CONNECTIVITY_ACTION
action (apps targeting Android 7.0 Nougat (API Level 24) and higher will not receive this broadcast if they declare the Receiver in their manifest).
The connectivity change broadcast isn’t sticky and doesn’t contain any additional information regarding the change. To extract details on the current connectivity status, you need to use the Connectivity Manager, as shown in Listing 6-21 .
INTRODUCING THE LOCAL BROADCAST MANAGER
The Local Broadcast Manager was introduced to the Android Support Library to simplify the process of registering for, sending, and receiving Intents broadcast only between components within your application.
Because of the reduced broadcast scope, using the Local Broadcast Manager is more efficient than sending a global broadcast. It also ensures that the Intent you broadcast cannot be received by any other applications, ensuring that there is no risk of leaking private or sensitive data.
Similarly, other applications can’t transmit broadcasts to your Receivers, negating the risk of these Receivers becoming vectors for security exploits. Note that the Broadcast Receiver specified can also be used to handle global Intent broadcasts.
To use the Local Broadcast Manager, you must first include the Android Support Library in your application, as described in Chapter 2 .
Use the
LocalBroadcastManager.getInstance
method to return an instance of the Local Broadcast Manager:
LocalBroadcastManager lbm = LocalBroadcastManager.getInstance(this);
To register a local Broadcast Receiver, use the Local Broadcast Manager’s
registerReceiver
method, much as you would register a global receiver, passing in a Broadcast Receiver and an Intent Filter as shown in
Listing 6-22
.
To transmit a local Broadcast Intent, use the Local Broadcast Manager’s
sendBroadcast
method, passing in the Intent to broadcast:
lbm.sendBroadcast(new Intent(LOCAL_ACTION));
The Local Broadcast Manager also includes a
sendBroadcastSync
method that operates synchronously, blocking until each registered Receiver has processed the broadcast Intent.
INTRODUCING PENDING INTENTS
The
PendingIntent
class provides a mechanism for creating Intents that can be fired on your application’s behalf by the system, or another application, at a later time.
A Pending Intent is commonly used to package Intents that will be fired in response to a future event, such as when a user touches a Notification.
The
PendingIntent
class offers static methods to construct Pending Intents used to start an Activity, to start background or foreground Services, or to broadcast implicit or explicit Intents:
int requestCode = 0;int flags = 0;// Start an ActivityIntent startActivityIntent = new Intent(this, MyActivity.class);PendingIntent.getActivity(this, requestCode,startActivityIntent, flags);// Start a ServiceIntent startServiceIntent = new Intent(this, MyService.class);PendingIntent.getService(this, requestCode,startServiceIntent, flags);// Start a foreground Service (API Level 26 or higher)Intent startForegroundServiceIntent = new Intent(this, MyFGService.class);PendingIntent.getForegroundService(this, requestCode,startForegroundServiceIntent flags);// Broadcast an Intent to an explicit Broadcast ReceiverIntent broadcastExplicitIntent = new Intent(this, MyReceiver.class);PendingIntent.getBroadcast(this, requestCode,broadcastExplicitIntent, flags);// Broadcast an implicit Intent (API Level 25 or lower)Intent broadcastImplicitIntent = new Intent(NEW_LIFEFORM_ACTION);PendingIntent.getBroadcast(this, requestCode,broadcastImplicitIntent, flags);
The
PendingIntent
class includes static constants that can be used to specify flags to update or cancel any existing Pending Intent that matches your specified action, as well as to specify if this Intent is to be fired only once. The various options are examined in more detail when Notifications are introduced in
Chapter 11
.
Because Pending Intents are triggered outside the scope of your application, it’s important to consider the user’s context when these Intents are likely to be executed; an Intent that starts a new Activity should be used only in response to direct user action, such as selecting a notification.
To improve battery life, Android 8.0 Oreo (API Level 26) introduced strict limits on application background execution that affect Pending Intents.
Since Android 8.0, apps can’t start new background Services if the app itself is idle in the background. As a result, a Pending Intent created using the
startService
method can’t start a new Service if the app is in the background when it’s triggered. For this reason, the
startForegroundService
method was introduced in Android 8.0. Pending Intents created using this method are allowed to start a new Service, which—once started—has five seconds to become a foreground Service through a call to
startForeground
, or it will be stopped and the application shown as not responding.
As mentioned previously, Android 8.0 also eliminated support for using your manifest to register for implicit Intent broadcasts. As Pending Intents are commonly fired when your application isn’t running, so it’s necessary to use an explicit Intent to ensure the target Receiver is triggered.
7
Using Internet Resources
CONNECTING TO THE INTERNET
One of the most powerful aspects of modern smart devices is their ability to connect to Internet services, and to expose the information—or those services—to users within native applications.
This chapter introduces Android’s Internet connectivity model and techniques for downloading and parsing data efficiently. You learn how to connect to an Internet resource and how to use the SAX Parser, XML Pull Parser, and JSON Reader to parse data feeds. Android requires that you perform all network tasks on a background thread, so you learn how to do this efficiently using a combination of View Models, Live Data, and Asynchronous Tasks.
Expanding the earthquake-monitoring example demonstrates how to tie together all these features.
This chapter also introduces the Download Manager, and you learn how to use it to schedule and manage long-running shared downloads. You are also introduced to the Job Scheduler, and learn the best practices for ensuring your downloads are fast, efficient, and don’t drain the battery.
Finally, this chapter introduces some popular Internet cloud services you can leverage to add additional cloud-based functionality to your Android apps.
CONNECTING, DOWNLOADING, AND PARSING INTERNET RESOURCES
Using Android’s network APIs, you can connect to remote server endpoints, make HTTP requests, and process server results and data feeds—including the ability to extract and process data using a parser, such as SAX, the XML Pull Parser, or the JSON Reader.
Modern mobile devices offer a number of alternatives for accessing the Internet. Broadly speaking, Android provides two connection techniques for Internet connectivity, each is offered to the application layer automatically—you don’t have to indicate which technology to use when making an Internet connection:
- Mobile Internet —GPRS, EDGE, 3G, 4G, and LTE Internet access is available through carriers that offer mobile data.
- Wi-Fi —Private and public Wi-Fi access points.
If you use Internet resources in your application, remember that your users’ data connections are dependent on the communications technology available to them. EDGE and GSM connections are notoriously low-bandwidth, whereas a Wi-Fi connection may be unreliable in a mobile setting.
Optimize the user experience by always minimizing the quantity of data transmitted and ensure that your application is robust enough to handle network outages and bandwidth/latency limitations.
Why Build a Native Internet App?
Given that a web browser is available on most smart devices, you might ask if there’s any reason to create native Internet-based applications when you could make a web-based version instead.
While mobile web browsers are becoming increasingly powerful, there are still a number of benefits to creating thick- and thin-client native applications rather than relying on entirely web-based solutions:
- Bandwidth —Static resources such as images, layouts, and sounds can be expensive on devices with bandwidth restraints. By creating a native application, you can limit the bandwidth requirements to changed data only.
- Offline availability —With a browser-based solution, a patchy Internet connection can result in intermittent application availability. A native application can cache data and user actions to provide as much functionality as possible without a live connection, and synchronize with the cloud when a connection is reestablished.
- Latency and UX —By building a native application, you can take advantage of lower user-interaction latency as well as ensure the user experience is consistent with the OS and other first- and third-party apps.
- Reducing battery drain —Each time your application opens a connection to a server, the wireless radio will be turned on (or kept on). A native application can bundle its connections, minimizing the number of connections initiated. The longer the period between network requests, the longer the wireless radio can be left off and the lower the impact on battery life.
- Native features —Android devices are more than simple platforms for running a browser. They include location-based services, Notifications, widgets, cameras, Bluetooth radios, background Services, and hardware sensors. By creating a native application, you can combine the data available online with the hardware features available on the device to provide a richer user experience.
Connecting to an Internet Resource
Before you can access Internet resources, you need to add an
INTERNET
uses-permission node to your application manifest, as shown in the following XML snippet:
<uses-permission android:name="android.permission.INTERNET"/>
Listing 7-1 shows the basic pattern for opening an Internet data connection and receiving a stream of data from a data feed.
Android includes several classes to help you handle network communications. They are available in the
java.net.*
and
android.net.*
packages.
Performing Network Operations on Background Threads Using View Models, Live Data, and Asynchronous Tasks
It’s always good practice to perform potentially time-consuming tasks such as network operations on a background thread. Doing so ensures you’re not blocking the UI thread, which would make your application janky or unresponsive. On Android, this best practice is enforced for network operations through the
NetworkOnMainThreadException
, which is triggered whenever a network operation is attempted on the main UI thread.
Within your Activity you can create and run a new
Thread
as shown in the following code. When you’re ready to post to the UI thread, call
runOnUIThread
and apply your UI changes within another Runnable:
Thread t = new Thread(new Runnable() {public void run() {// Perform Network operations and processing.final MyDataClass result = loadInBackground();// Synchronize with the UI thread to post changes.runOnUiThread(new Runnable() {@Overridepublic void run() {deliverResult(result);}});}});t.start();
Alternatively, you can take advantage of the
AsyncTask
class, which encapsulates this process for you. An Async Task lets you define an operation to be performed in the background and provides event handlers that enable you to monitor progress and post the results on the GUI Thread.
Async Task handles all the Thread creation, management, and synchronization, enabling you to create an asynchronous task consisting of processing to be done in the background, and UI updates to be performed both during the processing and once it’s complete.
To create a new asynchronous task, extend the
AsyncTask
class, specifying the parameter types to use, as shown in this skeleton code:
private class MyAsyncTask extends AsyncTask<String, Integer, String> {@Overrideprotected String doInBackground(String… parameter) {// Moved to a background thread.String result = "";int myProgress = 0;int inputLength = parameter[0].length();// Perform background processing task, update myProgressfor (int i = 1; i <= inputLength; i++) {myProgress = i;result = result + parameter[0].charAt(inputLength-i);try {Thread.sleep(100);} catch (InterruptedException e) { }// Send progress to onProgressUpdate handlerpublishProgress(myProgress);}// Return the value to be passed to onPostExecutereturn result;}@Overrideprotected void onProgressUpdate(Integer… progress) {// Synchronized to UI thread.// Update progress bar, Notification, or other UI elements}@Overrideprotected void onPostExecute(String result) {// Synchronized to UI thread.// Report results via UI update, Dialog, or notifications}}
After you’ve implemented an Asynchronous Task, execute it by creating a new instance and calling
execute
, passing in any parameters as required:
String input = "redrum … redrum";new MyAsyncTask().execute(input);
Each Async Task instance can be executed only once. If you attempt to call execute a second time, an exception will be thrown.
These approaches have several significant limitations stemming from the Activity life cycle described in Chapter 3 . As you know, an Activity (and its Fragments) may be destroyed and re-created whenever the device configuration changes. As a result a user rotating the screen may interrupt your running network Thread or Async Task, which will be destroyed along with its parent Activity.
For Threads that are started through user action, this will effectively cancel the operation. For Threads initiated within the Activity’s lifecycle handlers—such as
onCreate
or
onStart
—they will be re-created and rerun when the Activity is re-created—potentially executing the same network operation multiple times. This can result in duplicative data transfers and a shorter battery life.
A better approach is to use the
ViewModel
and
LiveData
classes provided as part of the Android Architecture Components. Any View Models associated with an Activity or Fragment are designed specifically to persist across configuration changes, effectively providing caching for the data they store. The data within a View Model is typically returned as Live Data.
Live Data is a lifecycle-aware class used to store, and provide observable updates for, application data. Lifecycle-awareness means that Live Data only sends updates to Observers within app components that are in an active lifecycle state.
To use View Models and Live Data, you must first add Android Architecture Components to your app module’s Gradle Build file:
dependencies {[… Existing dependencies nodes …]implementation "android.arch.lifecycle:extensions:1.1.1"}
Listing 7-2
shows a simple View Model implementation that takes advantage of the standard
MutableLiveData
class. It uses an
AsyncTask
to download and parse an Internet resource in the background, and returns the result as a Live Data representing a List of Strings.
To use a View Model within your application, you must first create a new (or return the existing) instance of your View Model within the Activity or Fragment that will be observing the Live Data.
Use the
ViewModelProviders
class’s static
of
method—passing in the current application component—to retrieve the View Models available, and use the
get
method to specify the View Model you wish to use:
MyViewModel myViewModel = ViewModelProviders.of(this).get(MyViewModel.class);
Once you have a reference to your View Model, you must add an
Observer
in order to receive the Live Data it contains. Call
getData
on the View Model, then use the
observe
method to add an
Observer
implementation whose
onChanged
handler will be triggered whenever the underlying data changes:
myViewModel.getData().observe(this, new Observer<List<String>>() {@Overridepublic void onChanged(@Nullable List<String> data) {// TODO When new View Model data is received, update the UI.}});
The full process of obtaining a View Model for your Activity, requesting the Live Data, and observing it for changes is shown in Listing 7-3 .
Because your View Model lifecycle is based on your application—rather than the parent Activity or Fragment—the View Model’s Live Data’s loading function won’t be interrupted by a device configuration change.
Similarly, your results are implicitly cached across device configuration changes. After a rotation, when
observe
is called on the View Model’s data, it will immediately return the last result set via the
onChanged
handler—without the View Model’s
loadData
method being called. This saves significant time and battery power by eliminating duplicative network downloads and the associated processing.
In Chapter 11 you are introduced to more powerful APIs for scheduling background network operations, which take into account timing and device state to improve the efficiency of your network transfers.
Parsing XML Using the XML Pull Parser
Although detailed instructions for parsing XML and interacting with specific web services are outside the scope of this book, it’s important to understand the available technologies.
This section provides a brief overview of the XML Pull Parser, and the following sections demonstrate the use of the DOM parser and JSON Reader to retrieve earthquake details from the United States Geological Survey (USGS).
The XML Pull Parser API is available from the following libraries:
org.xmlpull.v1.XmlPullParser;org.xmlpull.v1.XmlPullParserException;org.xmlpull.v1.XmlPullParserFactory;
It enables you to parse an XML document in a single pass. Unlike the DOM parser, the Pull Parser presents the elements of your document in a sequential series of events and tags.
Your location within the document is represented by the current event. You can determine the current event by calling
getEventType
. Each document begins at the
START_DOCUMENT
event and ends at
END_DOCUMENT
.
To proceed through the tags, simply call
next
, which causes you to progress through a series of matched (and often nested)
START_TAG
and
END_TAG
events. You can extract the name of each tag by calling
getName
and extract the text between each set of tags using
getNextText
.
Listing 7-4 demonstrates how to use the XML Pull Parser to extract details from the points of interest list returned by the Google Places API.
Connecting the Earthquake Viewer to the Internet
In this example you extend the Earthquake Viewer you began in Chapter 3 and improved in Chapter 5 . You’ll replace the dummy Array List of Earthquakes with a real list, by connecting to an earthquake feed, downloading, and parsing it so it can be displayed in your List Fragment.
The earthquake feed XML is parsed here by the DOM parser. Several alternatives exist, including the XML Pull Parser described in the previous section. Alternatively, you could parse the JSON feed using the
JsonReader
class, as shown in the following section
-
For this example, the feed used is the one-day USGS Atom feed for earthquakes with a magnitude greater than 2.5 on the Richter scale. Add the location of your feed as an external string resource within the
Strings.xmlresource file in theres/valuesfolder. This lets you potentially specify a different feed based on a user’s locale:<resources><string name="app_name">Earthquake</string><string name="earthquake_feed">https://earthquake.usgs.gov/earthquakes/feed/v1.0/summary/2.5_day.atom</string></resources> -
Before you can access this feed, your application needs to request permission for Internet access. Add the
Internetuses-permission to the top of your manifest file:<?xml version="1.0" encoding="utf-8"?><manifest xmlns_android="http://schemas.android.com/apk/res/android"package="com.professionalandroid.apps.earthquake"><uses-permission android:name="android.permission.INTERNET"/>[… Application Node …]</manifest> -
Our Internet access must happen on a background thread, and the results should persist on device configuration changes. Use a View Model and Live Data for this. Start by adding a dependency to the Android Architecture Components lifecycle extensions to your app module Gradle build file:
dependencies {[… Existing dependencies nodes …]implementation "android.arch.lifecycle:extensions:1.1.1"} -
Create a new
EarthquakeViewModelthat extendsAndroidViewModeland includes aMutableLiveDatavariable that represents a List of Earthquakes. This View Model will be cached and maintained across configuration changes. Create agetEarthquakesmethod that will check if our Earthquake List Live Data has been populated already, and if not, will load the Earthquakes from the feed:public class EarthquakeViewModel extends AndroidViewModel {private static final String TAG = "EarthquakeUpdate";private MutableLiveData<List<Earthquake>> earthquakes;public EarthquakeViewModel(Application application) {super(application);}public LiveData<List<Earthquake>> getEarthquakes() {if (earthquakes == null) {earthquakes = new MutableLiveData<List<Earthquake>>();loadEarthquakes();}return earthquakes;}// Asynchronously load the Earthquakes from the feed.public void loadEarthquakes() {}} -
Update the
loadEarthquakesmethod to download and parse the earthquake feed. This must be done on a background thread, so implement anAyncTaskto simplify this process. In the background, extract each earthquake and parse the details to obtain the ID, date, magnitude, link, and location. Once the feed has been parsed, update theonPostExecutehandler to set the value of the Mutable Live Data that represents our List of Earthquakes. This will alert any registered Observers, passing them the updated list:public void loadEarthquakes() {new AsyncTask<Void, Void, List<Earthquake>>() {@Overrideprotected List<Earthquake> doInBackground(Void… voids) {// Result ArrayList of parsed earthquakes.ArrayList<Earthquake> earthquakes = new ArrayList<>(0);// Get the XMLURL url;try {String quakeFeed =getApplication().getString(R.string.earthquake_feed);url = new URL(quakeFeed);URLConnection connection;connection = url.openConnection();HttpURLConnection httpConnection = (HttpURLConnection)connection;int responseCode = httpConnection.getResponseCode();if (responseCode == HttpURLConnection.HTTP_OK) {InputStream in = httpConnection.getInputStream();DocumentBuilderFactory dbf =DocumentBuilderFactory.newInstance();DocumentBuilder db = dbf.newDocumentBuilder();// Parse the earthquake feed.Document dom = db.parse(in);Element docEle = dom.getDocumentElement();// Get a list of each earthquake entry.NodeList nl = docEle.getElementsByTagName("entry");if (nl != null && nl.getLength() > 0) {for (int i = 0 ; i < nl.getLength(); i++) {// Check to see if our loading has been cancelled, in which// case return what we have so far.if (isCancelled()) {Log.d(TAG, "Loading Cancelled");return earthquakes;}Element entry =(Element)nl.item(i);Element id =(Element)entry.getElementsByTagName("id").item(0);Element title =(Element)entry.getElementsByTagName("title").item(0);Element g =(Element)entry.getElementsByTagName("georss:point").item(0);Element when =(Element)entry.getElementsByTagName("updated").item(0);Element link =(Element)entry.getElementsByTagName("link").item(0);String idString = id.getFirstChild().getNodeValue();String details = title.getFirstChild().getNodeValue();String hostname = "http://earthquake.usgs.gov";String linkString = hostname + link.getAttribute("href");String point = g.getFirstChild().getNodeValue();String dt = when.getFirstChild().getNodeValue();SimpleDateFormat sdf =new SimpleDateFormat("yyyy-MM-dd'T'hh:mm:ss.SSS'Z'");Date qdate = new GregorianCalendar(0,0,0).getTime();try {qdate = sdf.parse(dt);} catch (ParseException e) {Log.e(TAG, "Date parsing exception.", e);}String[] location = point.split(" ");Location l = new Location("dummyGPS");l.setLatitude(Double.parseDouble(location[0]));l.setLongitude(Double.parseDouble(location[1]));String magnitudeString = details.split(" ")[1];int end = magnitudeString.length()-1;double magnitude =Double.parseDouble(magnitudeString.substring(0, end));if (details.contains("-"))details = details.split("-")[1].trim();elsedetails = "";final Earthquake earthquake = new Earthquake(idString,qdate,details, l,magnitude,linkString);// Add the new earthquake to our result array.earthquakes.add(earthquake);}}}httpConnection.disconnect();} catch (MalformedURLException e) {Log.e(TAG, "MalformedURLException", e);} catch (IOException e) {Log.e(TAG, "IOException", e);} catch (ParserConfigurationException e) {Log.e(TAG, "Parser Configuration Exception", e);} catch (SAXException e) {Log.e(TAG, "SAX Exception", e);}// Return our result array.return earthquakes;}@Overrideprotected void onPostExecute(List<Earthquake> data) {// Update the Live Data with the new list.earthquakes.setValue(data);}}.execute();} -
Update your Earthquake Main Activity to remove the dummy data and update the Earthquake List Fragment to use your new
EarthquakeViewModel.-
6.1. Start by updating the Activity’s
onCreatehandler, removing the dummy dataEarthquakeViewModel earthquakeViewModel;@Overrideprotected void onCreate(Bundle savedInstanceState) {super.onCreate(savedInstanceState);setContentView(R.layout.activity_earthquake_main);FragmentManager fm = getSupportFragmentManager();// Android will automatically re-add any Fragments that// have previously been added after a configuration change,// so only add it if this is an automatic restart.if (savedInstanceState == null) {FragmentTransaction ft = fm.beginTransaction();mEarthquakeListFragment = new EarthquakeListFragment();ft.add(R.id.main_activity_frame, mEarthquakeListFragment,TAG_LIST_FRAGMENT);ft.commitNow();} else {mEarthquakeListFragment =(EarthquakeListFragment)fm.findFragmentByTag(TAG_LIST_FRAGMENT);}// Retrieve the Earthquake View Model for this Activity.earthquakeViewModel = ViewModelProviders.of(this).get(EarthquakeViewModel.class);} -
6.2. Within the Earthquake List Fragment, update the
onActivityCreatedhandler. Using the View Model Provider’s staticofmethod to retrieve the current instance of your Earthquake View Model. Add an Observer to the Live Data returned from your View Model—it will set the Earthquake List Fragment Earthquake List when your Activity is created, and again whenever the list of parsed Earthquakes is updated:protected EarthquakeViewModel earthquakeViewModel;@Overridepublic void onActivityCreated(@Nullable Bundle savedInstanceState) {super.onActivityCreated(savedInstanceState);// Retrieve the Earthquake View Model for the parent Activity.earthquakeViewModel = ViewModelProviders.of(getActivity()).get(EarthquakeViewModel.class);// Get the data from the View Model, and observe any changes.earthquakeViewModel.getEarthquakes().observe(this, new Observer<List<Earthquake>>() {@Overridepublic void onChanged(@Nullable List<Earthquake> earthquakes) {// When the View Model changes, update the Listif (earthquakes != null)setEarthquakes(earthquakes);}});}
-
6.1. Start by updating the Activity’s
-
When you run your project, you should see a Recycler View that features the earthquakes from the last 24 hours with a magnitude greater than 2.5 (
Figure 7-1
).

-
The earthquake data is cached by the View Model, so it will persist across device configuration changes, and only refresh when the app is restarted. Let’s update the app to let users refresh the earthquake list using the swipe-to-refresh pattern. Update the
fragment_earthquake_list.xmllayout resource to include aSwipeRefreshLayoutas the parent of theRecyclerView:<?xml version="1.0" encoding="utf-8"?><android.support.v4.widget.SwipeRefreshLayoutxmlns_android="http://schemas.android.com/apk/res/android"android:id="@+id/swiperefresh"android:layout_width="match_parent"android:layout_height="match_parent"><android.support.v7.widget.RecyclerViewxmlns_android="http://schemas.android.com/apk/res/android"xmlns_app="http://schemas.android.com/apk/res-auto"android:id="@+id/list"android:layout_width="match_parent"android:layout_height="match_parent"android:layout_marginLeft="16dp"android:layout_marginRight="16dp"app:layoutManager="LinearLayoutManager"/></android.support.v4.widget.SwipeRefreshLayout> -
Update
onCreateViewwithin the Earthquake List Fragment to get a reference to the Swipe Refresh Layout added in Step 8, and updateonViewCreatedto assign a refresh listener to the Swipe Refresh Layout that calls a newupdateEarthquakesmethod when the swipe to refresh action is made:private SwipeRefreshLayout mSwipeToRefreshView;@Overridepublic View onCreateView(LayoutInflater inflater, ViewGroup container,Bundle savedInstanceState) {View view = inflater.inflate(R.layout.fragment_earthquake_list,container, false);mRecyclerView = (RecyclerView) view.findViewById(R.id.list);mSwipeToRefreshView = view.findViewById(R.id.swiperefresh);return view;}@Overridepublic void onViewCreated(View view, Bundle savedInstanceState) {super.onViewCreated(view, savedInstanceState);// Set the Recycler View adapterContext context = view.getContext();mRecyclerView.setLayoutManager(new LinearLayoutManager(context));mRecyclerView.setAdapter(mEarthquakeAdapter);// Setup the Swipe to Refresh viewmSwipeToRefreshView.setOnRefreshListener(newSwipeRefreshLayout.OnRefreshListener() {@Overridepublic void onRefresh() {updateEarthquakes();}});}protected void updateEarthquakes() {} -
Update the
setEarthquakesmethod to disable the “refreshing” visual indicator when an update has been received:public void setEarthquakes(List<Earthquake> earthquakes) {mEarthquakes.clear();mEarthquakeAdapter.notifyDataSetChanged();for (Earthquake earthquake: earthquakes) {if (!mEarthquakes.contains(earthquake)) {mEarthquakes.add(earthquake);mEarthquakeAdapter.notifyItemInserted(mEarthquakes.indexOf(earthquake));}}mSwipeToRefreshView.setRefreshing(false);} -
The update itself will be performed by the Earthquake View Model, which we communicate with through the parent Activity. Define a new
OnListFragmentInteractionListenerwithin the Earthquake List Fragment; it should include anonListFragmentRefreshRequestedmethod that’s called when we request a refresh via theupdateEarthquakesmethod added in Step 9:public interface OnListFragmentInteractionListener {void onListFragmentRefreshRequested();}privateOnListFragmentInteractionListener mListener;@Overridepublic void onAttach(Context context) {super.onAttach(context);mListener = (OnListFragmentInteractionListener) context;}@Overridepublic void onDetach() {super.onDetach();mListener = null;}protected void updateEarthquakes() {if (mListener != null)mListener.onListFragmentRefreshRequested();} -
Return to the Earthquake Main Activity and have it implement the Interface defined in Step 11, and use the Earthquake View Model to force a refresh when requested:
public class EarthquakeMainActivity extends AppCompatActivity implementsEarthquakeListFragment.OnListFragmentInteractionListener {@Overridepublic void onListFragmentRefreshRequested() {updateEarthquakes();}private void updateEarthquakes() {// Request the View Model update the earthquakes from the USGS feed.earthquakeViewModel.loadEarthquakes();}[… Existing Class Definition …]} - You should also add a refresh action as a menu item or on your app’s action bar to support users who may not be able to perform a swipe gesture (for example, users with accessibility issues can trigger action bar actions using external devices, such as keyboards and D-pads). We show how to do this in Chapter 13 , “Implementing a Modern Android User Experience.”
Parsing JSON Using the JSON Parser
This section provides a brief overview of the
JsonParser
, demonstrating how it can be used to parse earthquake details from the JSON feed from the United States Geological Survey (USGS) found at
earthquake.usgs.gov/earthquakes/feed/v1.0/summary/2.5_day.geojson
.
As with XML parsing in the earlier sections, detailed instructions for parsing JSON are outside the scope of this book; however, with many APIs now providing JSON feeds it’s important to introduce the concepts.
Like the pull parser, the JSON Parser enables you to parse a document in a single pass, presenting the elements of your document in a sequential series of objects, arrays, and values.
To create a recursive parser, you must first create an entry point method that takes an Input Stream and creates a new JSON Reader:
private List<Earthquake> parseJson(InputStream in) throws IOException {// Create a new Json Reader to parse the input.JsonReader reader =new JsonReader(new InputStreamReader(in, "UTF-8"));// TODO: Parse the InputStream}
Data within each JSON feed are stored as names and values, structured using objects and arrays. JSON objects are used similarly to code objects—grouping together values that are semantically related. JSON also supports arrays to group multiple values or objects together.
For example, the USGS feed contains a type value, and metadata and bounding box objects at the root level, as well as an array of multiple feature objects representing each earthquake. Each feature object then contains values for type and ID, and objects to group earthquake properties and geometry details. The geometry object in turn includes a value for the geometry type, and an array of values representing the latitude, longitude, and depth of each earthquake. This structure is illustrated in part in Figure 7-2 .

To parse these structures, create handler methods that will parse each object, and array, within the JSON text.
For the object structure handler methods, begin by calling your JSON Reader object’s
beginObject
method to consume the opening brace. Then use the
hasNext
method to control a while loop within which you can extract values, or further objects (or arrays). Use the
endObject
method to read the object’s closing brace when the object has been fully read:
private MyObject readMyObject(JsonReader reader) throws IOException {// Create variables for the return values.String myValue = null;// Consume the opening brace.reader.beginObject();// Traverse the values, objects, and arrays within this object.while (reader.hasNext()) {// Find the next name.String name = reader.nextName();// Extract each of the values based on name matches.if (name.equals("my_value")) {myValue = reader.nextString();// Skip any unexpected (or purposefully ignored) values.} else {reader.skipValue();}}// Consume closing brace.reader.endObject();// Return parsed object.return new MyObject(myValue);}
Arrays are handled similarly, using the
beginArray
and
endArray
methods to consume the opening and closing brackets respectively. The values within an array are homogenous, allowing you to simply add each value to a list:
public List<Double> readDoublesArray(JsonReader reader)throws IOException {List<Double> doubles = new ArrayList<Double>();reader.beginArray();while (reader.hasNext()) {doubles.add(reader.nextDouble());}reader.endArray();return doubles;}
As you traverse each object or array, if a nested object or array is found, simply pass the JSON Reader object to the corresponding parsing method.
If an unknown name is encountered, you can choose to call
skipValue
to recursively skip the value’s nested tokens
Listing 7-5 demonstrates how to use the JSON Parser to extract details from the JSON feed of magnitude 2.5+ earthquake over the past day supplied by the USGS.
USING THE DOWNLOAD MANAGER
The Download Manager is a Service designed to optimize the handling of long-running downloads, by managing the HTTP connection and monitoring connectivity changes and system reboots to ensure each download completes successfully.
Downloads managed by the Download Manager are stored in a globally accessible location, so it’s unsuitable for privacy-sensitive downloads.
It’s good practice to use the Download Manager when a download is large—and therefore likely to continue in the background between user sessions, when successful completion is important, and when the file being downloaded will be shared with other applications (such as an image or PDF).
To access the Download Manager, request the
DOWNLOAD_SERVICE
using the
getSystemService
method:
DownloadManager downloadManager =(DownloadManager)getSystemService(Context.DOWNLOAD_SERVICE);
As the Download Manager uses the Internet, your app will need to request the
INTERNET
permission within its manifest in order to use the Download Manager:
<uses-permission android:name="android.permission.INTERNET"/>
Downloading Files
To request a download, create a new
DownloadManager.Request
, specifying the URI of the file to download and passing it in to the Download Manager’s
enqueue
method, as shown in
Listing 7-6
.
You can use the returned reference value to perform future actions or query the download, including checking its status or canceling it.
You can add an HTTP header to your request, or override the mime type returned by the server, by calling
addRequestHeader
and
setMimeType
, respectively, on your
Request
object.
You can also specify the connectivity conditions under which to execute the download. The
setAllowedNetworkTypes
method enables you to restrict downloads to either Wi-Fi or mobile networks. The
setAllowedOverRoaming
and
setAllowedOverMetered
methods allow you to prevent downloads while the phone is roaming or over a metered (paid) connection.
The following snippet shows how to ensure a large file is downloaded only when connected to Wi-Fi:
request.setAllowedNetworkTypes(Request.NETWORK_WIFI);
After calling
enqueue
, the download begins as soon as suitable connectivity is available, and the Download Manager is free.
By default, ongoing and completed downloads are indicated as Notifications. You should create a Broadcast Receiver that listens for the
ACTION_NOTIFICATION_CLICKED
action, which will be broadcast whenever a user selects a download from the Notification tray or the Downloads app. It will include an
EXTRA_NOTIFICATION_CLICK_DOWNLOAD_IDS
extra that contains the reference ID of the download that was selected.
When the download is complete, the Download Manager will broadcast the
ACTION_DOWNLOAD_COMPLETE
action, with an
EXTRA_DOWNLOAD_ID
extra indicating the reference ID of the completed file download, as shown in
Listing 7-7
.
The Download Manager will continue downloading your files between user sessions of your app, as well as phone reboots. As a result, it’s important for you to store the download reference numbers to ensure your app remembers them.
For the same reason you should register your Broadcast Receivers for Notification clicks and download completions within the manifest, as shown in Listing 7-8 , because there is no guarantee your app will be running when a user selects a download notification, or the download is completed.
Once the download has completed, you can use Download Manager’s
openDownloadedFile
method to receive a Parcel File Descriptor to your file, or use the ID to query the Download Manager and obtain metadata details.
You learn more about file handling in Chapter 8 , “Saving State, User Preferences, and Using and Sharing Files.”
Customizing Download Manager Notifications
By default, ongoing Notifications will be displayed for each file while it’s being downloaded by the Download Manager. Each Notification will show the current download progress and the filename ( Figure 7-3 ).

The Download Manager enables you to customize the Notification displayed for each download request, including hiding it completely. The following snippet shows how to use the
setTitle
and
setDescription
methods to customize the text displayed in the file download Notification.
Figure 7-4
shows the result.

request.setTitle("Hive Husks");request.setDescription("Downloading Splines for Reticulation");
The
setNotificationVisibility
method lets you control when, and if, a Notification should be displayed for your download using one of the following flags:
-
Request.VISIBILITY_VISIBLE—An ongoing Notification will be visible for the duration that the download is in progress. It will be removed when the download is complete. This is the default option. -
Request.VISIBILITY_VISIBLE_NOTIFY_COMPLETED—An ongoing Notification will be displayed during the download and will continue to be displayed once the download has completed, until it is selected or dismissed. -
Request.VISIBILITY_VISIBLE_NOTIFY_ONLY_COMPLETION—Useable only when usingaddCompletedDownloadto add an already downloaded file to the downloads database system. When selected, a notification will be displayed after the file has been added. -
Request.VISIBILITY_HIDDEN—No Notification will be displayed for this download. In order to set this flag, your application must have theDOWNLOAD_WITHOUT_NOTIFICATIONpermission specified in its manifest:<uses-permissionandroid:name="android.permission.DOWNLOAD_WITHOUT_NOTIFICATION"/>
Specifying a Download Location
By default, all Download Manager downloads are saved to the shared download cache using system-generated filenames, where they may be deleted automatically by the system, or manually by users.
Alternatively, a download Request can indicate a URI to a specific download location. In that case, the location must be on external storage, and accordingly your app must have the
WRITE_EXTERNAL_STORAGE
permission defined in its manifest:
<uses-permission android:name="android.permission.WRITE_EXTERNAL_STORAGE"/>
The following code snippet shows how to specify an arbitrary path on external storage:
request.setDestinationUri(Uri.fromFile(f));
If the downloaded file is specific to your application, you may want to place it in your application’s external storage folder. Note that access control is not applied to this folder, and other applications will be able to access it. If your application is uninstalled, files stored in these folders will also be removed.
The following snippet specifies storing a file in your application’s external downloads folder:
request.setDestinationInExternalFilesDir(this,Environment.DIRECTORY_DOWNLOADS, "bugdroid.png");
For files that can or should be shared with other applications—particularly those you want to scan with the Media Scanner—you can specify a location within the public folder on the external storage. The following snippet requests a file be stored in the public music folder:
request.setDestinationInExternalPublicDir(Environment.DIRECTORY_MUSIC,"android_anthem.mp3");
It’s important to note that by default, files downloaded by the Download Manager are not scanned by Media Scanner, so they might not appear in apps such as photo galleries and music players.
To make downloaded files scannable, call
allowScanningByMediaScanner
on the Request object
before
it is enqueued by the Download Manager:
request.allowScanningByMediaScanner();
By default, your files will be visible and manageable by the system’s Downloads app. If you’d prefer they not be, you can call
setVisibleInDownloadsUi
, passing in
false
:
request.setVisibleInDownloadsUi(false);
Canceling and Removing Downloads
The Download Manager’s
remove
method lets you cancel a pending download, abort a download in progress, or delete a completed download.
As shown in the following code snippet, the
remove
method accepts download IDs as optional arguments, enabling you to specify one or many downloads to cancel:
downloadManager.remove(fileRef1, fileRef2, fileRef3);
It returns the number of downloads successfully canceled. If a download is canceled, all associated files—both partial and complete—are removed.
Querying the Download Manager
You can query the Download Manager to find the status, progress, and details of your download requests by using the
query
method, which returns a Cursor to the list of downloads.
The
query
method takes a
DownloadManager.Query
object as a parameter. Use the
setFilterById
method on a Query object to specify a sequence of download reference IDs, or use the
setFilterByStatus
method to filter on a download status using one of the
DownloadManager.STATUS_*
constants to specify running, paused, failed, or successful downloads.
The Download Manager includes a number of
COLUMN_
static String constants that you can use to query the result Cursor. You can find details for each download, including the status, files size, bytes downloaded so far, title, description, URI, media type, and Media Provider download URI.
In addition, the Download Manager includes the
getUriForDownloadedFile
and
openDownloadedFile
methods.
Listing 7-9
expands on
Listing 7-7
to demonstrate how to find the Uri, or Parcel File Descriptor of completed downloads from within a Broadcast Receiver registered to listen for download completions.
For downloads that are either paused or have failed, you can query the
COLUMN_REASON
column to find the cause represented as an integer.
In the case of
STATUS_PAUSED
downloads, you can interpret the reason code by using one of the
DownloadManager.PAUSED_
static constants to determine if the download has been paused while waiting for network connectivity, a Wi-Fi connection, or pending a retry.
For
STATUS_FAILED
downloads, you can determine the cause of failure using the
DownloadManager.ERROR_
codes. Possible error codes include lack of a storage device, insufficient free space, duplicate filenames, or HTTP errors.
Listing 7-10 shows how to find a list of the currently paused downloads, extracting the reason the download was paused, the filename, its title, and the current progress.
BEST PRACTICES FOR DOWNLOADING DATA WITHOUT DRAINING THE BATTERY
Using the wireless radios to transfer data is a significant cause of battery drain. The mobile and Wi-Fi radios use a lot of power, not only transferring data, but powering up and maintaining network data connections.
The timing and approach you use to download data can have a significant effect on battery life, so to minimize the battery drain associated with network activity it’s critical that you understand how your connectivity model will affect the underlying radio hardware.
A cellular wireless radio transmitting or receiving data consumes significant power, while at the same time, powering up to provide connectivity introduces latency. As a result, the radio transitions between different power modes in order to conserve power and minimize latency.
For a typical 3G network radio that typically involves three energy states:
- Full power —Used when a connection is actively transferring data.
- Low power —Activated a short time (~5s) after a transfer has concluded. It uses around 50% of the power of a full connection, but has improved startup latency compared to standby mode.
- Standby —The minimal power draw state, activated after a reasonable period (~15s) during which no network traffic has occurred.
Every time you create a new connection or download additional data, you risk waking the wireless radio from standby mode, and/or prolonging the amount of time it spends in full- and low-power modes.
To use a converse example, creating frequent, short-lived connections that download small amounts of data can have a dramatically negative impact on the battery. Transferring data every 15 seconds can effectively keep the network radio at full power constantly.
The solution is to reduce the frequency and size of your data transfers. You can use the following techniques to minimize your application’s battery impact:
- Cache and compress data —Avoid downloading data more often than necessary by storing or caching it locally. Minimize the duration of transfers by compressing data efficiently at the server source, before transmitting it to your device.
- Consider Wi-Fi versus mobile network connections —The Wi-Fi radio can be significantly less power-hungry than the mobile network cell radio. For large files, and also where timeliness isn’t as important, consider delaying transfers until the device is connected over Wi-Fi.
- Aggressively prefetch —The more data you download in a single connection, the less frequently the radio will need to be powered up to download more data. This will need to be balanced with downloading too much data that won’t be used.
- Bundle your connections and downloads —Rather than sending time-insensitive data such as analytics as they’re received, bundle them together and schedule them to transmit concurrently with other connections, such as when refreshing content or prefetching data. Remember, each new connection has the potential of powering up the radio.
- Reuse existing connections rather than creating new ones —Using existing connections rather than initiating new ones for each transfer can dramatically improve network performance, reduce latency, and allow the network to intelligently react to congestion and related issues.
- Use server-initiated updates in preference to periodic downloads—Every time you initiate a connection you potentially power up the radio, even if you don’t end up downloading any new data. Instead of regular polling, have your server notify each client when there’s new data to download using Firebase Cloud Messaging (discussed in Chapter 11 ).
- Schedule periodic downloads as infrequently as possible —When periodic updates are necessary, it’s good practice to set the default refresh frequency to as low as usability will allow, rather than as frequent as possible. For users who require their updates to be more frequent, provide preferences that allow them to sacrifice battery life in exchange for freshness.
Android offers a number of APIs to assist you in performing data transfers efficiently, specifically the Android frameworks Job Scheduler.
This API provides facilities for you to intelligently schedule background data transfers within your application process. As a global Service, it can batch and defer transfers from multiple apps, in order to minimize the overall battery impact.
It provides:
- Scheduling for one-off or periodic downloads
- Automatic back-off and failure retry
- Persistence of scheduled transfers between device reboots
- Scheduling based on network connection type and device charging status.
We explore this API in detail in Chapter 11 .
AN INTRODUCTION TO INTERNET SERVICES AND CLOUD COMPUTING
Software as a service (SaaS) and cloud computing are becoming increasingly popular as companies reduce the cost overheads associated with installing, upgrading, and maintaining their own hardware. The result is a range of rich Internet services and cloud resources with which you can build and enhance mobile applications.
The idea of using a middle tier to reduce client-side load is not a novel one, and happily there are many Internet-based options to supply your applications with the level of service you need.
The sheer volume of Internet services available makes it impossible to list them all here (let alone look at them in any detail), but the following list shows some of the more mature and common Internet services currently available. With Android being primarily developed by Google, Google’s Cloud Platform offerings are particularly well supported, as summarized in the following section:
- Google Cloud Platform Compute services —A variety of services for running cloud-based servers, including Compute Engine for running large-scale workloads on virtual machines, the App Engine platform for building scalable mobile back ends, and Kubernetes Engine for running containers.
- Google Cloud Platform Storage and BigQuery —A range of products for storing data in the cloud, including Cloud Storage for object storage with global edge-caching, Cloud Spanner and Cloud SQL for relational databases supporting SQL queries, Cloud Bigtable for massively scalable NoSQL databases, and Cloud Datastore for NoSQL, schemaless databases (designed for storing non-relational data). They also offer BigQuery, a fully managed, petabyte scale, low-cost enterprise data warehouse for data analysis.
- Google Machine Learning APIs —Google offers a range of Machine Intelligence APIs built on its machine learning capabilities. That includes a Vision API that can understand the content of images, a Speech API for advanced speech recognition, a Natural Language API that derives insights from unstructured text, and a Translate API for programmatically translating text in real time.
- Amazon Web Services —Amazon offers a range of cloud-based services including a similar range of services for cloud compute and storage, including distributed storage solution (S3) and Elastic Compute Cloud (EC2).
A more detailed exploration of these products is out of scope for this book. However, Chapter 11 provides some additional details on how to use Firebase Cloud Messaging to replace client-side polling with server-driven updates.
8
Files, Saving State, and User Preferences
SAVING FILES, STATES, AND PREFERENCES
This chapter introduces some of the simplest and most versatile data-persistence and file sharing techniques in Android: Shared Preferences, instance-state Bundles, local files, and the Storage Access Framework.
At a minimum, an Activity should save its user interface (UI) state before becoming inactive, to ensure the same UI is presented when the Activity restarts. It’s also likely that you’ll need to save user preferences and UI selections.
Android’s nondeterministic Activity and application lifetimes make persisting UI state and application data between sessions particularly important, because your application process may have been killed and restarted before it returns to the foreground.
We will explore mechanisms to store complex, structured data in Chapter 9 , “Creating and Using Databases” and Chapter 10 , “Content Providers and Search”—but for saving simple values or files within your application Android offers several alternatives, each optimized to fulfill a particular need:
- Saved application UI state —Activities and Fragments include specialized event handlers to record the current UI state when your application is moved to the background.
- Shared Preferences —When storing UI state, user preferences, or application settings, you want a lightweight mechanism to store a known set of values. Shared Preferences let you save groups of name/value pairs of primitive data as named preferences.
- Files —Sometimes writing to and reading from files is the only way to go, particularly when saving binary data such as images, audio, and video. Android lets you create, load, and share files on the device’s internal or external media, as well as providing support for temporary caches. The File Provider and Storage Access Framework also provide the ability to share files with, and access files from, other applications.
SAVING AND RESTORING ACTIVITY AND FRAGMENT INSTANCE STATE USING THE LIFECYCLE HANDLERS
To save the state of instance variables within Activities and Fragments, Android provides the
onSaveInstanceState
handler to persist data associated with UI state across sessions.
While View state for any View with an
android:id
is automatically saved and restored by the framework, you are responsible for saving and restoring any other instance variables that are needed to re-create and restore the UI.
The
onSaveInstanceState
is designed specifically to allow you to persist UI state, in case the Activity is terminated by the run time within a single user session—either in an effort to free resources for foreground applications or to accommodate restarts caused by hardware configuration changes.
When overriding an Activity’s
onSaveInstanceState
event handler, use its
Bundle
parameter to save instance variables related to your UI using the
put
methods associated with each primitive type. Remember to always call the super type method to save the default state:
private static final String SEEN_WARNING_KEY = "SEEN_WARNING_KEY";// Has the user has seen an important warning during this sessionprivate boolean mSeenWarning = false;@Overridepublic void onSaveInstanceState(Bundle saveInstanceState) {super.onSaveInstanceState(saveInstanceState);// Save state associated with the UIsaveInstanceState.putBoolean(SEEN_WARNING_KEY,mSeenWarning);}
This handler will be triggered whenever an Activity completes its active lifecycle, but only when it’s not being explicitly finished (with a call to
finish
). As a result, it’s used to ensure a consistent Activity state between active lifecycles of a single user session.
The saved Bundle is passed in to the
onRestoreInstanceState
and
onCreate
methods if the Activity is restarted:
@Overridepublic void onCreate(Bundle savedInstanceState) {super.onCreate(savedInstanceState);setContentView(R.layout.main);if (savedInstanceState != null &&savedInstanceState.containsKey(SEEN_WARNING_KEY)) {mSeenWarning = savedInstanceState.getBoolean(SEEN_WARNING_KEY);}}
If an Activity is explicitly closed by the user (by pressing the Back button), or programmatically with a call to
finish
, the saved instance state Bundle will not be passed in to
onCreate
or
onRestoreInstanceState
when the Activity is next created. Data that should be persisted across user sessions should be stored using Shared Preferences, as described in the next sections.
The UI for many applications will be encapsulated within Fragments. Accordingly, Fragments also include an
onSaveInstanceState
handler that works in much the same way as its Activity counterpart.
The instance state persisted in that Bundle is passed as a parameter to the Fragment’s
onCreate
,
onCreateView
, and
onActivityCreated
handlers.
For Fragments with a UI component, the same techniques used for saving Activity state apply to Fragments: they should restore their exact UI state if an Activity is destroyed and restarted to handle a hardware configuration change, such as the screen orientation changing. Because Android will automatically re-create Fragments, any Fragments programmatically added within an Activity’s
onCreate
should only be added if the
savedInstanceState
parameter is null, in order to prevent duplicate Fragments, as shown in
Listing 8-1
.
RETAINING INSTANCE STATE WITH HEADLESS FRAGMENTS AND VIEW MODELS
Activities and Fragments are designed to display UI data and react to user interactions; they are destroyed and re-created each time the device configuration changes—most commonly when the display is rotated.
As a result, if you store data—or perform time consuming asynchronous operations—within these UI components, a user rotating the screen will destroy this data and interrupt any ongoing processes.
This can result in duplicative work, increased latency, and redundant processing. Instead, it is strongly recommended that you move application data and processing out of Activities and into a class that is persisted when device configuration changes cause Activity restarts.
View Models and headless Fragments provide two such mechanisms that ensure data is persisted across configuration changes, while also ensuring that your Activity or Fragment UI can be updated without risk of memory leaks.
View Models and Live Data
View Models and Live Data were introduced in Chapter 7 as part of a way to perform network operations on background Threads. They are the recommended best practice technique for persisting state across device configurations.
View Models are designed specifically to store and manage UI-related data such that it’s persisted across configuration changes. View Models provide a simple way to separate the data being displayed from the UI controller logic that belongs in the Fragment or Activity. As a result, it’s good practice to move all your data, business logic, and any code not directly related to UI elements out of your Activity or Fragment, and into a View Model.
Because View Models are retained during configuration changes, data they hold is immediately available to a newly re-created Activity or Fragment instance.
The data stored within a View Model is typically returned as
LiveData
, a class specifically designed to hold individual data fields for View Models.
Live Data is a lifecycle-aware class used to provide observable updates for application data. Lifecycle-awareness means that Live Data only sends updates to Observers within app components that are in an active lifecycle state. It’s sometimes useful to create your own Live Data class; however, in most instances the
MutableLiveData
class is sufficient.
Each Mutable Live Data instance can be declared to represent a particular data type:
private final MutableLiveData<List<String>> data;
Within your View Model, you can modify the value stored by your Live Data using the
setValue
method while on the main UI Thread:
data.setValue(data);
Alternatively, you can use
postValue
to update the UI from a background Thread, which will post a Task to a main Thread to perform the update.
Whenever the value of a Live Data object is changed, the new value will be dispatched to any active Observers as described later in this section.
An Observer added by an Activity or Fragment will automatically be removed when the corresponding Activity or Fragment is destroyed, ensuring they can safely observe Live Data without worrying about memory leaks.
The
ViewModel
and related
LiveData
classes are available as part of the Android Architecture Components library, so to use them you first need to add a dependency to your app module’s Gradle Build file:
dependencies {[… Existing dependencies nodes …]implementation "android.arch.lifecycle:extensions:1.1.1"}
The following snippet shows the skeleton code for a simple View Model implementation using a standard Mutable Live Data object to store UI-related data. It also uses an
AsyncTask
to encapsulate the background Threading needed to load the associated data:
public class MyViewModel extends AndroidViewModel {private static final String TAG = "MyViewModel";private MutableLiveData<List<String>> data = null;public MyViewModel(Application application) {super(application);}public LiveData<List<String>> getData() {if (data == null) {data = new MutableLiveData<List<String>>();loadData();}return data;}// Asynchronously load / update the data represented// by the Live Data object.public void loadData() {new AsyncTask<Void, Void, List<String>>() {@Overrideprotected List<String> doInBackground(Void… voids) {ArrayList<String> result = new ArrayList<>(0);// TODO Load the data from this background thread.return result;}@Overrideprotected void onPostExecute(List<String> resultData) {// Update the Live Data data value.data.setValue(resultData);}}.execute();}}
Once defined, to use a View Model within your application you must first create a new (or return the existing) instance of your View Model from within an Activity or Fragment.
The
ViewModelProviders
class includes a static
of
method that can be used to retrieve all the View Models associated with a given Context:
ViewModelProvider providers = ViewModelProviders.of(this);
Then use the
get
method to specify the View Model you wish to use:
MyViewModel myViewModel = providers.get(MyViewModel.class);
Once you have a reference to your View Model, access any of the Live Data fields it contains and use the
observe
method to add an
Observer
that will receive updates (via the
onChanged
handler) when the Observer is added, and again whenever the underlying data changes. This is typically done within the
onCreate
handler of your Activity or Fragment:
myViewModel.getData().observe(this,new Observer<List<String>>() {@Overridepublic void onChanged(@Nullable List<String> data) {// TODO When new View Model data is received, update the UI.}});
Because your View Model lifecycle is based on your application—rather than the corresponding Activity or Fragment—the View Model’s loading function won’t be interrupted by a device configuration change.
Similarly, your results are implicitly cached across device configuration changes. After a rotation, when
observe
is called on the View Model’s data, it will immediately return the last result set via the
onChanged
handler—without the View Model’s
loadData
method being called.
Headless Fragments
Prior to the availability of View Models through the Android Architecture Components, headless Fragments were useful mechanisms for retaining instance state across device configuration changes.
Fragments are not required to contain a UI—a “headless” Fragment can be created by returning
null
within its
onCreateView
method (this is the default implementation). Headless Fragments that are retained across Activity restarts can be used to encapsulate self-contained operations that need access to lifecycle methods, or that should not be terminated and restarted along with the Activity after a configuration change.
You can request that your Fragment instance be retained across configuration changes by calling
setRetainInstance
within a Fragment’s
onCreate
handler. This will disconnect the Fragment instance’s re-creation lifecycle from its parent Activity, meaning it will not be killed and restarted along with its parent Activity:
@Overridepublic void onCreate(Bundle savedInstanceState) {super.onCreate(savedInstanceState);// Retain this fragment across configuration changes.setRetainInstance(true);}@Overridepublic View onCreateView (LayoutInflater inflater,ViewGroup container,Bundle savedInstanceState){return null;}
As a result, the
onDestroy
and
onCreate
handlers for a retained Fragment will not be called when the device configuration changes and the attached Activity is destroyed and re-created. This can provide a significant efficiency improvement if you move the majority of your object creation into this Fragment’s
onCreate
handler.
Note that the rest of the Fragment’s lifecycle handlers, including
onAttach
,
onCreateView
,
onActivityCreated
,
onStart
,
onResume
, and their corresponding tear-down handlers, will still be called based on the parent Activity’s lifecycle.
As headless Fragments have no View associated with them, they can’t be created by adding a
<fragment>
tag to your layout; they must be created programmatically.
Fragment instances are only retained when they are active, meaning that this can only be used with Fragments not on the back stack.
CREATING AND SAVING SHARED PREFERENCES
Using the
SharedPreferences
class, you can create named maps of name/value pairs that can be persisted across sessions and shared among application components running within the same application sandbox, but that aren’t accessible to other apps.
To create or modify a Shared Preference, call
getSharedPreferences
on the current Context, passing in the name of the Shared Preference to change:
SharedPreferences prefs = getSharedPreferences(MY_PREFS,Context.MODE_PRIVATE);
In most cases, you can use the default Shared Preferences file by calling the static
getDefaultSharedPreferences
method from the Preference Manager:
Context context = getApplicationContext();SharedPreferences prefs =PreferenceManager.getDefaultSharedPreferences(context);
To modify a Shared Preference, use the
SharedPreferences.Editor
class. Get the
Editor
object by calling
edit
on the Shared Preferences object you want to change:
SharedPreferences.Editor editor = prefs.edit();
Use the
put<type>
methods to insert or update the values associated with the specified name:
// Store new primitive types in the shared preferences object.editor.putBoolean("isTrue", true);editor.putFloat("lastFloat", 1f);editor.putInt("wholeNumber", 2);editor.putLong("aNumber", 3l);editor.putString("textEntryValue", "Not Empty");
To save edits, call
apply
or
commit
on the
Editor
object to save the changes asynchronously or synchronously, respectively:
// Commit the changes.editor.apply();
Android 6.0 Marshmallow (API Level 23) introduced a new Cloud Backup feature that by default (but with user permission), backs up almost all data created by an app to the cloud, including Shared Preferences files. Whenever a user installs your app on a new device, the system will automatically restore this backup data.
If you have device-specific Shared Preference values that should not be backed up with Android’s Auto Backup, they must be stored in a separate file that can be excluded using a backup scheme definition XML file stored in the
res/xml
resources folder. Note that you must include the full filename of the Shared Preference, which includes the
.xml
extension:
<?xml version="1.0" encoding="utf-8"?><full-backup-content><exclude domain="sharedpref" path="supersecretlaunchcodes.xml"/></full-backup-content>
You assign this scheme to your app by specifying it using the
android:fullBackupContent
attribute in the application node of your application manifest:
<application …android:fullBackupContent="@xml/appbackupscheme"></application>
More details on Auto Backup, including which files it backs up, and how to disable Auto Backup are covered later in this chapter.
RETRIEVING SHARED PREFERENCES
To access Shared Preferences, like editing and saving them, you use the
getSharedPreferences
method.
Use the type-safe
get<type>
methods to extract saved values. Each getter takes a key and a default value (returned when no value has been saved for that key):
// Retrieve the saved values.boolean isTrue = prefs.getBoolean("isTrue", false);float lastFloat = prefs.getFloat("lastFloat", 0f);int wholeNumber = prefs.getInt("wholeNumber", 1);long aNumber = prefs.getLong("aNumber", 0);String stringPreference = prefs.getString("textEntryValue", "");
You can return a map of all the available Shared Preferences keys values by calling
getAll
, or check for the existence of a particular key by calling the
contains
method:
Map<String, ?> allPreferences = prefs.getAll();boolean containsLastFloat = prefs.contains("lastFloat");
INTRODUCING ON SHARED PREFERENCE CHANGE LISTENERS
You can implement the
onSharedPreferenceChangeListener
to invoke a callback whenever a particular Shared Preference value is added, removed, or modified.
This is particularly useful for Activities and Services that use the Shared Preference framework to set application preferences. Using this handler, your application components can listen for changes to user preferences and update their UIs, or behavior, as required.
Register your On Shared Preference Change Listeners using the Shared Preference you want to monitor:
public class MyActivity extends Activity implementsOnSharedPreferenceChangeListener {@Overridepublic void onCreate(Bundle savedInstanceState) {super.onCreate(savedInstanceState);// Register this OnSharedPreferenceChangeListener// with any SharedPreferences instanceSharedPreferences prefs =PreferenceManager.getDefaultSharedPreferences(this);prefs.registerOnSharedPreferenceChangeListener(this);}public void onSharedPreferenceChanged(SharedPreferences prefs,String key) {// TODO Check the shared preference and key parameters// and change UI or behavior as appropriate.}}
CONFIGURING AUTO BACKUP OF APPLICATION FILES AND SHARED PREFERENCES
Introduced as part of Android 6.0 Marshmallow (API Level 23), Auto Backup automatically backs up at most 25MB of files, databases, and Shared Preferences created by your app, by encrypting and uploading it to the user’s Google Drive account, such that it can automatically be restored when the app is installed on a new device, or after a device wipe.
Automatic backups occur at most once every 24 hours when the device is connected to Wi-Fi, charging, and idle.
When your app is installed by the same user on a new device, or if they reinstall your app on the same device, the system will use the last backup snapshot to restore your application data.
By default, almost all your application data files will be backed up, with the exception of all files stored in:
-
The temporary cache directories returned by
getCacheDirandgetCodeCacheDir -
External storage, except those stored in the directory returned by
getExternalFilesDir -
The directory returned by
getNoBackupFilesDir
You can also define a backup scheme XML file using the
full-backup-content
tag, defining specific files to include or exclude from the Auto Backup. Note that if you specify an explicit include, it will prevent any file
not
specified in an include node from being backed up:
<?xml version="1.0" encoding="utf-8"?><full-backup-content><include domain=["file" | "database" | "sharedpref" | "external" | "root"]path="[relative file path string]" /><exclude domain=["file" | "database" | "sharedpref" | "external" | "root"]path="[relative file path string]" /></full-backup-content>
As shown here, each
include
or
exclude
tag must include a
domain
attribute, which indicates the root directory for a file of that domain, and the path to the file (including file extension) relative to that domain root directory, where:
-
rootis the app’s root directory. -
fileis the directory returned by thegetFilesDirmethod. -
databaseis the default location for SQL databases, as returned bygetDatabasePath. -
sharedprefindicates a Shared Preferences XML file returned bygetSharedPreferences. -
externalcorresponds to a file in the directory returned bygetExternalFilesDir.
For example, this following snippet excludes a database file from Auto Backup:
<?xml version="1.0" encoding="utf-8"?><full-backup-content><exclude domain="database" path="top_secret_launch_codes.db"/></full-backup-content>
Once your backup scheme is defined, store it in your
res/xml
folder and associate it with your application using the
android:fullBackupContent
attribute in the application node of your manifest:
<application …android:fullBackupContent="@xml/mybackupscheme"></application>
Alternatively, if you wish to simply disable automatic app data backups completely, you can set the
android:allowBackup
attribute to false within the application node of your manifest:
<application …android:allowBackup="false"></application>
While it’s possible to disable Auto Backup, this isn’t recommended, as it offers a worse user experience for users moving between devices. Most users will expect your app to back up their settings and remember them when installing the app onto a new device. For this reason,
allowBackup
defaults to
true
. Make sure you have set up an alternate backup mechanism (for example, tied to your own custom login system) if you disable Android’s built in data backup.
BUILDING A PREFERENCE UI
Android offers an XML-driven framework to create system-style Preference Screens for your applications. By using this framework you can create a user-preferences UI that is consistent with those used in both native and other third-party applications.
This has two distinct advantages:
- Users will be familiar with the layout and use of your settings screens.
- You can integrate settings from other applications (including system settings, such as location settings) into your application’s preferences.
The preference framework consists of two primary components:
- Preference Screen layout —An XML file that defines the hierarchy of items displayed in your Preference Screens. It specifies the text and associated controls to display, the allowed values, and the Shared Preference keys to use for each control.
-
Preference Fragment
—Preference Screens are hosted within a
PreferenceFragmentorPreferenceFragmentCompat. It inflates the Preference Screen XML files, manages Preference dialog boxes, and handles transitions to other Preference Screens.
Using the Preference Support Library
The framework
PreferenceFragment
class must be added to a
PreferenceActivity
, meaning you can’t use Activity classes such as
AppCompatActivity
. As a result, it’s best practice use the
PreferenceFragmentCompat
class from the Preference Support Library, which allows you to add a support Preference Fragment to any Activity—which is what we’ll be doing in the remainder of this chapter.
If you’ve already downloaded the Android Support Library as described in Chapter 2 , you only need to add a Gradle dependency for the Preference Support Library, in order to take advantage of these features.
Open your
build.gradle
file and add the Fragment Support Library to the dependencies section:
dependencies {[… Existing dependencies …]implementation "com.android.support:preference-v14:27.1.1"}
Defining a Preference Screen Layout in XML
Unlike standard UI layouts, preference definitions are stored in the
res/xml
resources folder.
Although conceptually they are similar to the UI layout resources described in Chapter 5 , “Building User Interfaces,” Preference Screen layouts use a specialized set of UI controls designed specifically for Preference Screens. These native preference controls are described in the next section.
Each preference layout is defined as a hierarchy, beginning with a single
PreferenceScreen
element:
<?xml version="1.0" encoding="utf-8"?><PreferenceScreenxmlns_android="http://schemas.android.com/apk/res/android"></PreferenceScreen>
You can nest Preference Screen elements, where each nested screen is represented as a selectable element that displays a new screen when tapped.
Each Preference Screen can include any combination of
PreferenceCategory
and
Preference
elements.
Preference Category elements, as shown in the following snippet, are used to break each Preference Screen into subcategories using a title bar separator:
<PreferenceCategoryandroid:title="My Preference Category"/>
For example, Figure 8-1 shows the My Account and Services Preference Categories used on the Google Settings Preference Screen.
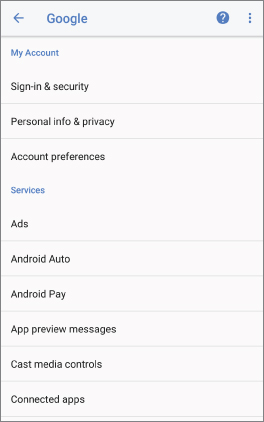
Preference elements are used to set and display the preferences themselves. The specific attributes used for each Preference element vary, but each includes at least the following:
-
android:key—The Shared Preference key against which the selected value will be recorded. -
android:title—The text displayed to represent the preference. -
android:summary—The longer text description displayed in a smaller font below the title text. -
android:defaultValue—The default value that will be displayed (and selected) if no preference value has been assigned to the associated preference key.
Listing 8-2 shows a sample Preference Screen that includes a Preference Category and Switch Preference.
When displayed, this Preference Screen will appear as shown in Figure 8-2 . You learn how to display a Preference Screen later in this chapter.

Native Preference Element Types
Android includes several Preference elements you can use to construct your Preference Screens:
-
CheckBoxPreference—A standard preference check box control used to set preferences to true or false. -
SwitchPreference—A two-state Boolean toggle displayed as an on-or-off switch to set preferences to true or false. Generally used in preference to the Check Box preference. -
EditTextPreference—Allows users to enter a string value as a preference. Selecting the preference text at run time displays a text-entry dialog box. -
ListPreference—The preference equivalent of a spinner. Selecting this preference displays a dialog box containing a list of values from which to select. You can specify separate arrays to contain different display text and corresponding selection values. -
MultiSelectListPreference—This is the preference equivalent of a check box list, allowing users to select multiple entries from a single list of options. -
RingtonePreference—A specialized List Preference that presents the list of available ringtones for user selection. This is particularly useful when you’re constructing a screen to configure Notification settings.
You can use a combination of each Preference element to construct your Preference Screen hierarchy. Alternatively, you can create your own specialized Preference elements by extending the
Preference
class (or any of the
Preference
subclasses from the list above.)
Using Intents to Add System Settings to Your Preference Screens
In addition to including your own Preference Screens, your hierarchies can include Preference Screens from other applications or—more usefully—the system Preferences.
You can invoke any Activity within your Preference Screen using an Intent; if you add an Intent element within a Preference Screen definition, the system will interpret this as a request to call
startActivity
using the specified action. The following XML snippet adds a link to the system’s display settings:
<?xml version="1.0" encoding="utf-8"?><PreferenceScreenxmlns_android="http://schemas.android.com/apk/res/android"><PreferenceCategoryandroid:title="My Preference Category"><Preferenceandroid:title="Intent preference"android:summary="System preference imported using an intent"><intent android:action="android.settings.DISPLAY_SETTINGS"/></Preference></PreferenceCategory></PreferenceScreen>
The
android.provider.Settings
class includes a number of
android.settings.*
constants that can be used to invoke the system settings screens including Bluetooth, location, and connectivity. You can see all of the available Intent actions at
d.android.com/reference/android/provider/Settings.html
.
Making Your Preference Screens Available to the System
To make your own Preference Screens available for invocation using this technique, simply add an Intent Filter to the manifest entry for the host Preference Activity (described in detail in the following section):
<activity android:name=".UserPreferences" android:label="My User Preferences"><intent-filter><action android:name="com.paad.myapp.ACTION_USER_PREFERENCE" /><category android:name="android.intent.category.DEFAULT" /></intent-filter></activity>
The most common use for this technique is to manage network usage. Since Android 4.0 Ice Cream Sandwich (API Level 14), the system preferences have allowed users to disable background data on a per-app basis. You can specify a Preference Activity that will be displayed when this setting is selected by adding an Intent Filter for
ACTION_MANAGE_NETWORK_USAGE
:
<activity android:name=".DataPreferences" android:label="Data Preferences"><intent-filter><action android:name="android.intent.action.MANAGE_NETWORK_USAGE" /><category android:name="android.intent.category.DEFAULT" /></intent-filter></activity>
The associated Preference Activity should provide settings for your app that provide fine-grained control over your app’s use of data, particularly in the background, such that users are more likely to modify data usage than disable background data completely.
Typical settings in this Preference Activity include update frequency, requirements for unmetered (Wi-Fi) connections, and charging status. In Chapter 11 , “Working in the Background” you’ll learn how to use the Job Scheduler to apply these settings to your background updates.
Introducing the Preference Fragment
The
PreferenceFragment
class hosts the Preference Screens defined earlier. To create a new Preference Fragment, extend the
PreferenceFragment
class. It’s best practice to use the support library Fragments, in which case you’ll extend the
PreferenceFragmentCompat
class:
public class MyPreferenceFragment extends PreferenceFragmentCompat
To inflate the Preference Screens, override
onCreatePreferences
and call
addPreferencesFromResource
, as shown in
Listing 8-3
.
Your application can include multiple Preference Fragments, which, just like any other Fragment, can be included in any Activity and added, removed, and replaced at run time. By convention the Preference Fragment will be the only Fragment displayed within its parent Activity.
Before you can add a Preference Fragment to an Activity, you must also include a
preferenceTheme
element in your Activity’s style. The following example uses the
PreferenceThemeOverlay.v14.Material
style available from the Preferences Support Library:
<style name="AppTheme" parent="@style/Theme.AppCompat"><item name="colorPrimary">@color/primary</item><item name="colorPrimaryDark">@color/primaryDark</item><item name="colorAccent">@color/colorAccent</item><itemname="preferenceTheme">@style/PreferenceThemeOverlay.v14.Material</item></style>
CREATING A SETTINGS ACTIVITY FOR THE EARTHQUAKE MONITOR
In the following example you build a settings Activity to set user preferences for the earthquake viewer last seen in the previous chapter. This Activity lets users configure settings for a more personalized experience. You’ll provide the option to toggle automatic updates, control the frequency of updates, and filter the minimum earthquake magnitude displayed.
-
Open the Earthquake project you last modified in
Chapter 7
, “Using Internet Resources,” and add the Preferences Support Library API to the app module
build.gradlefile. Our minimum SDK is 16, so we can use the v14 version of the preference support library:implementation 'com.android.support:preference-v14:27.1.1' -
Add new string resources to the
res/values/strings.xmlfile for the labels to be displayed in the Preference Screen. Also, add a string for the new Menu Item that will let users open the Preference Screen:<resources><string name="app_name">Earthquake</string><string name="earthquake_feed">https://earthquake.usgs.gov/earthquakes/feed/v1.0/summary/2.5_day.atom</string><string name="menu_update">Refresh Earthquakes</string><string name="auto_update_prompt">Auto refresh?</string><string name="update_freq_prompt">Refresh Frequency</string><string name="min_quake_mag_prompt">Minimum Quake Magnitude</string><string name="menu_settings">Settings</string></resources> -
Create four array resources in a new
res/values/arrays.xmlfile. They will provide the values to use for the update frequency and minimum magnitude spinners:<?xml version="1.0" encoding="utf-8"?><resources><string-array name="update_freq_options"><item>Every Minute</item><item>5 minutes</item><item>10 minutes</item><item>15 minutes</item><item>Every Hour</item></string-array><string-array name="update_freq_values"><item>1</item><item>5</item><item>10</item><item>15</item><item>60</item></string-array><string-array name="magnitude_options"><item>All Magnitudes</item><item>Magnitude 3</item><item>Magnitude 5</item><item>Magnitude 6</item><item>Magnitude 7</item><item>Magnitude 8</item></string-array><string-array name="magnitude_values"><item>0</item><item>3</item><item>5</item><item>6</item><item>7</item><item>8</item></string-array></resources> -
Create a new XML resource folder at
res/xml. Within it create a newuserpreferences.xmlfile. This file will define the settings UI for your earthquake application settings. Include a switch for indicating the “auto refresh” toggle, and List Preferences to select the update rate and magnitude filter. Note the key values for each preference:<?xml version="1.0" encoding="utf-8"?><PreferenceScreenxmlns_android="http://schemas.android.com/apk/res/android"><SwitchPreferenceandroid:key="PREF_AUTO_UPDATE"android:title="@string/auto_update_prompt"android:summary="Select to turn on automatic updating"android:defaultValue="true"/><ListPreferenceandroid:key="PREF_UPDATE_FREQ"android:title="@string/update_freq_prompt"android:summary="Frequency at which to refresh earthquake list"android:entries="@array/update_freq_options"android:entryValues="@array/update_freq_values"android:dialogTitle="Refresh frequency"android:defaultValue="60"/><ListPreferenceandroid:key="PREF_MIN_MAG"android:title="@string/min_quake_mag_prompt"android:summary="Select the minimum magnitude earthquake to display"android:entries="@array/magnitude_options"android:entryValues="@array/magnitude_values"android:dialogTitle="Magnitude"android:defaultValue="3"/></PreferenceScreen> -
Create a new
preferences.xmllayout resource in theres/layoutfolder for the Preferences Activity. Note that it includes aPrefFragmentinner class defined within thePreferencesActivty. You’ll create those in the next step.<?xml version="1.0" encoding="utf-8"?><FrameLayoutxmlns_android="http://schemas.android.com/apk/res/android"android:layout_width="match_parent"android:layout_height="match_parent"><fragmentandroid:id="@+id/preferences_fragment"android:layout_width="match_parent"android:layout_height="match_parent"android:name="com.professionalandroid.apps.earthquake.PreferencesActivity$PrefFragment"/></FrameLayout> -
Create the
PreferencesActivityActivity by extendingAppCompatActivity. OverrideonCreateto inflate the layout you created in Step 5, and create a staticPrefFragmentclass that extendsPreferenceFragmentCompat. Your Pref Fragment will contain your Preference Screen within the Preference Activity.import android.os.Bundle;import android.support.v7.app.AppCompatActivity;import android.support.v7.preference.PreferenceFragmentCompat;public class PreferencesActivity extends AppCompatActivity {@Overridepublic void onCreate(Bundle savedInstanceState) {super.onCreate(savedInstanceState);setContentView(R.layout.preferences);}public static class PrefFragment extends PreferenceFragmentCompat {}} -
Within your
PrefFragmentclass, override theonCreatePreferencesmethod to inflate theuserpreferences.xmlfile you created in Step 4:public static class PrefFragment extends PreferenceFragmentCompat {@Overridepublic void onCreatePreferences(Bundle savedInstanceState,String rootKey) {setPreferencesFromResource(R.xml.userpreferences, null);}} -
Within your
PreferencesActivity, add public static string values that correspond to the preference keys used in Step 4. You’ll use these strings to access the Shared Preferences used to store each preference value.public class PreferencesActivity extends AppCompatActivity {public static final String PREF_AUTO_UPDATE = "PREF_AUTO_UPDATE";public static final String USER_PREFERENCE = "USER_PREFERENCE";public static final String PREF_MIN_MAG = "PREF_MIN_MAG";public static final String PREF_UPDATE_FREQ = "PREF_UPDATE_FREQ";@Overridepublic void onCreate(Bundle savedInstanceState) {super.onCreate(savedInstanceState);setContentView(R.layout.preferences);}} -
Open your
res/values/styles.xmlfile and add a new item that defines yourpreferenceThemeto use the v14 Material design Preference Theme Overlay:<style name="AppTheme" parent="@style/Theme.AppCompat"><item name="colorPrimary">@color/primary</item><item name="colorPrimaryDark">@color/primaryDark</item><item name="colorAccent">@color/colorAccent</item><itemname="preferenceTheme">@style/PreferenceThemeOverlay.v14.Material</item></style> -
That completes your Preferences Activity. Open the application manifest and add an entry for this Activity, including an Intent Filter that it will be triggered if the user chooses to modify the app’s background data settings from the system preferences.
<activity android:name=".PreferencesActivity"><intent-filter><action android:name="android.intent.action.MANAGE_NETWORK_USAGE" /><category android:name="android.intent.category.DEFAULT" /></intent-filter></activity> -
Return to the
EarthquakeMainActivity, and add support for using the preferences selected from your Preference Activity. Start by adding a Menu Item to display the Preferences Activity. Override theonCreateOptionsMenumethod to include a new item that will open the Preferences Activity:private static final int MENU_PREFERENCES = Menu.FIRST+1;@Overridepublic boolean onCreateOptionsMenu(Menu menu) {super.onCreateOptionsMenu(menu);menu.add(0, MENU_PREFERENCES, Menu.NONE, R.string.menu_settings);return true;} -
Override the
onOptionsItemSelectedmethod to display thePreferencesActivitywhen the new Menu Item from Step 11 is selected. To launch the Preferences Activity, create an explicit Intent, and pass it in to thestartActivityForResultmethod. This will launch the Activity and alert theEarthquakeMainActivityclass when the Preferences Activity is finished via theonActivityResulthandler.private static final int SHOW_PREFERENCES = 1;public boolean onOptionsItemSelected(MenuItem item){super.onOptionsItemSelected(item);switch (item.getItemId()) {case MENU_PREFERENCES:Intent intent = new Intent(this, PreferencesActivity.class);startActivityForResult(intent, SHOW_PREFERENCES);return true;}return false;} -
Launch your application and select Preferences from the Activity menu. The Preferences Activity should be displayed, as shown in
Figure 8-3
.

-
All that’s left is to apply the preferences to the earthquake app functionality. Implementing the automatic updates will be left until
Chapter 11
, “Working in the Background,” where you learn to use the Job Scheduler for this. For now you can apply the magnitude filter. Start by creating a new
updateFromPreferencesmethod in theEarthquakeListFragmentthat reads the Shared Preference minimum magnitude value:private int mMinimumMagnitude = 0;private void updateFromPreferences() {SharedPreferences prefs =PreferenceManager.getDefaultSharedPreferences(getContext());mMinimumMagnitude = Integer.parseInt(prefs.getString(PreferencesActivity.PREF_MIN_MAG, "3"));} -
Apply the magnitude filter by updating the
setEarthquakesmethod from theEarthquakeListFragmentto update the minimum magnitude preference, and check each earthquake’s magnitude before adding it to the list:public void setEarthquakes(List<Earthquake> earthquakes) {updateFromPreferences();for (Earthquake earthquake: earthquakes) {if (earthquake.getMagnitude() >= mMinimumMagnitude) {if (!mEarthquakes.contains(earthquake)) {mEarthquakes.add(earthquake);mEarthquakeAdapter.notifyItemInserted(mEarthquakes.indexOf(earthquake));}}}if (mEarthquakes != null && mEarthquakes.size() > 0)for (int i = mEarthquakes.size() - 1; i >= 0; i--) {if (mEarthquakes.get(i).getMagnitude() < mMinimumMagnitude) {mEarthquakes.remove(i);mEarthquakeAdapter.notifyItemRemoved(i);}}mSwipeToRefreshView.setRefreshing(false);} -
The final step is to create a new
OnSharedPreferenceChangeListenerwithin the Earthquake List Fragment that will repopulate the Earthquake list, applying the magnitude filter based on the new setting. :@Overrideprotected void onActivityCreated(Bundle savedInstanceState) {[… Existing onActivityCreated method …]// Register an OnSharedPreferenceChangeListenerSharedPreferences prefs =PreferenceManager.getDefaultSharedPreferences(getContext());prefs.registerOnSharedPreferenceChangeListener(mPrefListener);}private SharedPreferences.OnSharedPreferenceChangeListener mPrefListener= new SharedPreferences.OnSharedPreferenceChangeListener() {@Overridepublic void onSharedPreferenceChanged(SharedPreferencessharedPreferences,String key) {if (PreferencesActivity.PREF_MIN_MAG.equals(key)) {List<Earthquake> earthquakes= earthquakeViewModel.getEarthquakes().getValue();if (earthquakes != null)setEarthquakes(earthquakes);}}};
INCLUDING STATIC FILES AS RESOURCES
If your application requires external file resources, you can include them in your distribution package by placing them in the
res/raw
folder of your project resources hierarchy.
To access these read-only file resources, call the
openRawResource
method from your application’s
Resource
object to receive an
InputStream
based on the specified file. Pass in the filename (without the extension) as the variable name from the
R.raw
class, as shown in the following skeleton code:
Resources myResources = getResources();InputStream myFile = myResources.openRawResource(R.raw.myfilename);
Adding raw files to your resources hierarchy is an excellent alternative for large, preexisting data sources (such as dictionaries) for which it’s not desirable (or even possible) to convert them into Android databases.
Android’s resource mechanism lets you specify alternative resource files for different languages, locations, and hardware configurations. For example, you could create an application that loads a different dictionary resource based on the user’s language settings.
WORKING WITH THE FILESYSTEM
It’s good practice to use Shared Preferences or a database (described in more detail in Chapter 9 , “Creating and Using Databases”) to store your application data, but there may still be times when you’ll want to use files directly rather than rely on Android’s managed mechanisms—particularly when working with binary files.
File-Management Tools
Android supplies some basic file-management tools to help you deal with the filesystem. Many of these utilities are located within the
java.io.File
package.
Although complete coverage of Java file-management utilities is beyond the scope of this book, Android does supply some specialized utilities for file management that are available from the application Context.
-
deleteFile—Enables you to remove files created by the current application -
fileList—Returns a string array that includes all the files created by the current application
These methods are particularly useful for cleaning up temporary files left behind if your application crashes or is killed unexpectedly.
Creating Files on Application-Specific Internal Storage
Each application is provided with a data directory on internal storage where it can create files that are private to the application, and not accessible to other apps. This data directory and all files within it are automatically deleted when the app is uninstalled.
The two primary subdirectories within this data directory are the files directory and cache directory, available via the
getFilesDir
and
getCacheDir
methods of your Context respectively.
The location returned by
getFilesDir
is the appropriate place to store persistent, private files that your app expects to be available until/unless it removes them.
In contrast, files storied in the location returned by
getCacheDir
will potentially be erased by the system when it is running low on available storage, and should therefore be considered temporary storage. As such, these cache files won’t be backed up by Auto Backup, their absence or deletion should not cause the user to lose any data, and your app should be prepared for these files to be removed at any time. In addition to the system, users can manually choose to remove these temporary cache files by selecting “Clear Cache” from the system settings for your app.
Creating Files on Application-Specific External Storage
In addition to the data directory on internal storage, your application also has access to application-specific directories on external storage. Similarly to the previously discussed internal storage directories, files created in these application-specific external storage directories are also deleted when the app is uninstalled.
When referring to
external
storage, we refer to the shared/media storage that is accessible by all applications and can typically be mounted to a computer filesystem when the device is connected via USB. Depending on the device, this can be a separate partition on the internal storage or on the SD card.
Environment.isExternalStorageEmulated
returns true if the internal storage and external storage are backed by the same underlying storage device.
The most important thing to remember when storing files on external storage is that no security is enforced on files stored here. Any application can access, overwrite, or delete files stored on the external storage.
The Context method
getExternalFilesDir
is the external storage equivalent to
getFilesDir
. It accepts a string parameter that can be used to specify the subdirectory into which you want to place your files. The
Environment
class includes a number of
DIRECTORY_[Category]
string constants that represent standard directories, such as for images, movies, and music files.
Similar to the case for internal storage,
getExternalCacheDir
allows you to store temporary files in external storage. Note that Android does not always monitor available storage space on external storage, so you must monitor and manage the size and age of your cache, deleting files when a reasonable maximum cache size is exceeded.
For devices that have multiple external directories available such as those with an emulated external storage and a separate SD card, Android 4.4 Kit Kat (API Level 19) added the
getExternalFilesDirs
and
getExternalCacheDirs
directories, which will return an array of directories, allowing your app read and write access to application-specific directories on each external storage device. The first directories in the array correspond with the directory returned by
getExternalFilesDir
or
getExternalCacheDir
.
Files stored in the application folders should be specific to the parent application and are typically not detected by the Media Scanner, and therefore won’t be added to the Media Library automatically.
If your application downloads or creates files that should be added to the Media Library such as images, audio, or video files, you should store them in the location returned by the
getExternalMediaDirs
method added in Android 6.0 Marshmallow (API Level 21) so that they are automatically scanned by the Media Scanner.
Accessing Public Directories Using Scoped Directory Access
Files stored in the application-specific directories on internal and external storage as described previously are deleted when the app is uninstalled. However, applications can also store files in shared public directories; these files will be persisted even if after your app is uninstalled.
Due to the shared nature of these public directories, users must explicitly give your app access before it can read or write files in these directories. Scoped Directory Access, introduced in Android 7.0 Nougat (API Level 24), is the process through which you can request access to these shared public directories on a given Storage Volume.
The primary Storage Volume is the same storage device as the application-specific external storage directories described previously. Secondary Storage Volumes may include SD cards and temporarily attached storage devices such as USB attached devices.
A particular
StorageVolume
object is retrieved using the
StorageManager
, as shown in the following snippet that retrieves the primary storage volume using the
getPrimaryStorageVolume
method:
StorageManager sm =(StorageManager)getSystemService(Context.STORAGE_SERVICE);StorageVolume volume = sm.getPrimaryStorageVolume();
To access a particular public directory, call
createAccessIntent
, passing in a parameter that specifies the directory you require using one of the
Environment.DIRECTORY_
static constants:
Intent intent =volume.createAccessIntent(Environment.DIRECTORY_PICTURES);
The
Environment
class includes a number of static string constants that let you specify the public directory you wish to access, including:
-
DIRECTORY_ALARMS—Audio files that should be available as user-selectable alarm sounds -
DIRECTORY_DCIM—Pictures and videos taken by the device -
DIRECTORY_DOCUMENTS—Documents created by the user -
DIRECTORY_DOWNLOADS—Files downloaded by the user -
DIRECTORY_MOVIES—Video files that represent movies -
DIRECTORY_MUSIC—Audio files that represent music -
DIRECTORY_NOTIFICATIONS—Audio files that should be available as user-selectable notification sounds -
DIRECTORY_PICTURES—Image files that represent pictures -
DIRECTORY_PODCASTS—Audio files that represent podcasts -
DIRECTORY_RINGTONES—Audio files that should be available as user-selectable ringtones
Once you have an Intent returned from
createAccessIntent
, pass it to
startActivityForResult
as seen in
Listing 8-4
:
The user will be shown a dialog box, as shown in Figure 8-4 , where they can grant your app access to the specified directory (and any subdirectories) on the given storage volume. If users have previously denied your request, they will be offered a “Don’t ask again” check box, which, if selected, will lead to an automatic denial on any further requests for the same location.

If the user accepts your request, the callback to
onActivityResult
will have a result code of
RESULT_OK
and
getData
will return a document tree URI to the newly accessible directory, as seen in
Listing 8-5
.
Unlike a traditional
java.io.File
, a document URI provides access to files through methods within the
DocumentContract
class, and by using a
ContentResolver
to query metadata about the file. Similarly, you must use
openInputStream
to access the contents of each document, as seen in
Listing 8-6
.
Alternatively, the Support Library includes a helper
DocumentFile
class, which emulates the
File
API at the expense of additional overhead, as shown in
Listing 8-7
.
You can find more details on using document URIs and using
DocumentContract
later in this chapter within the “Accessing Files from Other Applications Using the Storage Access Framework” section.
By default, each request for Scoped Directory Access will persist only for the current session. If your app needs persistent access to the requested directory, you must call
ContentResolver.takePersistableUriPermission
passing in the received document tree URI, and either (or both)
FLAG_GRANT_READ_URI_PERMISSION
and/or
FLAG_GRANT_WRITE_URI_PERMISSION
to request persistent read and/or write permission, respectively.
If the user grants permission, subsequent access requests will automatically return successfully with no user interaction or dialog box. This will allow your app to continue to have access to the directory across multiple sessions—even after the device reboots:
@Overridepublic void onActivityResult(int requestCode, int resultCode, Intent data) {if (requestCode == PICTURE_REQUEST_CODE && resultCode == RESULT_OK) {Uri documentTreeUri = data.getData();// Persist access to the directory so it can be accessed multiple timesgetContentResolver().takePersistableUriPermission(documentTreeUri,Intent.FLAG_GRANT_READ_URI_PERMISSION);// Use the returned URI to access the files within the directoryhandleDocumentTreeUri(documentTreeUri);}}
SHARING FILES USING FILE PROVIDER
The Android Support Library contains the
FileProvider
class, specifically designed for transforming files in application-specific directories into content URIs, making it possible to share them with other apps.
Creating a File Provider
Unlike Services or Activities, which you must extend and implement, File Providers are added directly to your manifest using a
provider
node:
<providerandroid:name="android.support.v4.content.FileProvider"android:authorities="${applicationId}.files"android:grantUriPermissions="true"android:exported="false"><meta-dataandroid:name="android.support.FILE_PROVIDER_PATHS"android:resource="@xml/filepaths"/></provider>
The
android:authorities
attribute must be a unique string, typically prefixed with the app’s
applicationId
or package name. Gradle offers a placeholder—
${applicationId}
—that you can use to insert the application ID.
Each File Provider allows sharing from the directories you specify in the XML paths file you specify in the
android:resource
attribute of the
android.support.FILE_PROVIDER_PATHS
metadata node. This XML file lets you specify paths relative to your application’s internal and external files and caches, for example:
<paths><!-- Any number of paths can be declared here --><files-path name="my_images" path="images/" /><cache-path name="internal_image_cache" path="imagecache/" /><external-files-path name="external_audio" path="audio/" /><external-cache-path name="external_image_cache" path="imagecache/" /></paths>
Each path node requires a unique name for that directory, and its relative path.
Sharing a File Using a File Provider
Sharing a file with
FileProvider
requires that you first create a content URI for it. You can do this using
FileProvider.getUriForFile
and passing in a Context, the authority you added to your manifest, and the file itself:
File photosDirectory = new File(context.getFilesDir(), "images");File imageToShare = new File(photosDirectory, "shared_image.png");Uri contentUri = FileProvider.getUriForFile(context,BuildConfig.APPLICATION_ID + ".files", imageToShare);
The content URI can then be attached to an
ACTION_SEND
Intent to share with another app. The Android Support Library includes the
ShareCompat
class, which makes this simple:
ShareCompat.IntentBuilder.from(activity).setType("image/png").setStream(contentUri).startChooser();
Receiving a File from a File Provider
When you receive a shared file, you can get access to its contents using
ContentResolver.openInputStream
. For example, to extract a Bitmap from a received content URI:
Uri uri = ShareCompat.IntentReader.from(activity).getStream();Bitmap bitmap;try (InputStream in = getContentResolver().openInputStream(uri)) {bitmap = BitmapFactory.decodeStream(in);} catch (IOException e) {Log.e(TAG, e.getMessage(), e);}
ACCESSING FILES FROM OTHER APPLICATIONS USING THE STORAGE ACCESS FRAMEWORK
The Storage Access Framework provides a standard system-wide UI that can be used to enable users to pick files from the external public storage directories, or from apps that choose to provide files by exposing Document Providers.
This feature is useful for applications that may wish to include files, particularly images, created and stored by those applications—such as when composing an e-mail, sending a text message, or posting to social media.
Android provides a number of built in Document Providers that provide access to images, videos, and audio files on the device—as well as access to the contents of all external public directories, including those on SD cards or other external storage devices.
Document Providers accessed through the Storage Access Framework provide access to documents , not traditional files .
Documents differ from files in that they are addressed by a URI, rather than by path and file name. They also provide a level of abstraction over the usual file APIs to allow transparent access to cloud based files.
Therefore when working with documents, you can’t use the
java.io
APIs. Instead, the
DocumentsContract
class contains the equivalent methods that take a document Uri.
Requesting Temporary Access to Files
When performing a one-time operation, such as posting a file to social media, you will only need temporary access to the relevant file. You can enable users to select one or more files by using the
ACTION_GET_CONTENT
action within an Intent:
Intent intent = new Intent(Intent.ACTION_GET_CONTENT);intent.setType("image/*");intent.addCategory(Intent.CATEGORY_OPENABLE);intent.putExtra(Intent.EXTRA_ALLOW_MULTIPLE, true);startActivityForResult(intent, REQUEST_IMAGES_CODE);
Using
startActivityForResult
, passing in this Intent, launches the Storage Access Framework UI, which filters the available files based on the mime type specified in the Intent using
setType
.
Android supports both openable files (those with direct byte representations that you can access with
openInputStream
) and virtual files (that do not have a byte representation). By specifying
CATEGORY_OPENABLE
using
addCategory
, only openable files will be available to select.
The
EXTRA_ALLOW_MULTIPLE
extra is optional and indicates that the user can select multiple files to return to your app. You can then use
getClipData
to retrieve the list of URIs selected when the result Intent is returned. In all cases, the first URI selected is available by calling
getData
.
Requesting Persistent Access to Files
If you require persistent access to selected files, you should use
ACTION_OPEN_DOCUMENT
instead of
ACTION_GET_CONTENT
. This allows your app to receive updates if the file is changed within the original provider.
All URIs returned when using
ACTION_OPEN_DOCUMENT
will be document URIs, allowing advanced functionality including retrieving metadata about the file (including the name and a summary of the file), as well as optional functionality (such as getting a thumbnail).
It also enables you to manage the file using operations such as copying, deleting, moving, removing, or renaming. Once you receive the document URI, you must call
ContentResolver.takePersistableUriPermission
for each URI to get persistent permission to access the URI across sessions and device reboots.
Requesting Access to Directories
Persistent access to files allows a client app to stay in sync with the Document Provider app, but ignores any structural changes such as the addition of new files or new subdirectories.
ACTION_OPEN_DOCUMENT_TREE
solves this problem by allowing the user to select a directory, and giving your app persistent access to the entire directory tree, as seen in
Listing 8-8
.
When a directory is selected, you’ll receive a document tree URI, allowing you to recursively enumerate all of the files in that directory. The same code used for Scoped Directory Access in
Listings 8-6
and
8
-
7
can be used to parse the results of
ACTION_OPEN_DOCUMENT_TREE
.
Creating New Files
By creating an Intent that uses the
ACTION_CREATE_DOCUMENT
action, you can enable users to select a location to save content—be it locally or to a cloud-based Document Provider offered through the Storage Access Framework. The only required field is a mime type, set using
setType
; however, you can provide a suggested initial name by including an
EXTRA_TITLE
extra. To ensure that you can write the byte representation of the new file,
CATEGORY_OPENABLE
is also specified:
Intent intent = new Intent(Intent.ACTION_CREATE_DOCUMENT);intent.setType("image/png");intent.addCategory(Intent.CATEGORY_OPENABLE);intent.putExtra(Intent.EXTRA_TITLE, "YourImage.png");startActivityForResult(intent, REQUEST_CREATE_IMAGE_CODE);
When the user has selected a location for the new file (either by selecting an existing file of the same mime type to override, or choosing a new filename), a document URI will be returned, and the content of the file can be written using
ContentResolver.openOutputStream
. You can maintain persistent permission to access the newly created file by passing the returned content URI to
ContentResolver.takePersistableUriPermission
as described earlier in this chapter.
USING URI-BASED PERMISSIONS
Android apps can only store files in application-specific directories, effectively segmenting them from all other apps. This useful security property would normally prevent apps from sharing files to other apps; however, Android provides a number of techniques using URI-based permissions, which allow your app to grant temporary or persistent access of its files to other applications.
URI-based permissions are applied to single URIs, where each URI represents a specific file or directory. This allows a much more fine-grained security model than file permissions.
URI-based permissions are used behind the scenes to enable Scoped Directory Access, File Providers, and the Storage Access Framework described earlier in this chapter, so understanding how they operate can be useful.
Using URI-based permissions, an application can grant access to a particular file or directory within its sandbox to another app—be it on the same user profile or on a work profile. You do this by including
FLAG_GRANT_READ_URI_PERMISSION
or
FLAG_GRANT_WRITE_URI_PERMISSION
, as appropriate, within an Intent passed to the app seeking to access its files:
Intent sendIntent = new Intent();sendIntent.setAction(Intent.ACTION_VIEW);sendIntent.setType("image/png");sendIntent.setData(contentUri);sendIntent.addFlags(Intent.FLAG_GRANT_READ_URI_PERMISSION);startActivity(sendIntent);
Using
FLAG_GRANT_PREFIX_URI_PERMISSION
can be combined with the read or write URI permission to grant access to all URIs with a particular prefix.
URI-based permissions are short lived—as soon as the component that received the Intent with the URI permission flags is destroyed, access to that URI is revoked. However, if the receiving component forwards the Intent, including the flags to a Service for processing, the permission will remain valid until both components are destroyed.
Further, if the sending app includes
FLAG_GRANT_PERSISTABLE_URI_PERMISSION
with the Intent, the permission can be persisted with
ContentResolver.takePersistableUriPermission
and will be kept until the app calls
releasePersistableUriPermission
, or the sending app calls
Context.revokeUriPermission
.
This level of fine-grained control and ability for a sending app to grant permissions to resources to other apps make URI-based permissions ideal for sharing files between apps.
9
Creating and Using Databases
INTRODUCING STRUCTURED DATA STORAGE IN ANDROID
This chapter introduces structured data storage in Android, starting with the Room persistence library, before investigating the underlying SQLite relational database, and exploring the Firebase Realtime NoSQL Database.
Room provides an abstraction layer over SQLite that allows you to persist your applications data using the powerful SQLite database, while abstracting away the complexity of managing the database itself.
You learn how to define the Room database and how to query it and perform transactions using Data Access Objects (DAO). You also learn how to use Live Data to track changes in query results within your application’s data layer, when the underlying data changes.
This chapter also explores the SQLite database APIs underlying Room. Using SQLite, you can create fully encapsulated relational databases for your applications, and use them to store and manage complex, structured application data.
Every application can create its own SQLite databases, over which it has complete control; all databases are private, accessible only by the application that created them.
In addition to the SQLite relational database library, you can use the Firebase Realtime Database to create and use a cloud-hosted NoSQL database.
By the end of this chapter, you’ll learn how to incorporate and use a cloud-based Firebase Database, which stores its contents as a JSON tree on each device and automatically synchronizes it in real time to the cloud-host and every connected client.
STORING DATA USING THE ROOM PERSISTENCE LIBRARY
Room is a persistence library that simplifies the process of adding a structured SQL database to your app. Room provides an abstraction layer over an SQLite backend, making it easier to define and access a database for your app’s structured data, while still offering the full power of SQLite.
One of the challenges of adding a database to your app is creating and maintaining an object-relational mapping (ORM). An ORM is necessary, because while your application’s data is stored as variables within objects defined by your classes, relational databases store data in rows using columns within tables.
As a result, whenever you wish to store data in an SQLite table, you must first extract the data stored as variables within each object, and convert them into a row of values according to the columns of your table (using Content Values). Similarly, when extracting data from the table, you receive one or more rows of values (as a Cursor), which must be translated into one or more objects. Figure 9-1 shows the typical mapping of objects to rows within tables.

Creating and maintaining the ORM code required to translate between your application’s class-based data model, and the relational databases tables and columns, is one of the most error prone and time-consuming aspects of using relational databases such as SQLite.
Room simplifies this by allowing you to use annotations within your class definitions, which map class variables to table columns, and methods to SQL statements. This abstracts away the underlying database, meaning you don’t need to maintain a separate list of table and column names, or separately maintain SQL statements for inserting, deleting, updating, or querying SQL statements.
Query annotations use SQL, providing the full power of SQLite, while also allowing the compiler to verify each query at compile time. As a result, if a query has invalid field/column names, a compilation error occurs instead of a runtime failure.
Adding the Room Persistence Library
The Room persistence library is available as part of the Android Architecture Components suite of libraries, available from Google’s Maven repository.
To add Room to your application, first ensure your project
build.gradle
file includes the Google Maven repository within the all projects repositories node:
allprojects {repositories {jcenter()maven { url 'https://maven.google.com' }}}
Open your app module
build.gradle
file and add the following Room library dependencies within the dependencies node (as always, you should indicate the newest version available to you):
dependencies {[… Existing dependencies …]implementation "android.arch.lifecycle:extensions:1.1.1"implementation "android.arch.persistence.room:runtime:1.1.1"annotationProcessor "android.arch.persistence.room:compiler:1.1.1"testImplementation "android.arch.persistence.room:testing:1.1.1"}
Defining a Room Database
The Room persistence model requires you to define three components:
-
Entity
—One or more classes, annotated with the
@Entityannotation, which define the structure of a database table that will be used to store instances of the annotated class. -
Data Access Object
—A class annotated with the
@Daoannotation that will define the methods used to modify or query the database. -
Room Database
—An abstract class annotated with the
@Databaseannotation that extendsRoomDatabase. This class is the main access point for the underlying SQLite connection, and must also include an abstract method that returns the Data Access Object class and the list of entities the database willcontain.
Figure 9-2 illustrates the relationship between the Room persistence model, the underlying database, and your application.

Classes annotated as entities are used to define the tables within your database. Each entity must include one non-nullable field annotated as the primary key using the
@PrimaryKey
annotation. The following snippet will create a table that includes three columns containing the hoard name, amount of gold hoarded, and the hoard’s accessibility, where the hoard name is the primary key:
@Entitypublic class Hoard {@NonNull@PrimaryKeypublic String HoardName;public int GoldHoarded;public boolean HoardAccessible;}
By default, all public fields will be included in the table definition. You can use the
@Ignore
annotation to indicate fields that should not be persisted.
To persist fields that are accessed using getters and setters, rather than public variables, you can annotate the private variables, provided that the getters and setters use JavaBeans notation, where the methods for variable
foo
would be
getFoo
and
setFoo
respectively, as shown in
Listing 9-1
. Note that for Boolean values, an
is
method—
isFoo
—can be used instead of a
get
method.
The parameters for your class’s constructors should contain names and types that correspond to the entity fields, as shown in Listing 9-1 . Empty or partial constructors are also supported.
Once your entities are defined, create a new abstract class that extends
RoomDatabase,
annotating it with a
@Database
annotation that includes a list of each of your entity classes and the current version number—as shown in
Listing 9-2
.
Before you can use your database you must create a data access object class, which will be returned from your Room Database, as shown in the section, “Defining Room Database Interactions Using Data Access Objects.”
Persisting Complex Objects Using Type Convertors
Room will attempt to allocate a column for each field; however, only the primitive types supported by SQLite—Booleans, Strings, integers, longs, and doubles—will work by default.
For public fields that hold class objects, you can choose to use the
@Ignore
annotation, as shown in the following snippet, to indicate a field that should not be stored in the database:
@Entitypublic class Album {@NonNull@PrimaryKeypublic String albumName;public String artistName;@Ignorepublic Bitmap albumArt;}
Alternatively, if you wish to record the contents of an object within your Room database you must define a pair of Type Convertor methods—annotated using the
@TypeConverter
annotation—that can translate back-and-forth between the object stored in the field and a single primitive value.
The following snippet shows a simple pair of Type Converters that translate between a Date object and a long value representing the timestamp:
public class MyTypeConverters {@TypeConverterpublic static Date dateFromTimestamp(Long value) {return value == null ? null : new Date(value);}@TypeConverterpublic static Long dateToTimestamp(Date date) {return date == null ? null : date.getTime();}}
Once defined, you can use the
@TypeConverters
annotation to apply the Type Converters within one or more classes, defined as an array value as shown in the following snippet:
@TypeConverters({MyTypeConverters.class})
Typically, you will apply the
@TypeConverters
annotation to the Room Database definition as shown in this snippet:
@Database(entities = {Album.class}, version = 1)@TypeConverters({MyTypeConverters.class})public abstract class AlbumDatabase extends RoomDatabase{}
This will apply the Type Converters within the specified class to every Entity and DAO within your database.
Alternatively, you can restrict the scope of the Type Converters within a given class to one or more specific Entities, DAOs, specific Entity fields, DAO methods, or even individual DAO method parameters.
As a result, you can create multiple alternative Type Converters—between the same object/ primitive-type pairs—that are applied to different elements within your Room Database.
For more information on why Room doesn’t automatically support storage or object references, see the Room documentation at
d.android.com/training/data-storage/room/referencing-data.html
.
Defining Room Database Interactions Using Data Access Objects
Data Access Objects (DAO) are classes used to define your Room database interactions, including methods used to insert, delete, update, and query your database. If your database includes multiple tables, it’s best practice to have multiple DAO classes, one for each table.
DAO’s are defined either as interfaces or abstract classes, annotated using the
@Dao
annotation as shown in
Listing 9-3
.
Once defined, make it available to your app by adding a new abstract public method to the Room Database class that returns the new DAO, as shown in Listing 9-4 that extends Listing 9-2 .
Within your DAO, create new methods to support each of your database interactions using the
@Insert
,
@Update
,
@Delete
, and
@Query
annotations.
Inserting Entities
Use the
@Insert
annotation to annotate methods that will be used to insert a new object/entity instance into your database. Each insert method can accept one or more parameters (including collections), of the type/entity represented by this DAO.
As shown in
Listing 9-5
, you can include multiple insert methods, and optionally use the
onConflict
annotation parameter to indicate a strategy for handling conflicts where the inserted object has the same primary key value as an existing stored object.
In addition to the replace strategy for conflict resolution shown in Listing 9-5 , the following alternatives are available:
-
ABORT—Cancel the ongoing transaction. -
FAIL—Cause the current transaction to fail. -
IGNORE—Ignore the conflicting new data and continue the transaction. -
REPLACE—Override the existing value with the newly supplied value and continue the transaction. -
ROLLBACK—Roll back the current transaction, reversing any previously made changes.
Updating Entities
You can create methods that update objects stored within your database using the
@Update
annotation, as shown in
Listing 9-6
.
Like insert methods, each update method can accept one or more entity parameters (including collections). Each object parameter passed in will be matched against the primary key of existing database entities and updated accordingly.
Deleting Entities
To define a method that deletes or removes an object from the database, use the
@Delete
annotation, as shown in
Listing 9-7
. Room will use the primary key of each received parameter to find entities within the database and remove them.
If you wish to remove all the entities stored within a given table, you must use a
@Query
annotation that deletes all the entries from a given table:
@Query("DELETE FROM hoard")public void deleteAllHoards();
Query annotations can be used to perform arbitrary SQL operations against your Room database, as shown in the following section.
Querying a Room Database
The most powerful annotation you can use within your DAO class is
@Query
. The
@Query
annotation allows you to perform read/write operations on the database using
SELECT
,
UPDATE
, and
DELETE
SQL statements, defined in the annotation value as shown in the snippet below, which will be executed when the associated method is called:
@Query("SELECT * FROM hoard")public List<Hoard> loadAllHoards();
Each
@Query
SQL statement is verified at compile time, so if there is a problem with the query, a compilation error occurs instead of a runtime failure.
To use method parameters within the SQL query statement, you can reference them by prepending a colon (
:
) to the parameter name, as shown in
Listing 9-8
, which shows two common
SELECT
statements—one that returns all the database table entries, and another that returns a given row based on a primary key value.
For
SELECT
queries that return one or more entities from a table, Room auto-generates the code that converts the query result into the return type indicated by your method.
It’s also possible to pass through method parameters that contain a List or array of values as shown in Listing 9-9 .
Room will construct a query that binds each element in the array or list, for example if the
hoardNames
parameter in
Listing 9-9
is an array of 3 elements, Room will run the query as follows:
SELECT * FROM Hoard WHERE hoardName IN(?, ?, ?)
For efficiency reasons, it’s often desirable to return only a subset of fields/columns from the underlying Room database—or to return a single calculated value such as in this snippet:
@Query("SELECT SUM(goldHoarded) FROM hoard")public int totalGoldHoarded();
To return a subset of columns/fields, create a new class that contains public fields that match the returned columns, as shown in this snippet:
public class AnonymousHoard {public int goldHoarded;public boolean hoardAccessible;}
Then define a
SELECT
statement that indicates the columns to return, and set the return type of the method to any class that contains public fields that match the returned column names, as shown in
Listing 9-10
.
When a single row is returned, the return type can be any compatible type. For queries that return multiple values, you can use a List or array of a compatible type. It’s also possible to return a raw Cursor, or have the results wrapped in a
LiveData
object as described in a later section.
Room verifies the return results of
SELECT
queries, such that if the fields in the method’s return type don’t match the columns names in the query response, you’ll receive a warning (if only some field names match), or an error (if no field names match.)
Performing Room Database Interactions
Once you’ve defined the entities, DAO, and Room Database classes for your Room database, you can interact with it using the Room
databaseBuilder
method, passing in the application context, your Room Database, and filename to use for your database.
Creating and maintaining a Room Database instance is resource intensive, so it’s best practice to use a singleton pattern to control access, as shown in Listing 9-11 .
You can then access your Room Database anywhere in your code, using the DAO classes to perform insert, delete, update, and query operations on your database as shown in Listing 9-12 .
Monitoring Query Result Changes with Live Data
The
LiveData
API allows you to receive updates when modifications to a database result in changes to the results of a query.
Live Data is an observable data holder that respects the lifecycle of Activities and Fragments, such that an observed Live Data only updates observers that are in an active lifecycle state.
To use Live Data, first add the Android Architecture Components Lifecycle extensions library to your project, by modifying your app module
build.gradle
file to include the following dependency:
implementation "android.arch.lifecycle:extensions:1.1.1"
To enable observing a Room query result for changes, set its return type to
LiveData
, and indicate the type being observed—as shown in
Listing 9-13
.
To monitor a Live Data query, implement a new
Observer
of the appropriate type—overriding the
onChanged
handler. Use your Database’s DAO to return an instance of the Live Data query result, and call its
observe
method, passing in the lifecycle owner (typically the Activity or Fragment whose UI is affected by the changed query result) and your Observer implementation, as shown in
Listing 9-14
.
Note that it’s generally considered best practice to begin observing a Live Data query from within a component’s
onCreate
handler.
Calling
observe
will immediately result in the Observer’s
onChanged
handler being triggered, after which it will be triggered again any time data in the underlying tables changes.
Live Data only notifies active observers about updates, automatically handling Activity and Fragment lifecycle changes, preventing crashes due to stopped Activities, and safely handling configuration changes.
You can learn more about the Lifecycle Library and other Android Architecture Components on the Android Developers site at:
developer.android.com/topic/libraries/architecture
PERSISTING EARTHQUAKES TO A DATABASE WITH ROOM
In this example you modify the ongoing earthquake monitoring example application by creating a Room database to persist the earthquake data between user sessions.
-
Begin by ensuring the project’s
build.gradlefile includes the Google Maven repository within the all projects repositories node:allprojects {repositories {jcenter()maven { url 'https://maven.google.com' }}} -
Then open your app module
build.gradlefile and add dependencies for the Android Architecture Components Room and Live Data libraries within the dependencies node:dependencies {[… Existing dependencies nodes …]implementation "android.arch.persistence.room:runtime:1.1.1"annotationProcessor "android.arch.persistence.room:compiler:1.1.1"testImplementation "android.arch.persistence.room:testing:1.1.1"implementation "android.arch.lifecycle.extensions:1.1.1"} -
You will be persisting instances of the Earthquake class, so open it now, and annotate the class using the
@Entityannotation. Take this opportunity to annotate themIdfield to be the non-null primary key.@Entitypublic class Earthquake {@NonNull@PrimaryKeyprivate String mId;private Date mDate;private String mDetails;private Location mLocation;private double mMagnitude;private String mLink;[… Existing Class definition …]} -
Notice that our Earthquake fields include complex Date and Location objects. Create a new
EarthquakeTypeConvertersclass with static methods to convert back-and-forth betweenDateobjects and Long values, andLocationobjects and String values. Each method must be annotated with the@TypeConverterannotation:public class EarthquakeTypeConverters {@TypeConverterpublic static Date dateFromTimestamp(Long value) {return value == null ? null : new Date(value);}@TypeConverterpublic static Long dateToTimestamp(Date date) {return date == null ? null : date.getTime();}@TypeConverterpublic static String locationToString(Location location) {return location == null ?null : location.getLatitude() + "," +location.getLongitude();}@TypeConverterpublic static Location locationFromString(String location) {if (location != null && (location.contains(","))) {Location result = new Location("Generated");String[] locationStrings = location.split(",");if (locationStrings.length == 2) {result.setLatitude(Double.parseDouble(locationStrings[0]));result.setLongitude(Double.parseDouble(locationStrings[1]));return result;}else return null;}elsereturn null;}} -
Create a new
EarthquakeDAOinterface definition. It should be annotated using the@Daoannotation, and will act as our Earthquake table Data Access Object. Include methods annotated with@Insertthat insert one Earthquake or a List of Earthquakes, and which resolves conflicts by replacing existing database entries. Also define a query method that returns a Live Data containing a List of all the Earthquakes, using the@Queryannotation with an SQL statement that selects all rows from the earthquake table:@Daopublic interface EarthquakeDAO {@Insert(onConflict = OnConflictStrategy.REPLACE)public void insertEarthquakes(List<Earthquake> earthquakes);@Insert(onConflict = OnConflictStrategy.REPLACE)public void insertEarthquake(Earthquake earthquake);@Deletepublic void deleteEarthquake(Earthquake earthquake);@Query("SELECT * FROM earthquake ORDER BY mDate DESC")public LiveData<List<Earthquake>> loadAllEarthquakes();} -
Complete the database setup by creating a new abstract
EarthquakeDatabaseclass that extendsRoomDatabase. It should be annotated using the@Databaseannotation, with values specifying the Earthquake class as an entity, and a database schema version number. Use the@TypeConvertersannotation to specify that our Earthquake Type Converters from Step 4 should be used, and include an abstract method that returns ourEarthquakeDAOdata access object from Step 5:@Database(entities = {Earthquake.class}, version = 1)@TypeConverters({EarthquakeTypeConverters.class})public abstract class EarthquakeDatabase extends RoomDatabase {public abstract EarthquakeDAO earthquakeDAO();} -
To interact with your new database, create a new
EarthquakeDatabaseAccessorclass, which uses the Singleton pattern to return an instance of theEarthquakeDatabasedefined in Step 6:public class EarthquakeDatabaseAccessor {private static EarthquakeDatabase EarthquakeDatabaseInstance;private static final String EARTHQUAKE_DB_NAME = "earthquake_db";private EarthquakeDatabaseAccessor() {}public static EarthquakeDatabase getInstance(Context context) {if (EarthquakeDatabaseInstance == null) {// Create or open a new SQLite database, and return it as// a Room Database instance.EarthquakeDatabaseInstance = Room.databaseBuilder(context,EarthquakeDatabase.class, EARTHQUAKE_DB_NAME).build();}return EarthquakeDatabaseInstance;}} -
Now update the
doInBackgroundmethod within the Async Task of yourEarthquakeViewModelto store the newly parsed List of Earthquakes into the database using the Earthquake Database Accessor from Step 7. Note that our DAO insert method has been configured to handle collisions by replacing existing rows to avoid duplicate entries:@Overrideprotected List<Earthquake> doInBackground(Void… voids) {// Result ArrayList of parsed earthquakes.ArrayList<Earthquake> earthquakes = new ArrayList<>(0);[… Existing earthquake feed downloading and parsing code …]// Insert the newly parsed array of EarthquakesEarthquakeDatabaseAccessor.getInstance(getApplication()).earthquakeDAO().insertEarthquakes(earthquakes);// Return our result array.return earthquakes;} -
Still within the Earthquake View Model, update the
onPostExecutehandler within your Async Task. TheloadEarthquakesmethod will no longer directly apply the list of parsed Earthquakes to our Live Data field, instead we’ll replace our Mutable Live Data with a query of the database:@Overrideprotected void onPostExecute(List<Earthquake> data) {} -
Update the View Model’s
earthquakesclass variable to be of typeLiveData, and update thegetEarthquakesmethod to query the Room database. The Earthquake List Fragment is already expecting Live Data, so no further changes are necessary—theonChangedhandler will be triggered whenever the Room database is modified:privateLiveData<List<Earthquake>> earthquakes;public LiveData<List<Earthquake>> getEarthquakes() {if (earthquakes == null) {// Load the Earthquakes from the database.earthquakes =EarthquakeDatabaseAccessor.getInstance(getApplication()).earthquakeDAO().loadAllEarthquakes();// Load the earthquakes from the USGS feed.loadEarthquakes();}return earthquakes;}
WORKING WITH SQLITE DATABASES
The SQLite APIs provide direct, low-level access to the SQLite database library. While powerful, using SQLite directly can require significant amounts of boilerplate code. It also offers no compile-time verification of SQL queries, increasing the risk of runtime errors.
To help simplify the process of storing application data within SQLite databases, Android has introduced the Room persistence library, described in the previous section. Room provides an abstraction layer over SQLite and is now considered best practice for storing and querying information for your application.
That said, there may be circumstances where you want to create or access your own SQLite database directly. This section assumes you have basic familiarity with SQL databases, and aims to help you apply that knowledge to SQLite databases on Android specifically.
SQLite is a well-regarded SQL-based relational database management system (RDBMS). It is:
- Open source
- Standards-compliant, implementing most of the SQL standard
- Lightweight
- Single-tier
- ACID compliant
It has been implemented as a compact C library that’s included as part of the Android software stack.
By being implemented as a library, rather than running as a separate ongoing process, each SQLite database is an integrated part of the application that created it. This reduces external dependencies, minimizes latency, and simplifies transaction locking and synchronization.
Lightweight and powerful, SQLite differs from many conventional SQL database engines by loosely typing each column, meaning that column values are not required to conform to a single type; instead, each value is typed individually in each row. As a result, type checking isn’t necessary when assigning or extracting values from each column within a row.
Android databases are stored in the
/data/data/<package_name>/databases
folder on your device (or emulator).
Relational database design is a big topic that deserves more thorough coverage than is possible within this book. It is worth highlighting that standard database best practices still apply in Android. In particular, when you’re creating databases for resource-constrained devices (such as mobile phones), it’s important to normalize your data to minimize redundancy.
The SQLite databases described in detail in this chapter are only one of countless database options available for storing structured data within your application—a comprehensive investigation of available database technologies is beyond the scope of this book.
Input Validation and SQL Injection
Insufficiently validating user input is one of the most common security risks for applications, irrespective of the underlying platform or database implementation. To minimize these risks, Android has multiple platform-level features that reduce the potential impact of input validation issues.
Dynamic, string-based languages such as SQL are particularly at risk from input validation problems due to their support for escape characters and the possibility of script injection.
If user data is used within the query or transaction strings submitted to an SQLite database (or Content Provider), SQL injection may be an issue. The most important best practice is to always pass in user strings using the parameterized query methods
query
,
insert
,
update
, and
delete
, as described in the following sections. This will minimize the potential for SQL injection from untrusted sources.
Using parameterized methods is not sufficient if the
selection
parameter is built by concatenating user data prior to submitting it to the method. Instead, you should use
?
to indicate user-supplied variables that are then passed in as an array of strings using the
selectionargs
parameter. These selection arguments are bound as strings, negating the risk of escape character or SQL injection.
You can learn more about SQL injection and how to mitigate the risks associated with it here:
www.owasp.org/index.php/SQL_Injection
Cursors and Content Values
SQLite Database and Content Provider query results are returned using
Cursor
objects. Rather than extracting and returning a copy of the result values, Cursors are pointers to the result set within the underlying data. Cursors provide a managed way of controlling your position (row) in the result set of a query.
The
Cursor
class includes a number of navigation and interaction functions, including, but not limited to, the following:
-
moveToFirst—Moves the cursor to the first row in the query result -
moveToNext—Moves the cursor to the next row -
moveToPrevious—Moves the cursor to the previous row -
getCount—Returns the number of rows in the result set -
getColumnIndexOrThrow—Returns the zero-based index for the column with the specified name (throwing an exception if no column exists with that name) -
getColumnName—Returns the column name with the specified index -
getColumnNames—Returns a string array of all the column names in the current Cursor -
moveToPosition—Moves the cursor to the specified row -
getPosition—Returns the current cursor row position
Where Cursors return results, Content Values are used to insert or update rows. Each
ContentValues
object represents a single table row as a map of column names to values.
Defining a Database Contract
It’s good form to encapsulate the underlying database and expose only the public methods and constants required to interact with the underlying data, generally using what’s often referred to as a contract or helper class. This class should expose database constants, particularly column names, which will be required for populating and querying the database as shown in Listing 9-15 .
Introducing the SQLiteOpenHelper
SQLiteOpenHelper
is an abstract class used to help implement the best practice pattern for creating, opening, and upgrading databases.
By implementing an SQLite Open Helper, you can encapsulate and hide the logic used to decide if a database needs to be created or upgraded before it’s opened, as well as ensure that each operation is completed efficiently.
It’s good practice to defer creating and opening databases until they’re needed, and the SQLite Open Helper facilitates this pattern by caching database instances after they’ve been successfully opened, so you can make requests to open the database immediately prior to performing any query or transaction. For the same reason, there is no need to close the database manually until the Activity is finished.
Listing 9-16
shows how to extend the
SQLiteOpenHelper
class by overriding the constructor,
onCreate
, and
onUpgrade
methods to handle the creation of a new database, and upgrading to a new version, respectively.
The database creation SQL string defined in the
DATABASE_CREATE
variable in
Listing 9-16
creates a new table that includes an auto-incrementing key. Although not strictly a requirement, it’s strongly recommended that all tables include an auto-increment key field to guarantee a unique identifier for each row.
If you plan to share your table using a Content Provider (described in Chapter 10 ), a unique ID field is required.
Opening Databases with the SQLite Open Helper
To access a database using the SQLite Open Helper, call
getWritableDatabase
or
getReadableDatabase
to open and obtain an instance of the underlying database.
Behind the scenes, if the database doesn’t exist, the helper executes its
onCreate
handler. If the database version has changed, the
onUpgrade
handler will fire. In either case, the
get<read/writ>ableDatabase
call will return the cached, newly opened, newly created, or upgraded database, as appropriate.
Note that in situations where the database exists and has previously been opened, both
get<read/writ>ableDatabase
methods will return the same, cached writeable database instance.
To create or upgrade the database, it must be opened in a writeable form; therefore, it’s generally good practice to always attempt to open a writeable database. However, a call to
getWritableDatabase
can fail due to disk space or permission issues so it’s good practice to fall back to the
getReadableDatabase
method for queries if possible as shown in
Listing 9-17
.
When a database has been successfully opened, the SQLite Open Helper will cache it, so you can (and should) use these methods each time you query or perform a transaction on the database, rather than caching the open database within your application.
Opening and Creating Databases Without the SQLite Open Helper
If you would prefer to manage the creation, opening, and version control of your databases directly, without the SQLite Open Helper, you can use the application Context’s
openOrCreateDatabase
method to create the database itself:
SQLiteDatabase db = context.openOrCreateDatabase(DATABASE_NAME,Context.MODE_PRIVATE,null);
This approach does not check for the existence of the database, or what version it is, so you must handle the creation and upgrade logic yourself—typically using the database’s
execSQL
method to create and drop tables, as required.
Adding, Updating, and Deleting Rows
The
SQLiteDatabase
class exposes
insert
,
delete
, and
update
methods that encapsulate the SQL statements required to perform these actions. Additionally, the
execSQL
method lets you execute any valid SQL statement on your database tables, should you want to execute these (or any other) operations manually.
Any time you modify the underlying database values, you should update any query result Cursors by re-running any queries.
Inserting Rows
To create a new row, construct a
ContentValues
object and use its
put
methods to add name/value pairs representing each column name and its associated value.
Insert the new row by passing the Content Values into the
insert
method called on the target database—along with the table name—as shown in
Listing 9-18
.
Updating Rows
You also update rows using Content Values. Create a new
ContentValues
object, using the
put
methods to assign new values to each column you want to update. Call the
update
method on the database, passing in the table name, the updated Content Values object, and a
where
clause that specifies the row(s) to update, as shown in
Listing 9-19
.
Deleting Rows
To delete a row, simply call the
delete
method on a database, specifying the table name and a
where
clause that describes the rows you want to delete, as shown in
Listing 9-20
.
Querying a Database
To execute a query on an SQLite
Database
object, use its
query
method, passing in the following:
- An optional Boolean that specifies if the result set should contain only unique values.
- The name of the table to query.
- A projection, as an array of strings that lists the columns to include in the result set.
-
A
whereclause that defines the criteria that will be used to limit the rows returned. You can include?wildcards that will be replaced by the values passed in through the selection argument parameter. -
An array of selection argument strings that will replace the
?wildcards in thewhereclause, bound as String values. -
A
group byclause that defines how the resulting rows will be grouped. -
A
havingclause that defines which row groups to include if you specified agroup byclause. - A string that describes the order of the returned rows.
- A string that limits the maximum number of rows in the result set.
Each database query is returned as a
Cursor
, which lets Android manage resources more efficiently by retrieving and releasing row and column values on demand.
Listing 9-21 shows how to return a selection of rows from within an SQLite database.
Extracting Values from a Cursor
To extract values from a Cursor, first use the
moveTo<location>
methods to move to the desired row. Then use the type-safe
get<type>
methods (passing in a column index) to return the value stored at the current row for the specified column.
The use of projections means that result Cursors may contain only a subset of the full set of columns available in the queried table, so the index of each column may be different for different result Cursors. To find the current index of a particular column within each result Cursor, use the
getColumnIndexOrThrow
and
getColumnIndex
methods.
It’s good practice to use
getColumnIndexOrThrow
when you expect a column to exist:
try {int columnIndex =cursor.getColumnIndexOrThrow(HoardContract.KEY_GOLD_HOARDED_COLUMN);String columnValue = cursor.getString(columnIndex);// Do something with the column value.}catch (IllegalArgumentException ex) {Log.e(TAG, ex.getLocalizedMessage());}
Using
getColumnIndex
and checking for a –1 result, as shown in the following snippet, is a more efficient technique than catching exceptions when you expect the column might not always exist:
int columnIndex =cursor.getColumnIndex(HoardContract.KEY_GOLD_HOARDED_COLUMN);if (columnIndex > -1) {String columnValue = cursor.getString(columnIndex);// Do something with the column value.}else {// Do something else if the column doesn't exist.}
Note that the column indexes will not change within a given result cursor, so for efficiency reasons you should determine these prior to iterating over the Cursor to extract results, as shown in Listing 9-22 .
Listing 9-22 shows how to iterate over a result Cursor, extracting and averaging a column of float values.
Because SQLite database columns are loosely typed, you can cast individual values into valid types, as required. For example, values stored as floats can be read back as strings.
When you have finished using your result Cursor, it’s important to close it to avoid memory leaks and reduce your application’s resource load:
cursor.close();
INTRODUCING THE FIREBASE REALTIME DATABASE
The Firebase Realtime Database is a cloud-hosted NoSQL database, whose data is synced across all clients in real time, and which remains available for queries and transactions on your device even when you lose Internet connectivity.
This approach to databases is significantly different from the SQLite databases described earlier in this chapter. SQLite databases are created and stored locally, and would need to be synchronized with a cloud-based data source to maintain a cloud copy of the data, or to share data across multiple devices.
Where SQLite databases are relational, and use SQL statements to execute queries and transactions that can include features such as joins across multiple tables, the Firebase Realtime Database works differently. As a NoSQL database, it is not relational and you do not use SQL statements to interact with it. The database is stored locally on each device as JSON files, which are synchronized in real time to the cloud-host and in turn with every connected client.
The Firebase Realtime Database is optimized for responsiveness and real-time updates, making it ideal for data that is frequently stored or modified by users, and which needs to be continuously synchronized across devices including mobile and web clients.
While a thorough investigation into the options available using the Firebase Realtime Database is beyond the scope of this book, within this section we will describe the simple case of adding it to your Android project, and interacting with it.
Adding Firebase to Your App
To add the Firebase Realtime Database to your app, you must install the Firebase SDK, which requires Android 4.0 Ice Cream Sandwich (API Level 14) and Google Play services version 10.2.6 or higher.
Android Studio includes a Firebase Assistant to simplify adding Firebase components to your app. To use it, select Tools
![]() Firebase to display the assistant window shown in
Figure 9-3
.
Firebase to display the assistant window shown in
Figure 9-3
.

Expand the Realtime Database list item and select the hyperlinked Save and retrieve data text, to display the Firebase Realtime Database assistant, as shown in Figure 9-4 .

Select Connect to Firebase, and a browser window will open, where you’ll be prompted to select a Google account to connect to. When you’re logged in, you’ll be prompted to accept a series of permissions as shown in Figure 9-5 .

You are now signed into Firebase within Android Studio. Return to Android Studio and you’ll see a dialog, shown in Figure 9-6 , which allows you to create a new Firebase project, or select an existing one to use with your app.

With your app connected, you can choose to “Add the Realtime Database to Your App,” which will add the Firebase Gradle build script dependency to your project-level
build.gradle
file, add the Firebase plug-in for Gradle, and add a dependency for the Firebase Database library to your
build .gradle
file.
Defining a Firebase Database and Defining Access Rules
Unlike SQLite databases, the Firebase Database is cloud-hosted, so we will use the Firebase Console to define our data structure and access rules.
In your browser, navigate to
console.firebase.google.com
, and select the project associated with your Android app.
Using the left-bar navigation, select the Develop item and then the Database option to display the configuration console for the Realtime Database, as shown in Figure 9-7 .

The Firebase Realtime Database uses a declarative rules language to define how your data should be accessed.
By default, Firebase Databases require Firebase Authentication, and grant full read and write permissions to all authenticated users. During development it can be useful to permit full unauthenticated access to get started, allowing you to develop your database before you have completed the authentication piece.
To set the access rules to public, switch to the rules tab and set the read and write elements to true:
{"rules": {".read": true,".write": true}}
Once you’re set up, you can customize your rules to your needs, so be sure to configure more secure and appropriate rules before launching your app.
Adding, Modifying, Deleting, and Querying Data from a Firebase Realtime Database
Firebase Realtime Database data is stored as JSON objects, effectively creating a cloud-hosted JSON tree. The data tab of the Firebase database console shows you the current state of the JSON tree representing the data you are recording in your database.
Unlike the SQLite databases described previously in this chapter, there are no tables or records. When you add new data, it becomes an element in the JSON tree, accessible using the associated key. You can define your own keys, such as unique user IDs, or you can let Firebase provide them for you automatically.
To write to a Firebase Database from within your Android app, you must first retrieve an instance of your database using the static
getInstance
method:
FirebaseDatabase database = FirebaseDatabase.getInstance();
Use the
getReference
method to find root-level nodes, and the
child
method to descend down the tree. To set a value for a given node, use the
setValue
method. Setting the value for a node or leaf element will automatically create all the parent nodes.
The following snippet shows how to add a new item to a Firebase table, using a simple data structure that stores similar information to the previous SQLite examples:
// Write a message to the databaseFirebaseDatabase database = FirebaseDatabase.getInstance();// Get a node corresponding to the root of our list of hoards.DatabaseReference listRootRef = database.getReference("hoards");// Get a node for our current hoard.DatabaseReference itemRootRef = listRootRef.child(hoard.getHoardName());// Set values for the properties of our hoard.itemRootRef.child("hoardName").setValue(hoard.getHoardName());itemRootRef.child("goldHoarded").setValue(hoard.getGoldHoarded());itemRootRef.child("hoardAccessible").setValue(hoard.getHoardAccessible());
Figure 9-8 shows how that data is represented in a JSON tree in the Firebase Console.

The
setValue
method allows you to pass in objects as well as primitives. When you pass in an object, the result of all its getters are saved as children of the node you’re saving to. The following snippet is the equivalent of the previous, using an object rather than passing in individual values:
// Write a message to the databaseFirebaseDatabase database = FirebaseDatabase.getInstance();// Get a node corresponding to the root of our list of hoards.DatabaseReference listRootRef = database.getReference("hoards");// Get a node for our current hoard and set its values.listRootRef.child(hoard.getHoardName()).setValue(hoard);
When constructing your data structure it’s important to keep in mind some best practices, including avoiding nested data, flattening data structures, and creating data that scales. To learn more about how to structure data in a NoSQL database like Firebase, refer to the Firebase “Structure Your Database” guide at
firebase.google.com/docs/database/android/structure-data
.
To modify an entry, simply use
setValue
as you would to create a new entry, and the previous value(s) will be overridden with the new values.
To delete an entry, call
removeValue
on the node or element you wish to remove:
DatabaseReference listRootRef = database.getReference("hoards");listRootRef.child(hoard.getHoardName()).removeValue();
You query a Firebase Database by adding a
ValueEventListener
to the Database Reference, and overriding its
onDataChange
handler:
FirebaseDatabase database = FirebaseDatabase.getInstance();DatabaseReference listRootRef = database.getReference("hoards");// Read from the databaselistRootRef.addValueEventListener(new ValueEventListener() {@Overridepublic void onDataChange(DataSnapshot dataSnapshot) {// This method is called once with the initial value and again// whenever data at this location is updated.String key = dataSnapshot.getKey();String value = dataSnapshot.getValue().toString();Log.d(TAG, "Key is: " + key);Log.d(TAG, "Value is: " + value);}@Overridepublic void onCancelled(DatabaseError error) {// Failed to read valueLog.w(TAG, "Failed to read value.", error.toException());}});
This handler is called immediately after the listener is attached, and again every time the data for it—and any of its children—is changed. As a result, you receive real-time updates whenever the database is changed, either within your app or from an external source—such as the server or another client.
To bind a Firebase Database to Android UI elements, you must store a local copy of the database tree, and use the
ValueEventListener
to observe and apply changes.
To simplify this process, the Firebase team has created the FirebaseUI open source library for Android, which allows you to quickly connect common UI elements, such as the Recycler View,
to Firebase APIs like the Realtime Database or Firebase Authentication. The FirebaseUI library is available at
github.com/firebase/firebaseui-android
.
You can learn more about the Firebase Realtime Database here:
firebase.google.com/docs/database/
Google has also released a new databse system, Cloud Firestore, into public Beta. Firestore is a highly-scalable NoSQL cloud database that, like Firebase Realtime Database, can be used to sync application data across servers and client apps in real time.
Firestore is designed specifically to be highly scalable and supports more expressive and efficient querying, including shallow queries that don’t require retrieving the entire collection, and support for sorting, filtering, and limiting query returns. It also offers seamless integration with other Firebase and Google Cloud Platform products, including Cloud Functions.
In addition to Android, web, and iOS SDKs, Firestore APIs are available in Node.js, Java, Python, and Go.
As Firestore is in beta at the time of writing this book, a more detailed exploration is beyond our scope. You can find more detail on Firestore at
firebase.google.com/docs/firestore/
.
10
Content Providers and Search
INTRODUCING CONTENT PROVIDERS
In this chapter you learn how to create and use Content Providers as a consistent way to share, and consume structured data within and between applications by providing an abstraction from the underlying data storage technique.
You see how to query Content Providers asynchronously using Cursor Loaders, to ensure your application remains responsive while you retrieve data.
In Android, access to a database is restricted to the application that created it, so Content Providers offer a standard interface your applications can use to share data with, and consume data from, other applications—including many of the native databases.
Content Providers are used extensively by the Android framework, giving you the opportunity to enhance your own applications with native Content Providers, including contacts, calendar, and the Media Store. You learn how to store and retrieve data from these core Android Content Providers to provide your users with a richer, more consistent, and fully integrated user experience.
Finally, you learn how to use Content Providers to offer rich search options, including how to provide real-time search suggestions using the Search View.
WHY SHOULD I USE CONTENT PROVIDERS?
The main reason to use a Content Provider is to facilitate data sharing across applications. Content Providers allow you to define granular data access restrictions so that other applications can securely access and modify your app’s data.
Any application—with the appropriate permissions—can potentially query, add, remove, or update data provided by another application through a Content Provider, including the native Android Content Providers.
By publishing your own Content Providers, you make it possible for you (and potentially other developers) to incorporate and extend your data in other applications. Content Providers are also the mechanism used to provide search results for the Search View, and to generate real-time search suggestions.
Content Providers are also useful as a way to decouple your application layers from the underlying data layers, by encapsulating and abstracting your underlying database. This approach is useful in making your applications data-source agnostic, such that your data storage mechanism can be modified or replaced without affecting your application layer.
If you aren’t planning to share your application data, you don’t need to use Content Providers; however, many developers still choose to create Content Providers on top of their databases so they can take advantage of a consistent abstraction layer. Content Providers also allow you to take advantage of several convenience classes for data access, particularly the Cursor Loader, as described later in this chapter.
Several native Content Providers have been made accessible for access by third-party applications, including the contact manager, Media Store, and calendar, as described later in this chapter.
CREATING CONTENT PROVIDERS
Content Providers are an abstraction layer over an underlying data source, which provide an interface for publishing data that will be consumed using a Content Resolver, potentially across process boundaries. Content Providers use an interface for publishing and consuming data based around a simple URI addressing model using the
content://
schema.
Content Providers allow you to decouple the application components that consume data from their underlying data sources, providing a generic mechanism through which applications can share their data or consume data provided by others.
They allow you to share data access across application process boundaries, and support the use of granular data access restrictions so that other applications can securely access and modify your app data.
To create a new Content Provider, extend the abstract
ContentProvider
class as shown in
Listing 10-1
.
In the following sections you learn how to implement the
onCreate
handler to initialize the underlying data source, and update the
query
,
getType
,
insert
,
update
, and
delete
methods to implement the interface used by the Content Resolver to interact with the data.
Creating the Content Provider’s Database
To initialize the data source you plan to access through the Content Provider, override the
onCreate
method, as shown in
Listing 10-2
. If you are using an SQLite database, this can be handled using an SQLite Open Helper implementation, as described in the previous chapter.
We’ll continue to use an SQLite database for all our examples of underlying databases within this chapter, but remember that the database implementation you choose is arbitrary—you may use a cloud-based database, an entirely in-memory database, or an alternative SQL or no-SQL database library. Later in this chapter, we’ll create a Content Provider over a Room database to provide search results for the ongoing Earthquake example. You can learn more about using SQLite in Chapter 9 , “Creating and Using Databases.”
Registering Content Providers
Like Activities and Services, Content Providers are application components that must be registered in your application manifest before the Content Resolver can discover and use them. You do this using a
provider
tag that includes a
name
attribute, describing the Provider’s class name, and an
authorities
tag.
Use the
authorities
tag to define the base URI of the Provider; a Content Provider’s authority is used by the Content Resolver as an address to find the database to interact with.
Each Content Provider authority must be unique, so it’s good practice to base the URI path on your package name. The general form for defining a Content Provider’s authority is as follows:
com.<CompanyName>.provider.<ApplicationName>
The completed
provider
tag should follow the format shown in
Listing 10-3
.
Publishing Your Content Provider’s URI Address
By convention, each Content Provider should expose its authority using a public static
CONTENT_URI
property that includes a data path to the primary content, as shown in
Listing 10-4
.
These content URIs will be used when accessing your Content Provider using a Content Resolver, as shown in the following sections. A query made using this form represents a request for all rows, whereas an appended trailing
/<rownumber>
, as shown in the following snippet, represents a request for a specific single record:
content://com.professionalandroid.provider.hoarder/lairs/5
It’s good practice to support access to your provider for both of these forms. The simplest way to do this is to add a
UriMatcher
to your Content Provider implementation to parse URIs, determine their forms, and extract the provided details.
Listing 10-5 shows the implementation pattern for defining a Uri Matcher that analyzes the form of a URI—specifically determining if a URI is a request for all data or for a single row.
You can use the same technique to expose alternative URIs within the same Content Provider that represent different subsets of data, or different tables within your database.
Implementing Content Provider Queries
To support queries with your Content Provider, you must override the
query
and
getType
methods. The Content Resolver uses these methods to access the underlying data, without knowing its structure or implementation. These methods enable applications to share data across application boundaries without having to publish a specific interface for each data source.
In this chapter we show how to use a Content Provider to provide access to an SQLite database, but within these methods you can access any source of data (including Room, files, application instance variables, or cloud-based databases).
Having used the Uri Matcher to distinguish between full table and single row queries, you can refine the query requests, and use the
SQLiteQueryBuilder
class to easily apply additional selection conditions to a query.
Android 4.1 Jelly Bean (API Level 16) extended the
query
method to support a
CancellationSignal
parameter:
CancellationSignal mCancellationSignal = new CancellationSignal();
By using a Cancellation Signal, you can notify the Content Provider that you wish to abort the currently running query by calling the Cancellation Signal’s
cancel
method:
mCancellationSignal.cancel();
For backward compatibility reasons, Android requires that you also implement the
query
method that doesn’t include the Cancellation Signal parameter, as shown in
Listing 10-6
.
Listing 10-6 shows the skeleton code for implementing queries within a Content Provider using an underlying SQLite database, using an SQLite Query Builder to pass each of the query parameters, including the Cancellation Signal, into a query made to the underlying SQLite database.
If a running query is canceled, SQLite will throw an
OperationCanceledException
. If your Content Provider doesn’t use an SQLite database, you will need to listen for cancellation signals using an
onCancelListener
handler, and handle them yourself:
cancellationSignal.setOnCancelListener(new CancellationSignal.OnCancelListener() {@Overridepublic void onCancel() {// TODO React when my query is cancelled.}});
Having implemented queries, you must also specify a MIME type to indicate the
type
of data returned. Override the
getType
method to return a string that uniquely describes your data type.
The type returned should include two forms, one for a single entry and another for all the entries, following these forms:
-
Single item:
vnd.android.cursor.item/vnd.<companyname>.<contenttype> -
All items:
vnd.android.cursor.dir/vnd.<companyname>.<contenttype>
Listing 10-7
shows how to override the
getType
method to return the correct MIME type based on the URI passed in.
Content Provider Transactions
To support delete, insert, and update transactions on your Content Provider, override the corresponding
delete
,
insert
, and
update
methods.
Like
query
, these methods are used by Content Resolvers to perform transactions on the underlying data without knowing its implementation.
When performing transactions that modify the dataset, it’s good practice to call the Content Resolver’s
notifyChange
method. This will notify any Content Observers, registered for a given Cursor using the
Cursor.registerContentObserver
method, that the underlying table (or a particular row) has been removed, added, or updated.
Listing 10-8 shows the skeleton code for implementing transactions within a Content Provider on an underlying SQLite database.
Sharing Files Using a Content Provider
Rather than store large files within your Content Provider, you should represent them within a table as fully qualified URIs to files stored somewhere else on the file-system.
To include files within your table, include a column labeled
_data
that will contain the path to the file represented by that record—this column should not be used by client applications directly. Instead, override the
openFile
handler within your Content Provider to provide a
ParcelFileDescriptor
when the Content Resolver requests a file associated with that record by providing its URI path.
To simplify this process, Android includes the
openFileHelper
method, which queries the Content Provider for the file path stored in the
_data
column and creates and returns a Parcel File Descriptor, as shown in
Listing 10-9
.
A better approach for sharing files between applications is the Storage Access Framework, introduced in Android 4.4 KitKat (API Level 19). The Storage Access Framework is described in detail in Chapter 8 , “Files, Saving State, and Preferences.”
Adding Permission Requirements to Content Providers
The primary purpose of Content Providers is to share data with other applications; by default, any application that knows the right URIs can use the Content Resolver to access your Content Provider and query its data or perform transactions.
If you have no intention of making your Content Provider accessible to other applications, set the
android:exported
attribute to
false
, to restrict access to only your application:
<providerandroid:name=".MyHoardContentProvider"android:authorities="com.professionalandroid.provider.hoarder"android:exported="false"></provider>
Alternatively, you can restrict read and/or write access to your Providers using permissions.
For example, native Android Content Providers that include sensitive information—such as contact details and call logs—require read and write permissions respectively to access and modify their content (native Content Providers are described in more detail in the section “Using Native Android Content Providers”).
Using permissions prevents malicious applications from corrupting data, gaining access to sensitive information, or making excessive (or unauthorized) use of hardware resources or external communication channels.
The most common use of permissions with Content Providers is to restrict access only to applications signed with the same signature—meaning other apps you have created and released—in order that they can work together.
To do this, you must first define a new permission within the application manifest of both the consumer and Content Provider apps, indicating a protection level of signature :
<permissionandroid:name="com.professionalandroid.provider.hoarder.ACCESS_PERMISSION"android:protectionLevel="signature"></permission>
Also add the corresponding uses-permission entry in each Manifest:
<uses-permissionandroid:name="com.professionalandroid.provider.hoarder.ACCESS_PERMISSION"/>
In addition to the signature protection level, which restricts access to apps signed with the same signature, permissions can be defined as requiring normal or dangerous protection levels. Normal permissions are displayed to the user at installation time, while dangerous permissions require run-time user acceptance.
More details on creating and using your own permissions is available in Chapter 20 , “Advanced Android Development.”
Once you have defined a permission, you can apply it by modifying the Content Provider manifest entry, indicating the permission required to read or write to the Provider. You can specify different permissions for read or write access, or require permissions for only one or the other:
<providerandroid:name=".MyHoardContentProvider"android:authorities="com.professionalandroid.provider.hoarder"android:writePermission="com.professionalandroid.provider.hoarder.ACCESS_PERMISSION"/>
It’s also possible to provide apps with temporary permission, to access or modify a particular record, using Intents. This works by having the requesting app send an Intent to the Content Provider host application, which then returns an Intent that contains the appropriate permissions for a specific URI, which lasts until the calling Activity is finished.
To support temporary permissions, start by setting the
android:grantUriPermissions
attribute to
true
in your Provider’s manifest entry:
<providerandroid:name=".MyHoardContentProvider"android:authorities="com.professionalandroid.provider.hoarder"android:writePermission="com.professionalandroid.provider.hoarder.ACCESS_PERMISSION"android:grantUriPermissions="true"/>
This will allow you to grant temporary permissions to any URI used to access your Provider. Alternatively, you can use a
grant-uri-permission
child node within your
provider
node to define a specific path pattern or prefix.
Within your application, provide functionality that listens for an Intent from another app (as described in
Chapter 6
, “Intents and Broadcast Receivers”). When such an Intent is received, display a UI to support the requested action, and return an Intent with a URI to the affected/selected record, setting either the
FLAG_GRANT_READ_URI_PERMISSION
or
FLAG_GRANT_WRITE_URI_PERMISSION
flag as applicable:
protected void returnSelectedRecord(int rowId) {Uri selectedUri =ContentUris.withAppendedId(MyHoardContentProvider.CONTENT_URI,rowId);Intent result = new Intent(Intent.ACTION_PICK, selectedUri);result.addFlags(FLAG_GRANT_READ_URI_PERMISSION);setResult(RESULT_OK, result);finish();}
Using this approach, your app provides the intermediation between the user the third-party application and your Content Provider—for example, by providing the UI that allows the user to select a record or modify data.
This limits the risks of data leakage or corruption by restricting the amount of data accessed, and ensuring your app—and by extension the user—is able to cancel any inappropriate access or changes. As a result, the requesting app does not need to request any special permissions when using an Intent to query or modify data.
The approach of using Intents to grant temporary permissions is used extensively to provide access to native Content Providers, as described in the section “Using Native Content Providers.”
ACCESSING CONTENT PROVIDERS WITH CONTENT RESOLVERS
Each application includes a
ContentResolver
instance, accessible using the
getContentResolver
method, as follows:
ContentResolver cr = getContentResolver();
Content Resolvers are used to query and perform transactions on Content Providers. The Content Resolver supplies methods to query and perform transactions on Content Providers, taking a URI that indicates which Content Provider to interact with.
A Content Provider’s URI is its authority as defined by its manifest entry, and typically published as a static constant on the Content Provider implementation.
As described in the previous section, Content Providers usually accept two forms of URI—one for requests against all data and another that specifies only a single row. The form for the latter appends the row identifier (in the form
/<rowID>
) to the base URI.
Querying Content Providers
Content Provider queries take a form very similar to that of SQLite database queries. Query results are returned as Cursors over a result set, and the values extracted, in the same way as described in the previous chapter describing SQLite databases.
Using the
query
method on the
ContentResolver
object, pass in the following:
- A URI to the Content Provider content you want to query.
- A projection that lists the columns you want to include in the result set.
-
A
whereclause that defines the rows to be returned. You should include?wildcards that will be replaced by the values passed into the selection argument parameter. -
An array of selection argument strings that will replace the
?wildcards in thewhereclause. - A String that describes the order of the returned rows.
Listing 10-10 shows how to use a Content Resolver to apply a query to a Content Provider.
In this example the query is made using the column names provided as static constants from the
HoardContract
class and the
CONTENT_URI
available from the
MyHoardContentProvider
class; however, it’s worth noting that a third-party application can perform the same query, provided it knows the content URI and column names, and has the appropriate permissions.
Most Content Providers also include a shortcut URI pattern that allows you to address a particular row by appending a row ID to the content URI. You can use the static
withAppendedId
method from the
ContentUris
class to simplify this, as shown in
Listing 10-11
.
To extract values from a result Cursor, use the same techniques described in the previous chapter, using the
moveTo<location>
methods in combination with the
get<type>
methods to extract values from the specified row and column.
Listing 10-12 extends the code from Listing 10-11 , by iterating over a result Cursor and displaying the name of the largest hoard.
When you have finished using your result Cursor it’s important to close it to avoid memory leaks and reduce your application’s resource load:
resultCursor.close();
You see more examples of querying for content later in this chapter when the native Android Content Providers are introduced in the section “Using Native Android Content Providers.”
Cancelling Queries
Android 4.1 Jelly Bean (API Level 16) extended the Content Resolver
query
method to support a
CancellationSignal
parameter:
CancellationSignal mCancellationSignal = new CancellationSignal();
The Android Support Library includes a
ContentResolverCompat
class that allows you to support query cancellation in a backward-compatible fashion:
Cursor resultCursor = ContentResolverCompat.query(cr,MyHoardContentProvider.CONTENT_URI,result_columns, where, whereArgs, order,mCancellationSignal);
Through its
cancel
method, a Cancellation Signal enables you to notify a Content Provider that you wish to abort a query:
mCancellationSignal.cancel();
If the query is canceled while running, a
OperationCanceledException
will be thrown.
Querying for Content Asynchronously with a Cursor Loader
Database operations can be time-consuming, so it’s particularly important that no database or Content Provider queries or transactions are performed on the main application thread.
To help simplify the process of managing Cursors, synchronizing correctly with the UI thread, and ensuring all queries occur on a background Thread, Android provides the
Loader
class.
Loaders and the Loader Manager are used to simplify asynchronous background data loading. Loaders create a background thread within which your database queries and transactions are performed, before syncing with the UI thread, and returning your processed data via callback handlers.
The Loader Manager includes simple caching, ensuring Loaders aren’t interrupted by Activity restarts due to device configuration changes, and Loaders are aware of Activity and Fragment life-cycle events. This ensures Loaders are removed when the parent Activity or Fragment is permanently destroyed.
The
AsyncTaskLoader
class can be extended to load any kind of data from any data source; of particular interest is the
CursorLoader
class. The Cursor Loader is designed specifically to support asynchronous queries on Content Providers, returning a result Cursor and notifications of any updates to the underlying provider.
The Cursor Loader handles all the management tasks required to use a Cursor, including managing the Cursor life cycle to ensure Cursors are closed when the Activity is terminated.
Cursor Loaders also observe changes in the underlying query, so you don’t need to implement your own Content Observers.
Implementing Cursor Loader Callbacks
To use a Cursor Loader, create a new
LoaderManager.LoaderCallbacks
implementation. Loader Callbacks are implemented using generics, so you should specify the explicit type being loaded, in this case Cursors, when implementing your own:
LoaderManager.LoaderCallbacks<Cursor> loaderCallback= new LoaderManager.LoaderCallbacks<Cursor>() {@Overridepublic Loader<Cursor> onCreateLoader(int id, Bundle args) {return null;}@Overridepublic void onLoadFinished(Loader<Cursor> loader,Cursordata) {}@Overridepublic void onLoaderReset(Loader<Cursor> loader) {}};
If you require only a single Loader implementation within your Fragment or Activity, you typically do this by having that component implement the interface:
public class MyActivity extends AppCompatActivityimplements LoaderManager.LoaderCallbacks<Cursor>
The Loader Callbacks consist of three handlers:
-
onCreateLoader—Called when the Loader is initialized, this handler should create and return new Cursor Loader object. The Cursor Loader constructor arguments mirror those required for executing a query using the Content Resolver. Accordingly, when this handler is executed, the query parameters you specify will be used to perform a query using the Content Resolver. Note that a Cancellation Signal is not required (or supported). Instead, the Cursor Loader creates its own Cancellation Signal object, which can be triggered by callingcancelLoad. -
onLoadFinished—When the Loader Manager has completed the asynchronous query, theonLoadFinishedhandler is called, with the result Cursor passed in as a parameter. Use this Cursor to update adapters and other UI elements. -
onLoaderReset—When the Loader Manager resets your Cursor Loader,onLoaderResetis called. Within this handler you should release any references to data returned by the query and reset the UI accordingly. The Cursor will be closed by the Loader Manager, so you shouldn’t attempt to close it.
Listing 10-13 shows a skeleton implementation of the Cursor Loader Callbacks.
Initializing, Restarting, and Cancelling a Cursor Loader
To initialize a new Loader, call the Loader Manager’s
initLoader
method, passing in a reference to your Loader Callback implementation, an optional arguments Bundle, and a Loader identifier. Here, as in the remainder of the book, we will use the Support Library version of the Loader Manager to ensure backward compatibility. Note also that in this snippet the enclosing Activity implements the Loader Callbacks:
Bundle args = null;// Initialize Loader. "this" is the enclosing Activity that implements callbacksgetSupportLoaderManager().initLoader(LOADER_ID, args, this);
This is generally done within the
onCreate
method of the host Activity (or the
onActivityCreated
handler in the case of Fragments).
If a Loader corresponding to the identifier used doesn’t already exist, it is created within the associated Loader Callback’s
onCreateLoader
handler as described in the previous section.
In most circumstances this is all that’s required. The Loader Manager will handle the life cycle of any Loaders you initialize and the underlying queries and resulting Cursors, including any changes in the query results.
If your Loader completes during a device configuration change, the result Cursor will be queued, and you’ll receive it via
onLoadFinished
once the parent Activity or Fragment has been re-created.
After a Loader has been created, your results are cached across device configuration changes. Repeated calls to
initLoader
will immediately return the last result set via the
onLoadFinished
handler—without the Loader’s
onStartLoading
method being called. This saves significant time and battery power by eliminating duplicative database reads and the associated processing.
Should you want to discard the previous Loader and re-create it, use the
restartLoader
method:
getSupportLoaderManager().restartLoader(LOADER_ID, args, this);
This is typically necessary only when your query parameters change—such as search queries, sort order, or filter parameters.
If you want to cancel a Cursor Loader while it’s running, you can call its
cancelLoad
method:
getSupportLoaderManager().getLoader(LOADER_ID).cancelLoad();
The will trigger an internal Cancellation Signal within the Cursor Loader, which will in turn be passed to the associated Content Provider.
Adding, Deleting, and Updating Content
To perform transactions on Content Providers, use the
insert
,
delete
, and
update
methods on the Content Resolver. Like queries, Content Provider transactions must be explicitly moved to a background worker Thread to avoid blocking the UI thread with potentially time-consuming operations.
Inserting Content
The Content Resolver offers two methods for inserting new records into a Content Provider:
insert
and
bulkInsert
. Both methods accept the URI of the Content Provider into which you’re inserting; the
insert
method takes a single new
ContentValues
object, and the
bulkInsert
method takes an array of them.
The
insert
method returns a URI to the newly added record, whereas the
bulkInsert
method returns the number of successfully added rows.
Listing 10-14
shows how to use the
insert
method to add new rows to a Content Provider.
Deleting Content
To delete a single record, call
delete
on the Content Resolver, passing in the URI of the row you want to remove. Alternatively, you can specify a
where
clause to remove multiple rows. Calls to
delete
will return the number of rows removed.
Listing 10-15
demonstrates how to delete a number of rows matching a given condition.
Updating Content
You can update rows by using the Content Resolver’s
update
method. The
update
method takes the URI of the target Content Provider, a
ContentValues
object that maps column names to updated values, and a
where
clause that indicates which rows to update.
When the update is executed, every row matched by the
where
clause is updated using the specified Content Values, and the number of successful updates is returned.
Alternatively, you can choose to update a specific row by specifying its unique URI, as shown in Listing 10-16 .
Accessing Files Stored in Content Providers
In the earlier section, “Storing Files in a Content Provider,” we described how to store files within Content Providers. To access a file stored in, or to insert a new file into, a Content Provider, use the Content Resolver’s
openOutputStream
or
openInputStream
methods.
Pass in the URI to the Content Provider row that includes the file you require, and the Content Provider will use its
openFile
implementation to interpret your request and return an input or output stream to the requested file, as shown in
Listing 10-17
.
Accessing Permission-Restricted Content Providers
Many Content Providers require specific permissions before you can read and write to them. For example, native Content Providers that include sensitive information such as contact details and call logs have both their read and write access protected by permissions. Native Content Providers are described in more detail in the section “Using Native Android Content Providers.”
To query or modify a Content Provider that has a permission requirement, you need to declare the corresponding uses-permissions in your manifest to read and/or write to them, respectively:
<uses-permission android:name="android.permission.READ_CONTACTS"/><uses-permission android:name="android.permission.WRITE_CALL_LOG"/>
Manifest permissions are granted by the user as part of the regular installation flow; however, Android 6.0 Marshmallow (API Level 23) introduced an additional requirement for dangerous permissions—including those which guard access to potentially sensitive information.
Dangerous permissions require explicit approval from the user when they are first accessed within the app, by way of runtime permission requests.
Each time you attempt to access a Content Provider protected by a dangerous permission you must use the
ActivityCompat.checkSelfPermission
method, passing in the appropriate permission constant to determine if you have access to the Provider. It will return
PERMISSION_GRANTED
if user permission is granted, or
PERMISSION_DENIED
if the user has declined, or not yet granted, access:
int permission = ActivityCompat.checkSelfPermission(this,Manifest.permission.READ_CONTACTS);if (permission==PERMISSION_GRANTED) {// Access the Content Provider} else {// Request the permission or// display a dialog showing why the function is unavailable.}
If you have not been granted permission, you can use the
ActivityCompat
class’s
shouldShowRequestPermissionRationale
method to determine if this is the first time this app has presented the user with a request for this permission—indicated with a
false
result—or if the user has already declined a request. In the latter case you may consider providing additional context describing why you need the requested permission, before presenting them with the permission-request dialog again:
if (ActivityCompat.shouldShowRequestPermissionRationale(this, Manifest.permission.READ_CALL_LOG)) {// TODO: Display additional rationale for the requested permission.}
To display the system’s runtime permission-request dialog, call the
ActivityCompat.requestPermission
method, specifying the required permissions:
ActivityCompat.requestPermissions(this,new String[]{Manifest.permission.READ_CONTACTS},CONTACTS_PERMISSION_REQUEST);
This function runs asynchronously, displaying a standard Android dialog that can’t be customized. You can receive a callback when the user has either accepted or denied your runtime request, by overriding the
onRequestPermissionsResult
handler:
@Overridepublic void onRequestPermissionsResult(int requestCode,@NonNull String[] permissions,@NonNull int[] grantResults) {super.onRequestPermissionsResult(requestCode, permissions, grantResults);// TODO React to granted / denied permissions.}
It’s common practice to listen for this callback, and if permission is granted to execute the functionality that was previously protected by your permission check. The result, for the user, will be an interstitial permission dialog displayed before the requested action is completed. This is generally preferable to them having to reinitiate the action; however, be careful not to create an endless loop of request-denial-request.
USING NATIVE ANDROID CONTENT PROVIDERS
Android exposes several native Content Providers that you can access directly using the techniques described earlier in this chapter. The
android.provider
package includes many useful Content Providers, including the following:
- Browser —Reads or modifies browser and browser search history.
- Calendar —Creates new events, and deletes, updates, and reads existing calendar entries. That includes modifying the attendee lists and setting reminders.
- Call Log and Blocked Numbers —The Call Log Provider stores the call history, including incoming and outgoing calls, missed calls, and call details, including caller IDs and call durations. Blocked Numbers exposes a table containing blocked numbers and e-mail addresses.
- Contacts —Retrieves, modifies, or stores contact details.
- Media Store —Provides centralized, managed access to the multimedia on your device, including audio, video, and images. You can store your own multimedia within the Media Store and make it globally available, as shown in Chapter 17 , “Audio, Video, and Using the Camera.”
Where possible, you should use native Content Providers rather than duplicating them whenever you are building an app that augments or replaces the native apps that use these Providers.
Accessing the Call Log
The Android Call Log contains information about placed and received calls. Access to the Call Log is protected by the
READ_CALL_LOG
manifest uses-permission:
<uses-permission android:name="android.permission.READ_CALL_LOG"/>
For Android devices running Android 6.0 Marshmallow (API Level 23) and above, you also require the corresponding runtime permission:
int permission = ActivityCompat.checkSelfPermission(this,Manifest.permission.READ_CALL_LOG);
Use the Content Resolver to query the Call Log Calls table using its
CONTENT_URI
static constant:
CallLog.Calls.CONTENT_URI
.
The Call Log is used to store all the incoming and outgoing call details, such as date/time of calls, phone numbers, and call durations, as well as cached values for caller details such as name, URI, and photos. Listing 10-18 shows how to query the Call Log for all outgoing calls, showing the name, number, and duration of each call.
Using the Media Store Content Provider
The Android Media Store is a managed repository of audio, video, and image files.
Whenever you add a new multimedia file to the filesystem, it should also be added to the Media Store, as described in Chapter 17 ; this will expose it to other applications, including media players. In most circumstances it’s not necessary (or recommended) to modify the contents of the Media Store Content Provider directly.
To access the media available within the Media Store, the
MediaStore
class includes
Audio
,
Video
, and
Images
subclasses, which in turn contain subclasses that are used to provide the column names and content URIs for the corresponding media providers.
The Media Store segregates media kept on the internal and external volumes of the host device. Each Media Store subclass provides a URI for either the internally or externally stored media using the forms:
-
MediaStore.<mediatype>.Media.EXTERNAL_CONTENT_URI -
MediaStore.<mediatype>.Media.INTERNAL_CONTENT_URI
Listing 10-19 shows a simple code snippet used to find the song title and album name for each piece of audio stored on the internal volume.
Using the Contacts Content Provider
Android makes the full database of contact information available to any application that has been granted the
READ_CONTACTS
permission.
The
ContactsContract
Provider provides an extensible database of contact-related information. This allows users to use and combine multiple sources for their contact information. More importantly, it allows developers to arbitrarily extend the data stored against each contact, or even become an alternative provider for contacts and contact details.
Rather than providing a single, fully defined table of contact detail columns, the Contacts Contract provider uses a three-tier data model to store data, associate it with a contact, and aggregate it to a single person using the following subclasses:
-
Data—Each row in the underlying table defines a set of personal data (phone numbers, e-mail addresses, and so on), separated by MIME type. Although there is a predefined set of common column names for each personal data type available (along with the appropriate MIME types from subclasses withinContactsContract.CommonDataKinds), this table can be used to store any value.The kind of data stored in a particular row is determined by the MIME type specified for that row. A series of generic columns is then used to store up to 15 different pieces of data varying by MIME type.
When adding new data to the Data table, you specify a Raw Contact to which a set of data will be associated.
-
RawContacts—Users can add multiple contact account providers to their device—for example, if they’ve added multiple Gmail accounts. Each row in the Raw Contacts table defines an account to which a set ofDatavalues is associated. -
Contacts—The Android Contacts app aggregates and exposes all contacts, from every account on the device, in a single list. It’s possible for the same person to be included as a contact in multiple accounts—for example, your significant other may appear as an entry in both your personal and work Gmail accounts. The Contacts table represents the aggregation of multiple rows from Raw Contacts that describe the same person, so they appear as one entry in the Android Contacts app.
The contents of each of these tables are aggregated as shown in Figure 10-1 .

Typically, you will use the Data table to add, delete, or modify data stored against an existing contact account, the Raw Contacts table to create and manage accounts, and both the Contact and Data tables to query the database to extract contact details.
Reading Contact Details
To access any of the Contact Contract Providers, you must include the
READ_CONTACTS
uses-permission in your application manifest:
<uses-permission android:name="android.permission.READ_CONTACTS"/>
Android devices running Android 6.0 Marshmallow (API Level 23) also require the corresponding runtime permission:
int permission = ActivityCompat.checkSelfPermission(this,Manifest.permission.READ_CONTACTS);
Use the Content Resolver to query any of the three Contact Contracts Providers previously described using their respective
CONTENT_URI
static constants. Each class includes their column names as static properties.
Listing 10-20 queries the Contacts table for a Cursor to every person in the address book, creating an array of strings that holds each contact’s name and unique ID.
The
ContactsContract.Data
Content Provider is used to store all the contact details, such as addresses, phone numbers, and e-mail addresses. In most cases, you will likely be querying for contact details based on a full or partial contact name.
To simplify this lookup, Android provides the
ContactsContract.Contacts.CONTENT_FILTER_URI
query URI. Append the full or partial name to this lookup as an additional path segment to the URI. To extract the associated contact details, find the
_ID
value from the returned Cursor, and use it to create a query on the Data table.
The content of each column with a row in the Data table depends on the MIME type specified for that row. As a result, any query on the Data table must filter the rows by MIME type to meaningfully extract data.
Listing 10-21
shows how to use the contact-detail column names available in the
CommonDataKinds
subclasses to extract the display name and mobile phone number from the Data table for a particular contact.
The
Contacts
subclass also offers a phone number lookup URI to help find a contact associated with a particular phone number. This query is highly optimized to return fast results for caller-ID notification.
Use
ContactsContract.PhoneLookup.CONTENT_FILTER_URI
, appending the number to look up as an additional path segment, as shown in
Listing 10-22
.
Using the Intents API for the Contacts Content Provider
The Contacts Contract Content Provider includes an Intent-based mechanism that can be used to view, insert, or select a contact using an existing contact application (typically, the native contact app).
This is the best practice approach and has the advantage of presenting the user with a consistent interface for performing the same task, avoiding ambiguity and improving the overall user experience. Because the user has the power to abort the action without affecting the Content Provider, you don’t require any special permissions to utilize this technique for selecting or creating new contacts.
Accessing Contacts Using Intents
To display a list of contacts for your users to select from, you can use the
Intent.ACTION_PICK
action, and use the
setType
method to indicate the MIME type of the contact data you wish to use.
Listing 10-23
requests that we pick a Contact with a phone number.
This will display a List View of the contacts available (as shown in Figure 10-2 ).

When the user selects a contact, it will be returned as a lookup URI within the data property of the returned Intent. To retrieve specific contact details, use the Content Resolver to perform a query using the lookup URI, and extract the required details as shown in this extension to Listing 10-23 :
@Overrideprotected void onActivityResult(int requestCode, int resultCode, Intent data) {super.onActivityResult(requestCode, resultCode, data);if ((requestCode == PICK_CONTACT) && (resultCode == RESULT_OK)) {Uri selectedContact = data.getData();Cursor cursor = getContentResolver().query(selectedContact,null, null, null, null);// If the cursor returned is valid, get the phone numberif (cursor != null && cursor.moveToFirst()) {int numberIndex = cursor.getColumnIndex(ContactsContract.CommonDataKinds.Phone.NUMBER);String number = cursor.getString(numberIndex);int nameIndex = cursor.getColumnIndex(ContactsContract.CommonDataKinds.Identity.DISPLAY_NAME);String name = cursor.getString(nameIndex);// TODO: Do something with the selected name and phone number.}}}
The contacts app delegates read and write permissions to this content URI for the life of your Activity, meaning you can use it to access the associated data without requesting special permission.
Inserting or Modifying Contacts with Intents
To insert a new contact, you will use an Intent specifying a phone number or e-mail address, along with extras that will pre-populate the new contact form.
The
ContactsContract.Intents.SHOW_OR_CREATE_CONTACT
action will search the Contacts Provider for a particular e-mail address or telephone number URI, offering to insert a new entry only if a contact with the specified contact address doesn’t exist. If the contact does exist, it will be displayed.
Use the constants in the
ContactsContract.Intents.Insert
class to include Intent extras that can be used to pre-populate contact details, including the name, company, e-mail, phone number, notes, and postal address of the new contact, as shown in
Listing 10-24
.
Using the Calendar Content Provider
Android 4.0 (API Level 14) introduced a supported API for accessing the Calendar Content Provider. The Calendar API allows you to insert, view, and edit the complete Calendar database, providing access to calendars, events, attendees, and event.
Like the Contacts Contract Content Provider, the Calendar Content Provider is designed to support multiple synchronized accounts. As a result, you can choose to read from, and contribute to, existing calendar applications and accounts; develop an alternative Calendar Provider by creating a calendar Sync Adapter; or create an alternative calendar application.
Querying the Calendar
The Calendar Provider requires that you include the
READ_CALENDAR
uses-permission in your application manifest:
<uses-permission android:name="android.permission.READ_CALENDAR"/>
Android devices running Android 6.0 Marshmallow (API Level 23) also require the granting of the corresponding runtime permission:
int permission = ActivityCompat.checkSelfPermission(this,Manifest.permission.READ_CALENDAR);
Use the Content Resolver to query any of the Calendar Provider tables using their
CONTENT_URI
static constant. Each table is exposed from within the
CalendarContract
class, including:
-
Calendars—The Calendar application can display multiple calendars associated with multiple accounts. This table holds each calendar that can be displayed, as well as details such as the calendar’s display name, time zone, and color. -
Events—The Events table includes an entry for each scheduled calendar event, including the name, description, location, and start/end times. -
Instances—Each event has one or (in the case of recurring events) multiple instances. The Instances table is populated with entries generated by the contents of the Events table and includes a reference to the event that generated it. -
Attendees—Each entry in the Attendees table represents a single attendee of a given event. Each attendee can include a name, e-mail address, and attendance status, and if they are optional or required guests. -
Reminders—Event reminders are represented within the Reminders table, with each row representing one reminder for a particular event.
Each class includes its column names as static properties.
Listing 10-25 queries the Events table for every event, creating an array of strings that holds each event’s name and unique ID.
Creating Calendar Entries Using Intents
The Calendar Content Provider includes an Intent-based mechanism that allows you to perform common actions without the need for special permissions by utilizing the Calendar application UI. Using Intents, you can open the Calendar application to a specific time, view event details, and insert a new event.
Like the Contacts API, using Intents is the best practice approach for manipulating calendar entries and should be used in preference to direct manipulation of the underlying tables whenever possible.
Using the
Intent.ACTION_INSERT
action, specifying the
CalendarContract.Events.CONTENT_URI
, you can add new events to an existing calendar without requiring any special permissions.
Your Intent can include extras that define each of the event attributes, including the title, start and end time, location, and description, as shown in Listing 10-26 . When triggered, the Intent will be received by the Calendar application, which will create a new entry pre-populated with the data provided.
To view a calendar event, you must first know its row ID. To find this, you need to query the Events Content Provider, as described earlier in this section.
When you have the ID of the event you want to display, create a new Intent using the
Intent.ACTION_VIEW
action and a URI that appends the event’s row ID to the end of the Events table’s
CONTENT_URI
, as shown in
Listing 10-27
.
To view a specific date and time, the URI should be of the form
content://com.android.calendar/time/[milliseconds since epoch]
, as shown in
Listing 10-28
.
ADDING SEARCH TO YOUR APPLICATION
Surfacing your application’s content through search is a simple and powerful way to make your content more discoverable and increase user engagement. On mobile devices speed is everything, and search helps users quickly find the content they need within your app.
Android includes a framework that helps you to implement a search experience within your app that’s consistent with the system and other applications.
You can provide search capabilities for your application in a number of ways, but the best practice solution is to use the Search View, included as an action in the app bar, as shown in its expanded form in Figure 10-3 .

It’s possible to add the Search View anywhere within your Activity layout, though the app bar is by far the most common location.
A Search View can be configured to display search suggestions as you type, providing a powerful mechanism for improving the responsiveness of your application.
Before you can enable a Search View within your application, you need to define what is being searched and how to display the results.
Defining Your Search Metadata
The first step in utilizing the system search facilities is to create a Searchable XML file that defines the settings that will be used by the Search View.
Create a new Searchable XML resource in your project’s
res/xml
folder. As shown in
Listing 10-29
, you must specify the
android:label
attribute (typically your application name), and an
android:hint
attribute to help users understand what they can search for. The hint is typically in
the form of “Search for [content type or product name].” Note that the hint must be a reference to a string resource. If you use a String constant, it will not be displayed.
In the section “Providing Search Suggestions Using a Content Provider” later in this chapter, you learn how to modify your Searchable configuration to provide as-you-type search suggestions within your application’s search framework.
Creating a Search Results Activity
When a search is executed using the Search View, it launches an associated search results Activity, which receives the search query as an Intent. Your search results Activity must then extract the search query from the Intent, perform the search, and present the results.
Your search results Activity can use any UI, but is most commonly a simple list of results, typically implemented using a Recycler View. It’s good practice to set your search results Activity as “single top,” ensuring that the same instance will be used repeatedly, rather than creating a new instance for each search and risk stacking search results on your back stack.
To indicate that an Activity will be used to provide search results, include an Intent Filter registered for the
SEARCH
action:
<intent-filter><action android:name="android.intent.action.SEARCH" /></intent-filter>
You must also include a
meta-data
tag that includes a
name
attribute that specifies
android.app.searchable
, and a corresponding
resource
attribute that specifies the
searchable
XML resource described in the previous section.
Listing 10-30 shows a simple application manifest entry for a search Activity.
When a search is initiated, your search results Activity will be started and the search query will be available from within the launch Intent, accessible through the
SearchManager.QUERY
extra, as shown in
Listing 10-31
.
When your search Activity receives a new search query, execute the search and display the results within the Activity. How you choose to implement your search query and display its results depends on your application, what you’re searching, and where the searchable content is stored.
Searching a Content Provider
Using a Content Provider to expose the data you plan to make searchable has a number of advantages; one of the most powerful is the ability to provide real-time search suggestions, as described later in this chapter.
If you’re providing results from a Content Provider, it’s good practice to use a Cursor Loader to execute a query and bind the result to the UI. In most circumstances you’ll want to provide functionality for users to select a search result and navigate to an appropriate part of your app to interact with it.
Listing 10-32 shows how to create a search results Activity that searches a Content Provider, displays the results Cursor in a Recycler View, and adds a Click Listener you can use to support a user selecting a search result. For brevity, the layout resources for the Activity and the search result items are not included in this listing.
Using the Search View Widget
The Search View widget appears and behaves much the same as an Edit Text View, but is designed to offer search suggestions and to initiate search queries within your application.
You can add the Search View anywhere in your View hierarchy and configure it in the same way; however, it’s best practice to add it as an action View within the app bar, as shown in Listing 10-33 .
Figure 10-4 shows a collapsed Search View displaying a magnifying glass icon within an app bar. You learn more about the app bar in Chapter 12 , “Implementing the Android Design Philosophy.”

To configure a Search View to display your search results Activity, you must first add a new meta-data tag to the manifest entry of the Activity that hosts the Search View, setting the
android.app.default_searchable
value to our search Activity, as shown in
Listing 10-34
.
Extract a reference to your
SearchableInfo
using the Search Manager’s
getSearchableInfo
method. Use the Search View’s
setSearchableInfo
method to bind this object to your Search View, as shown in
Listing 10-35
.
When connected, your Search View will send the entered search query to the Search Activity for execution and results display.
By default, the Search View will be displayed as an icon that, when touched, expands to display the search edit box. You can use the
setIconifiedByDefault
method to disable this and have it always display as an edit box:
searchView.setIconifiedByDefault(false);
Also by default, a Search View query is initiated when the user presses Enter. You can choose to also display a button to submit a search using the
setSubmitButtonEnabled
method:
searchView.setSubmitButtonEnabled(true);
Providing Search Suggestions Using a Content Provider
One of the most engaging innovations in search is the provision of real-time search suggestions as users type their queries.
Search suggestions display a list of possible search results beneath the Search View as users enter their queries, as shown in Figure 10-5 .

Users can then select a suggestion from this list, which allows us to handle this case directly, rather than displaying the list of potential search results as shown in the previous section. Search suggestion selections must still be handled by the search results Activity, but it can potentially start a new Activity without the search Activity being displayed.
If you want to provide search suggestions, you need to create (or modify) a Content Provider to receive search queries and return suggestions using the expected projection. Speed is critical for real-time search results; in many cases it’s good practice to create a separate table specifically to store and provide suggestions.
To support search suggestions, configure your Content Provider to recognize specific URI paths as search queries. Listing 10-36 shows a Uri Matcher used within a Content Provider to compare a requested URI to the known search-query path values.
Use the Uri Matcher to return the search suggestion MIME type for search queries using the
getType
handler, as shown in
Listing 10-37
.
The Search Manager will request search suggestions by initiating a query on your Content Provider and passing in the current search term as the last element in the URI path, making new queries as the user continues to type. To return suggestions, your Content Provider must return a Cursor with a set of predefined columns.
Two columns are required:
SUGGEST_COLUMN_TEXT_1
, which displays the search result text, and
_id
, which indicates the unique row ID. You can also supply another column containing text, and an icon to be displayed on either the left or right of the text results.
Listing 10-38 shows how to create a projection that returns a Cursor suitable for search suggestions.
To perform the query that will supply the search suggestions, use the Uri Matcher within your
query
implementation, applying the projection map of the form defined in the previous listing, as shown in
Listing 10-39
.
The final step is to update your Searchable XML resource as shown in Listing 10-40 . You need to specify the authority of the Content Provider that will be used to supply search suggestions for the Search View. This can be the same Content Provider used to execute regular searches (if you’ve mapped the columns as required), or an entirely different Provider.
It’s also useful to specify both a
searchSuggestIntentAction
and
searchSuggestIntentData
attribute. These attributes are used to create an Intent that is fired when a search suggestion is selected by the user, indicating the Intent action, and the base URI that will be used in the Intent’s data value.
If you specify an Intent action and base URI within the Searchable resource, you should update your Projection to include a column named
SearchManager.SUGGEST_COLUMN_INTENT_DATA_ID
that includes the row ID that will be appended to the base URI, as shown in
Listing 10-41
.
It’s also possible to specify unique actions and data URIs for each search suggestion, using the Search Manager’s
SUGGEST_COLUMN_INTENT_ACTION
and
SUGGEST_COLUMN_INTENT_DATA
constants, respectively.
Searching the Earthquake Monitor Database
In the following example, you add search functionality to the Earthquake project, by adding a Search View that supports search suggestions to the action bar:
-
To begin, open the Earthquake project and create a new
EarthquakeSearchProviderclass that extendsContentProvider. It will be used exclusively to generate search suggestions for your Search View. Include the required stubs overriding the abstractonCreate,getType,query,insert,delete, andupdatemethods:public class EarthquakeSearchProvider extends ContentProvider {@Overridepublic boolean onCreate() {return false;}@Nullable@Overridepublic Cursor query(@NonNull Uri uri, @Nullable String[] projection,@Nullable String selection,@Nullable String[] selectionArgs,@Nullable String sortOrder) {return null;}@Nullable@Overridepublic String getType(@NonNull Uri uri) {return null;}@Nullable@Overridepublic Uri insert(@NonNull Uri uri, @Nullable ContentValues values) {return null;}@Overridepublic int delete(@NonNull Uri uri, @Nullable String selection,@Nullable String[] selectionArgs) {return 0;}@Overridepublic int update(@NonNull Uri uri, @Nullable ContentValues values,@Nullable String selection,@Nullable String[] selectionArgs) {return 0;}} -
Add a
UriMatcher, which can be used to handle requests made using different URI patterns. As you will use this Content Provider exclusively for search suggestions, you only need to include matches for those query types:private static final int SEARCH_SUGGESTIONS = 1;// Allocate the UriMatcher object, recognize search requests.private static final UriMatcher uriMatcher;static {uriMatcher = new UriMatcher(UriMatcher.NO_MATCH);uriMatcher.addURI("com.professionalandroid.provider.earthquake",SearchManager.SUGGEST_URI_PATH_QUERY, SEARCH_SUGGESTIONS);uriMatcher.addURI("com.professionalandroid.provider.earthquake",SearchManager.SUGGEST_URI_PATH_QUERY + "/*", SEARCH_SUGGESTIONS);uriMatcher.addURI("com.professionalandroid.provider.earthquake",SearchManager.SUGGEST_URI_PATH_SHORTCUT, SEARCH_SUGGESTIONS);uriMatcher.addURI("com.professionalandroid.provider.earthquake",SearchManager.SUGGEST_URI_PATH_SHORTCUT + "/*", SEARCH_SUGGESTIONS);} -
Also override the Content Provider’s
getTypemethod to return the MIME type for search suggestions:@Nullable@Overridepublic String getType(@NonNull Uri uri) {switch (uriMatcher.match(uri)) {case SEARCH_SUGGESTIONS:return SearchManager.SUGGEST_MIME_TYPE;default:throw new IllegalArgumentException("Unsupported URI: " + uri);}} -
Rather than accessing a SQLite database directly, you will use the Room Database created in
Chapter 9
to perform searches. Confirm you can access it within the
onCreatehandler, and return true:@Overridepublic boolean onCreate() {EarthquakeDatabaseAccessor.getInstance(getContext().getApplicationContext());return true;} -
Open the
EarthquakeDAOand add a new query method that returns a Cursor of search suggestions based on a partial query passed in as a parameter. Search suggestion columns require specific names and unfortunately, it’s not currently possible to use static constants, or passed parameters, when defining column aliases. Instead, while not ideal, hard-code the required String constants. You may want to shower afterwards:@Query("SELECT mId as _id, " +"mDetails as suggest_text_1, " +"mId as suggest_intent_data_id " +"FROM earthquake " +"WHERE mDetails LIKE :query " +"ORDER BY mdate DESC")public Cursor generateSearchSuggestions(String query); -
Still within the Earthquake Data Access Object, add another query method that includes a query String parameter. This method returns full search results as a Live Data object containing a List of Earthquakes that match the query:
@Query("SELECT * " +"FROM earthquake " +"WHERE mDetails LIKE :query " +"ORDER BY mdate DESC")public LiveData<List<Earthquake>> searchEarthquakes(String query); -
Return to the Content Provider, and implement the query method stub. Check if the received URI is of the form of a request for search suggestions, and if so query the Room database using the current partial query:
@Nullable@Overridepublic Cursor query(@NonNull Uri uri, @Nullable String[] projection,@Nullable String selection,@Nullable String[] selectionArgs,@Nullable String sortOrder) {if (uriMatcher.match(uri) == SEARCH_SUGGESTIONS) {String searchQuery = "%" + uri.getLastPathSegment() + "%";EarthquakeDAO earthquakeDAO= EarthquakeDatabaseAccessor.getInstance(getContext().getApplicationContext()).earthquakeDAO();Cursor c = earthquakeDAO.generateSearchSuggestions(searchQuery);// Return a cursor of search suggestions.return c;}return null;} -
Now that it’s complete, add the Content Provider to the manifest. Note that this Content Provider is very limited; it does not include the ability to insert, delete, or update records—nor does it support queries beyond supplying search suggestions:
<provider android:name=".EarthquakeSearchProvider"android:authorities="com.professionalandroid.provider.earthquake"/> -
Open the
strings.xmlresource file (in theres/valuesfolder) and add new string resources that describe the Earthquake search label and text entry hint:<resources>[… Existing String resource values …]<string name="search_label">Search</string><string name="search_hint">Search for earthquakes…</string></resources> -
Create a new
searchable.xmlfile in theres/xmlfolder that defines the metadata for your Earthquake Search Provider. Use thesearch_hintString from Step 9 as the hint value, and use theapp_nameString resource as the label value. Note that the label value must be the same as the application label specified in the manifest. Also set the authority to use for generating search suggestions to the Earthquake Search Provider’s authority, and configure thesearchSuggestIntentActionandsearchSuggestIntentDataattributes:<?xml version="1.0" encoding="utf-8"?><searchablexmlns_android="http://schemas.android.com/apk/res/android"android:label="@string/app_name"android:hint="@string/search_hint"android:searchSuggestAuthority="com.professionalandroid.provider.earthquake"android:searchSuggestIntentAction="android.intent.action.VIEW"android:searchSuggestIntentData="content://com.professionalandroid.provider.earthquake/earthquakes"></searchable> -
Now create a new empty
EarthquakeSearchResultActivitythat extendsAppCompatActivity:public class EarthquakeSearchResultActivityextends AppCompatActivity {@Overrideprotected void onCreate(Bundle savedInstanceState) {super.onCreate(savedInstanceState);setContentView(R.layout.activity_earthquake_search_result);}} -
The list of Earthquake search results will be displayed using a Recycler View that uses your existing Earthquake list item layout and Recycler View Adapter. Modify the layout for the Earthquake Search Result Activity created in Step 11 to include a Recycler View:
<?xml version="1.0" encoding="utf-8"?><android.support.v7.widget.RecyclerViewxmlns_android="http://schemas.android.com/apk/res/android"xmlns_app="http://schemas.android.com/apk/res-auto"android:id="@+id/search_result_list"android:layout_width="match_parent"android:layout_height="match_parent"android:layout_marginLeft="16dp"android:layout_marginRight="16dp"app:layoutManager="LinearLayoutManager"/> -
Within the Earthquake Search Result Activity, update the
onCreatehandler to apply the Earthquake Recycler View Adapter to the Recycler View that will display the search results:private ArrayList<Earthquake> mEarthquakes = new ArrayList< >();privateEarthquakeRecyclerViewAdapter mEarthquakeAdapter= new EarthquakeRecyclerViewAdapter(mEarthquakes);@Overrideprotected void onCreate(Bundle savedInstanceState) {super.onCreate(savedInstanceState);setContentView(R.layout.activity_earthquake_search_result);RecyclerView recyclerView = findViewById(R.id.search_result_list);recyclerView.setLayoutManager(new LinearLayoutManager(this));recyclerView.setAdapter(mEarthquakeAdapter);} -
Some of the next steps require Lambda functions, so make sure your project is targeting Java 1.8. Open your App module
build.gradlefile and confirm the target and source compatibility compile options within the Android node are set to 1.8:android {[… Existing Android node values …]compileOptions {targetCompatibility 1.8sourceCompatibility 1.8}} -
Return to the Search Results Activity, and add a new Live Data
Observerthat will update the Array List of Earthquakes displayed by the Recycler View. Also create a new Mutable Live Data that will store the current search query, and asetSearchQuerymethod that will modify that query:MutableLiveData<String> searchQuery;private void setSearchQuery(String query) {searchQuery.setValue(query);}private final Observer<List<Earthquake>> searchQueryResultObserver= updatedEarthquakes -> {// Update the UI with the updated search query results.mEarthquakes.clear();if (updatedEarthquakes != null)mEarthquakes.addAll(updatedEarthquakes);mEarthquakeAdapter.notifyDataSetChanged();}; -
To simplify the process of applying updated search terms, we can use
Transformations.switchMap. This method automatically modifies the underlying data of one Live Data based on changes in another. Apply a Switch Map that monitors thesearchQueryLive Data, and when it changes—update asearchResultsLive Data variable, by querying the database using the updated search term. Then use the Observer from Step 15 to observe changes in thesearchResultsLive Data. Finally, extract the search query from the Intent that launched the Activity, and pass it into thesetSearchQuerymethod.LiveData<List<Earthquake>> searchResults;@Overrideprotected void onCreate(Bundle savedInstanceState) {super.onCreate(savedInstanceState);setContentView(R.layout.activity_earthquake_search_result);RecyclerView recyclerView = findViewById(R.id.search_result_list);recyclerView.setLayoutManager(new LinearLayoutManager(this));recyclerView.setAdapter(mEarthquakeAdapter);// Initialize the search query Live Data.searchQuery = new MutableLiveData<>();searchQuery.setValue(null);// Link the search query Live Data to the search results Live Data.// Configure Switch Map such that a change in the search query// updates the search results by querying the database.searchResults = Transformations.switchMap(searchQuery,query -> EarthquakeDatabaseAccessor.getInstance(getApplicationContext()).earthquakeDAO().searchEarthquakes("%" + query + "%"));// Observe changes to the search results Live Data.searchResults.observe(EarthquakeSearchResultActivity.this,searchQueryResultObserver);// Extract the search query term and update the search query// Live Data.String query = getIntent().getStringExtra(SearchManager.QUERY);setSearchQuery(query);} -
Also override the
onNewIntenthandler to update the search query if a new search request Intent is received:@Overrideprotected void onNewIntent(Intent intent) {super.onNewIntent(intent);// If the search Activity exists, and another search// is performed, set the launch Intent to the newly// received search Intent.setIntent(intent);// Extract the search query and update the searchQuery Live Data.String query = getIntent().getStringExtra(SearchManager.QUERY);setSearchQuery(query);} -
Open the application Manifest, and modify the
EarthquakeSearchResultActivityelement, making its launch modesingleTopand adding an Intent Filter for theSEARCHAction. You will also need to add ameta-datatag that specifies thesearchableXML resource you created in Step 10:<activityandroid:name=".EarthquakeSearchResultActivity"android:launchMode="singleTop"><intent-filter><action android:name="android.intent.action.SEARCH" /></intent-filter><meta-dataandroid:name="android.app.searchable"android:resource="@xml/searchable"/></activity> -
Still in the manifest, add a new
meta-datatag to the Earthquake Main Activity to specify the Earthquake Search Results Activity as its default search provider:<activity android:name=".EarthquakeMainActivity"><intent-filter><action android:name="android.intent.action.MAIN"/><category android:name="android.intent.category.LAUNCHER"/></intent-filter><meta-dataandroid:name="android.app.default_searchable"android:value=".EarthquakeSearchResultActivity"/></activity> -
Now add a Search View to the Earthquake Main Activity’s app bar as an action button. Create a new
options_menu.xmlresource in theres/menufolder that includes a menu item for displaying settings, as well as a new Search View:<?xml version="1.0" encoding="utf-8"?><menu xmlns_app="http://schemas.android.com/apk/res-auto"xmlns_android="http://schemas.android.com/apk/res/android"><item android:id="@+id/settings_menu_item"android:title="Settings" /><item android:id="@+id/search_view"android:title="@string/search_label"app:showAsAction="collapseActionView|ifRoom"app:actionViewClass="android.support.v7.widget.SearchView" /></menu> -
Return to the Earthquake Main Activity and modify the
onCreateOptionsMenuhandler to inflate the new XML menu definition, before connecting the Search View to your searchable definition:@Overridepublic boolean onCreateOptionsMenu(Menu menu) {super.onCreateOptionsMenu(menu);// Inflate the options menu from XMLMenuInflater inflater = getMenuInflater();inflater.inflate(R.menu.options_menu, menu);// Use the Search Manager to find the SearchableInfo related// to the Search Result Activity.SearchManager searchManager =(SearchManager) getSystemService(Context.SEARCH_SERVICE);SearchableInfo searchableInfo = searchManager.getSearchableInfo(new ComponentName(getApplicationContext(),EarthquakeSearchResultActivity.class));SearchView searchView =(SearchView)menu.findItem(R.id.search_view).getActionView();searchView.setSearchableInfo(searchableInfo);searchView.setIconifiedByDefault(false);return true;} -
Modify the
onOptionsItemSelectedhandler to use the Menu Item identifier from the XML definition created in Step 20:public boolean onOptionsItemSelected(MenuItem item) {super.onOptionsItemSelected(item);switch (item.getItemId()) {caseR.id.settings_menu_item:Intent intent = new Intent(this, PreferencesActivity.class);startActivityForResult(intent, SHOW_PREFERENCES);return true;}return false;} -
If you start the application, you can now initiate a search by touching the “Search” action bar button and entering a query. As a final step, modify the search results query to handle the case of users selecting a search suggestion. For now, you will display the search result as though the user had completed the full search String. First, return to the Earthquake DAO and add a new
getEarthquakequery method that takes an Earthquake unique ID, and returns a Live Data containing the matching Earthquake:@Query("SELECT * " +"FROM earthquake " +"WHERE mId = :id " +"LIMIT 1")public LiveData<Earthquake> getEarthquake(String id); -
Then, within the Earthquake Search Result Activity, add a new
selectedSearchSuggestionIdMutable Live Data variable that will store the ID of the selected search suggestion. Create asetSelectedSearchSuggestionmethod that will modify theselectedSearchSuggestionIdLive Data based on the Earthquake ID extracted from a Content Provider Uri, and create an Observer that will set the search query term using the details extracted from the selected search suggestion:MutableLiveData<String> selectedSearchSuggestionId;private void setSelectedSearchSuggestion(Uri dataString) {String id = dataString.getPathSegments().get(1);selectedSearchSuggestionId.setValue(id);}final Observer<Earthquake> selectedSearchSuggestionObserver= selectedSearchSuggestion -> {// Update the search query to match the selected search suggestion.if (selectedSearchSuggestion != null) {setSearchQuery(selectedSearchSuggestion.getDetails());}}; -
Modify the
onCreatehandler to initialize the selected search suggestion Id Live Data and repeat the process from Step 16 to apply a Switch Map. This one should monitor theselectedSearchSuggestionIdLive Data, and update theselectedSearchSuggestionLive Data variable, by querying the database using the selected suggestion’s Id. Also check for the View action, which is sent when a suggested search result is selected. In that case, apply the Observer from Step 24 to theselectedSearchSuggestionLive Data, and use thesetSelectedSearchSuggestionto extract and set the selected search suggestion Id.LiveData<Earthquake> selectedSearchSuggestion;@Overrideprotected void onCreate(Bundle savedInstanceState) {super.onCreate(savedInstanceState);setContentView(R.layout.activity_earthquake_search_result);RecyclerView recyclerView = findViewById(R.id.search_result_list);recyclerView.setLayoutManager(new LinearLayoutManager(this));recyclerView.setAdapter(mEarthquakeAdapter);// Initialize the search query Live Data.searchQuery = new MutableLiveData<>();searchQuery.setValue(null);// Link the search query Live Data to the search results Live Data.// Configure Switch Map such that a change in the search query// updates the search results by querying the database.searchResults = Transformations.switchMap(searchQuery,query -> EarthquakeDatabaseAccessor.getInstance(getApplicationContext()).earthquakeDAO().searchEarthquakes("%" + query + "%"));// Observe changes to the search results Live Data.searchResults.observe(EarthquakeSearchResultActivity.this,searchQueryResultObserver);// Initialize the selected search suggestion Id Live Data.selectedSearchSuggestionId = new MutableLiveData<>();selectedSearchSuggestionId.setValue(null);// Link the selected search suggestion ID Live Data to the// selected search suggestion Live Data.// Configure Switch Map such that a change in the ID of the// selected search suggestion, updates the Live Data that// returns the corresponding Earthquake by querying the database.selectedSearchSuggestion =Transformations.switchMap(selectedSearchSuggestionId,id -> EarthquakeDatabaseAccessor.getInstance(getApplicationContext()).earthquakeDAO().getEarthquake(id));// If the Activity was launched by a search suggestionif (Intent.ACTION_VIEW.equals(getIntent().getAction())) {selectedSearchSuggestion.observe(this,selectedSearchSuggestionObserver);setSelectedSearchSuggestion(getIntent().getData());}else {// If the Activity was launched from a search query.String query = getIntent().getStringExtra(SearchManager.QUERY);setSearchQuery(query);}} -
Finally, update the
onNewIntenthandler to also check for the View action to update either the selected search suggestion or the search query as appropriate:@Overrideprotected void onNewIntent(Intent intent) {super.onNewIntent(intent);// If the search Activity exists, and another search// is performed, set the launch Intent to the newly// received search Intent and perform a new search.setIntent(intent);if (Intent.ACTION_VIEW.equals(getIntent().getAction())) {// Update the selected search suggestion Id.setSelectedSearchSuggestion(getIntent().getData());}else {// Extract the search query and update the searchQuery Live Data.String query = getIntent().getStringExtra(SearchManager.QUERY);setSearchQuery(query);}}
We’ll return to the Earthquake app in later chapters.
11
Working in the Background
WORKING IN THE BACKGROUND
To help balance the trade-offs between timely, low-latency app data updates and longer battery life, Android provides a number of APIs and best-practice patterns designed to support running background tasks, while minimizing their impact on battery life.
By default, all Activities, Services, and Broadcast Receivers are executed on the main application UI Thread. To keep your applications responsive while they execute long-running tasks, in this chapter you learn to move any non-trivial tasks that aren’t directly related to updating the UI onto background Threads, using the
HandlerThread
and
AsyncTask
classes.
It makes sense that when the screen turns off no apps should be running, and no data transferred; however, in practice such an extreme approach would result in a significantly worse user experience by delaying a variety of time-sensitive updates and behaviors. Finding the right balance between longer battery life and lower update latency is one of the biggest challenges in developing for mobile devices.
We expect alerts for everything from phone calls to SMS messages and incoming instant messages to be received immediately (and to be notified accordingly). We expect alarms to wake us each morning, for e-mail to arrive in a timely fashion, and for music to keep playing—even when the screen is off and the phone is in our pockets.
To minimize battery drain associated with running background tasks, Android 5.0 Lollipop (API Level 21) introduced the
JobScheduler
. You’ll learn to use the Job Scheduler to batch background tasks (or “jobs”), scheduled by multiple apps across the entire system. The Job Scheduler executes jobs at times, and in a sequence, designed to minimize the associated battery drain by taking into consideration constraints such as network availability and charging state.
To provide a backward compatible API for devices running Android 4.0 Ice Cream Sandwich (API Level 14) or above, you’ll learn to use the Firebase
JobDispatcher
, which is available on devices that include Google Play services. You’ll also be introduced to the
WorkManager
, available as part of the Android Architecture Components, which dynamically selects the best way to execute background tasks—Threads, Job Scheduler, Firebase Job Dispatcher, or the Alarm Manager—based on factors including app state and platform API level.
When applications perform background tasks, they often have no visible UI to provide user feedback. In this chapter you learn to use Notifications to display information to users when your app is in the background, as well as optionally providing user actions related to that information.
The most efficient way to perform background tasks related to updating your app from a remote server is to rely on the server itself to push information or messages directly to each device; you learn to implement this using Firebase Cloud Messaging and Firebase Notifications as an alternative to client-side polling.
This chapter also introduces the Alarm Manager, a mechanism for firing Intents at set times, outside the scope of your application’s life cycle. An Alarm will fire even after its owner application has been closed and can wake a device from sleep, so you learn to use Alarms to trigger actions based on a specific time or time interval.
Finally, for ongoing processing that interacts directly with the user, such as music playback or file uploads, a foreground
Service
may be necessary. You learn to use foreground Services that include the required Notification that gives users the ability to stop, control, and observe the progress of long-running background operations.
USING BACKGROUND THREADS
All Android application components—including Activities, Services, and Broadcast Receivers—run on the main application Thread. As a result, time-consuming processing in any component can block all other components, including any running Services and the visible Activity.
Activities that don’t respond to an input event (such as a screen touch) within 5 seconds, and Broadcast Receivers that don’t complete their
onReceive
handlers within 10 seconds, are considered unresponsive.
Not only do you want to avoid this scenario, you don’t even want to come close. In practice, users will notice input delays and UI pauses of more than a couple of hundred milliseconds.
Responsiveness is one of the most critical attributes of a good user experience for Android applications. To ensure that your app responds quickly to any user interaction or system event, your app should use background Threads for all nontrivial processing that doesn’t directly interact with user interface components. It’s particularly important that long-running operations such as file I/O, network lookups, database transactions, and complex calculations are executed on background Threads.
The
AsyncTask
class is a wrapper around standard Java Threading; it encapsulates the most common pattern of executing background work on a child Thread, before syncing with the UI Thread to deliver progress and the final result. An Async Task allows you to execute background tasks sequentially, in parallel, or through your own Thread Pool.
Alternatively, if you need more control over your Threads, or don’t need to synchronize with the UI Thread when the work has been completed, the
HandlerThread
class can be used to create a Thread to which components can send work using the
Handler
class.
Using Asynchronous Tasks to Run Tasks Asynchronously
The
AsyncTask
class implements the best-practice pattern for moving time-consuming operations onto a background Thread, and then synchronizing with the UI Thread to report updates, and again when the processing is complete.
It’s important to note that Async Tasks have no built-in understanding of the life cycle of the components they’re running within. This means that if you are creating an Async Task in an Activity, to avoid memory leaks you should define it as static (and ensure that it doesn’t hold a strong reference to an Activity or its Views).
Creating New Asynchronous Tasks
Each Async Task implementation can specify parameter types to be used for input parameters, progress-reporting values, and the returned result value. If you don’t need, or want, your implementation to take input parameters, update progress, or report a final result, specify
Void
for any or all the required types.
To create a new asynchronous task, extend the
AsyncTask
class and specify the parameter types to use, as shown in the skeleton code of
Listing 11-1
.
Your subclass should override the following event handlers:
-
doInBackground—This method will be executed on a background Thread, so place your long-running code here, and don’t attempt to interact with UI objects from within this handler. It takes a set of parameters of the type defined in your class implementation.Immediately before this method is called, the
onPreExecutemethod will be called. You can then use thepublishProgressmethod from within this handler to pass parameter values to theonProgressUpdatehandler. When your background task is complete return the final result, which will be passed as a parameter to theonPostExecutehandler—from where you can update the UI accordingly. -
onPreExecute—Override this handler to update the UI immediately beforedoInBackgroundruns. For example, to show a loading Progress Bar.This handler is synchronized with the UI Thread when executed, so you can safely modify UI elements.
-
onProgressUpdate—Override this handler to update the UI with interim progress updates. This handler receives the set of parameters passed in topublishProgress(typically from within thedoInBackgroundhandler).This handler is synchronized with the UI Thread when executed, so you can safely modify UI elements.
-
onPostExecute—WhendoInBackgroundhas completed, its return value is passed in to this event handler.This handler is synchronized with the UI Thread when executed, so you can safely use this handler to update any UI components when your asynchronous task has completed.
Running Asynchronous Tasks
After you’ve implemented an asynchronous task, execute it by creating a new instance and calling
execute
, as shown in
Listing 11-2
. You can pass in a number of parameters, each of the type specified in your implementation.
By default, Async Tasks are executed using the
AsyncTask.SERIAL_EXECUTOR
, which results in every Async Task within your application being executed serially, on the
same
background Thread. You can modify this behavior using the
executeOnExecutor
method instead of
execute
, which allows you to specify an alternative executor.
If you specify the
AsyncTask.THREAD_POOL_EXECUTOR
as seen in
Listing 11-3
, a new Thread Pool will be created, sized appropriately for the number of CPUs available on the device, and your Async Tasks will be executed in parallel.
You can also pass in your own
Executor
implementation, or use the static methods found in the
Executors
class, such as
newFixedThreadPool
, to create a new Executor—in that case one that reuses a fixed number of Threads.
Using Asynchronous Tasks in a Broadcast Receiver
As described in Chapter 6 “Intents and Broadcast Receivers,” a Broadcast Receiver can receive callbacks from other applications, and can handle processing a small amount of work in the background.
Like all components, its
onReceive
method runs on the main application UI Thread. By calling
goAsync
within
onReceive
, you can move work onto a background Thread for up to 10 seconds, before it is terminated as non-responsive.
Listing 11-4
shows how an Async Task can be useful in this context. It provides a simple way to marshal the background work within
doInBackground
, and uses the
onPostExecute
handler to call the
finish
method on the
BroadcastReceiver.PendingResult
as required to indicate that the asynchronous background work is complete.
Manual Thread Creation Using Handler Threads
An Async Task is a useful shortcut for running one-off tasks, but you may also need to create and manage your own Threads to perform background processing. This is often the case when you have long-running or inter-related Threads that require more subtle or complex management than is possible using Async Task.
A
Thread
, by itself, is very similar to an Async Task in that it runs a single
Runnable
and then stops. To provide a persistent Thread that can be used as a queue for background tasks, Android provides a special subclass, the
HandlerThread
.
A
HandlerThread
is kept alive by a
Looper
, a class that manages a queue of incoming work. Work can then be added to the work queue as a
Runnable
, posted to a
Handler
as seen in
Listing 11-5
.
Multiple Runnables posted to the same Handler Thread will be run sequentially. To ensure all the Thread’s resources are properly cleaned up, you must call
quit
(which stops the Thread after the current Runnable has completed, and drops all queued Runnables) or
quitSafely
(which allows all queued Runnables to complete), to clean up the Thread’s resources.
Handlers can send information across Threads using the
Message
class. A Message is constructed using the Handler’s
obtainMessage
methods (which use a pool of Messages to avoid unnecessary object creation), or the helper method
sendEmptyMessage
.
An empty Message contains a single integer code in its
what
field, while an obtained Message instance can also contain a Bundle of information set via its
setData
method, making it a useful mechanism for sending information between Handlers.
When you send a new Message to a Handler, the
handleMessage
method is executed on the Thread the Handler is associated with, as seen in
Listing 11-6
.
Operations that directly interact with objects created on the UI Thread (such as Views), or that display messages (such as Toasts), must always be invoked on the main Thread. Within an Activity, you can use the
runOnUiThread
method to force a Runnable to execute on the same Thread as the Activity UI, as shown in the following code snippet:
runOnUiThread(new Runnable() {public void run() {// Update a View or other Activity UI element.}});
The UI Thread, just like a Handler Thread, has an associated Looper (
Looper.getMainLooper
). You can use this to create a
Handler
and post methods directly to the UI Thread.
The
Handler
class also enables you to delay posts or execute them at a specific time, using the
postDelayed
and
postAtTime
methods, respectively:
// Start work after 1sec.handler.postDelayed(aRunnable, 1000);// Start work after the device has been in use for 5mins.int upTime = 1000*60*5;handler.postAtTime(aRunnable, SystemClock.uptimeMillis()+upTime);
SCHEDULING BACKGROUND JOBS
Applications performing tasks in the background is one of the most powerful features of Android, but also the most likely to result in significant battery drain. Having multiple applications wake, and keep the device awake, can significantly reduce the expected battery life of a device.
The
JobScheduler
API was introduced in Android 5.0 Lollipop (API Level 21) to serve as a coordinator for all background work requested by any application running on a device. It effectively batches the background jobs of multiple applications, introducing efficiencies in both battery and memory use, which serves to reduce the overall impact of each individual background job.
More recently, Android Architecture Components introduced the Work Manager, which offers the same features as the Job Scheduler with the advantage of backward-compatible support for earlier platform releases.
As described in Chapter 7 , “Using Internet Resources,” every network request made while connected using a cellular network will result in the cell radio moving to a higher power-use state, and staying there for some time. As a result, poorly timed data transfers, initiated without context from multiple apps, can result in the radio staying in a high power state for prolonged periods.
By batching network data transfers from multiple apps such that they occur during the same time window, the Job Scheduler avoids the power drain caused by the cell radio turning on, and staying on, multiple times. The Job Scheduler also encapsulates the best practices of background jobs. It holds Wake Locks to ensure your jobs complete, checks for (and monitors) network connectivity, and it will defer and retry jobs if they fail.
Similarly, you can specify that your scheduled jobs should only occur when the device is connected to Wi-Fi, or while the device is charging, as described later in this chapter.
The Job Scheduler also reduces overall system memory usage. As described in Chapter 3 “Applications and Activities and Fragments—Oh My!,” Android manages system memory primarily by killing Application processes until there is sufficient memory to support the highest-priority processes. On devices running Android 7.0 Nougat (API Level 24), the Job Scheduler optimizes background work by serializing and ordering jobs based on the available memory, effectively minimizing the risk of background tasks being killed—a strong likelihood if multiple background tasks attempt to execute simultaneously.
Creating a Job Service for the Job Scheduler
To use the Job Scheduler, your application must include a
JobService
that overrides the
onStartJob
handler. Within this handler you include the code that implements the background job to be run, while the Job Service itself is used by the system Job Scheduler to schedule and execute jobs.
You can include multiple Job Services within your app, so it’s good practice to create a separate one for each distinct job type your app requires.
Listing 11-7
shows a simple
JobService
implementation; the Job Scheduler will call
onStartJob
on the main UI Thread when it’s determined your job should begin.
If your background work can be completed quickly and safely on the main Thread, you can return
false
from
onStartJob
to indicate that there is no further work to be done; in this case
onStopJob
will not be called.
In most cases—such as when accessing Internet data, performing database operations, or file I/O—your job will need to be executed asynchronously. You can do this by creating and starting a new Thread within
onStartJob
, using the techniques described earlier in this chapter. In this case, you must return
true
from
onStartJob
, to indicate that additional work is still being completed.
When the work on the background Thread is completed, you must call the Job Service’s
jobFinished
method, passing in any
JobParameters
associated with the job that finished, and a
boolean
indicating whether or not the job completed successfully or should be rescheduled.
Listing 11-8
shows how this asynchronous approach can be implemented using an
AsyncTask
created and started within
onStartJob
. It moves our processing to a background Thread, and supplies a convenient callback to indicate success or failure—and by utilizing the
AsyncTask
cancel
method, we can fulfill the contract of calling
onStopJob
.
By calling
jobFinished
you notify the Job Scheduler that your background job is complete, which releases the Wake Lock and allows the device to return to standby.
If the
JobService
is only responsible for a single job, a single Async Task is enough. If you have multiple jobs running from the same Job Service, you should instead maintain a Map of Async Tasks.
Between returning true from
onStartJob
and calling
jobFinished
, the system may call
onStopJob
to indicate that there has been a system change such that the requirements you specified when scheduling the job are no longer being met. For example, if you required a charging device and the device is unplugged, or if you requested an unmetered connection and the Wi-Fi signal is lost.
When the
onStopJob
handler is triggered, you should cancel any ongoing processes as the system will release the Wakelock being held for your app—as a result of which your Thread may be stopped. The return value you indicate within
onStopJob
allows you to indicate if your job should be rescheduled to retry when your conditions are once again met.
Job Service extends the Service application component so, like all Service implementations, you must include each of your Job Services within your application manifest as shown in Listing 11-9 .
Scheduling Jobs with the Job Scheduler
Having defined your job by implementing a
JobService
, you use the
JobScheduler
to schedule when, and under what circumstances, it should be run.
The Job Scheduler is a system Service that you can access using the
getSystemService
method, passing in
Context.JOB_SCHEDULER_SERVICE
:
JobScheduler jobScheduler= (JobScheduler) context.getSystemService(Context.JOB_SCHEDULER_SERVICE);
To schedule a job, use the Job Scheduler’s
schedule
method, passing in a
JobInfo
object that is used to specify the timeframe and conditions under which your job should be run.
To create a
JobInfo
object, use the
JobInfo.Builder
. The Job Info Builder requires two mandatory parameters: an Integer indicating the job ID, and the
ComponentName
for your Job Service implementation. A common pattern used to encapsulate the logic of scheduling a job is to include a static method in your
JobService
implementation as shown in
Listing 11-10
.
The specified job ID is a unique identifier for a particular job; scheduling a new job with the same job ID will override any previously scheduled jobs. Similarly, you can pass this job ID into the Job Scheduler’s
cancel
method to cancel a job scheduled with that identifier.
The builder used to construct your
JobInfo
supports a large number of optional constraints that specify the timing and system conditions that determine when, and if, your job should be run. These include:
-
setRequiredNetworkType—Defines a mandatory network type for your job. Must be one of:-
NETWORK_TYPE_NONE—The default option, meaning no network connectivity is required. -
NETWORK_TYPE_ANY—Requires a network connection, but can be of any type. -
NETWORK_TYPE_UNMETERED—Requires an unmetered network connection, meaning a connection that likely doesn’t charge for data traffic (typically Wi-Fi). -
NETWORK_TYPE_NOT_ROAMING—Requires a network connection (Wi-Fi or cellular) that isn’t roaming (only available on Android 7.0 (API Level 24) or higher). -
NETWORK_TYPE_METERED—Requires a metered network connection (typically a cellular connection). Only available on Android 8.0 Oreo (API Level 26) or higher.
-
-
setRequiresCharging—Restricts your job to run only when the device is plugged in and charging. -
setRequiresDeviceIdle—Restricts your job to only run when the device is not in use and has not been in use for some time. -
addTriggerContentUri—Indicates your job should be triggered when a particularcontent://URI changes (typically indicating a database has changed). Only available on devices running Android 7.0 Nougat (API Level 24) or higher. -
setPeriodic—Schedules the job to recur, at a frequency no greater than the specified period. -
setMinimumLatency—Requires that the job be executed no sooner than after the specified time has passed. This cannot be combined with a periodic job. -
setOverrideDeadline—Indicates an amount of time after which the job must run, even if the other constraints aren’t met. You can check if this has occurred from within your Job Service by checking the Job Parameter’sisOverrideDeadlineExpiredvalue.
Listing 11-10 schedules a job that requires unmetered network connectivity and a charging device, making it suitable for a one-time upload of information that isn’t time sensitive.
In addition to setting conditions for when a job is run, you can also use the Job Info Builder to indicate the correct behavior if a job fails, or if the device is rebooted before the job executes.
As shown in
Listing 11-11
, you can use
setBackoffCriteria
to customize the back-off/retry policy by defining the length of an initial back-off and either a linear or exponential back-off strategy. By default, the Job Scheduler will use a 30 second initial value with and linear back-off. You can also use
setPersisted
to indicate if a job should be retained across device reboots.
The Job Info Builder also provides the
setExtras
method to support sending additional data to your
JobInfo
.
Scheduling Jobs with the Firebase Job Dispatcher
The Job Scheduler was introduced in Android 5.0 Lollipop (API Level 21); the Firebase Job Dispatcher was created to provide support for devices running Android 4.0 Ice Cream Sandwich (API Level 14) and above.
On Android 7.0 Nougat (API Level 24) and higher devices, the Firebase Job Dispatcher passes responsibility for scheduling jobs to the framework Job Scheduler, ensuring future compatibility with system-wide background optimizations while maintaining backward compatibility for earlier platform versions.
To include the Firebase Job Dispatcher within your project, add a dependency to your App Module
Build.gradle
file:
dependencies {implementation 'com.firebase:firebase-jobdispatcher:0.8.5'}
The Firebase Job Dispatcher includes a
JobService
class as part of the
com.firebase.jobdispatcher
package (rather than the framework’s
com.android.job
package). Like the Job Scheduler, The Job Dispatcher includes
onStartJob
and
onStopJob
methods to override.
In cases where you only need to run a single job at a time on a background thread, Job Dispatcher provides a
SimpleJobService
, which implements
onStartJob
and
onStopJob
for you. You instead only override
onRunJob
, which is called on a background Thread, as shown in
Listing 11-12
:
Once you’ve created your Job Dispatcher Job Service, you can add it to your application manifest as shown in Listing 11-13 .
The Job Dispatcher allows you to define many of the same constraints as the Job Scheduler using the Job Dispatcher’s
newJobBuilder
method, as shown in
Listing 11-14
, that re-creates the same job defined earlier using the Job Scheduler in
Listing 11-10
.
With backward compatibility and parity with Job Scheduler, Firebase Job Dispatcher allows you to write one system to handle background jobs that works on all devices with Google Play services.
Scheduling Work with the Work Manager
The Work Manager is an Android Architecture Component that provides a rich, backward-compatible way to use the features provided by the platform Job Scheduler.
Like the Job Scheduler, the Work Manager is intended for work that must be completed even if your app has been closed. Background work that can be abandoned if your app is closed or terminated by the runtime should be handled using Handlers, Threads, or Thread Pools, as described earlier in this chapter.
When work is scheduled, the Work Manager will determine the best available alternative to execute scheduled work: the latest available version of the platform Job Scheduler, the firebase Job Dispatcher, or even the Alarm Manager. The scheduled work is guaranteed to run, even if your app has been terminated or the device has been rebooted.
To use the Work Manager, add a dependency to the Android Architecture Components Work Manager library, and (optionally) the Work Manager Firebase Job Dispatcher library, to your app module’s Gradle Build file:
dependencies {implementation "android.arch.work:work-runtime:1.0.0-alpha03"implementation "android.arch.work:work-firebase:1.0.0-alpha03"androidTestImplementation "android.arch.work:work-testing:1.0.0-alpha03"}
The Work Manager API is similar to the Job Scheduler and Firebase Job Dispatcher. Begin by extending the
Worker
class, overriding its
doWork
handler to implement the background work to be
executed. Return
Worker.Result.SUCCESS
to indicate the background work has been successfully completed,
FAILURE
to indicate it has failed and should not be retried, or
RETRY
to indicate Work Manager should retry the Worker at a later point:
public class MyBackgroundWorker extends Worker {@Overridepublic Worker.Result doWork() {// TODO Do your background work.// Return SUCCESS if the background work has executed successfully.return Result.SUCCESS;// Return RETRY to reschedule this work.// Return FAILURE to indicate a failure that shouldn't be retried.}}
Once you’ve defined a Worker, request an instance of the Work Manager to request your Worker be executed using a
OneTimeWorkRequest
or
PeriodicWorkRequest
to schedule a one-off or repeating request, respectively:
// Schedule a one-off execution of the background workOneTimeWorkRequest myOneTimeWork =new OneTimeWorkRequest.Builder(MyBackgroundWorker.class).build();// Schedule a background worker to repeat every 12 hours.PeriodicWorkRequest myPeriodicWork =new PeriodicWorkRequest.Builder(MyBackgroundWorker.class,12, TimeUnit.HOURS).build();// Enqueue the work requests.WorkManager.getInstance().enqueue(myOneTimeWork);WorkManager.getInstance().enqueue(myPeriodicWork);
Once your Work Request has been enqueued, Work Manager will schedule a time to execute the specified Worker based on available system resources, and any constraints you’ve specified.
If no constraints have been specified (such as in the previous code snippet), the Work Manager will typically run the Worker immediately. Alternatively, you can use the
Constraint.Builder
to construct a
Constraint
, which specifies requirements—including battery and storage level, charging and idle status, and network connection type—and assign it to your Work Request using the
setConstraints
method:
Constraints myConstraints = new Constraints.Builder().setRequiresDeviceIdle(true).setRequiresCharging(true).build();OneTimeWorkRequest myWork =new OneTimeWorkRequest.Builder(MyBackgroundWorker.class).setConstraints(myConstraints).build();WorkManager.getInstance().enqueue(myWork);
The Work Manager also provides support for Worker chaining, and using Live Data to observe Work Status and associated output values.
Chaining allows you to schedule Work Requests sequentially, effectively creating a dependency graph between independent Work Requests.
To create a new chained sequence, use the Work Manager’s
beginWith
method, passing in the first Work Request to execute. This will return a
WorkContinuation
object whose
then
method allows you to add the next Work Request, and so on. When the sequence definition is complete, you call
enqueue
on the final Work Continuation object:
WorkManager.getInstance().beginWith(myWork).then(mySecondWork).then(myFinalWork).enqueue();
Each
beginWith
and
then
method can accept multiple Work Request objects, all of which will then be run in parallel, and must complete, before the next Worker (or group of Workers) is run. It’s possible to create even more complex sequences by joining multiple chains together using the Work Continuation’s
combine
methods.
In any case, each Worker is still subject to any Constraints you assign, and a permanent failure on any Worker in the chain will terminate the entire sequence.
The current status of any enqueued Work Request is reported using a
WorkStatus
within a Live Data object, and can be observed by calling the
getStatusById
method on a Work Manager instance, passing in the unique ID of the Work Request to monitor:
WorkManager.getInstance().getStatusById(myWork.getId()).observe(lifecycleOwner, workStatus -> {if (workStatus != null) {// TODO Do something with the current status}});
When the Work Request has completed, you can extract any output Data assigned within your Worker implementation:
@Overridepublic Worker.Result doWork() {// TODO Do your background work.Data outputData = new Data.Builder().putInt(KEY_RESULT, result).build();setOutputData(outputData);return Result.SUCCESS;}
To extract the output Data, use the Work Status
getOutputData
method, and specify the desired keys:
if (workStatus != null && workStatus.getState().isFinished()) {int myResult = workStatus.getOutputData().getInt(KEY_RESULT, defaultValue));}
To cancel an enqueued Work Request, pass its UUID to the Work Manager’s
cancelWorkById
method:
UUID myWorkId = myWork.getId();WorkManager.getInstance().cancelWorkById(myWorkId);
An Earthquake-Monitoring Job Service Example
In this example you move the earthquake updating and processing functionality into its own
SimpleJobService
component.
-
Update your
build.gradlefile to add a dependency on Firebase Job Dispatcher:dependencies {[…existing dependencies …]implementation 'com.firebase:firebase-jobdispatcher:0.8.5'} -
Update the
res/values/arrays.xmlto use more realistic frequency options (loading more often than every 15 minutes should only be done in response to push messages, described later in this chapter):<string-array name="update_freq_options"><item>Every 15 minutes</item><item>Every hour</item><item>Every 4 hours</item><item>Every 12 hours</item><item>Every 24 hours</item></string-array><string-array name="update_freq_values"><item>15</item><item>60</item><item>240</item><item>720</item><item>1440</item></string-array> -
Create a new
EarthquakeUpdateJobServicethat extendsSimpleJobServiceand requires a network connection for the job to be run:package com.professionalandroid.apps.earthquake;import com.firebase.jobdispatcher.Constraint;import com.firebase.jobdispatcher.FirebaseJobDispatcher;import com.firebase.jobdispatcher.GooglePlayDriver;import com.firebase.jobdispatcher.JobParameters;import com.firebase.jobdispatcher.SimpleJobService;public class EarthquakeUpdateJobService extends SimpleJobService {private static final String TAG = "EarthquakeUpdateJob ";private static final String UPDATE_JOB_TAG = "update_job";private static final String PERIODIC_JOB_TAG = "periodic_job";public static void scheduleUpdateJob(Context context) {FirebaseJobDispatcher jobDispatcher =new FirebaseJobDispatcher(new GooglePlayDriver(context));jobDispatcher.schedule(jobDispatcher.newJobBuilder().setTag(UPDATE_JOB_TAG).setService(EarthquakeUpdateJobService.class).setContraints(Constraint.ON_ANY_NETWORK).build());}@Overridepublic int onRunJob(final JobParameters job) {return RESULT_SUCCESS;}} -
Add this new Service to the manifest by adding a new
servicetag within theapplicationnode:<service android:name=".EarthquakeUpdateJobService"android:exported="true"><intent-filter><actionandroid:name="com.firebase.jobdispatcher.ACTION_EXECUTE/></action></intent-filter></service> -
Move the XML parsing code from the
doInBackgroundhandler within the Async Task defined in theloadEarthquakesmethod of theEarthquakeViewModel, into theonRunJobmethod in theEarthquakeUpdateJobService. Take the opportunity to also create a newscheduleNextUpdatemethod that should be called after the parsed Earthquakes have been added to the database:@Overridepublic int onRunJob(final JobParameters job) {// Result ArrayList of parsed earthquakes.ArrayList<Earthquake> earthquakes = new ArrayList<>();// Get the XMLURL url;try {String quakeFeed = getString(R.string.quake_feed);url = new URL(quakeFeed);URLConnection connection;connection = url.openConnection();HttpURLConnection httpConnection = (HttpURLConnection)connection;int responseCode = httpConnection.getResponseCode();if (responseCode == HttpURLConnection.HTTP_OK) {InputStream in = httpConnection.getInputStream();DocumentBuilderFactory dbf= DocumentBuilderFactory.newInstance();DocumentBuilder db = dbf.newDocumentBuilder();// Parse the earthquake feed.Document dom = db.parse(in);Element docEle = dom.getDocumentElement();// Get a list of each earthquake entry.NodeList nl = docEle.getElementsByTagName("entry");if (nl != null && nl.getLength() > 0) {for (int i = 0 ; i < nl.getLength(); i++) {Element entry = (Element)nl.item(i);Element title= (Element)entry.getElementsByTagName("title").item(0);Element g= (Element)entry.getElementsByTagName("georss:point").item(0);Element when= (Element)entry.getElementsByTagName("updated").item(0);Element link= (Element)entry.getElementsByTagName("link").item(0);String details = title.getFirstChild().getNodeValue();String hostname = "http://earthquake.usgs.gov";String linkString = hostname + link.getAttribute("href");String point = g.getFirstChild().getNodeValue();String dt = when.getFirstChild().getNodeValue();SimpleDateFormat sdf= new SimpleDateFormat("yyyy-MM-dd'T'hh:mm:ss'Z'");Date qdate = new GregorianCalendar(0,0,0).getTime();try {qdate = sdf.parse(dt);} catch (ParseException e) {Log.e(TAG, "Date parsing exception.", e);}String[] location = point.split(" ");Location l = new Location("dummyGPS");l.setLatitude(Double.parseDouble(location[0]));l.setLongitude(Double.parseDouble(location[1]));String magnitudeString = details.split(" ")[1];int end = magnitudeString.length()-1;double magnitude= Double.parseDouble(magnitudeString.substring(0, end));if (details.contains("-"))details = details.split(",")[1].trim();elsedetails = "";final Earthquake earthquake = new Earthquake(idString, qdate, details, l,magnitude, linkString);// Add the new earthquake to our result array.earthquakes.add(earthquake);}}}httpConnection.disconnect();EarthquakeDatabaseAccessor.getInstance(getApplicationContext()).earthquakeDAO().insertEarthquakes(earthquakes);scheduleNextUpdate();return RESULT_SUCCESS;} catch (MalformedURLException e) {Log.e(TAG, "Malformed URL Exception", e);return RESULT_FAIL_NORETRY;} catch (IOException e) {Log.e(TAG, "IO Exception", e);return RESULT_FAIL_RETRY;} catch (ParserConfigurationException e) {Log.e(TAG, "Parser Configuration Exception", e);return RESULT_FAIL_NORETRY;} catch (SAXException e) {Log.e(TAG, "SAX Exception", e);return RESULT_FAIL_NORETRY;}}private void scheduleNextUpdate() {} -
Update the
loadEarthquakesmethod within theEarthquakeViewModelto remove the Async Task and instead call the staticscheduleUpdateJobmethod within theEarthquakeUpdateJobServiceto schedule the job to execute:public void loadEarthquakes() {EarthquakeUpdateJobService.scheduleUpdateJob(getApplication());} -
Return to the
EarthquakeUpdateJobService. Update thescheduleNextUpdatemethod to create a new periodic job that will be used to regularly update the earthquake list if the user has set a preference to do so:private void scheduleNextUpdate() {if (job.getTag().equals(UPDATE_JOB_TAG)) {SharedPreferences prefs =PreferenceManager.getDefaultSharedPreferences(this);int updateFreq = Integer.parseInt(prefs.getString(PreferencesActivity.PREF_UPDATE_FREQ, "60"));boolean autoUpdateChecked =prefs.getBoolean(PreferencesActivity.PREF_AUTO_UPDATE, false);if (autoUpdateChecked) {FirebaseJobDispatcher jobDispatcher =new FirebaseJobDispatcher(new GooglePlayDriver(context));jobDispatcher.schedule(jobDispatcher.newJobBuilder().setTag(PERIODIC_JOB_TAG).setService(EarthquakeUpdateJobService.class).setConstraints(Constraint.ON_ANY_NETWORK).setReplaceCurrent(true).setRecurring(true).setTrigger(Trigger.executionWindow(updateFreq*60 / 2,updateFreq*60)).setLifetime(Lifetime.FOREVER).build());}}}
Now, when the Earthquake Main Activity is launched, it will start the Earthquake Update Job Service, which will continue to schedule jobs—updating the database in the background—even after the Activity is suspended or closed.
Because the Earthquake List Fragment is observing the database, each new Earthquake will automatically be added to the list.
USING NOTIFICATIONS TO NOTIFY USERS
Notifications, such as those shown in Figure 11-1 , are a powerful mechanism that makes it possible for your application to communicate important, timely information with users, even when none of your app’s Activities are visible.

While it’s likely that your users will have their phones with them at all times, it’s quite unlikely that they will be paying attention to them, or your application, at any given time. Generally, users will have several applications open in the background, and they won’t be paying attention to any of them.
Depending on priority, Notifications can be displayed visually above the active Activity; trigger sounds, lights, and/or a status bar icon; or be completely passive—visible only when the Notification tray is open.
It’s also possible to dramatically change the appearance and interactivity of each Notification, or group of Notifications, using Notification Styles and actions. Actions add interactive controls to the Notification UI, making it possible for users to respond to Notifications without needing to open your app.
Notifications are the preferred mechanism for invisible application components (particularly Job Services) to alert users that events have occurred that may require timely attention. They are also required to indicate a running Service with foreground priority as described later in this chapter.
Introducing the Notification Manager
The
NotificationManager
is a system Service used to manage Notifications. To provide a consistent experience across all API levels, the Support Library provides a
NotificationManagerCompat
class, which you should use rather than the framework Notification Manager when posting Notifications.
The Support Library Notification Manager can be accessed as shown in Listing 11-15 .
Using the Notification Manager, you can trigger new Notifications, modify existing ones, or cancel those that are no longer required.
Each Notification is identified by a unique integer ID, and an optional String tag that are used to determine if a new Notification should be created, or if an existing Notification should be updated. Similarly, these properties are used to determine which Notification to cancel.
Working with Notification Channels
Starting in Android 8.0 Oreo (API Level 26), all Notifications must be associated with a Notification Channel. At minimum, each Notification Channel has a unique ID and a user-visible name, but they are also used to define a default priority, sound, light, and vibration for all Notifications posted to that Notification Channel.
After you’ve created a Notification Channel, and posted a Notification to it, the user can modify that Channel’s settings—including raising or lowering the priority of all future Notifications posted to that Channel.
As a result, it’s critical to create the right granularity of Notification Channels and carefully set the defaults to be consistent with the expectations of the majority of your users. For example, Notifications for messges received from other users should be in a separate—higher—priority Notification Channel from Notifications regarding service updates.
Mixing different Notifications types within the same Notification Channel makes it is much more likely that users will disable or demote the priority of that Channel, consistent with the expectations for the lowest priority Notifications they receive.
In most cases, an app has a fixed number of Notification Channels, each with a static String ID. This type of Notification Channel is shown in Listing 11-16 . Note that you must create your Notification Channels using the system Notification Manager, and only on devices running Android 8.0 or later.
This method should then be called before every Notification to ensure the corresponding Notification Channel is created.
As the Android system UI allows users to directly adjust the settings for each Notification Channel, your app doesn't need to provide a separate UI for setting Notification preferences on Android 8.0 or higher devices. However, you may consider providing those settings within your app for users on older versions of Android.
For Android 8.0 or higher devices, rather than providing Notification settings within your app, you should redirect users to the system Notification settings screen:
Intent intent = new Intent(Settings.ACTION_CHANNEL_NOTIFICATION_SETTINGS);intent.putExtra(Settings.EXTRA_APP_PACKAGE, context.getPackageName());startActivity(intent);
Creating Notifications
In addition to a Notification Channel, every Notification is required to contain three primary elements: a small icon, a title, and descriptive text.
The small icon is displayed in the status bar, and should be immediately recognizable as representing your app. A small icon should be 24x24dp in size and should be white on a transparent background.
Small icons are typically simplified versions of your app’s launcher icon, and should always match the iconography used within your app so that users will recognize them in the status bar.
The main content of a Notification is split across two lines as shown in Figure 11-2 .

The first line is the title, with the text beneath.
With these fields, it is possible to build a simple Notification using a
NotificationCompat.Builder
and post a Notification using
notify
, as shown in
Listing 11-17
.
The title should contain the information needed to understand each Notification’s importance to the user. It’s always displayed on a single line, so whenever possible it’s important to keep the title length under 30 characters to ensure it’s displayed in full.
For example, Notifications indicating incoming messages from another person should display the sender’s name in the title. Always avoid using your app’s name within the title; it’s redundant—and the app name is displayed within the header on Android 7.0 Nougat (API Level 24) and higher devices.
The content text provides the context and more detailed information. In our messaging example, the content text would be the latest message received. In all cases the content text should not duplicate information already available in the title.
It’s also good practice to use the
setColor
method to specify a color for your Notifications consistent with your app’s branding:
builder.setColor(ContextCompat.getColor(context, R.color.colorPrimary));
Between Android 5.0 Lollipop (API Level 21) and Android 6.0 Marshmallow (API Level 23), this color is used as the background color surrounding the small icon on a Notification. Since Android 7.0 Nougat (API Level 24) the specified color is used for the small icon, app name, and any actions you use as shown in Figure 11-3 .

In either case, the color you select should contrast with the light background color used on the Notification tray.
Notifications also support the use of a large icon. The large icon is displayed in an open Notification, and provides additional context alongside the content title and text strings, as shown in Figure 11-4 .

You can set a large icon using a Bitmap passed in to the
setLargeIcon
method of the Builder:
builder.setLargeIcon(profilePicture);
Handling Notification Taps
In almost all cases, a Notification should respond to a user tap by opening the corresponding application, and navigating to the correct context for the user to either get more detail or provide a response.
To support taps, each Notification can include a content Intent, specified using the
setContentIntent
method of the Notification Builder. This method takes a
PendingIntent
that should launch the appropriate Activity.
In most cases, a Notification tap will deep link into a specific Activity within your application—for example, an e-mail to read or an image to view. In this case, it’s important to also construct the correct back stack to ensure navigation occurs the way users would predict when using the back button.
To accomplish this, you should use the
TaskStackBuilder
class as shown in
Listing 11-18
:
By default, Activities have no parent Activity declared, which means that tapping the Notification does not create any additional back stack. While this is appropriate for your launcher Activity, a parent Activity should be set for all other Activities in your app. The process for setting the parent Activity is described in Chapter 12 .
To dismiss a Notification when it is tapped, you can set the Notification to automatically cancel with
setAutoCancel
:
builder.setAutoCancel(true);
Handling Notification Dismissal by Users
Users can dismiss Notifications by swiping them away individually, or by choosing to clear all of them at once. You can specify a delete Intent using the
setDeleteIntent
method on the Builder that will be sent to your app when a Notification is dismissed, rather than clicked or canceled.
This is useful if you need to sync dismissals across multiple devices, or update your app’s internal state. The Pending Intent you specify here should almost always point to a Broadcast Receiver that can do the processing in the background, or initiate a background job if necessary:
Intent intent = new Intent(context, DeleteReceiver.class);// Add any extras or a data URI that uniquely defines this NotificationPendingIntent deleteIntent = PendingIntent.getBroadcast(context, 0,intent, PendingIntent.FLAG_UPDATE_CURRENT);builder.setDeleteIntent(deleteIntent);
Using an Expanded Notification Style
Android 4.1 Jelly Bean (API Level 16) introduced the ability to create Notifications that can be expanded to show additional information, as well as include user actions. Android provides multiple expanded Notification styles:
-
BigTextStyle—Displays multiple lines of text. -
BigPictureStyle—Displays a large image within the expanded Notification. -
MessagingStyle—Displays messages received as part of conversations. -
MediaStyle—Displays information on playing media and up to five actions to control media playback. -
InboxStyle—Displays a summary Notification that represents multiple Notifications.
Each Notification style provides a different UI and set of functionality, as shown in Figure 11-5 and described below.

The most widely applicable is the
BigTextStyle
, which displays multiple lines of text as specified using the
bigText
method from the Big Text Style, rather than the single line of text displayed in a standard (non-styled) Notification.
Listing 11-19
shows how to apply the Big Text Style using the
setStyle
method of the Notification Builder.
For purely visual content, the
BigPictureStyle
allows you to specify a large image using the
bigPicture
method, returned when adding the Big Picture Style, when the Notification is expanded—as shown in
Listing 11-20
.
For Notifications published by messaging apps—particularly those featuring conversations with multiple people—you can use the
MessagingStyle
.
When using this style, provide a
userDisplayName
string to represent the current user, and a set of messages using the
addMessage
method as shown in
Listing 11-21
.
Each added message has three main properties: the text of the incoming message, the time the message was sent (in milliseconds), and the name of the sender. A null sender indicates that the message was sent by the user of the host device. For group conversations, the conversation title can be set with
setConversationTitle
.
For media playback apps, a
MediaStyle
Notification offers users quick access to up to five actions (such as play/pause, next/previous track). This style is discussed in detail in
Chapter 17
, “Audio, Video, and Using the Camera.”
InboxStyle
Notifications are particularly useful for generating a summary Notification, as discussed later in this chapter within the “Grouping Multiple Notifications” section.
Setting a Notification’s Priority
The priority attached to a Notification represents its relative importance to your users, and the level of user-interruption it will cause.
The lowest-priority Notifications (such as weather forecasts) are only presented when the Notification tray is expanded, while the highest-priority Notifications (such as incoming calls) trigger sounds, lights, and vibrations—as well as potentially bypassing users’ Do Not Disturb settings.
Setting the importance on a Notification Channel
On Android 8.0 Oreo (API Level 26) or higher devices, the priority of a Notification is set by the importance on its Notification Channel:
channel.setImportance(NotificationManager.IMPORTANCE_HIGH);
The default importance,
IMPORTANCE_DEFAULT
, causes Notifications to show on the status bar as an icon and will alert the user. By default, this uses the default sound, but you can choose to specify a custom sound, vibration, or light pattern (as discussed below).
For time-sensitive alerts such as incoming communication messages from chat services, consider using a channel with
IMPORTANCE_HIGH
. Notifications from channels of this importance or higher will “peek” onto the user’s screen (if the screen is on), as shown in
Figure 11-6
.

Alternatively,
IMPORTANCE_LOW
is appropriate for non-time-sensitive information. A status bar icon will still be displayed, but no sound, vibration, or lights will be used.
For nice-to-know information that should not intrude on the user at all,
IMPORTANCE_MIN
should be used. These Notifications are not displayed as icons in the status bar; they are shown only at the bottom of the Notification tray when it is expanded.
Understanding the Notification Priority System
Prior to Android 8.0, the priority of a Notification is set using the
setPriority
method on the Notification Builder:
builder.setPriority(NotificationCompat.PRIORITY_HIGH);
The priorities here match the importance levels of Notification Channels, with one exception: a
PRIORITY_MAX
was also available. Generally,
PRIORITY_MAX
should not be used except for the most critical, time-sensitive Notifications such as incoming phone calls, which must be handled immediately.
-
PRIORITY_HIGH—Equivalent toIMPORTANCE_HIGH -
PRIORITY_DEFAULT—Equivalent toIMPORTANCE_DEFAULT -
PRIORITY_LOW—Equivalent toIMPORTANCE_LOW -
PRIORITY_MIN—Equivalent toIMPORTANCE_MIN
Adding Sound, Vibration, and Lights to Notifications
Notification Channels of
IMPORTANCE_DEFAULT
or higher can alert the user via sound, vibration or lights.
By default, the default Notification ring tone is used. The default vibration or light pattern can be added by calling the appropriate methods when constructing your Notification Channel:
channel.enableVibration(true);channel.enableLights(true);
Prior to Android 8.0, the simplest and most consistent way to add sounds, lights, and vibrations to your Notifications is to use the default settings. Using the
setDefaults
method on the Notification Builder, you can combine the following constants:
-
NotificationCompat.DEFAULT_SOUND -
NotificationCompat.DEFAULT_VIBRATE -
NotificationCompat.DEFAULT_LIGHTS
For example, the following code snippet assigns the default sound and vibration settings to a Notification:
builder.setDefaults(NotificationCompat.DEFAULT_SOUND |NotificationCompat.DEFAULT_VIBRATE);
If you want to use all the default values, you can use the
NotificationCompat.DEFAULT_ALL
constant.
The sound, vibration pattern, and LED color and rate can be customized from the default values using the
setSound
,
setVibrationPattern
, and
setLightColor
methods on the Notification Channel, respectively.
Generally, sounds are chosen from the
RingtoneManager
class, which respects the user’s preferences. A custom vibration pattern can be specified using an array of longs, alternating between the milliseconds to remain on and milliseconds to remain off. The color of the LED can also be customized, and prior to Android 8.0, you can also set the rate at which the LED flashes using two integers—the number of milliseconds for the LED to be on and then the number of milliseconds to be off.
Listing 11-22
builds a Notification that uses the
RingtoneManager
to get an appropriate sound, vibrates the phone for a total of three times over a 5-second period, and rapidly blinks the LED red.
To only have the sound and vibrate occur the first time the Notification is posted and not every time the Notification is updated, you can use
setOnlyAlertOnce
passing in
true
:
builder.setOnlyAlertOnce(true);
Respecting Requests That You “Do Not Disturb”
Since Android 5.0 Lollipop (API Level 21), users have been able to customize which Notifications can use sound, vibration, and lights to alert them while in “Do Not Disturb” (or “Priority Only”) mode.
When deciding if these alerting mechanisms are allowed while Do Not Disturb mode is active, the Notification Manager uses two pieces of metadata: the Notification category, and the person whose action triggered the Notification.
A Notification’s category is set using the
setCategory
method:
builder.setCategory(NotificationCompat.CATEGORY_EVENT);
The
Notification
class includes a variety of category constants including
CATEGORY_ALARM
,
CATEGORY_REMINDER
,
CATEGORY_EVENT
,
CATEGORY_MESSAGE
, and
CATEGORY_CALL
. By setting the correct category, you ensure that the user’s system settings to enable or disable certain categories while in Do Not Disturb mode are respected.
For some Notification categories, specifically message and call, users can choose to allow Notifications only from specific people—namely, their starred contacts.
You can attach people to the Notification by using
addPerson
, passing in one of three types of URIs, as shown in
Listing 11-23
:
-
A
CONTENT_LOOKUP_URIor the “permanent” link to an individual contact already in the user’s Contacts Content Provider -
A
tel:schema for phone numbers, which will useContactsContract.PhoneLookupto find the associated user -
A
mailto:schema for e-mail addresses
Adding Notification Actions
Expanded Notifications also enable you to offer users up to three actions in addition to tapping the Notification itself. For example, an e-mail Notification might contain an action to archive or delete it.
Any action added to the Notification must offer unique functionality rather than duplicate the action taken when tapping the Notification. Actions are only available when the Notification has been expanded, so it’s best practice to ensure that every action available in the expanded Notification is also available in the Activity launched when the Notification is tapped.
Each Notification action has a title, an icon (32x32dp, white on a transparent background), and a
PendingIntent
. On devices running Android 7.0 Nougat (API Level 24) or above, the icon is not displayed in the expanded Notification, but it’s used on devices such as Wear OS and on earlier versions of Android.
Add new actions to a Notification using the
addAction
method on the Notification Builder as shown in
Listing 11-24
.
The Notification Builder offers additional support for actions on Wear OS through the
Action.WearableExtender
class. You can provide quick access to a primary action on Android Wear devices using its
setHintDisplayActionInline
method:
builder.addAction(new NotificationCompat.Action.Builder(R.drawable.archive,context.getString(R.string.archive_action),archiveIntent).extend(new NotificationCompat.Action.WearableExtender().setHintDisplayActionInline(true)).build());
The Wearable Extender can also be used to further improve the transition animation on Wear OS using the
setHintLaunchesActivity(true)
when appropriate, which will play an “Opened on the phone” animation when set to
true
.
Adding Direct Reply Actions
The actions described in the previous section are limited to firing a predefined Intent when an action is selected. Android 7.0 Nougat (API Level 24) and Wear OS expand this further with the introduction of “direct reply actions,” making it possible for users to respond to a Notification by entering text directly from the Notification itself, as shown in Figure 11-7 .
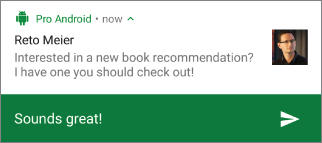
Direct reply actions are particularly useful for situations where the most common user response to a Notification is to provide a short reply—such as responding to an incoming message. For this reason, direct reply actions are typically paired with the
MessagingStyle
.
To add a direct reply action to your Notification, add a
RemoteInput
object to the action, as shown in
Listing 11-25
.
A simple way to improve the user experience on Android Wear devices is to enable generated replies with
setAllowGeneratedReplies(true)
. Generated replies attempt to predict likely user responses, allowing the user to select a predetermined reply rather than needing to type (or say) anything at all.
When users enter their reply, it is included in your Pending Intent with the key you used to construct the
RemoteInput
. You can extract the text within your app using the static
RemoteInput.getResults-FromIntent
method to obtain a Bundle from which you can extract the user’s inputted text:
Bundle remoteInput = RemoteInput.getResultsFromIntent(intent);CharSequence message = remoteInput != null? remoteInput.getCharSequence(KEY_TEXT_REPLY): null;
Immediately after users have entered their reply, Android will add an indeterminate progress spinner to indicate that your app is processing the reply. Once you receive and process the user input, you must update the Notification such that it reflects their input and the progress spinner is removed.
If you’re using the
MessagingStyle
, you can do this by adding a new message using
addMessage
. For any other Notification style, use
setRemoteInputHistory
.
// If you have multiple replies, the most recent// should be the first in the arraybuilder.setRemoteInputHistory(new CharSequence[] { lastReply });
Grouping Multiple Notifications
Rather than sending multiple individual Notifications (such as one per e-mail), it’s generally a better user experience to bundle multiple Notifications into a single group. This ensures users retain a Notification tray that can be understood at a glance, and won’t be overwhelmed with multiple Notifications from any single app.
One approach is to have a single Notification that is updated to reflect multiple items that triggered it; however, the small available space limits the information you can display.
A better approach is to bundle multiple individual Notifications from your app. These grouped Notifications appear the same size as a single Notification, as shown in Figure 11-8 , but can be expanded, such that a user can view and interact with multiple individual Notifications from within that group.

Notifications can be added to a group by calling
setGroup
on the Builder, passing in a String that provides a unique key for each group:
String accountName = "reto@example.com";builder.setGroup(accountName);
For each group, you must also post a group summary Notification—a Notification that has the same
setGroup
call and also calls
setGroupSummary(true)
, as shown in
Listing 11-26
.
On devices running Android 7.0 Nougat (API Level 24) and higher, this summary Notification is used only to populate the content Intent, delete Intent, and the subtext that is seen when the bundle is collapsed.
However, on Android 6.0 Marshmallow (API Level 23) and earlier devices—where Notification bundling is not available—this summary bundle will be the only one displayed for your app. This makes Inbox Style the best style to use, as it provides a single line summary of each Notification that can be accessed when the user clicks on the summary Notification.
This means that your summary Notification should contain enough information to be useful even without the child Notifications, and every time a Notification within the group is created, updated, or deleted, the summary Notification should also be updated to reflect the current summary state.
Adding Notifications to the Earthquake Monitor
The following example enhances the
EarthquakeUpdateJobService
to trigger a Notification for the most severe new earthquake after an update. The Notification will show the magnitude and location in the Notification tray, and selecting the Notification will open the Earthquake Activity.
-
Start by adding an
earthquake_channel_nameString to theres/values/strings.xmlfile:<string name="earthquake_channel_name">New earthquake!</string> -
In the
EarthquakeUpdateJobService,add new constants which we’ll use for constructing each Notification:private static final String NOTIFICATION_CHANNEL = "earthquake";public static final int NOTIFICATION_ID = 1; -
Still within the Earthquake Update Job Service, add a
createNotificationChannelmethod to define a high importance channel with vibration and lights, suitable for something as high priority as a new earthquake:private void createNotificationChannel() {if (Build.VERSION.SDK_INT >= Build.VERSION_CODES.O) {CharSequence name = getString(R.string.earthquake_channel_name);NotificationChannel channel = new NotificationChannel(NOTIFICATION_CHANNEL,name,NotificationManager.IMPORTANCE_HIGH);channel.enableVibration(true);channel.enableLights(true);NotificationManager notificationManager =getSystemService(NotificationManager.class);notificationManager.createNotificationChannel(channel);}} -
Create a Notification icon named
notification_iconand store it in yourres/drawablefolder by selecting the New
Vector Asset menu item in Android Studio. For the icon, select the
vibrationmaterial icon. Use the default24 x 24 dp(which is the correct size for Notification icons). Edit the resultingnotification_icon.xmlto change thefillColorto#FFF(white):<vectorxmlns_android="http://schemas.android.com/apk/res/android"android:width="24dp"android:height="24dp"android:viewportWidth="24.0"android:viewportHeight="24.0"><pathandroid:fillColor="#FFF"android:pathData="M0,15h2L2,9L0,9v6zM3,17h2L5,7L3,7v10zM22,9v6h2L24,9h-2zM19,17h2L21,7h-2v10zM16.5,3h-9C6.67,3 6,3.67 6,4.5v15c0,0.83 0.67,1.5 1.5,1.5h9c0.83,0 1.5,-0.67 1.5,-1.5v-15c0,-0.83 -0.67,-1.5 -1.5,-1.5zM16,19L8,19L8,5h8v14z"/></vector> -
Create a new
broadcastNotificationmethod that will callcreateNotificationChannel, then create the Notification Builder instance using an Earthquake object:private void broadcastNotification(Earthquake earthquake) {createNotificationChannel();Intent startActivityIntent = new Intent(this,EarthquakeMainActivity.class);PendingIntent launchIntent = PendingIntent.getActivity(this, 0,startActivityIntent, PendingIntent.FLAG_UPDATE_CURRENT);final NotificationCompat.Builder earthquakeNotificationBuilder= new NotificationCompat.Builder(this, NOTIFICATION_CHANNEL);earthquakeNotificationBuilder.setSmallIcon(R.drawable.notification_icon).setColor(ContextCompat.getColor(this, R.color.colorPrimary)).setDefaults(NotificationCompat.DEFAULT_ALL).setVisibility(NotificationCompat.VISIBILITY_PUBLIC).setContentIntent(launchIntent).setAutoCancel(true).setShowWhen(true);earthquakeNotificationBuilder.setWhen(earthquake.getDate().getTime()).setContentTitle("M:" + earthquake.getMagnitude()).setContentText(earthquake.getDetails()).setStyle(new NotificationCompat.BigTextStyle().bigText(earthquake.getDetails()));NotificationManagerCompat notificationManager= NotificationManagerCompat.from(this);notificationManager.notify(NOTIFICATION_ID,earthquakeNotificationBuilder.build());} -
To avoid interrupting users with Notification for earthquakes that have already been recived, we’ll need to compare any newly parsed earthquakes with those already in the database.
-
6.1 In the
EarthquakeDAOclass, create anloadAllEarthquakesBlockingmethod that will be used to synchronously return all Earthquakes when called from the background thread thatonRunJobruns on:@Query("SELECT * FROM earthquake ORDER BY mDate DESC")List<Earthquake> loadAllEarthquakesBlocking(); -
6.2 Return to the
EarthquakeUpdateJobServiceclass. Create afindLargestNewEarthquakemethod to compare the two lists of Earthquakes:private Earthquake findLargestNewEarthquake(List<Earthquake> newEarthquakes) {List<Earthquake> earthquakes = EarthquakeDatabaseAccessor.getInstance(getApplicationContext()).earthquakeDAO().loadAllEarthquakesBlocking();Earthquake largestNewEarthquake = null;for (Earthquake earthquake : newEarthquakes) {if (earthquakes.contains(earthquake)) {continue;}if (largestNewEarthquake == null|| earthquake.getMagnitude() >largestNewEarthquake.getMagnitude()) {largestNewEarthquake = earthquake;}}return largestNewEarthquake;}
-
6.1 In the
-
Update the
onRunJobmethod to broadcast a new Notification when the periodic job finds a new earthquake that is larger than the user’s specified minimum magnitude. Add a call tobroadcastNotificationimmediately before the call to insert the new Earthquakes into the database:public int onRunJob(final JobParameters job) {[… Existing onRunJob …]if (job.getTag().equals(PERIODIC_JOB_TAG)) {Earthquake largestNewEarthquake= findLargestNewEarthquake(earthquakes);SharedPreferences prefs =PreferenceManager.getDefaultSharedPreferences(this);int minimumMagnitude = Integer.parseInt(prefs.getString(PreferencesActivity.PREF_MIN_MAG, "3"));if (largestNewEarthquake != null&& largestNewEarthquake.getMagnitude() >= minimumMagnitude) {// Trigger a NotificationbroadcastNotification(quake);}}[… Existing onRunJob …]}
USING FIREBASE CLOUD MESSAGING
Firebase Cloud Messaging (FCM) can be used to “push” Notifications or data messages, directly from the cloud, or your server, to your app running on multiple devices. Using FCM you can remotely deliver simple Notifications, notify your app of updates to data on the server, or send data directly to your app.
Using FCM allows you to significantly lower the battery impact associated with synchronizing updates to your app (such as receiving new e-mail or changes to your calendar). This is an alternative to client-side polling, where your app wakes the device to check for server updates. Using a push model for updates ensures your app only wakes the device for updates when it knows they are available.
This approach also ensures more timely delivery of time-sensitive server-side messages, such as new chat messages, which users expect to be shown on their devices immediately.
Your apps can receive FCM messages even when they’re not running, and while the device is asleep. FCM messages can display Notifications directly, or wake your app remotely, allowing them to respond by displaying a Notification of their own, updating their UI based on the received message data, or by starting a background job that performs a synchronization with the updated server data.
Before you can use Firebase Cloud Messaging in your app, the API must first be added as a Gradle dependency. Note that the version number in the following code snippet should be replaced with the latest version of Firebase Cloud Messaging:
dependencies {implementation 'com.google.firebase:firebase-messaging:17.0.0'}
Triggering Notifications Remotely with Firebase Notifications
One of the most powerful features of Firebase Cloud Messaging is the Firebase Notifications API.
Built on top of Firebase Cloud Messaging, Firebase Notifications can be sent directly to your app from the Firebase Console at
console.firebase.google.com
(shown in
Figure 11-9
), without needing to write any server-side, or client-side, code.

Using the console, you can send Firebase Notifications to all of your users, a subset based on properties such as the app version, or an individual device—or group of devices—belonging to a particular user.
When creating a Firebase Notification, you can specify the message text that’s displayed as the Notification’s content title, the content text using the Notification title field, and a delivery time, as shown in Figure 11-10 .

Listing 11-27
shows the
meta-data
properties you should add to your application manifest to indicate the small icon, Notification color, and the Notification Channel that should be used for displaying received Firebase Notifications.
The content Intent, triggered if a user touches the Notification, is always set to your main launcher Activity.
When you send a Firebase Notification from the console, you can optionally enable sound, which will add the default Notification Ringtone to the Notification. Firebase Notifications default to high priority, so if your message is not time critical, consider reducing the priority to normal.
Sending Firebase Notifications to a Topic
Firebase Notifications can also be sent to devices that have subscribed to a specific topic. You can define these topics within your app, providing the ability to segment your users based on arbitrary business logic, app status, or explicit user selection.
Within your application, you can subscribe to a particular topic using the
subscribeToTopic
method, passing in a string representing a topic name to an instance of the
FirebaseMessaging
class:
FirebaseMessaging.getInstance().subscribeToTopic("imminent_missile_attack");
Unsubscribing to a topic is similar, using the corresponding
unsubscribeFromTopic
method:
FirebaseMessaging.getInstance().unsubscribeFromTopic("imminent_missile_attack");
Once an application has subscribed to a new topic, it will be available within the Firebase Console, and can be used as a target for new Firebase Notifications.
Receiving Firebase Notifications When in the Foreground
Firebase Notifications are designed to display Notifications, and like the Notifications described earlier in this chapter, they are displayed only when no Activities for your app are active.
To receive Firebase Notifications while your app is in the foreground, you must create a new
FirebaseMessagingService
, overriding the
onMessageReceived
handler, as shown in
Listing 11-28
.
Within this callback you can extract the received Notification details and either create a Notification, or update your current Activity to display the message inline.
Once created, be sure to register the new Service in your manifest, including an Intent Filter for
com.google.firebase.MESSAGING_EVENT
as shown in
Listing 11-29
.
Receiving Data with Firebase Cloud Messaging
In addition to the Notifications described in the previous sections, Firebase Cloud Messaging (FCM) can also be used to send your app data in the form of key/value pairs.
The simplest case is by attaching custom data to a Firebase Notification, which will be received in the extras of the content Intent if the user selects your Notification, as shown in Listing 11-30 .
The same data is available from the
onMessageReceived
callback within your Firebase Messaging Service implementing using the
getData
method, as shown in
Listing 11-31
.
When building your own server or using the Firebase Admin API, it is possible to send a message that does not contain a Notification and only contains data. In these cases, every message results in a callback to
onMessageReceived
, whether your app is in the foreground or background, giving you complete control over your app’s behavior and allowing you to use the full Notification API or trigger additional background processing.
USING ALARMS
Alarms are a means of firing Intents at predetermined times. Unlike Handlers, alarms operate outside the scope of your application, so you can use them to trigger application events or actions even after your application has been closed.
Unlike the Job Scheduler, Firebase Job Dispatcher, and Work Manager, alarms can be set to trigger at exact times, making them particularly suitable for calendar events or alarm clocks.
Alarms remain active even when your app’s process is killed; however, all alarms are canceled whenever the device is rebooted and must be manually re-created.
Alarm operations are handled through the
AlarmManager
, a system Service accessed via
get-SystemService
, as follows:
AlarmManager alarmManager =(AlarmManager) getSystemService(Context.ALARM_SERVICE);
Creating, Setting, and Canceling Alarms
To create a new alarm that fires at a specific time, use the
setExactAndAllowWhileIdle
method and specify an alarm type of
RTC_WAKEUP
, a trigger time, and a Pending Intent to fire when the alarm triggers. If the trigger time you specify for the alarm occurs in the past, the alarm will be triggered immediately.
Listing 11-32 shows the Alarm-creation process.
When the alarm goes off, the Pending Intent you specified will be broadcast. Setting a second alarm using the same Pending Intent replaces the previous alarm.
To cancel an alarm, call
cancel
on the Alarm Manager, passing in the Pending Intent you no longer want to trigger, as shown in the
Listing 11-33
.
If you have multiple exact alarms in your app (say, multiple upcoming alarm clocks), it’s best practice to schedule only the next alarm. When your Broadcast Receiver fires, it should respond to the triggered alarm, and also set the next one. This ensures the system only needs to manage the minimal number of alarms at any given time.
Setting an Alarm Clock
Alarms, despite the name, are not user visible; only alarms set via
setAlarmClock
—as seen in
Listing 11-34
—are shown to the user, typically within the Clock app.
You can retrieve the next scheduled alarm clock using the Alarm Manager’s
getNextAlarmClock
method.
The system will exit the low-power doze-mode several minutes before an alarm clock fires, ensuring that apps have an opportunity to fetch fresh data before the users pick up their device.
INTRODUCING SERVICES
While short amounts of background work are best accomplished with a Broadcast Receiver, and the Job Service (or Work Manager) is preferred for batching background work, there are cases where your app will need to continue running well beyond the lifecycle of a particular Activity. These types of longer running operations that happen in the background are the focus for Services.
Most Services have their life cycle tied to other components; these are called bound Services. Many of the Services introduced in this book are extensions of bound Services, such as the
JobService
introduced earlier in this chapter. The Job Service is bound to the system, and unbound when your jobs have finished processing, allowing it to be terminated.
Services that have an unbounded life cycle may remain active when no Activity is visible; these are called “started Services.” This type of Service should be started as a foreground Service which ensures that they are given a high priority by the system (to avoid being terminated due to low memory) and that the user is aware of the background work via a required notification.
Using Bound Services
Services can be bound to other components, with the latter maintaining a reference to an instance of the former, enabling you to make method calls on the running Service as you would on any other instantiated class.
Binding is useful for components that would benefit from a detailed interface with a Service, or where the Service lifetime is directly tied to its client component(s). This strong coupling is often used as the basis for a higher-level API, such as the
JobService
, that takes advantage of the direct communication available between two bound components. This same capability can be used within your own app to provide a detailed interface between two components, such as a Service and your Activity.
A bound Service has a life cycle that is intrinsically linked to one or more
ServiceConnection
objects representing application components to which it is bound; a bound Service will live until all of its clients unbind from it.
To support binding for a Service, implement the
onBind
method, returning the current instance of the Service being bound, as shown in
Listing 11-35
.
The connection between the Service and another component is represented as a
Service-Connection
.
To bind a Service to another application component, you need to implement a new
Service-Connection
, overriding the
onServiceConnected
and
onServiceDisconnected
methods to get a reference to the Service instance after a connection has been established, as shown in
Listing 11-36
.
To perform the binding, call
bindService
within your Activity, passing in an explicit Intent that selects the Service to bind to, and an instance of a
ServiceConnection
implementation.
You can also specify a number of binding flags, as shown in
Listing 11-37
. In this example you specify that the target Service should be created when the binding is initiated. Generally you do this in the
onCreate
of your Activity and the equivalent
unbindService
is done in
onDestroy
.
The last parameter to
bindService
is a flag that can be used and combined when binding a Service to an application:
-
BIND_ADJUST_WITH_ACTIVITY—Causes the Service’s priority to be adjusted based on the relative importance of the Activity to which it is bound. As a result, the run time will increase the priority of the Service when the Activity is in the foreground. -
BIND_ABOVE_CLIENTandBIND_IMPORTANT—Specify that the bound Service is so important to the binding client that it should become a foreground process when the client is in the foreground—in the case ofBIND_ABOVE_CLIENT, you are specifying that the run time should terminate the Activity before the bound Service in cases of low memory. -
BIND_NOT_FOREGROUND—Ensures the bound Service is never brought to foreground priority. By default, the act of binding a Service increases its relative priority. -
BIND_WAIVE_PRIORITY—Indicates that binding the specified Service shouldn’t alter its priority.
When the Service has been bound, all its public methods and properties are available through the
serviceBinder
object obtained from the
onServiceConnected
handler.
Android applications do not (normally) share memory, but in some cases your application may want to interact with (and bind to) Services running in different application processes.
You can communicate with a Service running in a different process by using Android Interface Definition Language (AIDL). AIDL defines the Service’s interface in terms of OS-level primitives, allowing Android to transmit objects across process boundaries. AIDL definitions are described at
developer.android.com/guide/components/aidl.html
.
Creating a Started Service
A started Service can be started and stopped separate from any other application components. While the life cycle of a bound Service is explicitly tied to the components to which it’s bound, the life cycle of a started Service must be explicitly managed.
Without intervention, a started Service may continue to take up system resources for several minutes, even if it is not actively doing any work, and its high priority will impact the system’s efforts to terminate it (and the application that contains it.)
Started Services should be used sparingly, typically in cases where they provide user interactivity that happens without a visible user interface—such that it should continue running even after the user moves your app’s Activities to the background. Wherever possible, it’s best practice to use higher-level APIs that use bound Services—such as the Job Scheduler or Firebase Cloud Messaging—that take advantage of the Service architecture without requiring you to manually manage Service life cycles.
The most common use for creating your own started Service is to create foreground Services. Foreground Services run at the same priority as an active foreground Activity, ensuring that it will almost certainly not be removed due to low memory. This is useful if you’re creating an application that interacts with the user without a UI always visible—such as a music player or turn-by-turn navigation.
Android also allows you to construct Services that are both bound and started . A common example is in audio playback, as described in Chapter 17 , “Audio, Video, and Using the Camera.”
Creating a Service
Every
Service
class must implement the
onBind
method, as shown in
Listing 11-38
. In the case of a started Service, this method can return
null
, indicating that no caller can bind to the Service.
To ensure your Service can be started and stopped only by your own application, add a
permission
attribute to its Service node in your application manifest:
<service android:enabled="true"android:name=".MyService"android:permission="com.paad.MY_SERVICE_PERMISSION"/>
This will require any third-party applications to include a uses-permission in their manifests in order to access your Service. You learn more about creating and using permissions in Chapter 20 , “Advanced Android Development.”
Starting and Stopping Services
To start a Service, call
startService
. Services require that you always use an explicit Intent by including the class to start. If the Service requires permissions that your application does not have, the call to
startService
will throw a
SecurityException
.
Any information added to the Intent such as is demonstrated in
Listing 11-39
will be available in the Service’s
onStartCommand
method.
To stop a Service, call
stopService
, using an Intent that defines the Service to stop (in the same way you specified which Service to start), as shown in
Listing 11-40
.
Calls to
startService
do not nest, so a single call to
stopService
will terminate the running Service it matches, no matter how many times
startService
has been called.
Since Android 8.0, any non-foreground started Services will be automatically stopped by the system several minutes after your app goes into the background just as if you had called
stopService
. This prevents started Services from adversely affecting system performance long after the user puts the app in the background. If your Service needs to continue while your Activity is in the background, you will need to start a foreground Service as described later in this chapter.
Controlling Service Restart Behavior
The
onStartCommand
handler is called whenever a Service is started using
startService
, so it may be executed several times within a Service’s lifetime. You should ensure that your Service accounts for this.
You should override the
onStartCommand
event handler to execute the task (or begin the ongoing operation) encapsulated by your Service. You can also specify your Service’s restart behavior within this handler.
Like all components, Services are launched on the main Application Thread, meaning that any processing done in the
onStartCommand
handler will happen on the UI Thread. The standard pattern for implementing a Service is to create and run a new Thread or Async Task (as described earlier in this chapter) from
onStartCommand
to perform the processing in the background, and then stop the Service when it’s been completed.
Listing 11-41
extends the skeleton code shown in
Listing 11-38
by overriding the
onStartCommand
handler. Note that it returns a value that controls how the system will respond if the Service is restarted should it be killed by the run time before completing.
This pattern lets
onStartCommand
complete quickly, and it enables you to control the restart behavior by returning one of the following
Service
constants:
-
START_STICKY—This is the standard behavior and indicates that the system should callonStartCommandany time your Service restarts after being terminated by the run time. Note that on a restart the Intent parameter passed in toonStartCommandwill benull.This mode typically is used for Services that handle their own states and that are explicitly started and stopped as required (via
startServiceandstopService). -
START_NOT_STICKY—This mode is used for Services that are started to process specific actions or commands. Typically, they will usestopSelfto terminate once that command has been completed.Following termination by the run time, Services set to this mode restart only if there are pending start calls. If no
startServicecalls have been made since the Service was terminated, the Service will be stopped without a call being made toonStartCommand. -
START_REDELIVER_INTENT—In some circumstances you will want to ensure that the commands you have requested from your Service are completed—for example, when timeliness is important.This mode is a combination of the first two; if the Service is terminated by the run time, it will restart only if there are pending start calls or the process was killed prior to its calling
stopSelf. In the latter case, a call toonStartCommandwill be made, passing in the initial Intent whose processing did not properly complete.
Note that each mode requires you to explicitly stop your Service, through a call to
stopService
or
stopSelf
, when your processing has completed. Both methods are discussed in more detail later in this chapter.
The restart mode you specify in your
onStartCommand
return value will affect the parameter values passed in to it on subsequent calls. Initially, the Intent will be the parameter you passed in to
startService
to start your Service. After system-based restarts it will be either null, in the case of
START_STICKY
mode, or the original Intent if the mode is set to
START_REDELIVER_INTENT
.
You can use the
flag
parameter to discover how the Service was started. In particular, you determine if either of the following cases is true:
-
START_FLAG_REDELIVERY—Indicates that the Intent parameter is a redelivery caused by the system run time’s having terminated the Service before it was explicitly stopped by a call tostopSelf. -
START_FLAG_RETRY—Indicates that the Service has been restarted after an abnormal termination. It is passed in when the Service was previously set toSTART_STICKY.
Self-Terminating Services
By explicitly stopping the Service when your processing is complete, you allow the system to recover the resources otherwise required to keep it running.
When your Service has completed the actions or processing for which it was started, you should terminate it by making a call to
stopSelf
. You can call
stopSelf
either without a parameter to force an immediate stop, or by passing in a
startId
value to ensure processing has been completed for each instance of
startService
called so far.
Creating Foreground Services
In cases where your Service is interacting directly with the user, it may be appropriate to lift its priority to the equivalent of a foreground Activity. You can do this by setting your Service to run in the foreground by calling its
startForeground
method.
Because foreground Services are expected to be interacting directly with the user (for example by playing music), calls to
startForeground
must specify a Notification that will be displayed for as long as your Service is running in the foreground.
As the Notification cannot be manually dismissed by the user while your service is in the foreground, it’s good practice to provide an action within the Notification that lets users cancel or stop the ongoing operation. It’s also best practice to have the content Intent bring the users to an Activity where they can manage or cancel the ongoing Service.
When your Service no longer requires foreground priority, you can move it back to the background, and optionally remove the ongoing Notification, using the
stopForeground
method. The Notification will be canceled automatically if your Service stops or is terminated.
12
Implementing the Android Design Philosophy
INTRODUCING THE ANDROID DESIGN PHILOSOPHY
In Chapter 5 , “Building User Interfaces,” you learned the basics of creating user interfaces (UIs) in Android with an introduction to layouts and Views. These functional skills are the basis for building the UI for all apps, but creating a successful Android app requires a deeper understanding of Android’s design principles, and the things to consider when building your UI.
This chapter introduces you to some best practices and techniques to create user experiences that are compelling and aesthetically pleasing on a diverse range of devices, and to an equally diverse range of users.
You are introduced to the best practices for creating resolution- and density-independent UIs, and how to use Drawables to create scalable image assets—including Vector Drawables.
Next you dive into the material design philosophy, which provides the foundation for all modern Android visual design. You learn how to apply the principles of material design to your app, including how to create screen elements that reflect physical sheets of paper, how to guide users through color and keylines, and how motion can provide continuity that will aid users’ understanding.
Finally, you learn how to use three common material design UI elements: The app bar, cards—to visually group content and actions, and the Floating Action Buttons (FABs)—a high-profile circular button used to promote a single important action within your UI.
DESIGNING FOR EVERY SCREEN
The first four Android handsets all featured identical 3.2" HVGA screens; making UI design relatively simple. Since then, tens of thousands of different Android devices have been created, resulting in thousands of different combinations of screen sizes and pixel densities—ranging from wearable devices, to phones, tablets, and even televisions. This has helped make Android incredibly popular with consumers, but creates a challenge for designers.
To provide a great experience for users no matter what Android device they own, it’s important to create your UIs knowing that your applications can run on a broad variety of resolutions and physical screen sizes. It’s impractical to attempt to create custom UI layouts for every possible variation, so in practice this means designing and building application interfaces with the expectation that they be capable of being used on an infinitely varied set of devices.
That means supplying image assets that can be scaled where possible, and in a variety of pixel densities where not. It means creating layouts that can scale within a known range of resolutions, and defining multiple layouts optimized for a variety of different size ranges and interaction models.
The following sections describe the range of screens you need to consider, and how to support them, before detailing some best practices for ensuring that your applications are resolution- and density-independent—and optimized for a range of different screen sizes and layouts.
Resolution Independence
A display’s pixel density is calculated as a function of the physical screen size and resolution, referring to the number of physical pixels on a display relative to the physical size of that display. It’s typically measured in dots per inch (dpi).
Using Density-Independent Pixels
As a result of the variations in screen size and resolution for Android devices, the same number of pixels can correspond to different physical sizes on different devices based on the screen’s DPI.
As you learned in Chapter 5 , “Building User Interfaces,” this makes it impossible to create consistent layouts by specifying pixels. Instead, Android uses density-independent pixels (dp) to specify screen dimensions that scale to appear the same on screens of the same physical dimensions but with different pixel densities.
In practical terms, one density-independent pixel is equivalent to one pixel on a 160dpi screen. For example, a line specified as 2dp wide appears as 3 pixels on a display with 240dpi (or 7 pixels on a Pixel XL).
When specifying your user interface, you should always use density-independent pixels, avoiding specifying any layout dimensions, View sizes, or Drawable dimensions using raw pixel values.
In addition to dp units, Android also uses a scalable pixel (sp) for the special case of font sizes. Scalable pixels use the same base unit as density-independent pixels but can be further scaled based on the user’s preferred text size.
Resource Qualifiers for Pixel Density
Chapter 4 , “Understanding the Android Manifest, Gradle Build Files, and Externalizing Resources” introduced you to the Android resource framework, which uses a parallel directory structure for including resources such as Drawables within your app.
The
res/drawable
directory is suitable for graphics that work on all pixel densities such as Vector Drawables and other scalable graphic assets detailed later in this chapter. It is strongly recommended that you use these types of graphics whenever possible as they will automatically scale to all pixel densities, without the requirement that you provide additional assets. This helps reduce your app’s size, as well as improving forward compatibility.
There will be circumstances where scalable graphics can’t be used, and you must include bitmap images in your app. Scaling bitmap images can result in either lost detail (when scaling down) or pixilation (when scaling up). To ensure that your UI is crisp, clear, and devoid of artifacts, you can create and include image assets optimized for each pixel density category, including:
-
res/drawable-mdpi—Medium-density resources for screens approximately 160pi -
res/drawable-hdpi—High-density resources for screens approximately 240dpi -
res/drawable-xhdpi—Extra-high density resources for screens approximately 320dpi -
res/drawable-xxhdpi—Extra-extra-high density resources for screens approximately 480dpi -
res/drawable-xxxhdpi—Extra-extra-extra-high density resources for screens approximately 640dpi -
res/drawable-nodpi—Used for resources that must not be scaled regardless of the host screen’s density
Keep in mind that including multiple sizes of bitmaps does have a cost in the form of an increased size of your application. In addition, while these pixel density buckets give you a rough set of densities to target, there are devices that exist between these generic buckets; where a specific resolution asset is unavailable, Android will automatically scale your bitmaps for these devices, preferring to scale down.
Supporting and Optimizing for Different Screen Sizes
Android devices come in countless shapes and sizes (though so far mainly quadrilaterals and circles), so when designing your UI it’s important to ensure that your layouts not only support different screen sizes, orientations, and aspect ratios, but also that they’re accordingly optimized.
It’s neither practical nor desirable to create a layout specific to each possible screen configuration; instead, best practice is to take a two-phased approach:
- Ensure that all your layouts are capable of scaling within a reasonable set of bounds.
- Create a set of alternative layouts whose bounds overlap, such that all possible screen configurations are covered.
This approach is similar to that taken by most websites and desktop applications. After a fling with fixed-width pages in the ’90s, most websites now scale to fit the available space on desktop browsers and offer an alternative CSS definition to provide an optimized layout based on the available window size.
The same is true for mobile devices. After those first four devices, developers were forced to use the same approach of flexible layouts. We now create optimized layouts for different screen size ranges, each capable of scaling to account for variation within that range.
Creating Scalable Layouts
The layouts provided by the framework were described in detail in Chapter 5 , “Building User Interfaces.” They are designed to support the implementation of UIs that scale to fit the available space. In all cases, you should avoid defining the location of your layout elements in absolute terms.
In most cases the Constraint Layout offers the most powerful and flexible alternative, supporting complex layouts that would otherwise require you to nest layouts.
For very simple UIs, the Linear Layout can be used to represent a simple column or row that fills the available width or height of the screen, respectively, whereas the Relative Layout can be used to define the position of each UI element relative to the parent Activity and other elements.
When defining the height or width of your scalable UI elements (such as Buttons and Text Views) it’s good practice to avoid providing specific dimensions. Instead, you can define the height and width of Views using
wrap_content
or
match_parent
attributes, as appropriate:
<Buttonandroid:id="@+id/button"android:layout_width="match_parent"android:layout_height="wrap_content"android:text="@string/buttonText"/>
The
wrap_content
flag enables the View to define its size based on the amount of space potentially available to it, whereas the
match_parent
flag enables the element to expand as necessary to fill the available space.
Deciding which screen element should expand (or contract) when the screen size changes is one of the most important factors in optimizing your layouts for variable screen dimensions.
Optimizing Layouts for Different Screen Types
In addition to providing layouts that scale, you should consider creating alternative layout definitions optimized for different screen sizes.
There is a significant difference in screen space available on a 3" QVGA smart phone display compared to a 4K 10" tablet. Similarly, and particularly for devices with significant aspect ratios, a layout that works well viewed in landscape mode might be unsuitable when the device is rotated into portrait.
Creating a layout that scales to accommodate the space available is a good first step; it’s also good practice to consider ways that you can take advantage of the extra space (or consider the effect of reduced space) to create a better user experience.
With the introduction of multi-window support in Android 7.0 Nougat (API Level 24), the screen size available to your app might be only a fraction of the total screen size. This, combined with a spectrum of devices that include large phones and small tablets, makes it best practice to optimize your layouts based on the available space, rather than designing for a particular category of device.
The Android resource system allows you to build alternate layouts and provide alternate dimensions. Your default layouts and dimensions should be placed in the
res/layout
and
res/values
resource directories—these will be used when there is the smallest amount of screen-space available. You can then provide alternate layouts and dimensions by using additional resource qualifiers for larger screens.
For most apps, the available width is going to be the most influential factor affecting your layout design—a single column of elements might look fine on a phone in portrait, but becomes increasingly sub-optimal as the width increases, first through a rotation into landscape, and further still on a larger tablet device.
This leads to a natural system of “breaking points”—specific widths at which scaling stops being effective and you need a more fundamental change to your layout. To support this, the Android resource system provides the
w
resource qualifier to indicate a minimum supported width.
A layout in the
res/layout-w600dp
will be used instead of one in
res/layout
when the available width is over 600dp.
In some cases, your UI requires a minimum height—such as in cases where you have a vertically scrolling container of full-bleed images. With insufficient height, users might not be able to ever actually see a full image on screen at once! Android provides the
h
resource qualifier for this purpose; for example,
res/layout-h480dp
.
Using height and width modifiers allows you to account for different devices, and rotation from landscape to portrait on any given device. In addition to these modifiers, the
sw
resource qualifier can be used to handle the smallest width on the device.
Unlike width and height, smallest width does not change when a device is rotated—it is always the smallest value of width and height. This is incredibly useful in building a rotation-insensitive UI—a concept where all operations are available in every orientation and that the basic usage patterns are consistent across rotation.
This is even more important in multi-window mode, where “landscape” and “portrait” are not tied to the device’s orientation, but whether the available width is greater than the height (landscape) or vice versa (portrait).
Figure 12-1 shows how each of the values described previously correspond to a real device in standard and multi-window mode.

Building a rotation-insensitive UI, you ensure that small adjustments to the size of your app do not result in large UI changes that could be disorienting to users. A natural ordering occurs when structuring your layouts and dimensions where larger structural UI changes are tied to smallest width and smaller changes are tied to width or height breakpoints. As with any other resource qualifier, you can combine these qualifiers, allowing you to provide a layout optimized for use when a screen is a particular width now, and has the possibility of being no smaller than another value when rotated.
For example, the following resource folder is optimized for a display 800dp wide, provided that when rotated, the screen width will be no smaller than 600dp, as shown in Figure 12-2 :

res/layout-sw600dp-w800dp
Layouts in this folder would share the same larger structure of the UI with layouts in the
res/layout-sw600dp
(to provide a rotation-insensitive UI) but would offer some smaller structural changes to take advantage of the extra width.
Creating Scalable Graphics Assets
Android includes a number of simple Drawable resource types that can be defined entirely in XML. These include the
ColorDrawable
,
ShapeDrawable
, and
VectorDrawable
classes. These resources are stored in the
res/drawable
folder.
When these Drawables are defined in XML, and you specify their attributes using density-independent pixels, these Drawables can be scaled dynamically at run time to display correctly, without scaling artifacts, regardless of screen size, resolution, or pixel density.
As you will see in Chapter 14 , “Advanced Customization of Your User Interface,” you can use these Drawables in combination with transformative Drawables and composite Drawables. Together, they can result in dynamic, scalable UI elements that require fewer resources and appear crisp on any screen.
Android also supports NinePatch PNG images, described later in this section, that enable you to mark the parts of a bitmap image that can be stretched.
Color Drawables
A
ColorDrawable
, the simplest of the XML-defined Drawables, enables you to specify an image asset based on a single solid color. Color Drawables, such as this solid red Drawable, are defined as XML files using the
color
tag in the
res/drawable
folder:
<color xmlns_android="http://schemas.android.com/apk/res/android"android:color="#FF0000"/>
Shape Drawables
Shape Drawable resources let you define simple primitive shapes by defining their dimensions, background, and stroke/outline using the
shape
tag.
Each shape consists of a type (specified via the
shape
attribute), attributes that define the dimensions of that shape, and subnodes to specify padding, stroke (outline), and background color values.
Android currently supports the following shape types as values for the
shape
attribute:
-
line—A horizontal line spanning the width of the parent View. The line’s width and style are described by the shape’s stroke. -
oval—A simple oval shape. -
rectangle—A simple rectangular shape. Also supports acornerssubnode that uses aradiusattribute to create a rounded rectangle. -
ring—Supports theinnerRadiusandthicknessattributes to let you specify the inner radius of the ring shape and its thickness, respectively. Alternatively, you can useinnerRadiusRatioandthicknessRatioto define the ring’s inner radius and thickness, respectively, as a proportion of its width (where an inner radius of a quarter of the width would use the value4).
Use the
stroke
subnode to specify an outline for your shapes using
width
and
color
attributes.
You can also include a
padding
node to automatically inset the contents of the View that uses this Shape Drawable, to prevent overlapping between the content and the shape’s outline.
More usefully, you can include a subnode to specify the background color. The simplest case involves using the
solid
node, including the
color
attribute, to define a solid background color.
The following snippet shows a rectangular Shape Drawable with a solid fill, rounded edges, 5dp outline, and 10dp of padding. Figure 12-3 shows the result.

<?xml version="1.0" encoding="utf-8"?><shape xmlns_android="http://schemas.android.com/apk/res/android"android:shape="rectangle"><solidandroid:color="#f0600000"/><strokeandroid:width="5dp"android:color="#00FF00"/><cornersandroid:radius="15dp" /><paddingandroid:left="10dp"android:top="10dp"android:right="10dp"android:bottom="10dp"/></shape>
Vector Drawables
Android 5.0 Lollipop (API Level 21) introduced the
VectorDrawable
to define more complicated, custom shapes. The Vector Support Library is also available for using Vector Drawables within apps supporting devices running at least Android 4.0 Ice Cream Sandwich (API Level 14).
Vector Drawables are defined using the
vector
tag, and require four additional attributes. You must specify
height
and
width
to indicate the intrinsic size of the Drawable (its default size), and the
viewportWidth
and
viewportHeight
to define the size of the virtual canvas that the vector’s
path
will be drawn on.
While you’ll typically create at least one Vector Drawable with identical for height/width and their viewport equivalents, it’s often useful to create duplicate Vector Drawables with different height/width values.
This is because the Android system creates a single bitmap cache for each Vector Drawable to optimize for the re-drawing performance. If you refer to the same Vector Drawable multiple times, specifying different sizes, the bitmap will be re-created and redrawn every time a different size is required. As a result, it is more efficient to create multiple Vector Drawables, one for each required size.
Within the
vector
tag, the shape is defined using the
path
element. The color of the shape is determined by the
fillColor
attribute, while the
pathData
attribute uses the same syntax as SVG path elements to define arbitrary shapes or lines. The following snippet creates the shape shown in
Figure 12-4
:

<?xml version="1.0" encoding="utf-8"?><vector xmlns_android="http://schemas.android.com/apk/res/android"android:height="256dp"android:width="256dp"android:viewportWidth="32"android:viewportHeight="32"><pathandroid:fillColor="#8f00"android:pathData="M20.5,9.5c-1.955,0,-3.83,1.268,-4.5,3c-0.67,-1.732,-2.547,-3,-4.5,-3C8.957,9.5,7,11.432,7,14c0,3.53,3.793,6.257,9,11.5c5.207,-5.242,9,-7.97,9,-11.5C25,11.432,23.043,9.5,20.5,9.5z" /></vector>
The
strokeColor
and
strokeWidth
attributes indicate the color and width of the shape’s outline—or if no fill color is specified, the color and width of the line being drawn.
Android Studio includes a tool called the Vector Asset Studio (shown in
Figure 12-5
) accessible through the New
![]() Vector Asset menu item, which includes support for importing Scalable Vector Graphic (SVG) and Adobe Photoshop Document (PSD) files into your project as Vector Drawable resources.
Vector Asset menu item, which includes support for importing Scalable Vector Graphic (SVG) and Adobe Photoshop Document (PSD) files into your project as Vector Drawable resources.

You can find more details on the SVG path elements at
www.w3.org/TR/SVG/paths.html#PathData
.
Animating Vector Drawables
Vector Drawables also support animations through the aptly named
AnimatedVectorDrawable
class. When building an animation, it is important to set the
name
on each
path
that you plan to animate—this allows you to reference it when building the animation. If you have multiple paths that need to be animated together, you can put all of the paths within a named
group
element and scale, rotate, or translate all of the paths simultaneously.
When creating an Animated Vector Drawable, you can include the Vector Drawable directly within its definition:
<animated-vector xmlns_android="http://schemas.android.com/apk/res/android"xmlns_aapt="http://schemas.android.com/aapt"><aapt:attr name="android:drawable"><vectorandroid:height="256dp"android:width="256dp"android:viewportWidth="32"android:viewportHeight="32"><pathandroid:name="heart"[… Vector Drawable path definition …]/></vector></aapt:attr>[… Remainder of Animated Vector Drawable definition …]</animated-vector>
Alternatively, you can reference an existing Vector Drawable by adding a
drawable
attribute to the root
animated-vector
element:
<animated-vector xmlns_android="http://schemas.android.com/apk/res/android"android:drawable="@drawable/vectordrawable">[… Remainder of Animated Vector Drawable definition …]</animated-vector>
You can then add a series of animations by adding
target
elements, where the
name
attribute within the target element specifies the
name
in the Vector Drawable that the animation applies to:
<animated-vector xmlns_android="http://schemas.android.com/apk/res/android"xmlns_aapt="http://schemas.android.com/aapt"><aapt:attr name="android:drawable"><vectorandroid:height="256dp"android:width="256dp"android:viewportWidth="32"android:viewportHeight="32"><pathandroid:name="heart"[… Vector Drawable path definition …]/></vector></aapt:attr><target android:name="heart">[… Animation definition goes here …]</target></animated-vector>
The
objectAnimator
node allows you to define a simple animation. The timing of each animation is determined by the
duration
in milliseconds and an optional
startOffset
(also in milliseconds). The
path
or
group
attribute that is being animated is set by the
propertyName
attribute. The initial and final values are set by the
valueFrom
and
valueTo
attributes, respectively, as shown in
Listing 12-1
.
Figure 12-6
shows the end state of the animation.

The
interpolator
attribute lets you control the rate of change between values within the animation. If you have multiple animations that share the same timing, you can include them all in a
set
element.
Within your application, you retrieve a reference to Animated Vector Drawables using the
ContextCompat.getDrawable
method, passing in the resource ID (the filename) of your Animated Vector Drawable:
AnimatedVectorDrawable avd =(AnimatedVectorDrawable)ContextCompat.getDrawable(context,R.drawable.avd);
If you are using the Android Support Library to support Animated Vector Drawables, you must instead use its associated
create
method:
AnimatedVectorDrawableCompat avd =(AnimatedVectorDrawableCompat)AnimatedVectorDrawableCompat.create(context,R.drawable.avd);
In either case, you can then use the Animated Vector Drawable in any operation that accepts a
Drawable
, and call
start
to trigger the animation:
imageView.setImageDrawable(avd);avd.start();
NinePatch Drawables
NinePatch (or stretchable) images are PNG files that mark the parts of an image that can be stretched. They’re stored in your
res/drawable
folders with names ending in
.9.png
extensions:
res/drawable/stretchable_background.9.png
NinePatches use a one-pixel border to define the area of the image that can be stretched if the image is enlarged. This makes them particularly useful for creating backgrounds for Views or Activities that may have a variable size.
To create a NinePatch, draw single-pixel black lines that represent stretchable areas along the left and top borders of your image, as shown in Figure 12-7 .

The unmarked sections won’t be resized, and the relative size of each of the marked sections remains the same as the image size changes, as shown in Figure 12-8 .

To simplify the process of creating NinePatch images for your application, Android Studio includes a WYSIWIG Draw 9-Patch tool. To use it, right-click the PNG image you’d like to create a NinePatch image from, then click “Create 9-patch file.”
INTRODUCING MATERIAL DESIGN
Material design is Google’s design philosophy and language for mobile platforms and the web. It provides a set of guidelines and specifications that offer guidance for creating a modern look and feel for applications.
Material design became the standard design used within the Android system and core applications in Android 5.0 Lollipop (API Level 21), but many of its related APIs and design components are now available in the Android Support Library. As a result, material design is the de facto design standard for all Android devices, irrespective of API level.
As an evolving design philosophy, it’s impossible to cover the full breadth of material design within the confines of this book. However, we will build an understanding of the core concepts behind material design, and introduce some of the most common iconic components that embody its philosophy.
In Chapter 13 , “Implementing a Modern Android User Experience,” we’ll return to material design and explore the practicalities of implementing a design using its underlying philosophy.
Thinking in Terms of Paper and Ink
The foundational principle of material design is “material is the metaphor.” While acknowledging that everything visible on screen is a digital creation, our goal is to make this digital environment parallel our expectations of real-world materials.
In material design, every View displayed is imagined as being placed on a physical material—a conceptual piece of paper. Each sheet of virtual material, just like a piece of paper, is flat and 1dp thick. Just like real-world material, where you can stack paper, each piece of virtual material is imagined in a 3D environment, and has an elevation (defined using the
elevation
attribute) that is used to give your finished layout the appearance of depth.
Views with a higher elevation are shown above those at a lower elevation, and should cast shadows on the Views below them.
As a result elevation plays a meaningful role in the structural design of your UI layout, with global navigation elements being placed at a higher elevation than the Activity-specific content. Many of the built-in navigation elements discussed in Chapter 13 have their default elevations set according to this principle.
Building on the core material metaphor, material design prescribes that everything drawn in your UI should be as ink on the material surfaces.
This concept is readily apparent when handling touch feedback. Whenever a material design button is touched, it produces a ripple centered on the location the user has touched. The default touch feedback provided by the backgrounds of
selectableItemBackground
produces the same ripple, making it simple to apply to your own touchable screen elements as shown in
Listing 12-2
.
Just like ink, the ripple only flows to the material it is on. However, if your clickable layout is just a part of a larger piece of continuous material, consider using
selectableItemBackgroundBorderless
to allow the ripple of ink to spread outside of the boundaries of the single View.
Using Color and Keylines as Guides
The second principle of material design is to be bold, graphic, and intentional.
Every element of your design should be a deliberate choice not just to look good, but to enforce the hierarchy and importance of each element of your app in order to assist and guide users on their journey within your app.
Using Color in Your App
One of the most bold design choices you can make is your use of color.
A monochromatic user interface runs the risk of being more than a little bland, but will also make it difficult for users to identify the most significant Views with which they’ll likely interact. A design that uses every color of the spectrum may be striking, but can also be jarring and just as difficult to understand as a black-and-white UI.
A better approach is to construct a complementary color palette that you’ll to use throughout your app. This color palette should be based on a primary—signature—color, a darker variant, and an accent color.
Material design encourages you to always put the content first. Having a strong primary color can act as subtle branding, making the app feel unique and distinct—without explicit branding elements that would otherwise occupy valuable screen real estate that should be dedicated to displaying your content.
The darker variant of your primary color is commonly used to color the status bar, to visually separate it from your application’s content.
The accent color should be distinct, but complementary, to your primary color; it’s used to draw attention to important Views within your UI, such as Floating Action Buttons, links within body text, or as a highlight color on a text entry View.
You can integrate these colors into your app by building a custom theme. A theme is a collection of attributes that you can apply to an Activity using the
android:theme
attribute of your Activity node, or to all your app’s Activities using the Application element within your Application manifest.
A simple theme that incorporates the color palette just described would consist of a
res/values/colors.xml
file containing a
colorPrimary
,
colorPrimaryDark
, and a
colorAccent
.
These colors are then used to construct a theme within a
res/values/styles.xml
resource:
<?xml version="1.0" encoding="utf-8"?><resources><style name="AppTheme" parent="Theme.AppCompat"><item name="colorPrimary">@color/primary</item><item name="colorPrimaryDark">@color/primary_dark</item><item name="colorAccent">@color/accent</item></style></resources>
The theme can then be applied to your entire application by adding
android:theme=
"@
style/AppTheme
" in your application element in the manifest:
<applicationandroid:theme="@style/AppTheme">[… Remaining application node …]</application>
This will result in the app bar and status bar along the top of each activity colored according to the
colorPrimary
and
colorPrimaryDark
, respectively.
In the preceding snippet, we use a parent theme of
Theme.AppCompat
—this theme is provided by the Android Support Library and includes a consistent base for applying a material-style theme for all API levels, without you needing to define each element yourself.
We go into more details on how themes can be used in your app in Chapter 13 .
Aligning to Keylines
Reducing the visual noise of your layout is vital for drawing attention to its critical elements. To help, material design incorporates techniques from traditional print design—one of the most important being aligning content to keylines.
A keyline is a vertical or horizontal guideline used to align elements, particularly text. By aligning everything to a set of keylines, users are able to easily scan your app’s layout and content to find what they’re looking for.
A number of keylines and dimensions are specified by the material design specifications. The most important are the horizontal margins found on the edges of the screen, and the content’s left margin from the screen edge, shown in Figure 12-9 .
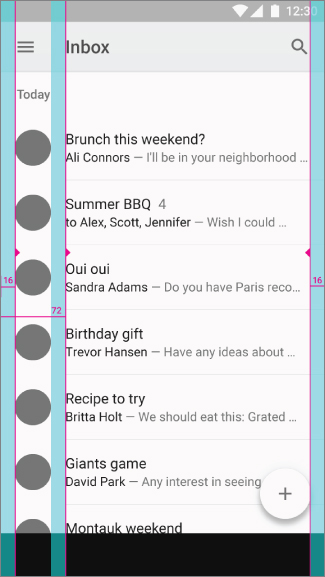
The horizontal margins defined by material design for mobile devices is 16dp, while for tablets it expands to 24dp. The content left margin from the screen edge is 72dp on mobile and 80dp on tablets.
With more visual space on larger devices, having a larger margin allows you to make better use of the available space, and prevents content from appearing too close to the edge of the screen.
Note that the content left margin applies primarily to text—ensuring it’s aligned with the Toolbar’s title. Icons and round avatars should be aligned with the 16dp horizontal margin.
Continuity Through Motion
The third, and final, principle of material design is that motion provides meaning.
When experimenting with motion it’s tempting to move everything around, simply because you can. Don’t. Unnecessary motion is distracting at best, and frustrating at worst. No one wants to chase a touch target around the screen. Material design requires a disciplined approach to using motion within your UI, with each movement intentionally designed to guide the user’s eyes and attention.
The ripple animation described earlier is itself considered a form of motion, designed to provide feedback to the user. It’s a common pattern in material design that a user’s actions initiate motion.
The Animated Vector Drawables, discussed earlier in this chapter, are an example of how actions and feedback can be linked. For example, an audio player app might animate the play button into a pause button using an Animated Vector Drawable to transition between mutually exclusive—but tightly related—states.
Animating View Visibility Using the Reveal Effect
To provide visual continuity for user actions that result in the reveal of new Views, Android provides the
ViewAnimationUtils.createCircularReveal
method for devices running Android 5.0 Lollipop (API Level 21) or higher. This creates an animation that reveals (or hides) a View by clipping it within a circle with a growing (or shrinking) radius.
Depending on where you center the reveal animation, this might require some minor math as shown in Listing 12-3 .
The same approach can be used in reverse to hide a View as shown in Listing 12-4 .
Building Shared Element Activity Transitions
Typically the largest transitions within your app will be moving between Activities. Android 5.0 Lollipop (API Level 21) introduced shared element Activity transitions that provide visual continuity for critical Views that exist in both Activities—dynamically transitioning them from their initial position in the first Activity, to their final position in the next.
To take advantage of shared element Activity transitions, add the
android:transitionName
attribute to Views within the layouts of both Activities to link the Views for animation:
<?xml version="1.0" encoding="utf-8"?><LinearLayout xmlns_android="http://schemas.android.com/apk/res/android"android:layout_width="match_parent"android:layout_height="wrap_content"android:orientation="vertical"><ImageViewandroid:id="@+id/avatar_view"android:transitionName="avatar_view_transition"android:layout_width="match_parent"android:layout_height="wrap_content"/><TextViewandroid:id="@+id/username_view"android:transitionName="username_view_transition"android:layout_width="match_parent"android:layout_height="wrap_content"/></LinearLayout><?xml version="1.0" encoding="utf-8"?><LinearLayout xmlns_android="http://schemas.android.com/apk/res/android"android:layout_width="match_parent"android:layout_height="wrap_content"android:orientation="horizontal"><ImageViewandroid:id="@+id/avatar_view"android:transitionName="avatar_view_transition"android:layout_width="wrap_content"android:layout_height="match_parent"/><TextViewandroid:id="@+id/username_view"android:transitionName="username_view_transition"android:layout_width="wrap_content"android:layout_height="match_parent"/></LinearLayout>
To activate an animated transition between two Activities, pass in a
Bundle
built from the
makeSceneTransitionAnimation
method of the
ActivityOptionsCompat
class, passing it
Pair
instances representing the Views in your current Activity’s layout, and the
transitionName
they are transitioning to (found by passing each View to the
ViewCompat.getTransitionName
method) as shown in
Listing 12-5
.
You can apply the same animation in reverse if the second Activity is closed by calling
ActivityCompat.finishAfterTransition
instead of
finish
.
MATERIAL DESIGN UI ELEMENTS
Along with guiding principles, material design introduces a range of new UI elements. They are used frequently throughout the system UI and the core apps. By incorporating these elements within your app, you will make it more easily understood to new users, and more consistent with the system and other third-party apps using the material design philosophy.
The App Bar
The app bar, formerly known as the Action Bar, runs along the top of your app as shown in Figure 12-10 .

Its prominence at the very top of your UI means that it’s often the first thing a user sees and reads. For that reason, your app bar serves as the anchor for your user interface, offering a familiar place for users to return when unsure of where they’ve navigated.
The app bar is automatically colored using the
colorPrimary
attribute as defined by your app’s theme, offering a subtle indication of which app the user has open.
When defining a Theme, ensure that you assign a “parent” theme that will display a strong contrast between your
colorPrimary
and the text color used in the app bar. You can ensure this by selecting from one of the following:
-
Theme.AppCompat—Use when you have a dark background for your UI and a darkcolorPrimary. Text colors will be light to contrast with the dark backgrounds. -
Theme.AppCompat.Light—Use with a light background and primary color; it provides dark text. -
Theme.AppCompat.Light.DarkActionBar—Matches the light theme, but inverts the colors specifically for the app bar.
The most prominent text displayed with the app bar is the
android:title
attribute taken from each Activity’s manifest entry. It offers users a visual signpost of where they are within your app by updating as you move between Activities.
To programmatically change the title, call the
getSupportActionBar
method from your
AppCompatActivity
to retrieve the app bar and call
setTitle
to specify a new value:
String title = "New Title";getSupportActionBar().setTitle(title);
The app bar also includes a navigation button, most often used for navigating up your app’s navigation hierarchy.
The goal of “up” navigation differs from the Back button. Where the Back button should return the user to exactly the previous location (including restoring the state of the previous Activity), pressing “up” should serve as an escape hatch.
It should always move the user to a specific Activity in a fresh state; repeatedly pressing up should eventually take users to the main launch Activity.
Up button navigation is constructed by defining each Activity’s parent. Consider a simple app that has a
MainActivity
that typically leads to
CategoryActivity
, which in turn leads to a
DetailActivity
.
As shown in
Figure 12-11
,
MainActivity
has no parent, while
CategoryActivity
has a parent of
MainActivity
and
DetailActivity
has a parent of
CategoryActivity
. As a result the up button should transition from the very specific pieces of content (a detail screen) up the content hierarchy until reaching the main Activity.

You can indicate the parent of each Activity within your Application manifest using the
android:parentActivityName
attribute. The
parentActivityName
attribute was introduced in Android 4.1 Jelly Bean (API Level 16), so you must also add a
<meta-data>
element to support earlier platform releases:
<application …>…<activityandroid:name="com.example.MainActivity" …>…</activity><activityandroid:name="com.example.CategoryActivity"android:parentActivityName="com.example.MainActivity"…>…<!-- This is only needed to support Android 4.0 or lower --><meta-dataandroid:name="android.support.PARENT_ACTIVITY"android:value="com.example.MainActivity" /></activity><activityandroid:name="com.example.DetailActivity"android:parentActivityName="com.example.CategoryActivity"…>…<!-- This is only needed to support Android 4.0 or lower --><meta-dataandroid:name="android.support.PARENT_ACTIVITY"android:value="com.example.CategoryActivity" /></activity></application>
To enable the up button on your app bar, call
setDisplayHomeAsUpEnabled(true)
within the
onCreate
handler of each Activity.
getSupportActionBar().setDisplayHomeAsUpEnabled(true);
In cases where there may be multiple instances of a given parent Activity, you must add more detail to the
Intent
to ensure you navigate to the correct Activity.
You do this by overriding
getSupportParentActivityIntent
and adding the appropriate extras. For example, the
DetailActivity
example above may want to pass an additional extra to its parent
CategoryActivity
to ensure the correct category is shown:
@Overridepublic Intent getSupportParentActivityIntent() {// Get the Intent from the parentActivityNameIntent intent = super.getSupportParentActivityIntent();// Add the information needed to create the CategoryActivity// in a fresh stateintent.putExtra(CategoryActivity.EXTRA_CATEGORY_ID, mCategoryId);return intent;}
Applying Material Design to the Earthquake Monitor
The default project templates in Android Studio provide the correct scaffolding to include material design in your app, but the personal branding of the app is something that must be added on top of that scaffolding. The earthquake viewer built over the previous chapters is no exception.
You’ll now update the default theme to use new colors, use the Image Asset wizard to create an app icon, and ensure that each Activity has the appropriate “Up” hierarchy.
-
Open the Earthquake project and update the colors in the
res/values/colors.xmlfile:<?xml version="1.0" encoding="utf-8"?><resources><color name="colorPrimary">#D32F2F</color><color name="colorPrimaryDark">#9A0007</color><color name="colorAccent">#448AFF</color></resources> -
Open the Image Asset wizard by selecting File
New
Image Asset. Ensure the Icon Type is set to Launcher Icons and change the following options, and then click Finish to apply the new launcher icon:
-
2.1. For the foreground layer, change the Asset Type to Clip Art and select the vibration icon. Change the color to
FFFand resize the icon to 80%. -
2.2. For the background layer, change the Asset Type to Color and use the color
D32F2F.
-
2.1. For the foreground layer, change the Asset Type to Clip Art and select the vibration icon. Change the color to
-
Open
AndroidManifest.xmland add parent Activities to bothPreferencesActivityandEarthquakeSearchResultActivity:<activityandroid:name=".PreferencesActivity"android:parentActivityName=".EarthquakeMainActivity"><intent-filter><actionandroid:name="android.intent.action.MANAGE_NETWORK_USAGE"/><category android:name="android.intent.category.DEFAULT"/></intent-filter><meta-dataandroid:name="android.support.PARENT_ACTIVITY"android:value=".EarthquakeMainActivity" /></activity><activityandroid:name=".EarthquakeSearchResultActivity"android:launchMode="singleTop"android:parentActivityName=".EarthquakeMainActivity"><intent-filter><action android:name="android.intent.action.SEARCH" /></intent-filter><meta-dataandroid:name="android.app.searchable"android:resource="@xml/searchable"/><meta-dataandroid:name="android.support.PARENT_ACTIVITY"android:value=".EarthquakeMainActivity" /></activity> -
Update the
PreferenceActivityto callsetDisplayHomeAsUpEnabled(true)after thesetContentViewcall:@Overridepublic void onCreate(Bundle savedInstanceState) {super.onCreate(savedInstanceState);setContentView(R.layout.preferences);getSupportActionBar().setDisplayHomeAsUpEnabled(true);} -
Also update the
EarthquakeSearchResultActivityto also callsetDisplayHomeAsUpEnabled(true)after thesetContentViewcall:@Overridepublic void onCreate(Bundle savedInstanceState) {super.onCreate(savedInstanceState);setContentView(R.layout.activity_earthquake_search_result);getSupportActionBar().setDisplayHomeAsUpEnabled(true);[… Existing onCreate method …]}
Using Cards to Display Content
No matter your design philosophy, content should always be the focus of your app; providing structure for that content helps the user focus on it as well.
A card, as shown in Figure 12-12 , is a raised piece of material with rounded corners that groups together information and actions about a single subject.

When all elements are similar, and quick scanning is important, a traditional list or grid of content works well. Cards come into their own when there are many different elements, many actions associated with each piece of content, or when it’s important that users can remove individual cards.
The
CardView
class, offered as part of the Android Support Library, provides an implementation of the card concept, including the visual elements including rounded corners and elevation. In order to use Card Views in your app, you must add a dependency for the Card View library into your app module
build.gradle
file:
implementation 'com.android.support:cardview-v7:27.0.2'
CardView
extends
FrameLayout
, so all of the layout techniques introduced in
Chapter 5
, “Building User Interfaces,” apply to placing content within a Card View, with the exception of padding. Within Card Views you should use the
contentPadding
attribute rather than
padding
to ensure only the content within the card is padded inward (rather than the card’s border).
Cards are designed to be modular. Each card is assembled using a set of common content blocks, added in a particular order from the top to bottom as shown in Figure 12-13 , including:

- An optional header (not pictured) with an avatar image, title, and subtitle for cards associated with a person.
- Rich media in a 16:9 or 1:1 aspect ratio.
- A primary title and subtitle (if not using a “person header”). This is used to describe the content of the card.
- Multiple lines of supporting text.
- Actions—either left aligned text or right aligned icons.
Expanded supporting text can be used by adding an expansion action that displays additional content appended to the bottom of the card.
Listing 12-6 shows a simple card that contains a 16:9 image, a primary title and subtitle, and two actions.
Floating Action Buttons
The Floating Action Button (FAB), shown in Figure 12-14 , is an iconic pattern of material design, designed to draw attention to the single most important action the user can take within an Activity.
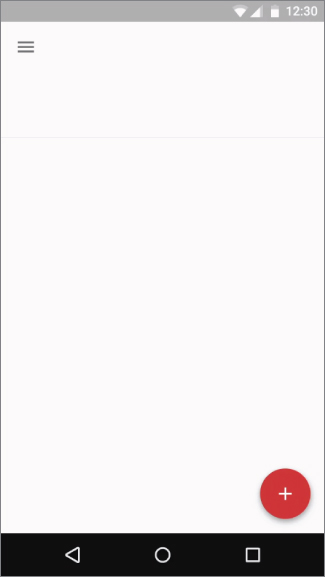
A FAB is represented as a circular icon with an increased elevation that appears above the rest of the UI, colored with your application’s accent color. The floating action button should stand out considerably, making it possible for users to easily identify and find the action.
The Android Design Support Library contains the
FloatingActionButton
class, which implements the material design specifications for a FAB. It supports both the default size of 56dp and the mini size of 40dp with the
fabSize
attribute.
In almost all cases, the default size is most appropriate—the only exception is when you have other elements such as avatar images (which are also 40dp) that the FAB should align with. In either case, the icon it contains is 24dp square.
Unlike other Views, where visibility is set using
setVisibility
, it is strongly recommended to use the
show
and
hide
methods to control FAB visibility. This will animate the FAB by scaling it up from a 0 radius or back down to a 0 radius, respectively.
Where you position the FAB is ultimately a design choice, and it’s important to note that not every app, nor every Activity, needs a floating action button. If there is not primary action, then you should avoid including a floating action button.
13
Implementing a Modern Android User Experience
THE MODERN ANDROID UI
To help you create a user interface (UI) that’s stylish, easy to use, and that offers a user experience consistent with the underlying platform and other applications, this chapter demonstrates techniques to expand the user experience beyond layouts and UI components.
This starts with an exploration of the AppCompat API, provided as part of the Android Support Library, which makes it possible to create a consistent, modern look for your app across all Android API levels using themes.
The app bar, introduced in Chapter 5 , is an important component of your application. In this chapter you learn how to customize it further through the addition of Menus and actions. You also learn to utilize Toolbars to replace the app bar within your own layouts, and to take advantage of the functionality it supports, including specialized scrolling techniques.
When your app grows beyond a single screen, you need to incorporate a navigation pattern to facilitate user interaction. Tabs are one pattern that allows users to easily swipe between top-level Activities, while a bottom navigation bar offers persistent access to 3–5 top-level Activities, and finally a navigation drawer makes it possible for users to focus solely on content, while still making simple navigation easily accessible.
In addition to navigation, you are introduced to techniques used to alert users of exceptional circumstances. Modal dialogs force users to handle issues before continuing their work, while Toasts provide a mechanism for completely non-interactive floating messages. The Snackbar provides a non-modal alert that’s interactive, and makes it simple for users to recover from potentially destructive interactions through a single action.
CREATING CONSISTENT, MODERN USER INTERFACES USING APPCOMPAT
The Android platform is constantly evolving, and the prevailing design language evolves with it; each Android release introduces new UI patterns, elements, and functionality.
The AppCompat API is available within the Android Support Library, and provides a single, backward compatible API, which developers can use to offer a consistent, modern user interface across all versions of Android.
AppCompat provides a set of themes, each prefixed with
Theme.AppCompat
. To take advantage of AppCompat’s ability to make your app’s appearance backward compatible, you must create a new theme that uses one of these AppCompat themes as its parent—and extend the
AppCompatActivity
within your app when creating new Activities.
AppCompat provides a number of attributes that have the same name as the framework equivalents. For example,
android:colorAccent
defines the accent color for many views on Android 5.0 Lollipop (API Level 21) and higher devices. To produce the same behavior on older versions of Android—when
android:colorAccent
wasn’t available—you can instead use the
colorAccent
attribute within your theme.
In cases where an attribute exists both in AppCompat and the framework, you should always pick the AppCompat equivalent to ensure compatibility across all API levels.
Creating and Applying Themes Using AppCompat
In
Chapter 12
, “Implementing the Android Design Philosophy,” you were introduced to the need to define a basic color palette for your app using
colorPrimary
,
colorPrimaryDark
, and
colorAccent
within your application’s theme. We can use similar techniques to further customize the appearance of your app’s Views without needing to extend or create custom Views.
For controlling the “normal” state of components such as an unselected
EditText
,
Checkbox
, and
RadioButton
, you can override the
colorControlNormal
attribute. The default value for this attribute is
?android:attr/textColorSecondary
.
The activated or checked state for Checkboxes and Radio Buttons can be separately controlled by
colorControlActivated
if you wish to override the default color of
?attr/colorAccent
.
Finally, the
colorControlHighlight
attribute controls the ripple coloring. In almost all cases, this should be kept to the default 20% white color (
#33ffffff
) for dark themes, and 12% black (
#1f000000
) for light themes.
Listing 13-1 shows a custom theme that specifies custom View colors.
Once defined, a theme can be added to the application manifest, where it can be applied to the entire application (via the
android:theme
attribute on the
application
element) or a specific Activity (using the
android:theme
attribute on the
activity
element):
<application …android:theme="@style/AppTheme"><activityandroid:theme="@style/AppTheme.Custom" /></application>
Creating Theme Overlays for Specific Views
It’s also possible to apply a theme to a specific View (and its children) by applying the
android:theme
attribute to an individual View within a layout definition.
Unlike themes applied at the Application or Activity level, themes applied directly to Views should have a parent theme of
ThemeOverlay.AppCompat
(rather than
Theme.AppCompat
).
Theme overlays are designed to be applied over the base AppCompat theme, only affecting specific elements and ignoring attributes that are only applicable at the Activity level.
The two most common theme overlays are
ThemeOverlay.AppCompat.Light
and
ThemeOverlay.AppCompat.Dark
. The light theme alters the background colors, text colors, and highlight colors so that they are appropriate for a light background, and the dark theme does the same when using a dark background.
This approach can be particularly useful if you choose to color a portion of your screen with your primary color, and overlay it with text that must be readable:
<!-- Ensure text is readable on a darkprimary color background by usinga Dark ThemeOverlay --><FrameLayoutandroid:layout_width="match_parent"android:layout_height="wrap_content"android:background="?attr/colorPrimary"android:theme="@style/ThemeOverlay.AppCompat.Dark">[… Remaining Layout Definition …]</FrameLayout>
A custom theme overlay is defined like any other theme. Start by declaring a parent theme using the
parent
attribute, and then specify any attributes you wish to modify:
<style name="ThemeOverlay.AccentSecondary"parent="ThemeOverlay.AppCompat"><item name="colorAccent">@color/accent_secondary</item></style>
ADDING A MENU AND ACTIONS TO THE APP BAR
With the app bar a standard fixture within most apps, it’s a useful surface onto which we can add functionality. For common actions that are associated with the entire Activity, or a Fragment that takes up the majority of the screen, you can define a menu that will appear on the app bar in the form of icons, or within an overflow menu, as shown in Figure 13-1 .

Defining a Menu Resource
Menus can be defined as an XML resource, stored in the
res/menu
folder of your project. This gives you the ability to create different Menus for alternative hardware configurations, screen sizes, languages, or Android versions.
Each Menu consists of a
menu
tag at the root node, and a series of
item
tags each specifying a Menu Item. The
android:title
is what is displayed to the user. Each Menu hierarchy must be created as a separate file.
Each item should also have an
android:id
, which you will use within your app to determine which Menu Item was tapped, as shown in
Listing 13-2
.
By default, Menu Items will appear in the overflow menu. To promote a Menu Item onto the app bar, you must add the
app:showAsAction
attribute, which controls where the Menu Item is shown:
-
always—Forces the Menu Item to always be displayed as an action on the app bar. -
ifRoom—Indicates that the Menu Item should be displayed as an action provided there is enough space in the app bar to display it. It is good practice to use this option in preference toalwaysgiving the system flexibility when displaying actions. -
never—The default value, which ensures the Menu Item is only shown in the overflow menu.
For each Menu Item that uses
always
or
ifRoom
, you should also include an
android:icon
attribute.
When shown in the overflow menu, only the text title will be displayed. When displayed as part of the app bar, the Menu Item will be represented as an icon (a long press will briefly display the title). By including a
withText
modifier (separated with a
|
), both the icon and title are displayed on the App Bar. This should be used rarely, and only when there is ample space.
<menu xmlns_android="http://schemas.android.com/apk/res/android"xmlns_app="http://schemas.android.com/apk/res/res-auto"><itemandroid:id="@+id/action_filter"android:icon="@drawable/action_filter"android:title="@string/action_filter"app:showAsAction="ifRoom|withText"/></menu>
Displaying Menu Items as actions on the app bar should be reserved for those that are very frequently used, critically important for users to discover, or highly expected based on actions available in similar applications.
Generic and seldom used Menu Items, such as settings, help, or about, should never be presented as action items.
Adding a Menu to an Activity
To associate a Menu with an Activity, you must first inflate your Menu XML resource into a
Menu
instance by overriding the Activity’s
onCreateOptionsMenu
handler. You must return
true
to display your Menu (
false
hides the Menu entirely), as shown in
Listing 13-3
.
As with layouts, it’s also possible to programmatically create Menu Items, and add them to the Menu object using its
add
method. The ID used when creating these dynamic Menu Items must always be greater than or equal to the
Menu.FIRST
constant, to avoid conflicting with any previously inflated Menu Items.
Adding a Menu to a Fragment
Menus can also be associated with Fragments. Fragment Menus will only be visible on the app bar when the host Fragment is visible. This allows you to dynamically change the actions available to match the content being displayed.
Fragment Menus should be inflated within the Fragment’s
onCreateOptionsMenu
handler; however, unlike Activities you must also call
setHasOptionsMenu(true)
within the Fragment’s
onCreate
handler, as shown in
Listing 13-4
.
Updating Menu Items Dynamically
By overriding your Activity’s or Fragment’s
onPrepareOptionsMenu
method, you can modify a Menu based on an application’s current state at run time, immediately before the Menu is displayed. This lets you dynamically disable/enable Menu Items, set visibility, and even modify text.
To modify Menu Items dynamically, you can either record a reference to them from within the
onCreateOptionsMenu
method when they’re created, or you can use the
findItem
method on the Menu object, as shown in
Listing 13-5
:
Handling Menu Selections
Android handles the app bar actions and overflow Menu using a single event handler,
onOptionsItemSelected
. The Menu Item selected is passed in to this method as the
MenuItem
parameter.
To react to the menu selection, compare the
item.getItemId
value to the resource identifiers in your Menu XML (or the Menu Item identifiers you used when populating the Menu programmatically), as shown in
Listing 13-6
, and perform the corresponding action.
If you have supplied Menu Items from within a Fragment, you can choose to handle them within the
onOptionsItemSelected
handler of either the Activity or the Fragment. Note that the Activity will receive the selected Menu Item first, and that the Fragment will not receive it if the Activity handles it and returns
true
.
Adding Action Views and Action Providers
To support cases where a simple icon is not a rich enough interface, Menu Items can also display an arbitrary layout. This comes in two varieties: a
CollapsibleActionView
and an
ActionProvider
.
When an icon (and/or text) is suitable as a prompt, but a richer interface is required after it’s selected, you should consider adding an
app:actionLayout
or
app:actionViewClass
attribute to your Menu Item definition.
The
app:actionLayout
attribute is suitable when you have defined a Menu Item layout as a layout resource, while
app:actionViewClass
is optimized for a single View (or View Group).
Add the
collapseActionView
value to your
app:showAsAction
attribute to ensure your Menu Item uses the Collapsible Action View specified, as shown in
Listing 13-7
.
When the Menu Item is tapped, it will be expanded to fill the app bar, as shown in Figure 13-2 .

Once added, you will need to implement handlers to react to user interaction with the collapsible Action View. This is typically done within the
onCreateMenuOptions
handler:
MenuItem searchItem = menu.findItem(R.id.action_search);SearchView searchView = (SearchView) searchItem.getActionView();searchView.setOnSearchClickListener(new OnClickListener() {public void onClick(View v) {// TODO React to the button press.}});
The example in
Listing 13-7
uses the
SearchView
, which is implemented to receive callbacks when it’s collapsed or expanded. If you’re using your own custom layout, you should make sure it also implements this approach. Alternatively, you can set an
OnActionExpandListener
via the
setOnActionExpandListener
method.
In circumstances where the custom layout should remain visible in the app bar at all times, you can use an
ActionProvider
. The Action Provider is attached to a Menu Item using the
app:actionProviderClass
attribute, and is responsible for displaying the appropriate layout—and handling any user interactions with it.
Listing 13-8
demonstrates adding a
MediaRouteActionProvider
—an Action Provider used to support Google Cast integration, which handles the connection status and selection of Cast devices.
GOING BEYOND THE DEFAULT APP BAR
Any Activity that applies a
Theme.AppCompat
theme will display an AppCompat-style app bar by default. You can choose to customize this, by delegating the responsibilities of the app bar to a Toolbar that you can add directly to your Activity layout.
This flexibility makes it possible to take advantage of scrolling behaviors, such as having your Toolbar scroll “off screen” as part of your content scrolling, to offer more room for content to be displayed.
Toolbars support all of the same functionality as the app bar, including the “up” navigation affordance, an Activity title, Menu Item actions, and the overflow Menu.
Replacing Your App Bar with a Toolbar
To add a Toolbar to an Activity, you must first disable the default app bar by applying a
NoActionBar
theme such as
Theme.AppCompat.NoActionBar
or
Theme.AppCompat.Light.NoActionBar
to your Activity within the manifest:
android:theme="@style/Theme.AppCompat.NoActionBar"
Within the Activity layout, add a Toolbar element aligned with the top of the screen, and sized to match the app bar:
<android.support.v7.widget.Toolbarandroid:id="@+id/toolbar"android:layout_width="match_parent"android:layout_height="?attr/actionBarSize"/>
Within your Activity’s
onCreate
handler, specify the Toolbar within your layout to be used as your app bar replacement using the
setSupportActionBar
method, as shown in
Listing 13-9
. Any Menu Items added within the
onCreateOptionsMenu
handler will then be added to, and displayed, on your Toolbar.
The Toolbar is available as part of the Android Design Support Library. Before it can be used, you must add the Android Design Support Library to your app module
build.gradle
file:
implementation 'com.android.support:design:27.1.1'
Listing 13-10
shows how to style the look and feel of the standard app bar for your Toolbar by wrapping the Toolbar in an
AppBarLayout
, part of the Android Design Support Library. The App Bar Layout automatically sets the background color to your
colorPrimary
resource value, and adds the correct elevation; the App Bar Layout should always be used when using a Toolbar to replace the app bar. To set the correct text and icon colors, select a theme from:
-
ThemeOverlay.AppCompat.ActionBar—Sets the correct styling to support a Search View, and sets thecolorControlNormaltoandroid:textColorPrimary. -
ThemeOverlay.AppCompat.Dark.ActionBar—As above, but also sets the text colors to be light for use on a dark background. -
ThemeOverlay.AppCompat.Light.ActionBar—As for the first item, but also sets the text colors to be dark for use on a light background.
Advanced Scrolling Techniques for the Toolbar
While app bars and toolbars present users with important information and priority actions, they’re also part of the app’s “chrome”—and as such steal space from the content , which should always be prioritized. To help balance these two considerations, material design includes a number of techniques that can be used to alter the behavior of the Toolbar when users scroll app content.
Scrolling techniques often involve interaction between multiple Views—the View being scrolled and any View (or Views) reacting to the scrolling (typically the Toolbar replacing your app bar.)
To ensure this interaction is properly coordinated, each affected View must be the direct child of a
CoordinatorLayout
. The Coordinator Layout is used to attach Behaviors to specific Views using the
app:layout_behavior
attribute in their layout element. Each Behavior can intercept touch events, window insets, measurement and layout, and nested scrolling events for the affected View without requiring you to subclass the Views to add that additional functionality.
The most basic scrolling technique is to have the Toolbar scroll “off-screen,” such that it disappears when the user begins scrolling the content, and then have it scroll back on-screen when the user scrolls in the opposite direction.
This is achieved by placing your Toolbar within an
AppBarLayout
and adding the
ScrollingViewBehavior
to the View being scrolled (typically a Recycler View or Nested Scroll View), as demonstrated in
Listing 13-11
.
In this layout, as the Recycler View scrolls, the
ScrollingViewBehavior
attached to it causes the App Bar Layout to respond based on the
app:layout_scrollFlags
attribute on each of the App Bar Layout’s child views. This flag controls the behavior for the View as it scrolls on, and off, the screen:
-
scroll—Required for any View that is to scroll off the screen—Views without this flag will always remain at the top of the screen. -
snap—When a scroll event ends, Views with this flag will be scrolled to the closest edge, ensuring they are either fully visible, or completely scrolled off screen. -
enterAlways—Indicates that the View will immediately begin entering the screen on any reverse (downward) scroll event. This enables the “quick return” pattern, without which the user would need to scroll to the very top of the Recycler View before the Toolbar was scrolled back into frame. -
enterAlwaysCollapsed—Can be added toenterAlwaysto ensure the View is only scrolled back to its “collapsed” height, as described later within this section. -
exitUntilCollapsed—When scrolling off the screen, the view will first “collapse” before exiting and scrolling off the screen.
The App Bar Layout supports multiple children, laying them out similarly to a vertical Linear Layout. Every View that includes the
scroll
flag must be positioned above Views without it. This ensures that views are always scrolled off the top of the screen.
The collapsing flags are useful if you have a view that initially has a larger height (set with
android:layout_height
), but a smaller minimum height set with
android:minHeight
. This pattern is often found in combination with the
CollapsingToolbarLayout
, as shown in
Listing 13-12
. It provides fine-grained control over which elements collapse, and which should be “pinned” to the top of the Collapsing Toolbar Layout.
Note that the
AppBarLayout
has a fixed height—this is the expanded height. The Toolbar’s height is set to
?attr/actionBarSize
, which is the default height of the app bar. The Collapsing Toolbar Layout ensures the title text animates correctly while the View collapses, moving from the bottom of the View to the appropriate location on the Toolbar, which has its navigation button and actions pinned using the
app:layout_collapseMode="pin"
.
The Collapsing Toolbar Layout supports multiple children, laying them out similar to a Frame Layout. This is useful when adding an additional
ImageView
serving as a “hero image” behind the expanded app bar. Use the attribute
app:layout_collapseMode="parallax"
to have the image scroll at a different rate than the scrolling content to provide a parallax effect:
<android.support.design.widget.AppBarLayoutandroid:layout_width="match_parent"android:layout_height="192dp"android:theme="@style/ThemeOverlay.AppCompat.Dark.ActionBar"><android.support.design.widget.CollapsingToolbarLayoutandroid:layout_width="match_parent"android:layout_height="match_parent"app:layout_scrollFlagts="scroll|exitUntilCollapsed"><ImageViewandroid:id="@+id/hero_image"android:layout_width="match_parent"android:layout_height="match_parent"app:layout_collapseMode="parallax" /><android.support.v7.widget.Toolbarandroid:id="@+id/toolbar"android:layout_width="match_parent"android:layout_height="?attr/actionBarSize"app:layout_collapseMode="pin" /></android.support.design.widget.CollapsingToolbarLayout></android.support.design.widget.AppBarLayout>
Incorporating Menus Without the App Bar
The app bar is the first place users will look for actions related to your app, but its top-level context makes it an inappropriate place for actions associated with only a portion of your layout. This can commonly be the case for large layouts, such as those optimized for tablets.
To provide actions for a specific portion of your layout, you can include a Toolbar specifically for that region. Actions can be added to that Toolbar using
inflateMenu
or programmatically by using the Toolbar’s
getMenu
method. Any Menu Item selected will trigger a callback to the
OnMenuItemClickListener
you’ve set using with the Toolbar’s
setOnMenuItemClickListener
.
If you don’t need a navigation icon or a title, you can use the
ActionMenuView
as an alternative. Similar to the Toolbar, you can add Menu Items using the
getMenu
method and use
setOnMenuItemClickListener
to allocate a Menu Item Click Listener to handle selections, as shown in
Listing 13-13
.
IMPROVING THE EARTHQUAKE MONITOR’S APP BAR
In the following example, the earthquake-monitoring application, which you updated to material design in Chapter 12 , “Implementing the Android Design Philosophy,” will be enhanced to use a Toolbar and scroll techniques:
-
Update the app
build.gradlefile to include Design Support Library:dependencies {[… Existing dependencies …]implementation 'com.android.support:design:27.1.1'} -
Update the
styles.xmlresource, adding a newAppTheme.NoActionBartheme:<style name="AppTheme.NoActionBar"parent="Theme.AppCompat.Light.NoActionBar"><item name="colorPrimary">@color/colorPrimary</item><item name="colorPrimaryDark">@color/colorPrimaryDark</item><item name="colorAccent">@color/colorAccent</item></style> -
Modify the
AndroidManifest.xmlentry forEarthquakeMainActivityto use the new theme added in Step 2:<activityandroid:name="com.professionalandroid.apps.earthquake.EarthquakeMainActivity"android:theme="@style/AppTheme.NoActionBar"><intent-filter><action android:name="android.intent.action.MAIN"/><category android:name="android.intent.category.LAUNCHER"/></intent-filter><meta-dataandroid:name="android.app.default_searchable"android:value=".EarthquakeSearchResultActivity"/></activity> -
Update the
activity_earthquake_main.xmllayout to use aCoordinatorLayout,AppBarLayout, andToolbarusing thescroll|enterAlways|snapscroll flags so that the Toolbar scrolls off the screen, returns immediately when the user scrolls up, and snaps to avoid being only partially visible:<?xml version="1.0" encoding="utf-8"?><android.support.design.widget.CoordinatorLayoutxmlns_android="http://schemas.android.com/apk/res/android"xmlns_app="http://schemas.android.com/apk/res-auto"android:layout_width="match_parent"android:layout_height="match_parent"><android.support.design.widget.AppBarLayoutandroid:layout_width="match_parent"android:layout_height="wrap_content"android:theme="@style/ThemeOverlay.AppCompat.Dark.ActionBar"><android.support.v7.widget.Toolbarandroid:id="@+id/toolbar"android:layout_width="match_parent"android:layout_height="wrap_content"app:layout_scrollFlags="scroll|enterAlways|snap"/></android.support.design.widget.AppBarLayout><FrameLayoutandroid:id="@+id/main_activity_frame"android:layout_width="match_parent"android:layout_height="match_parent"app:layout_behavior="@string/appbar_scrolling_view_behavior"/></android.support.design.widget.CoordinatorLayout> -
Update the
onCreatemethod in the Earthquake Main Activity to set the Toolbar as the app bar:@Overrideprotected void onCreate(Bundle savedInstanceState) {super.onCreate(savedInstanceState);setContentView(R.layout.activity_earthquake_main);Toolbar toolbar = findViewById(R.id.toolbar);setSupportActionBar(toolbar);[… Existing onCreate Method …]}
While a static image won’t show any visible difference, scrolling the earthquake list will cause the app bar to scroll off-screen, ensuring users have the maximum amount of space to interact with the content. By using the
enterAlways
scroll flag, the app bar will return as soon as the user scrolls back, allowing quick access to the overflow menu and Search View.
APP NAVIGATION PATTERNS
Apps come in many different sizes and complexities, resulting in a number of different patterns to help users navigate your app easily.
Three primary navigation patterns are in common use:
- Tabs—allow users to swipe between equally important top-level screens
- Bottom navigation bar—an always visible bar containing 3 to 5 generally independent top-level screens
- Navigation drawer—a drawer generally only accessed by manually opening it, suitable for apps that have one primary screen and multiple independent secondary screens
Navigating with Tabs
Tabs are an effective navigation pattern when you have two equally important top-level Views. When using Tabs, users can switch between these Views either by tapping the Tab, or swiping between the Views.
Tabs are displayed using
TabLayout
, and are always shown along the top of the screen, as shown in
Figure 13-3
.

Tabs are generally included as a second child View of an App Bar Layout beneath a Toolbar, as shown in Listing 13-14 .
Note that the swipe functionality is provided by the incorporation of a
ViewPager
.
The
TabLayout
in
Listing 13-14
does not include any
app:layout_scrollFlags
—as a result, the tabs remain visible when the user scrolls.
The content displayed within the View Pager is populated using a
PagerAdapter
. By default, the Pager Adapter inflates a single View for each page; however, when working with Tabs, it’s often more convenient to use the
FragmentPagerAdapter
and use a Fragment to represent each page.
This structure allows each Fragment to add actions using
onCreateOptionsMenu
that will only be visible when the associated Tab is selected.
To build a Fragment Pager Adapter, extend
FragmentPagerAdapter
and override
getCount
to return the number of pages, and
getItem
to return the appropriate Fragment for a given position.
To use your Fragment Pager Adapter with Tab navigation, you’ll also need to override
getPageTitle
to return a title for a given position, which will be displayed within the Tab Layout.
When using a View Pager and Tab Layout for your main navigation with a fixed set of elements,
getItem
and
getPageTitle
can be simple
switch
statements mapping positions to fixed data, as shown in
Listing 13-15
.
Connect your
PagerAdapter
and your
ViewPager
using the
setAdapter
method, then call
setupWithViewPager
on the
TabLayout
to create the correct Tabs. Ensure that Tab selection events change the selected page and that swiping through pages updates the selected tab, as shown in
Listing 13-16
.
Navigating between Tabs does not affect the back stack, so pressing the back button won’t reverse Tab navigation. As a result, individual pages should not include any internal navigation or back stack history—all navigation should be done by opening a Dialog (as discussed later in this chapter), or through a new Activity.
By following these guidelines, users will always have a consistent experience when tapping the back button.
Implementing a Bottom Navigation Bar
A bottom navigation bar, as shown in Figure 13-4 , is presented along the bottom of the screen; users can switch between Views by tapping on the desired item.

Users will generally read from top to bottom, so this layout puts more emphasis on the content, while still ensuring that the top-level Views are available.
Bottom navigation bars are ideal when your app has three to five top-level navigation destinations that are of similar importance but generally independent of each other.
Unlike Tabs, a bottom navigation bar navigation pattern should not support swiping between Views, and transitions should cross-fade from the current item to the new, rather than using a lateral animation to “slide in.”
As a result, any of the Views available from the bottom navigation can support swiping behaviors—for example, you may want to swipe to delete an e-mail from a list, or embed scrollable tabs to categorize content.
Selecting a bottom navigation item should reset that View’s task state instead of restoring any previous intermediate state (such as scroll position).
The items displayed in the bottom navigation bar are defined as a Menu, as shown in
Listing 13-17
. Each item is defined using
item
elements, where the
android:id
attribute is later used to identify which item has been selected, and the
android:icon
and
android:title
attributes are used to populate the title and icon displayed for the bottom navigation bar items.
To add a bottom navigation bar, add a
BottomNavigationView
element, part of the Android Design Support Library, to your layout. Use the
app:menu
attribute to associate a Menu resource that defines the available selections, as shown in
Listing 13-18
.
Set an
OnNavigationItemSelectedListener
to the Bottom Navigation View to listen for selection changes. Each selection should result in a
FragmentTransaction
that replaces the currently displayed content with a new Fragment based on the selection.
An
OnNavigationItemReselectedListener
is also available to receive callbacks when the currently selected item is reselected. By convention, selecting the currently selected item should scroll the content to the top.
Listing 13-19
implements this by having each Fragment extend
ScrollableFragment
, which adds a single method—
scrollToTop
.
As with Tabs, bottom navigation bar navigation should not add to the back stack, and pressing the back button should not undo a selection.
Using a Navigation Drawer
The navigation drawer, shown in Figure 13-5 , is typically hidden until invoked by the user tapping the navigation icon in the app bar.

Because the navigation options are hidden by default, this pattern is particularly appropriate when a single, main screen is significantly more important than the others. It also supports app architectures that require six or more equally important top-level screens.
The
NavigationView
class, also part of the Android Design Support Library, provides the UI for a Navigation Drawer. Like the Bottom Navigation View, the Navigation View is populated using a Menu resource, either through the
app:menu
attribute in your layout XML resource, or programmatically using the
inflateMenu
or
getMenu
methods.
When creating your navigation drawer Menu definition, use menu groups via the
android:checkableBehavior="single"
attribute, as shown in
Listing 13-20
.
Using this approach, only one Menu Item can be selected at a time, and calling
setChecked
on a different Menu Item will automatically uncheck the previous selection.
The Navigation View also supports the
app:headerLayout
attribute (and corresponding
addHeaderView
method), to add headers to be displayed above any following Menu Items. The header can be retrieved in code using the
getHeaderView
method.
For larger screen UIs, a Navigation View can be included within the layout and made permanently visible as a side navigation affordance (see Figure 13-6 ).

However, in most cases where side navigation is used, it’s common to use a Navigation View within a
DrawerLayout
. Using a Drawer Layout makes it possible for users to swipe from the left screen edge to open the drawer, and swipe in the opposite direction to close the drawer.
This also allows the temporary side navigation to be toggled open and closed by selecting the navigation affordance on the left of the app bar, causing the Navigation View to appear over the content while the user selects a new top-level screen, as shown in Figure 13-7 .

A Drawer Layout’s first child view should always be the main layout that is always visible—in turn, this layout contains the
CoordinatorLayout
,
AppBarLayout
, and the layout or View that will contain your content, as shown in
Listing 13-21
. Setting
android:fitsSystemWindows="true"
on both the
DrawerLayout
and
NavigationView
ensures that the navigation drawer will be drawn underneath the status bar—as suggested by the material design guidelines.
To connect the app bar’s navigation icon to the Navigation Drawer, use the
ActionBarDrawerToggle
. To ensure that the state of the
ActionBarDrawerToggle
is updated correctly, you must override
onPostCreate
and
onConfigurationChanged
, including a call to the
syncState
method.
By calling your Action Bar Drawer Toggle’s
onOptionsItemSelected
method from within the Activity’s
onOptionsMenuSelected
handler, as shown in
Listing 13-22
, selecting the app bar navigation affordance will toggle the navigation drawer visibility.
When a Navigation View item is selected, the
OnNavigationItemSelectedListener
callback is called. Within that handler, the received Menu Item should be compared to the currently visible screen—and then the drawer should be closed—before the transition to the newly selected screen (if it’s different from that currently displayed) should begin.
The content transition should begin only after the drawer has completely closed. This reduces jank by avoiding multiple concurrent animations, as well as making it easier for users to understand what is changing.
Listing 13-23
demonstrates how to configure the Action Bar Drawer Toggle by implementing a
DrawerListener
, an interface that provides callbacks for the drawer opening and closing.
Note that the main content transition, and related events such as updating the title in the app bar, are run within the
onDrawerClosed
handler.
Combining Navigation Patterns
It can often be useful to combine multiple navigation patterns. For example, when using tabs it’s common to have one or two additional secondary views accessible as app bar actions (for example, Settings and About). When you have three or more of these secondary views, you might consider adding a navigation drawer, as shown in Figure 13-8 .

This provides users with a visual cue (in the form of the drawer indicator icon) that additional screens are available, without distracting from the tabs that should be the focus of user navigation attention.
Similarly, if you are using a bottom navigation bar, you should consider also using a navigation drawer when there are three or more secondary views, as shown in Figure 13-9 .
In both of these examples, the navigation drawer should not contain the items available within the primary navigation element.
ADDING TABS TO THE EARTHQUAKE MONITOR
Let’s improve the earthquake-monitoring example by incorporating Tab navigation. The two tabs will be the existing list of earthquakes, and a second tab will be used to display a map of the earthquake locations.
In this example, we’ll add the navigation elements—the map itself will be added in Chapter 15 , “Location, Contextual Awareness, and Mapping.”
-
Start by creating the layout for the Fragment that will be used to display the map by creating a new
fragment_earthquake_map.xmllayout in theres/layoutfolder. A Text View will serve as a placeholder until we add a map in Chapter 15 :<?xml version="1.0" encoding="utf-8"?><FrameLayout xmlns_android="http://schemas.android.com/apk/res/android"android:layout_width="match_parent"android:layout_height="match_parent"><TextViewandroid:layout_width="match_parent"android:layout_height="match_parent"android:gravity="center"android:text="Map Goes Here!"/></FrameLayout> -
Create a new
EarthquakeMapFragmentclass that extendsFragment, overriding theonCreateViewhandler to inflate thefragment_earthquake_maplayout from Step 1:public class EarthquakeMapFragment extends Fragment {@Overridepublic View onCreateView(@NonNull LayoutInflater inflater,ViewGroup container, Bundle savedInstanceState) {return inflater.inflate(R.layout.fragment_earthquake_map,container, false);}} -
On larger screens (such as a tablet) we can display the list and map side-by-side. Create a variation of the
activity_earthquake_main.xmllayout within theres/layout-sw720dpfolder that we’ll optimize for displays with at least 720dp of screen width. This layout will display the Earthquake List Fragment and Earthquake Map Fragment side-by-side, limiting the width of the list Fragment to half the minimum width for this layout (360dp). With the additional screen space available, we can also use an expanded toolbar pattern, built with anAppBarLayoutthat is double the height of a normal Toolbar on tablets (64dp), aCollapsingToolbarLayoutand aToolbar:<?xml version="1.0" encoding="utf-8"?><android.support.design.widget.CoordinatorLayoutxmlns_android="http://schemas.android.com/apk/res/android"xmlns_app="http://schemas.android.com/apk/res-auto"android:layout_width="match_parent"android:layout_height="match_parent"><android.support.design.widget.AppBarLayoutandroid:layout_width="match_parent"android:layout_height="128dp"android:theme="@style/ThemeOverlay.AppCompat.Dark.ActionBar"><android.support.design.widget.CollapsingToolbarLayoutandroid:layout_width="match_parent"android:layout_height="match_parent"><android.support.v7.widget.Toolbarandroid:id="@+id/toolbar"android:layout_width="match_parent"android:layout_height="?attr/actionBarSize"/></android.support.design.widget.CollapsingToolbarLayout></android.support.design.widget.AppBarLayout><LinearLayoutandroid:layout_width="match_parent"android:layout_height="match_parent"android:baselineAligned="false"android:orientation="horizontal"app:layout_behavior="@string/appbar_scrolling_view_behavior"><fragmentandroid:id="@+id/EarthquakeListFragment"android:name="com.professionalandroid.apps.earthquake.EarthquakeListFragment"android:layout_width="360dp"android:layout_height="match_parent"/><fragmentandroid:id="@+id/EarthquakeMapFragment"android:name="com.professionalandroid.apps.earthquake.EarthquakeMapFragment"android:layout_width="0dp"android:layout_weight="1"android:layout_height="match_parent"android:layout_weight="1"/></LinearLayout></android.support.design.widget.CoordinatorLayout> -
On smaller screens (such as a phone) we will display only the list or the map at any given time, using tabs to switch between them. Modify
strings.xmlto add the labels for the new tabs:<string name="tab_list">List</string><string name="tab_map">Map</string> -
Modify the
activity_earthquake_main.xmllayout in theres/layoutfolder, adding aViewPagerthat will contain the list and map Fragments. Also take this opportunity to add aTabLayoutto the App Bar Layout:<?xml version="1.0" encoding="utf-8"?><android.support.design.widget.CoordinatorLayoutxmlns_android="http://schemas.android.com/apk/res/android"xmlns_app="http://schemas.android.com/apk/res-auto"android:layout_width="match_parent"android:layout_height="match_parent"><android.support.design.widget.AppBarLayoutandroid:layout_width="match_parent"android:layout_height="wrap_content"android:theme="@style/ThemeOverlay.AppCompat.Dark.ActionBar"><android.support.v7.widget.Toolbarandroid:id="@+id/toolbar"android:layout_width="match_parent"android:layout_height="wrap_content"app:layout_scrollFlags="scroll|enterAlways|snap" /><android.support.design.widget.TabLayoutandroid:id="@+id/tab_layout"android:layout_width="match_parent"android:layout_height="wrap_content" /></android.support.design.widget.AppBarLayout><android.support.v4.view.ViewPagerandroid:id="@+id/view_pager"android:layout_width="match_parent"android:layout_height="match_parent"app:layout_behavior="@string/appbar_scrolling_view_behavior"/></android.support.design.widget.CoordinatorLayout> -
Now add navigation support for switching between the list and map. In your Earthquake Main Activity, create a
FragmentPagerAdapterthat displays the list as the first tab, and the map as the second:class EarthquakeTabsPagerAdapter extends FragmentPagerAdapter {EarthquakeTabsPagerAdapter(FragmentManager fm) {super(fm);}@Overridepublic int getCount() {return 2;}@Overridepublic Fragment getItem(int position) {switch(position) {case 0:return new EarthquakeListFragment();case 1:return new EarthquakeMapFragment();default:return null;}}@Overridepublic CharSequence getPageTitle(int position) {switch(position) {case 0:return getString(R.string.tab_list);case 1:return getString(R.string.tab_map);default:return null;}}} -
Still within the Earthquake Main Activity, modify the
onCreatehandler to remove the Fragment Transaction code and instead set up tab navigation when the View Pager is detected, using the Pager Adapter from Step 6:@Overridepublic void onCreate(Bundle savedInstanceState) {super.onCreate(savedInstanceState);setContentView(R.layout.activity_earthquake_main);Toolbar toolbar = findViewById(R.id.toolbar);setSupportActionBar(toolbar);ViewPager viewPager = findViewById(R.id.view_pager);if (viewPager != null) {PagerAdapter pagerAdapter =new EarthquakeTabsPagerAdapter(getSupportFragmentManager());viewPager.setAdapter(pagerAdapter);TabLayout tabLayout = findViewById(R.id.tab_layout);tabLayout.setupWithViewPager(viewPager);}[… Existing code for loading and observing data …]}
Figure 13-10 shows the app running on a phone, where it displays the App Bar with two Tabs, and on a tablet device, where the two Fragments are shown side-by-side.

CHOOSING THE RIGHT LEVEL OF INTERRUPTION
In Chapter 11 , “Working on the Background,” you were introduced to Notifications as a method of informing users of important information while your app is in the background. Android also offers a number of mechanisms that can be used to inform—and even interrupt—the user while your app is in the foreground, including Dialogs, Toast messages, and Snackbars.
Whenever possible, your app should allow users to continue with their regular workflow unhindered. In exceptional cases, though, it may make sense to interrupt the users to inform them of a significant event or change.
Note that every interruption or significant change in your app’s appearance has an inherent cost; users must process what has changed and what, if any, actions they need to perform in response.
Initiating a Dialog
Android Dialogs are partially transparent, floating windows that partially obscure the UI that launched them, as shown in Figure 13-11 .

Dialog boxes are a common UI metaphor in desktop, web, and mobile applications. Modal Dialogs are the most intrusive of the options available for interrupting users—presenting information and requiring a response before allowing users to continue.
In terms of Android UX design, Dialogs should be used to represent global system-level events, such as displaying system errors or supporting required account selection. It’s good practice to limit the use of Dialogs within your applications, and to minimize the degree to which you customize them.
Create Dialogs by extending the
AppCompatDialogFragment
class, a Fragment subclass that includes all of the AppCompat styling, and handles saving and restoring the Dialog appropriately during configuration changes.
Most Dialogs fall into a number of standard Dialog categories:
- A confirmation message with positive and negative response buttons
- A single-choice list of items for the user to make a selection
- A multiple-select list of items with checkboxes
These standard cases can be accommodated using an
AlertDialog
. To take advantage of the standard Alert Dialog UI, you must create a new
AlertDialog.Builder
object within the
onCreateDialog
handler of your
AppCompatDialogFragment
, before assigning values for the title, message to display, and optionally for any buttons, selection items, and text input boxes required—as shown in
Listing 13-24
.
Clicking either button will close the Dialog after executing the attached On Click Listeners.
Use the
setCancelable
method to determine if the user should be able to close the Dialog by pressing the back button without making a selection. If you choose to make the Dialog cancelable, you can override the
onCancel
method in the App Compat Dialog Fragment to react to this event.
It’s also possible to build an entirely custom Dialog by overriding the
onCreateView
and inflating your own layout.
Whether you are using a totally custom Dialog, an
AlertDialog
, or one of the other specialized Dialog subclasses such as
DatePickerDialog
or
TimePickerDialog
, the dialog is shown by calling the
show
method, as shown in
Listing 13-25
.
Let’s Make a Toast
On the other end of the interruption spectrum are Toast messages. Toasts are transient notifications that don’t steal focus, cannot be interacted with, and are non-modal; they appear, show a brief message, and then disappear.
Given these limitations, they should only be used to confirm a user’s action immediately after it occurs, or for system-level messages. They should only be displayed when your app has an active Activity visible.
The
Toast
class includes a static
makeText
method that creates a standard Toast display window. To construct a new Toast, pass the current Context, the text to display, and the length of time to display it (
LENGTH_SHORT
or
LENGTH_LONG
) into the
makeText
method. After creating a Toast, you can display it by calling
show
, as shown in
Listing 13-26
.
Figure 13-12 shows a Toast. It will remain on-screen for approximately 2 seconds before fading out. The application behind it remains fully responsive and interactive while the Toast is visible.

Inline Interruptions with Snackbars
A Snackbar allows you to build interruptions directly into your UI using a temporary View that is displayed by animating up from the bottom of the screen, as shown in Figure 13-13 .

Users can choose to swipe away a Snackbar immediately, or allow it to time out and disappear automatically—similar to a Toast.
The Snackbar API, available as part of the Android Design Support Library, includes a
make
method that takes a View, the text to display, and the length of time to display it. Unlike Toasts, Snackbars also offer the ability to add a single action using the
setAction
method, as shown in
Listing 13-27
.
This is often used to offer users an “undo” facility to recover from destructive actions. For example, when a user deletes an object, it can be marked for deletion while the Snackbar is displayed, while a callback is added using the
addCallback
method. Selecting the “undo” action simply unmarks the object for deletion, while the
onDismissed
callback would apply the deletion.
The position of the Snackbar is dependent on what View you pass into
make
. If the View you pass in is a Coordinator Layout or has a Coordinator Layout as one of its parents (either directly or indirectly), the Snackbar will be positioned at the bottom of that Coordinator Layout. If no Coordinator Layout is found, the Snackbar will be positioned at the bottom of your Activity.
The Snackbar mechanism reduces risk and anxiety with your users by eliminating the potential of a mistake causing an inadvertent—and unrecoverable—destructive action, without regularly interrupting experienced users.
Strongly consider replacing blocking “are you sure?” confirmation Dialogs with Snackbars that include restorative actions, as it allows both new users and frequent users to recover when needed without constantly interrupting their workflow.
14
Advanced Customization of Your User Interface
EXPANDING THE USER EXPERIENCE
Material design serves as the basis for the structure, UI, and the interaction patterns that make for a great user experience (UX) on Android, but it’s only a base to build upon.
In this chapter you learn to think beyond basic necessities and create applications that combine purpose with beauty and simplicity, even (or especially) when they’re providing complex functionality.
You also discover how to ensure your app offers a great user experience to all users, including those users who take advantage of accessibility services when using their devices.
Next, you are introduced to the text-to-speech, speech recognition, and vibration APIs, in order to expand the range of interactions available to users.
To further immerse the user within your app, you then learn to control the visibility of the system UI including the status bar and navigation bar on the top and bottom of the screen, respectively.
You also discover how to use property animations to change individual views and how to enhance the custom Views you created in Chapter 5 , “Building User Interfaces,” using advanced canvas-drawing techniques and your own touch event handling.
SUPPORTING ACCESSIBILITY
An important part of creating a compelling UI is to ensure that it can be used by everyone, including people with disabilities that require them to interact with their devices in different ways.
The Accessibility APIs provide alternative interaction methods for users with visual, physical, or age-related disabilities that make it difficult to interact fully with a touch screen.
In Chapter 5 you learned how to make your custom Views accessible and navigable. This section summarizes some of the best practices to ensure your entire user experience is accessible.
Supporting Navigation Without a Touch Screen
While physical directional controllers, such as D-pads and arrow keys, are no longer common on smartphone devices, they are emulated when users enable the Accessibility Services, making them the primary means of navigation for many users.
To ensure that your UI is navigable without requiring a touch screen, it’s important that your application supports each of these input mechanisms.
The first step is to ensure that each input View is focusable and clickable. Pressing the center or OK button should then affect the focused control in the same way as touching it using the touch screen.
It’s good practice to visually indicate when a control has the input focus, allowing users to know which control they are interacting with. All the Views included in the Android SDK are focusable.
The Android run time determines the focus order for each control in your layout based on an algorithm that finds the nearest neighbor in a given direction. You can manually override that order using the
android:nextFocusDown
,
android:nextFocusLeft
,
android:nextFocusRight
, and
android:nextFocusUp
attributes for any View within your layout definition. It’s good practice to ensure that consecutive navigation movements in the opposite direction should return you to the original location.
Providing a Textual Description of Each View
Context is of critical importance when designing your UI. Button images, text labels, or even the relative location of each control can be used to indicate the purpose of each input View.
To ensure your application is accessible, consider how a user without visual context can navigate and use your UI. To assist, each View can include an
android:contentDescription
attribute that can be read aloud to users who have enabled the accessibility speech tools:
<Buttonandroid:id="@+id/pick_contact_button"android:layout_width="match_parent"android:layout_height="wrap_content"android:text="@string/pick_contact_button"android:contentDescription="@string/pick_contact_button_description"/>
Every View within your layout that can hold focus should have a content description that provides the entire context necessary for a user to act on it.
INTRODUCING ANDROID TEXT-TO-SPEECH
The text-to-speech (TTS) libraries, also known as speech synthesis , enable you to output synthesized speech from within your applications, allowing them to “talk” to your users.
Due to storage space constraints on some Android devices, the language packs are not always preinstalled on each device. Before using the TTS engine, it’s good practice to confirm the language packs are installed.
To check for the TTS libraries, start a new Activity for a result using the
ACTION_CHECK_TTS_DATA
action from the
TextToSpeech.Engine
class:
Intent intent = new Intent(TextToSpeech.Engine.ACTION_CHECK_TTS_DATA);startActivityForResult(intent, TTS_DATA_CHECK);
The
onActivityResult
handler receives
CHECK_VOICE_DATA_PASS
if the voice data has been installed successfully. If the voice data is not currently available, start a new Activity using the
ACTION_INSTALL_TTS_DATA
action from the TTS Engine class to initiate its installation:
Intent installVoice = new Intent(Engine.ACTION_INSTALL_TTS_DATA);startActivity(installVoice);
After confirming the voice data is available, you need to create and initialize a new
TextToSpeech
instance. Note that you cannot use the new Text To Speech object until initialization is complete. Pass an
OnInitListener
into the constructor that will be fired when the TTS engine has been initialized:
boolean ttsIsInit = false;TextToSpeech tts = null;protected void onActivityResult(int requestCode,int resultCode, Intent data) {if (requestCode == TTS_DATA_CHECK) {if (resultCode == Engine.CHECK_VOICE_DATA_PASS) {tts = new TextToSpeech(this, new OnInitListener() {public void onInit(int status) {if (status == TextToSpeech.SUCCESS) {ttsIsInit = true;// TODO Speak!}}});}}}
After initializing Text To Speech, you can use the
speak
method to synthesize voice data using the default device audio output:
Bundle parameters = null;String utteranceId = null; // Can be used with setOnUtteranceProgressListenertts.speak("Hello, Android", TextToSpeech.QUEUE_ADD, parameters, utteranceId);
The
speak
method enables you to specify either to add the new voice output to the existing queue or to flush the queue and start speaking immediately.
You can affect the way the voice output sounds using the
setPitch
and
setSpeechRate
methods. Each method accepts a float parameter that modifies the pitch and speed, respectively, of the voice output.
You can also change the pronunciation of your voice output using the
setLanguage
method. This method takes a
Locale
parameter to specify the country and language of the text to speak. This affects the way the text is spoken to ensure the correct language and pronunciation models are used.
When you have finished speaking, use
stop
to halt voice output and
shutdown
to free the TTS resources:
tts.stop();tts.shutdown();
Listing 14-1 determines whether the TTS voice library is installed, initializes a new TTS engine, and uses it to speak in UK English.
USING SPEECH RECOGNITION
Android supports voice input and speech recognition using the
RecognizerIntent
class. This API enables you to accept voice input into your application using the standard voice input dialog, as shown in
Figure 14-1
.

To add voice input to your app, your app must hold the RECORD_AUDIO permission:
<uses-permission android:name="android.permission.RECORD_AUDIO"/>
To initialize voice recognition, call
startNewActivityForResult
, passing in an Intent that specifies the
RecognizerIntent.ACTION_RECOGNIZE_SPEECH
or
RecognizerIntent.ACTION_WEB_SEARCH
actions. The former action enables you to receive the input speech within your application, whereas the latter action enables you to trigger a web search or voice action using the native providers.
The launch Intent must include the
RecognizerIntent.EXTRA_LANGUAGE_MODEL
extra to specify the language model used to parse the input audio. This can be either
LANGUAGE_MODEL_FREE_FORM
or
LANGUAGE_MODEL_WEB_SEARCH
; both are available as static constants from the
RecognizerIntent
class.
You can also specify a number of optional extras to control the language, potential result count, and display prompt using the following Recognizer Intent constants:
-
EXTRA_LANGUAGE—Specifies a language constant from theLocaleclass to use an input language other than the device default. You can find the current default by calling the staticgetDefaultmethod on theLocaleclass. -
EXTRA_MAXRESULTS—Uses an integer value to limit the number of potential recognition results returned. -
EXTRA_PROMPT—Specifies a string that displays in the voice input dialog (shown in Figure 14-1 ) to prompt the user to speak.
Using Speech Recognition for Voice Input
When using voice recognition to provide user input to your application, call
startNewActivityForResult
using the
RecognizerIntent.ACTION_RECOGNIZE_SPEECH
action, as shown in
Listing 14-2
.
When the user finishes speaking, the speech recognition engine analyzes and processes the resulting audio and returns the results through the
onActivityResult
handler as an Array List of strings in the
EXTRA_RESULTS
extra, as shown in
Listing 14-3
.
Each string returned in the Array List represents a potential match for the spoken input. You can find the recognition engine’s confidence in each result using the float array returned in the
EXTRA_CONFIDENCE_SCORES
extra. Each value in the array is the confidence score between 0 (no confidence) and 1 (high confidence) that the speech has been correctly recognized.
Using Speech Recognition for Search
When using speech recognition to facilitate search, rather than handling the received speech yourself you can use the
RecognizerIntent.ACTION_WEB_SEARCH
action to display a web search result or to trigger another type of voice action based on the user’s speech, as shown in
Listing 14-4
.
CONTROLLING DEVICE VIBRATION
In Chapter 11 , “Working in the Background,” you learned how to create Notifications that can use vibration to enrich event feedback. In some circumstances, you may want to vibrate the device independently of Notifications.
For example, vibrating the device is an excellent way to provide haptic user feedback, and is particularly popular as a feedback mechanism for games.
To control device vibration, your applications needs the
VIBRATE
permission:
<uses-permission android:name="android.permission.VIBRATE"/>
Device vibration is controlled through the
Vibrator
Service, accessible via the
getSystemService
method:
String vibratorService = Context.VIBRATOR_SERVICE;Vibrator vibrator = (Vibrator)getSystemService(vibratorService);
Not all devices contain a vibrator (for example, televisions), so use the
hasVibrator
method to determine if you should use a different mechanism to provide feedback to the user:
boolean hasVibrator = vibrator.hasVibrator();
Call
vibrate
to start device vibration; you can pass in either a vibration duration or a pattern of alternating vibration/pause sequences along with an optional index parameter that repeats the pattern starting at the index specified:
long[] pattern = {1000, 2000, 4000, 8000, 16000 };vibrator.vibrate(pattern, 0); // Execute vibration pattern.Vibrator.vibrate(pattern, -1); // Execute vibration pattern just oncevibrator.vibrate(1000); // Vibrate for 1 second.
To cancel vibration, call
cancel
; exiting your application automatically cancels any vibration it has initiated:
vibrator.cancel();
GOING FULL SCREEN
If, and only if, you’re building an application that is designed to be fully immersive it may make sense for your application to occupy the entire screen, hiding or obscuring the system UI including the status bar along the top of the screen and any on-screen navigation controls. Examples of immersive applications include games such as first-person racers or shooters, e-learning applications, and video players.
To control the visibility of the navigation bar on handsets, or the appearance of the system bar in tablets, you can use the
setSystemUiVisibility
method on any View visible within your Activity hierarchy. The
SYSTEM
_
UI
_
FLAG
_
HIDE
_
NAVIGATION
flag hides the navigation bar while the
SYSTEM
_
UI
_
FLAG
_
FULLSCREEN
flag
will result in the status bar being hidden.
By default, any user interaction with the Activity will show the navigation bar, and swiping down from the top edge of the screen will show the status bar, resetting the flags. This is appropriate for apps such as video players where you expect minimal user interaction.
Android 4.4 Kit Kat (API Level 19) added the ability to provide truly immersive experiences even when the user is interacting with your Activity. This comes with the addition of two additional flags:
-
SYSTEM_UI_FLAG_IMMERSIVE—In Immersive mode, users can interact with the Activity, requiring that they swipe down from the top edge of the screen in order to reveal the hidden system UI and exit immersive mode. This is appropriate for a book or news reader, where users will need to touch the Activity to scroll or change pages. -
SYSTEM_UI_FLAG_IMMERSIVE_STICKY—Similar to Immersive mode, the user can fully interact with the Activity. However, swiping down only temporarily reveals the system UI, before it automatically hides again. This is appropriate for a game or drawing app that expects infrequent use of the system UI.
When using only these flags, the position of your Views will be adjusted whenever the system UI is hidden or shown. To stabilize your UI, you can use the additional flags of
SYSTEM
_
UI
_
FLAG
_
LAYOUT
_
FULLSCREEN, SYSTEM
_
UI
_
FLAG
_
LAYOUT
_
HIDE
_
NAVIGATION
, and
SYSTEM
_
UI
_
FLAG
_
LAYOUT
_
STABLE
to request that the Activity always be laid out as if the system UI is always hidden:
private void hideSystemUI() {// Hide the navigation bar, status bar, and use IMMERSIVE// Note the usage of the _LAYOUT flags to keep a stable layoutgetWindow().getDecorView().setSystemUiVisibility(View.SYSTEM_UI_FLAG_LAYOUT_STABLE| View.SYSTEM_UI_FLAG_LAYOUT_HIDE_NAVIGATION| View.SYSTEM_UI_FLAG_LAYOUT_FULLSCREEN| View.SYSTEM_UI_FLAG_HIDE_NAVIGATION // hide nav bar| View.SYSTEM_UI_FLAG_FULLSCREEN // hide status bar| View.SYSTEM_UI_FLAG_IMMERSIVE);}// Show the system UI – note how the _LAYOUT flags are kept to maintain// a stable layoutprivate void showSystemUI() {getWindow().getDecorView().setSystemUiVisibility(View.SYSTEM_UI_FLAG_LAYOUT_STABLE| View.SYSTEM_UI_FLAG_LAYOUT_HIDE_NAVIGATION| View.SYSTEM_UI_FLAG_LAYOUT_FULLSCREEN);}
It’s good practice to synchronize other changes within your UI with changes in navigation visibility. For example, you may choose to hide and display the App Bar and other navigational controls based on entering and exiting full screen mode.
You can do this by registering an
OnSystemUiVisibilityChangeListener
to a View—typically, the View you’re using to control the navigation visibility—as shown in
Listing 14-5
.
Note that the system UI flags are reset whenever the user leaves (and subsequently returns to) your app. As a result the timing of calls to set these flags is important to ensure the UI is always in the state you expect. It’s recommended that you set and reset any system UI flags within the
onResume
and
onWindowFocusChanged
handlers.
WORKING WITH PROPERTY ANIMATIONS
In Chapter 12 , “Implementing the Android Design Philosophy,” you learned how to build “reveal” animations and shared element Activity transitions, to help construct larger transitions within your app. When it comes to animating individual Views, you can use property animators.
A property animator directly modifies any property—visual or otherwise—to transition from one value to another, over a specified period of time, using the interpolation algorithm of your choice, and repeating as required. The value can be any variable or object, from a regular integer to a complex Class instance.
You can use property animators to create a smooth transition for anything within your code; the target property doesn’t even need to represent something visual. Property animations are effectively iterators implemented using a background timer to increment or decrement a value according to a given interpolation path over a given period of time.
This is an incredibly powerful tool that can be used for anything from a simple View effect (such as moving, scaling, or fading a View), to complex animations, including runtime layout changes and curved transitions.
Creating Property Animations
The simplest technique for creating property animations is using an
ObjectAnimator
. The Object Animator class includes the
ofFloat
,
ofInt
, and
ofObject
static methods to easily create an animation that transitions the specified property of the target object between the values provided:
String propertyName = "alpha";float from = 1f;float to = 0f;ObjectAnimator anim = ObjectAnimator.ofFloat(targetObject, propertyName,from, to);// Make sure to start your animation!anim.start();
Alternatively, you can provide a single value to animate the property from its current value to its final value:
ObjectAnimator anim = ObjectAnimator.ofFloat(targetObject, propertyName, to);anim.start();
To target a property of a type other than integer or float, use the
ofObject
method. This method requires that you supply an implementation of the
TypeEvaluator
class. Implement the
evaluate
method to return an object that should be returned when the animation is a given fraction of the way through animating between the start and end objects:
TypeEvaluator<MyClass> evaluator = new TypeEvaluator<MyClass>() {public MyClass evaluate(float fraction,MyClass startValue,MyClass endValue) {MyClass result = new MyClass();// TODO Modify the new object to represent itself the given// fraction between the start and end values.return result;}};// Animate between two instancesValueAnimator oa= ObjectAnimator.ofObject(evaluator, myClassFromInstance, myClassToInstance);oa.setTarget(myClassInstance);oa.start();
By default, each animation will run once with a 300ms duration. Use the
setDuration
method to alter the amount of time the interpolator should use to complete the transition:
anim.setDuration(500);
You can use the
setRepeatMode
and
setRepeatCount
methods to cause the animation to be applied either a set number of times or infinitely:
anim.setRepeatCount(ValueAnimator.INFINITE);
You can set the repeat mode either to restart from the beginning or to apply the animation in reverse:
anim.setRepeatMode(ValueAnimator.REVERSE);
To create the same Object Animator as an XML resource, create a new XML file in the
res/animator
folder:
<objectAnimator xmlns_android="http://schemas.android.com/apk/res/android"android:valueTo="0"android:propertyName="alpha"android:duration="500"android:valueType="floatType"android:repeatCount="-1"android:repeatMode="reverse"/>
The filename can then be used as the resource identifier. To affect a particular object with an XML animator resource, use the
AnimatorInflator.loadAnimator
method, passing in the current context and the resource ID of the animation to apply in order to obtain a copy of the Object Animator, and then use the
setTarget
method to apply it to an object:
Animator anim = AnimatorInflater.loadAnimator(context, resID);anim.setTarget(targetObject);
By default, the interpolator used to transition between the start and end values of each animation uses a nonlinear
AccelerateDecelerateInterpolator
, which provides the effect of accelerating at the beginning of the transition and decelerating when approaching the end.
You can use the
setInterpolator
method to apply one of the following SDK interpolators:
-
AccelerateDecelerateInterpolator—The rate of change starts and ends slowly but accelerates through the middle. -
AccelerateInterpolator—The rate of change starts slowly but accelerates through the middle. -
AnticipateInterpolator—The change starts backward and then flings forward. -
AnticipateOvershootInterpolator—The change starts backward, flings forward, overshoots the target value, and finally goes back to the final value. -
BounceInterpolator—The change bounces at the end. -
CycleInterpolator—The change is repeated following a sinusoidal pattern. -
DecelerateInterpolator—The rate of change starts out quickly and then decelerates. -
LinearInterpolator—The rate of change is constant. -
OvershootInterpolator—The change flings forward, overshoots the last value, and then comes back. -
PathInterpolator—The change follows a Path object that extends from Point (0, 0) to (1, 1). The x coordinate along the Path is the input value and the output is the y coordinate of the line at that point:anim.setInterpolator(new OvershootInterpolator());
You can also extend your own
TimeInterpolator
class to specify a custom interpolation algorithm.
To execute an animation, you must call its
start
method:
anim.start();
Creating Property Animation Sets
Android includes the
AnimatorSet
class to make it easier to create complex, interrelated animations:
AnimatorSet bouncer = new AnimatorSet();
To add a new animation to an Animator Set, use the
play
method. This returns an
AnimatorSet.Builder
object that lets you specify when to play the new animation in relation to the existing set:
AnimatorSet mySet = new AnimatorSet();mySet.play(firstAnimation).before(concurrentAnim1);mySet.play(concurrentAnim1).with(concurrentAnim2);mySet.play(lastAnim).after(concurrentAnim2);
Use the
start
method to execute the sequence of animations:
mySet.start();
Using Animation Listeners
The
Animator
.
AnimationListener
class lets you create event handlers that are fired when an animation begins, ends, repeats, or is canceled:
Animator.AnimatorListener animListener = new AnimatorListener() {public void onAnimationStart(Animator animation) {// TODO Auto-generated method stub}public void onAnimationRepeat(Animator animation) {// TODO Auto-generated method stub}public void onAnimationEnd(Animator animation) {// TODO Auto-generated method stub}public void onAnimationCancel(Animator animation) {// TODO Auto-generated method stub}};
To apply an Animation Listener to your property animation, use the
addListener
method:
anim.addListener(animListener);
ENHANCING YOUR VIEWS
Custom Views were introduced in Chapter 5 and can serve as an important differentiator among a sea of standard apps when used properly—overuse often leads to additional user confusion as they are overwhelmed with custom controls and new UI elements to understand.
It’s important when building custom Views to ensure this additional risk is offset by a dramatically improved user experience. This could be through improved visual effects or through intuitive interactions by handling touch events.
ADVANCED CANVAS DRAWING
You were introduced to the
Canvas
class in
Chapter 5
, where you learned how to go beyond the included Views and build custom UIs. In this section you learn more about the Canvas, and take advantage of advanced UI visual effects such as Shaders and translucency.
The concept of the canvas is a common metaphor in graphics programming, and generally consists of three basic drawing components:
-
Canvas—Supplies the draw methods that paint drawing primitives onto the underlying bitmap. -
Paint—Also referred to as a “brush,”Paintlets you specify how a primitive is drawn on the bitmap. -
Bitmap—The surface being drawn on.
Most of the advanced techniques described in this chapter involve variations and modifications to the
Paint
object that enable you to add depth and texture to otherwise flat raster drawings.
The Android drawing API supports translucency, gradient fills, rounded rectangles, and anti-aliasing. These drawing APIs use a traditional raster-style painter’s algorithm. The result of this raster approach is improved efficiency, but changing a
Paint
object does not affect primitives that have already been drawn; it affects only new elements.
What Can You Draw?
The
Canvas
class encapsulates the bitmap used as a surface for your artistic endeavors; it also exposes the
draw
methods used to implement your designs.
Without going into detail about each
draw
method, the following list provides a taste of the primitives available:
-
drawARGB/drawRGB/drawColor—Fills the canvas with a single color. -
drawArc—Draws an arc between two angles within an area bounded by a rectangle. -
drawBitmap—Draws a bitmap on the Canvas. You can alter the appearance of the target bitmap by specifying a target size or using a matrix to transform it. -
drawBitmapMesh—Draws a bitmap using a mesh that lets you manipulate the appearance of the target by moving points within it. -
drawCircle—Draws a circle of a specified radius centered on a given point. -
drawLine[s]—Draws a line (or series of lines) between two points. -
drawOval—Draws an oval bounded by the rectangle specified. -
drawPaint—Fills the entire Canvas with the specified Paint. -
drawPath—Draws the specified Path. APathobject is often used to hold a collection of drawing primitives within a single object. -
drawPicture—Draws aPictureobject within the specified rectangle. -
drawRect—Draws a rectangle. -
drawRoundRect—Draws a rectangle with rounded edges. -
drawText—Draws a text string on the Canvas. The text font, size, color, and rendering properties are set in thePaintobject used to render the text. -
drawTextOnPath—Draws text that follows along a specified path (not supported when using hardware acceleration). -
drawVertices—Draws a series of tri-patches specified as a series of vertex points (not supported when using hardware acceleration).
Each drawing method lets you specify a
Paint
object to render it. In the following sections, you learn how to create and modify
Paint
objects to get the most out of your drawings.
Getting the Most from Your Paint
The
Paint
class represents a paintbrush and palette. It lets you choose how to render the primitives you draw onto the Canvas using the draw methods described in the previous section. By modifying the
Paint
object, you can control the color, style, font, and special effects used when drawing.
Most simply,
setColor
enables you to select the color of a Paint, whereas the style of a
Paint
object (controlled using
setStyle
) enables you to decide if you want to draw only the outline of a drawing object (
STROKE
), just the filled portion (
FILL
), or both (
STROKE_AND_FILL
).
Beyond these simple controls, the
Paint
class also supports transparency and can be modified with a variety of Shaders, filters, and effects to provide a rich palette of complex paints and brushes.
In the following sections, you learn what some of the features available in the
Paint
class are and how to use them. These sections outline what can be achieved (such as gradients and edge embossing) without exhaustively listing all possible alternatives.
Using Translucency
All colors in Android include an opacity component (alpha channel). You define an alpha value for a color when you create it using the
argb
or
parseColor
methods:
// Make color red and 50% transparentint opacity = 127;int intColor = Color.argb(opacity, 255, 0, 0);int parsedColor = Color.parseColor("#7FFF0000");
Alternatively, you can set the opacity of an existing
Paint
object using the
setAlpha
method:
// Make color 50% transparentint opacity = 127;myPaint.setAlpha(opacity);
Creating a paint color that’s not 100 percent opaque means that any primitive drawn with it will be partially transparent—making whatever is drawn beneath it partially visible.
You can use transparency effects in any class or method that uses colors including Paint colors, Shaders, and Mask Filters.
Introducing Shaders
Extensions of the
Shader
class let you create Paints that fill drawn objects with more than a single solid color.
The most common use of Shaders is to define gradient fills; gradients are an excellent way to add depth and texture to 2D drawings. Android includes three gradient Shaders as well as a Bitmap Shader and a Compose Shader.
Trying to describe painting techniques seems inherently futile, so
Figure 14-2
shows how each Shader works. Represented from left to right are
LinearGradient
,
RadialGradient
, and
SweepGradient
.

Creating Gradient Shaders
Gradient Shaders let you fill drawings with an interpolated color range. You can define the gradient in two ways. The first is a simple transition between two colors:
int colorFrom = Color.BLACK;int colorTo = Color.WHITE;LinearGradient myLinearGradient =new LinearGradient(x1, y1, x2, y2,colorFrom, colorTo, TileMode.CLAMP);
The second alternative is to specify a more complex series of colors distributed at set proportions:
int[] gradientColors = new int[3];gradientColors[0] = Color.GREEN;gradientColors[1] = Color.YELLOW;gradientColors[2] = Color.RED;float[] gradientPositions = new float[3];gradientPositions[0] = 0.0f;gradientPositions[1] = 0.5f;gradientPositions[2] = 1.0f;RadialGradient radialGradientShader= new RadialGradient(centerX, centerY,radius,gradientColors,gradientPositions,TileMode.CLAMP);
Each gradient Shader (linear, radial, and sweep) lets you define the gradient fill using either of these techniques.
Applying Shaders to Paint
To use a Shader when drawing, apply it to a Paint using the
setShader
method:
shaderPaint.setShader(myLinearGradient);
Anything you draw with this Paint will be filled with the Shader you specified rather than the paint color.
Using Shader Tile Modes
The brush sizes of the gradient Shaders are defined using explicit bounding rectangles or center points and radius lengths; the Bitmap Shader implies a brush size through its bitmap size.
If the area defined by your Shader brush is smaller than the area being filled, the
TileMode
determines how the remaining area will be covered. You can define which tile mode to use with the following static constants:
-
CLAMP—Uses the edge colors of the Shader to fill the extra space -
MIRROR—Flips the Shader image horizontally and vertically so that each image seams with the last -
REPEAT—Repeats the Shader image horizontally and vertically, but doesn’t flip it
Using Mask Filters
The
MaskFilter
classes let you assign edge effects to your Paint. Mask Filters are not supported when the Canvas is hardware-accelerated.
Extensions to
MaskFilter
apply transformations to the alpha-channel of a Paint along its outer edge. Android includes the following Mask Filters:
-
BlurMaskFilter—Specifies a blur style and radius to feather the edges of your Paint -
EmbossMaskFilter—Specifies the direction of the light source and ambient light level to add an embossing effect
To apply a Mask Filter, use the
setMaskFilter
method, passing in a
MaskFilter
object:
// Set the direction of the light sourcefloat[] direction = new float[]{ 1, 1, 1 };// Set the ambient light levelfloat light = 0.4f;// Choose a level of specularity to applyfloat specular = 6f;// Apply a level of blur to apply to the maskfloat blur = 3.5f;EmbossMaskFilter emboss = new EmbossMaskFilter(direction, light,specular, blur);// Apply the maskif (!canvas.isHardwareAccelerated())myPaint.setMaskFilter(emboss);
Using Color Filters
Whereas Mask Filters are transformations of a Paint’s alpha-channel, a
ColorFilter
applies a transformation to each of the RGB channels. All
ColorFilter
-derived classes ignore the alpha-channel when performing their transformations.
Android includes three Color Filters:
-
ColorMatrixColorFilter—Lets you specify a 4 x 5ColorMatrixto apply to a Paint. Color Matrixes are commonly used to perform image processing programmatically and are useful because they support chaining transformations using matrix multiplication. -
LightingColorFilter—Multiplies the RGB channels by the first color before adding the second. The result of each transformation will be clamped between 0 and 255. -
PorterDuffColorFilter—Lets you use any one of the 18 Porter-Duff rules for digital image compositing to apply a specified color to the Paint. The Porter-Duff rules are defined atdeveloper.android.com/reference/android/graphics/PorterDuff.Mode.html.
Apply
ColorFilters
using the
setColorFilter
method:
myPaint.setColorFilter(new LightingColorFilter(Color.BLUE, Color.RED));
Using Path Effects
The effects described so far affect the way the Paint fills a drawing; Path Effects are used to control how its outline (stroke) is drawn.
Using Path Effects, you can change the appearance of a shape’s corners and control the appearance of the outline. Path Effects are particularly useful for drawing Path primitives, but they can be applied to any Paint via the
setPathEffect
method:
borderPaint.setPathEffect(new CornerPathEffect(5));
Android includes several Path Effects, including the following:
-
CornerPathEffect—Lets you smooth sharp corners in the shape of a primitive by replacing them with rounded corners. -
DashPathEffect—Rather than drawing a solid outline, you can use the Dash Path Effect to create an outline of broken lines (dashes/dots). You can specify any repeating pattern of solid/empty line segments. -
DiscretePathEffect—Similar to the Dash Path Effect, but with added randomness. Specifies the length of each segment and a degree of deviation from the original path to use when drawing it. -
PathDashPathEffect—Enables you to define a new shape (path) to use as a stamp to outline the original path.
The following effects let you combine multiple Path Effects to a single Paint:
-
SumPathEffect—Adds two effects to a path in sequence, such that each effect is applied to the original path and the two results are combined. -
ComposePathEffect—Applies first one effect and then applies the second effect to the result of the first.
Path Effects that modify the shape of the object being drawn change the area of the affected shape. This ensures that any fill effects applied to the same shape are drawn within the new bounds.
Changing the Transfer Mode
Change a Paint’s
Xfermode
to affect the way it paints new colors on top of what’s already on the Canvas. Under normal circumstances, painting on top of an existing drawing layers the new shape on top. If the new Paint is fully opaque, it totally obscures the paint underneath; if it’s partially transparent, it tints the colors underneath.
The
PorterDuffXfermode
is a powerful transfer mode with which you can use any of the 18 Porter-Duff rules for image composition to control how the paint interacts with the existing canvas image.
To apply transfer modes, use the
setXferMode
method:
PorterDuffXfermode mode = new PorterDuffXfermode(PorterDuff.Mode.DST_OVER);borderPen.setXfermode(mode);
Improving Paint Quality with Anti-Aliasing
When you create a new
Paint
object, you can pass in several flags that affect the way the Paint will be rendered. One of the most interesting is the
ANTI_ALIAS_FLAG
, which ensures that diagonal lines drawn with this paint are anti-aliased to give a smooth appearance (at the cost of performance).
Anti-aliasing is particularly important when drawing text, as anti-aliased text can be significantly easier to read. To create even smoother text effects, you can apply the
SUBPIXEL_TEXT_FLAG
, which applies subpixel anti-aliasing.
Paint paint = new Paint(Paint.ANTI_ALIAS_FLAG|Paint.SUBPIXEL_TEXT_FLAG);
You can also set both of these flags manually using the
setSubpixelText
and
setAntiAlias
methods:
myPaint.setSubpixelText(true);myPaint.setAntiAlias(true);
Canvas Drawing Best Practice
2D owner-draw operations tend to be expensive in terms of processor use; inefficient drawing routines can block the GUI thread and have a detrimental effect on application responsiveness. This is particularly true for resource-constrained mobile devices.
In
Chapter 5
you learned how to create your own Views by overriding the
onDraw
method within a View-derived class. To ensure you don’t end up with an attractive application that’s unresponsive, laggy, or “janky,” you should be conscious of the resource drain and CPU-cycle cost of your
onDraw
method.
Rather than focus on general principles, I’ll describe some Android-specific considerations for ensuring that you can create Views that look good and remain interactive. (Note that list is not exhaustive.)
- Consider size and orientation —When you design your Views and Overlays, be sure to consider (and test!) how they look at different resolutions, pixel densities, and sizes.
-
Create static objects once
—Object creation and garbage collection are particularly expensive operations. Where possible, create drawing objects such as
Paintobjects, Paths, and Shaders once, rather than re-creating them each time the View is invalidated. -
Remember that
onDrawis expensive —Performing theonDrawmethod is an expensive process that forces Android to perform several image composition and bitmap construction operations. Many of the following points suggest ways to modify the appearance of your Canvas without having to call redraw:-
Use Canvas transforms
—Use Canvas transforms, such as
rotateandtranslate, to simplify complex relational positioning of elements on your canvas. For example, rather than positioning and rotating each text element around a clock face, simply rotate the canvas 22.5 degrees, and draw the text in the same place. - Use Animations —Consider using Animations to perform preset transformations of your View rather than manually redrawing it. Scale, rotation, and translation Animations can be performed on any View within an Activity and provide a resource-efficient way to provide zoom, rotate, or shake effects.
- Consider using bitmaps, Vector Drawables, NinePatches, and Drawable resources —It is less computationally expensive to add a pre-rendered bitmap to a Canvas than drawing it from scratch. Where possible, you should consider using a Drawable such as a bitmap, scalable NinePatch, Vector Drawable, or static XML Drawable rather than dynamically creating it at run time.
-
Use Canvas transforms
—Use Canvas transforms, such as
- Avoid overdrawing —A combination of raster painting and layered Views can result in many layers being drawn on top of each other. Before drawing a layer or object, check to confirm if it will be completely obscured by a layer above it. It’s good practice to avoid drawing more than 2.5 times the number of pixels on screen per frame. Transparent pixels still count—and are more expensive to draw than opaque colors.
Advanced Compass Face Example
In
Chapter 5
, you created a simple compass UI. In the following example, you make some significant changes to the Compass View’s
onDraw
method to change it from a simple, flat compass to a dynamic artificial horizon, as shown in
Figure 14-3
. Because the image in
Figure 14-3
is limited to black and white, you need to create the control to see it in its full technicolor glory.

-
Start by adding properties to store the pitch and roll values to the
CompassViewclass:private float mPitch;public void setPitch(float pitch) {mPitch = pitch;sendAccessibilityEvent(AccessibilityEvent.TYPE_VIEW_TEXT_CHANGED);}public float getPitch() {return mPitch;}private float mRoll;public void setRoll(float roll) {mRoll = roll;sendAccessibilityEvent(AccessibilityEvent.TYPE_VIEW_TEXT_CHANGED);}public float getRoll() {return mRoll;} -
Modify the
colors.xmlresource file to include color values for the border gradient, the glass compass shading, the sky, and the ground. Also update the colors used for the border and the face markings:<?xml version="1.0" encoding="utf-8"?><resources><color name="background_color">#F000</color><color name="marker_color">#FFFF</color><color name="text_color">#FFFF</color><color name="shadow_color">#7AAA</color><color name="outer_border">#FF444444</color><color name="inner_border_one">#FF323232</color><color name="inner_border_two">#FF414141</color><color name="inner_border">#FFFFFFFF</color><color name="horizon_sky_from">#FFA52A2A</color><color name="horizon_sky_to">#FFFFC125</color><color name="horizon_ground_from">#FF5F9EA0</color><color name="horizon_ground_to">#FF00008B</color></resources> -
The
PaintandShaderobjects used for the sky and ground in the artificial horizon are created based on the size of the current View, so they can’t be static like thePaintobjects you created in Chapter 5 . Instead of creatingPaintobjects, update the constructor of theCompassViewclass to construct the gradient arrays and colors they use. The existing method code can be left largely intact, with some changes to thetextPaint,circlePaint, andmarkerPaintvariables, as highlighted in the following code:int[] borderGradientColors;float[] borderGradientPositions;int[] glassGradientColors;float[] glassGradientPositions;intskyHorizonColorFrom;int skyHorizonColorTo;int groundHorizonColorFrom;int groundHorizonColorTo;public CompassView(Context context, AttributeSet attrs,int defStyleAttr) {setFocusable(true);final TypedArray a = context.obtainStyledAttributes(attrs,R.styleable.CompassView, defStyleAttr, 0);if (a.hasValue(R.styleable.CompassView_bearing)) {setBearing(a.getFloat(R.styleable.CompassView_bearing, 0));}Context c = this.getContext();Resources r = this.getResources();circlePaint = new Paint(Paint.ANTI_ALIAS_FLAG);circlePaint.setColor(ContextCompat.getColor(c,R.color.background_color));circlePaint.setStrokeWidth(1);circlePaint.setStyle(Paint.Style.STROKE);northString = r.getString(R.string.cardinal_north);eastString = r.getString(R.string.cardinal_east);southString = r.getString(R.string.cardinal_south);westString = r.getString(R.string.cardinal_west);textPaint = new Paint(Paint.ANTI_ALIAS_FLAG);textPaint.setColor(ContextCompat.getColor(c,R.color.text_color));textPaint.setFakeBoldText(true);textPaint.setSubpixelText(true);textPaint.setTextAlign(Align.LEFT);textPaint.setTextSize(30);textHeight = (int)textPaint.measureText("yY");markerPaint = new Paint(Paint.ANTI_ALIAS_FLAG);markerPaint.setColor(r.getColor(R.color.marker_color));markerPaint.setAlpha(200);markerPaint.setStrokeWidth(1);markerPaint.setStyle(Paint.Style.STROKE);markerPaint.setShadowLayer(2, 1, 1, ContextCompat.getColor(c,R.color.shadow_color));}-
3.1 Still within the constructor, create the color and position arrays that will be used by a radial Shader to paint the outer border:
public CompassView(Context context, AttributeSet attrs,int defStyleAttr) {[ … Existing code … ]borderGradientColors=new int[4];borderGradientPositions=new float[4];borderGradientColors[3] = ContextCompat.getColor(c,R.color.outer_border);borderGradientColors[2] = ContextCompat.getColor(c,R.color.inner_border_one);borderGradientColors[1] = ContextCompat.getColor(c,R.color.inner_border_two);borderGradientColors[0] = ContextCompat.getColor(c,R.color.inner_border);borderGradientPositions[3] = 0.0f;borderGradientPositions[2] = 1-0.03f;borderGradientPositions[1] = 1-0.06f;borderGradientPositions[0] = 1.0f;} -
3.2 Then create the radial gradient color and position arrays that will be used to create the semitransparent “glass dome” that sits on top of the View to give it the illusion of depth:
public CompassView(Context context, AttributeSet attrs,int defStyleAttr) {[ … Existing code … ]glassGradientColors = new int[5];glassGradientPositions = new float[5];int glassColor = 245;glassGradientColors[4] = Color.argb(65, glassColor,glassColor, glassColor);glassGradientColors[3] = Color.argb(100, glassColor,glassColor, glassColor);glassGradientColors[2] = Color.argb(50, glassColor,glassColor, glassColor);glassGradientColors[1] = Color.argb(0, glassColor,glassColor, glassColor);glassGradientColors[0] = Color.argb(0, glassColor,glassColor, glassColor);glassGradientPositions[4] = 1-0.0f;glassGradientPositions[3] = 1-0.06f;glassGradientPositions[2] = 1-0.10f;glassGradientPositions[1] = 1-0.20f;glassGradientPositions[0] = 1-1.0f;} -
3.3 Finally, get the colors you’ll use to create the linear gradients that will represent the sky and the ground in the artificial horizon:
public CompassView(Context context, AttributeSet attrs,int defStyleAttr) {[ … Existing code … ]skyHorizonColorFrom= ContextCompat.getColor(c,R.color.horizon_sky_from);skyHorizonColorTo = ContextCompat.getColor(c,R.color.horizon_sky_to);groundHorizonColorFrom = ContextCompat.getColor(c,R.color.horizon_ground_from);groundHorizonColorTo = ContextCompat.getColor(c,R.color.horizon_ground_to);}
-
3.1 Still within the constructor, create the color and position arrays that will be used by a radial Shader to paint the outer border:
-
Before you start drawing the face, create a new
enumthat stores each of the cardinal directions:private enum CompassDirection { N, NNE, NE, ENE,E, ESE, SE, SSE,S, SSW, SW, WSW,W, WNW, NW, NNW } -
Now you need to completely replace the existing
onDrawmethod. You start by figuring out some size-based values, including the center of the View, the radius of the circular control, and the rectangles that will enclose the outer (heading) and inner (tilt and roll) face elements. To start, replace the existingonDrawmethod:@Overrideprotected void onDraw(Canvas canvas) { -
Calculate the width of the outer (heading) ring based on the size of the font used to draw the heading values:
float ringWidth = textHeight + 4; -
Calculate the height and width of the View, and use those values to establish the radius of the inner and outer face dials, as well as to create the bounding boxes for each face:
int height = getMeasuredHeight();int width = getMeasuredWidth();int px = width/2;int py = height/2;Point center = new Point(px, py);int radius = Math.min(px, py)-2;RectF boundingBox = new RectF(center.x - radius,center.y - radius,center.x + radius,center.y + radius);RectF innerBoundingBox = new RectF(center.x - radius + ringWidth,center.y - radius + ringWidth,center.x + radius - ringWidth,center.y + radius - ringWidth);float innerRadius = innerBoundingBox.height()/2; -
With the dimensions of the View established, it’s time to start drawing the faces.
Start from the bottom layer at the outside, and work your way in and up, starting with the outer face (heading). Create a new
RadialGradientShader using the colors and positions you defined in Step 3.2, and assign that Shader to a new Paint before using it to draw a circle:RadialGradient borderGradient = new RadialGradient(px, py, radius,borderGradientColors, borderGradientPositions, TileMode.CLAMP);Paint pgb = new Paint();pgb.setShader(borderGradient);Path outerRingPath = new Path();outerRingPath.addOval(boundingBox, Direction.CW);canvas.drawPath(outerRingPath, pgb); -
Now you need to draw the artificial horizon. You do this by dividing the circular face into two sections, one representing the sky and the other the ground. The proportion of each section depends on the current pitch.
Start by creating the
ShaderandPaintobjects that will be used to draw the sky and earth:LinearGradient skyShader = new LinearGradient(center.x,innerBoundingBox.top, center.x, innerBoundingBox.bottom,skyHorizonColorFrom, skyHorizonColorTo, TileMode.CLAMP);Paint skyPaint = new Paint();skyPaint.setShader(skyShader);LinearGradient groundShader = new LinearGradient(center.x,innerBoundingBox.top, center.x, innerBoundingBox.bottom,groundHorizonColorFrom, groundHorizonColorTo, TileMode.CLAMP);Paint groundPaint = new Paint();groundPaint.setShader(groundShader); -
Normalize the pitch and roll values to clamp them within ±90 degrees and ±180 degrees, respectively:
float tiltDegree = mPitch;while (tiltDegree > 90 || tiltDegree < -90) {if (tiltDegree > 90) tiltDegree = -90 + (tiltDegree - 90);if (tiltDegree < -90) tiltDegree = 90 - (tiltDegree + 90);}float rollDegree = mRoll;while (rollDegree > 180 || rollDegree < -180) {if (rollDegree > 180) rollDegree = -180 + (rollDegree - 180);if (rollDegree < -180) rollDegree = 180 - (rollDegree + 180);} -
Create paths that will fill each segment of the circle (ground and sky). The proportion of each segment should be related to the clamped pitch:
Path skyPath = new Path();skyPath.addArc(innerBoundingBox,-tiltDegree,(180 + (2 * tiltDegree))); -
Spin the canvas around the center in the opposite direction to the current roll, and draw the sky and ground paths using the Paints you created in Step 4:
canvas.save();canvas.rotate(-rollDegree, px, py);canvas.drawOval(innerBoundingBox, groundPaint);canvas.drawPath(skyPath, skyPaint);canvas.drawPath(skyPath, markerPaint); -
Next is the face marking. Start by calculating the start and endpoints for the horizontal horizon markings:
int markWidth = radius / 3;int startX = center.x - markWidth;int endX = center.x + markWidth; -
To make the horizon values easier to read, you should ensure that the pitch scale always starts at the current value. The following code calculates the position of the UI between the ground and sky on the horizon face:
double h = innerRadius*Math.cos(Math.toRadians(90-tiltDegree));double justTiltY = center.y - h; -
Find the number of pixels representing each degree of tilt:
float pxPerDegree = (innerBoundingBox.height()/2)/45f; -
Iterate over 180 degrees, centered on the current tilt value, to give a sliding scale of possible pitch:
for (int i = 90; i >= -90; i -= 10) {double ypos = justTiltY + i*pxPerDegree;// Only display the scale within the inner face.if ((ypos < (innerBoundingBox.top + textHeight)) ||(ypos > innerBoundingBox.bottom - textHeight))continue;// Draw a line and the tilt angle for each scale increment.canvas.drawLine(startX, (float)ypos,endX, (float)ypos,markerPaint);int displayPos = (int)(tiltDegree - i);String displayString = String.valueOf(displayPos);float stringSizeWidth = textPaint.measureText(displayString);canvas.drawText(displayString,(int)(center.x-stringSizeWidth/2),(int)(ypos)+1,textPaint);} -
Draw a thicker line at the earth/sky interface. Change the stroke thickness of the
markerPaintobject before drawing the line (and then set it back to the previous value):markerPaint.setStrokeWidth(2);canvas.drawLine(center.x - radius / 2,(float)justTiltY,center.x + radius / 2,(float)justTiltY,markerPaint);markerPaint.setStrokeWidth(1); -
To make it easier to read the exact roll, you should draw an arrow and display a text string that shows the value.
Create a new
Path, and use themoveTo/lineTomethods to construct an open arrow that points straight up. Draw the path and a text string that shows the current roll:// Draw the arrowPath rollArrow = new Path();rollArrow.moveTo(center.x - 3, (int)innerBoundingBox.top + 14);rollArrow.lineTo(center.x, (int)innerBoundingBox.top + 10);rollArrow.moveTo(center.x + 3, innerBoundingBox.top + 14);rollArrow.lineTo(center.x, innerBoundingBox.top + 10);canvas.drawPath(rollArrow, markerPaint);// Draw the stringString rollText = String.valueOf(rollDegree);double rollTextWidth = textPaint.measureText(rollText);canvas.drawText(rollText,(float)(center.x - rollTextWidth / 2),innerBoundingBox.top + textHeight + 2,textPaint); -
Spin the canvas back to upright so that you can draw the rest of the face markings:
canvas.restore(); -
Draw the roll dial markings by rotating the canvas 10 degrees at a time, drawing a value every 30 degrees and otherwise draw a mark. When you’ve completed the face, restore the canvas to its upright position:
canvas.save();canvas.rotate(180, center.x, center.y);for (int i = -180; i < 180; i += 10) {// Show a numeric value every 30 degreesif (i % 30 == 0) {String rollString = String.valueOf(i*-1);float rollStringWidth = textPaint.measureText(rollString);PointF rollStringCenter =new PointF(center.x-rollStringWidth/2,innerBoundingBox.top+1+textHeight);canvas.drawText(rollString,rollStringCenter.x, rollStringCenter.y,textPaint);}// Otherwise draw a marker lineelse {canvas.drawLine(center.x, (int)innerBoundingBox.top,center.x, (int)innerBoundingBox.top + 5,markerPaint);}canvas.rotate(10, center.x, center.y);}canvas.restore(); -
The final step in creating the face is drawing the heading markers around the outside edge:
canvas.save();canvas.rotate(-1*(mBearing), px, py);double increment = 22.5;for (double i = 0; i < 360; i += increment) {CompassDirection cd = CompassDirection.values()[(int)(i / 22.5)];String headString = cd.toString();float headStringWidth = textPaint.measureText(headString);PointF headStringCenter =new PointF(center.x - headStringWidth / 2,boundingBox.top + 1 + textHeight);if (i % increment == 0)canvas.drawText(headString,headStringCenter.x, headStringCenter.y,textPaint);elsecanvas.drawLine(center.x, (int)boundingBox.top,center.x, (int)boundingBox.top + 3,markerPaint);canvas.rotate((int)increment, center.x, center.y);}canvas.restore(); -
With the face complete, you can add some finishing touches.
Start by adding a “glass dome” over the top to give the illusion of a watch face. Using the radial gradient array you constructed earlier, create a new
ShaderandPaintobject. Use them to draw a circle over the inner face that makes it look like it’s covered in glass:RadialGradient glassShader =new RadialGradient(px, py, (int)innerRadius,glassGradientColors,glassGradientPositions,TileMode.CLAMP);Paint glassPaint = new Paint();glassPaint.setShader(glassShader);canvas.drawOval(innerBoundingBox, glassPaint); -
All that’s left is to draw two more circles as clean borders for the inner and outer face boundaries. Then restore the canvas to upright, and finish the
onDrawmethod:// Draw the outer ringcanvas.drawOval(boundingBox, circlePaint);// Draw the inner ringcirclePaint.setStrokeWidth(2);canvas.drawOval(innerBoundingBox, circlePaint);}
If you run the parent activity, you will see an artificial horizon, as shown at the beginning of this example in Figure 14-3 .
Creating Interactive Controls
The primary interaction model for Android Devices is through the touch screen, however—as noted above in the accessibility section—you can’t take this for granted. As Android continues to expand to devices including TVs and laptop form factors, your app must consider that user input may also come from D-pads, keyboards, and mice.
The challenge for you as a developer is to create intuitive UIs that make the most of whatever input hardware is available, while introducing as few hardware dependencies as possible.
The techniques described in this section show how to listen for (and react to) user input from touch-screen taps and key presses using the following event handlers in Views and Activities:
-
onTouchEvent—The touch-screen event handler, triggered when the touch screen is touched, released, or dragged -
onKeyDown—Called when any hardware key is pressed -
onKeyUp—Called when any hardware key is released
Using the Touch Screen
The physical size and dimensions of mobile devices are inexorably tied to the size of their touch screens, so it should come as no surprise that touch screen input is all about fingers—a design principle that assumes users will use their fingers rather than a specialized stylus to touch the screen and navigate your UI.
Finger-based touch makes interaction less precise and is often based more on movement than simple contact. Android’s native applications make extensive use of finger-based, touch-screen UIs—including the use of dragging motions to scroll through lists, swipe between screens, or perform actions.
Android supports two types of touch interactions: traditional touch interactions using a finger or stylus and “faketouch” where a trackpad or mouse input is interpreted as touch input events. By default, all Android apps require faketouch support, making them compatible with devices such as TVs and laptops without a touch screen.
If you’d like your app to be available
only
on devices with a real touch screen you must specify this in your manifest by adding
required="true"
to the
android.hardware.touchscreen
feature:
<manifest xmlns_android=http://schemas.android.com/apk/res/android… ><uses-feature android:name="android.hardware.touchscreen"android:required="true" /></manifest>
To create a View or Activity that uses touch-screen interaction (including faketouch), override the
onTouchEvent
handler:
@Overridepublic boolean onTouchEvent(MotionEvent event) {return super.onTouchEvent(event);}
Return
true
if you have handled the screen press; otherwise, return
false
to pass events down through the View stack until the touch has been successfully handled.
Processing Single and Multiple Touch Events
For each gesture, the
onTouchEvent
handler is fired several times. Starting when the user touches the screen, multiple times while the system tracks the current finger position, and, finally, once more when the contact ends.
Android supports processing an arbitrary number of simultaneous touch events. Each touch event is allocated a separate pointer identifier that is referenced in the Motion Event parameter of the
onTouchEvent
handler.
Call
getAction
on the
MotionEvent
parameter to find the event type that triggered the handler. For either a single touch device, or the first touch event on a multi-touch device, you can use the
ACTION_UP[DOWN/MOVE/CANCEL/OUTSIDE]
constants to find the event type:
@Overridepublic boolean onTouchEvent(MotionEvent event) {int action = event.getAction();switch (action) {case (MotionEvent.ACTION_DOWN):// Touch screen pressedreturn true;case (MotionEvent.ACTION_MOVE):// Contact has moved across screenreturn true;case (MotionEvent.ACTION_UP):// Touch screen touch endedreturn true;case (MotionEvent.ACTION_CANCEL):// Touch event cancelledreturn true;case (MotionEvent.ACTION_OUTSIDE):// Movement has occurred outside the// bounds of the current screen elementreturn true;default: return super.onTouchEvent(event);}}
To track touch events from multiple pointers, you need to apply the
MotionEvent.ACTION_MASK
and
MotionEvent.ACTION_POINTER_INDEX_MASK
constants to find the touch event (either
ACTION_POINTER_DOWN
or
ACTION_POINTER_UP
) and the pointer ID that triggered it, respectively. Call
getPointerCount
to find if this is a multiple-touch event:
@Overridepublic boolean onTouchEvent(MotionEvent event) {int action = event.getAction();if (event.getPointerCount() > 1) {int actionPointerId = action & MotionEvent.ACTION_POINTER_INDEX_MASK;int actionEvent = action & MotionEvent.ACTION_MASK;// Do something with the pointer ID and event.}return super.onTouchEvent(event);}
The Motion Event also includes the coordinates of the current screen contact. You can access these coordinates using the
getX
and
getY
methods. These methods return the coordinate relative to the responding View or Activity.
In the case of multiple-touch events, each Motion Event includes the current position of each pointer. To find the position of a given pointer, pass its index into the
getX
or
getY
methods. Note that its index is
not
equivalent to the pointer ID. To find the index for a given pointer, use the
findPointerIndex
method, passing in the pointer ID whose index you need:
int xPos = -1;int yPos = -1;if (event.getPointerCount() > 1) {int actionPointerId = action & MotionEvent.ACTION_POINTER_INDEX_MASK;int actionEvent = action & MotionEvent.ACTION_MASK;int pointerIndex = event.findPointerIndex(actionPointerId);xPos = (int)event.getX(pointerIndex);yPos = (int)event.getY(pointerIndex);}else {// Single touch event.xPos = (int)event.getX();yPos = (int)event.getY();}
The Motion Event parameter also includes the pressure being applied to the screen using
getPressure
, a method that returns a value usually between 0 (no pressure) and 1 (normal pressure).
You use the
getToolType
method to determine whether the touch event was from a finger, mouse, stylus, or eraser, allowing you to handle them differently.
Finally, you can also determine the normalized size of the current contact area by using the
getSize
method. This method returns a value between 0 and 1, where 0 suggests a precise measurement and 1 indicates a possible “fat touch” event in which the user may not have intended to press anything.
Tracking Movement
Whenever the current touch contact position, pressure, or size changes, a new
onTouchEvent
is triggered with an
ACTION_MOVE
action.
The Motion Event parameter can include historical values, in addition to the fields described previously. This history represents all the movement events that have occurred between the previously handled
onTouchEvent
and this one, allowing Android to buffer rapid movement changes to provide fine-grained capture of movement data.
You can find the size of the history by calling
getHistorySize
, which returns the number of movement positions available for the current event. You can then obtain the times, pressures, sizes, and positions of each of the historical events by using a series of
getHistorical*
methods and passing in the position index. Note that as with the
getX
and
getY
methods described earlier, you can pass in a pointer index value to track historical touch events for multiple cursors:
int historySize = event.getHistorySize();if (event.getPointerCount() > 1) {int actionPointerId = action & MotionEvent.ACTION_POINTER_ID_MASK;int pointerIndex = event.findPointerIndex(actionPointerId);for (int i = 0; i < historySize; i++) {float pressure = event.getHistoricalPressure(pointerIndex, i);float x = event.getHistoricalX(pointerIndex, i);float y = event.getHistoricalY(pointerIndex, i);float size = event.getHistoricalSize(pointerIndex, i);long time = event.getHistoricalEventTime(i);// TODO Do something with each point}}else {for (int i = 0; i < historySize; i++) {float pressure = event.getHistoricalPressure(i);float x = event.getHistoricalX(i);float y = event.getHistoricalY(i);float size = event.getHistoricalSize(i);// TODO Do something with each point}}
The normal pattern for handling movement events is to process each of the historical events first, followed by the current Motion Event values, as shown in Listing 14-6 .
Using an On Touch Listener
You can listen for touch events without subclassing an existing View by attaching an
OnTouchListener
to any
View
object, using the
setOnTouchListener
method:
myView.setOnTouchListener(new OnTouchListener() {public boolean onTouch(View view, MotionEvent event) {// TODO Respond to motion eventsreturn false;}});
Using the Device Keys, Buttons, and D-Pad
Button and key-press events for all hardware keys are handled by the
onKeyDown
and
onKeyUp
handlers of the active Activity or the focused View. This includes keyboard keys, the D-pad, and the back button. The only exception is the
home
key, which is reserved to ensure that users can never get locked within an application.
To have your View or Activity react to button presses, override the
onKeyUp
and
onKeyDown
event handlers:
@Overridepublic boolean onKeyDown(int keyCode, KeyEvent event) {// Perform on key pressed handling, return true if handledreturn false;}@Overridepublic boolean onKeyUp(int keyCode, KeyEvent event) {// Perform on key released handling, return true if handledreturn false;}
The
keyCode
parameter contains the value of the key being pressed; compare it to the static key code values available from the
KeyEvent
class to perform key-specific processing.
The
KeyEvent
parameter also includes the
isCtrlPressed
,
isAltPressed
,
isShiftPressed
,
isFunctionPressed
, and
isSymPressed
methods to determine if the Control, Alt, Shift, function, or symbols keys are also being held. The static
isModifierKey
method accepts the
keyCode
and determines whether this key event was triggered by the user pressing one of these modifier keys.
Using the On Key Listener
To respond to key presses within existing Views in your Activities, implement an
OnKeyListener
, and assign it to a View using the
setOnKeyListener
method. Rather than implementing a separate method for key-press and key-release events, the
OnKeyListener
uses a single
onKey
event:
myView.setOnKeyListener(new OnKeyListener() {public boolean onKey(View v, int keyCode, KeyEvent event) {// TODO Process key press event, return true if handledreturn false;}});
Use the
keyCode
parameter to find the key pressed. The
KeyEvent
parameter is used to determine if the key has been pressed or released, where
ACTION_DOWN
represents a key press and
ACTION_UP
signals its release.
COMPOSITE DRAWABLE RESOURCES
In Chapter 12 , “Implementing the Android Design Philosophy,” you examined a number of scalable Drawable resources, including shapes, colors, and vectors. This section introduces a number of additional XML-defined Drawables.
Composite Drawables are used to combine and manipulate other Drawable resources. You can use any Drawable resource within the following composite resource definitions, including bitmaps, shapes, and colors. Similarly, you can use these new Drawables within each other and assign them to Views in the same way as all other Drawable assets.
Transformative Drawables
You can scale and rotate existing Drawable resources using the aptly named
ScaleDrawable
and
RotateDrawable
classes. These transformative Drawables are particularly useful for creating progress bars or animating Views:
-
ScaleDrawable
—Within the
scaletag, use thescaleHeightandscaleWidthattributes to define the target height and width relative to the bounding box of the original Drawable, respectively. Use thescaleGravityattribute to control the anchor point for the scaled image:<?xml version="1.0" encoding="utf-8"?><scale xmlns_android="http://schemas.android.com/apk/res/android"android:drawable="@drawable/icon"android:scaleHeight="100%"android:scaleWidth="100%"android:scaleGravity="center_vertical|center_horizontal"/> -
RotateDrawable
—Within the
rotatetag, usefromDegreesandtoDegreesto define the start and end rotation angle around a pivot point, respectively. Define the pivot using thepivotXandpivotYattributes, specifying a percentage of the Drawable’s width and height, respectively, usingnn% notation:<?xml version="1.0" encoding="utf-8"?><rotate xmlns_android="http://schemas.android.com/apk/res/android"android:drawable="@drawable/icon"android:fromDegrees="0"android:toDegrees="90"android:pivotX="50%"android:pivotY="50%"/>
To apply the scaling and rotation at run time, use the
setImageLevel
method on the View object hosting the Drawable to move between the start and finish values on a scale of 0 to 10,000. This allows you to define a single Drawable that can be modified to suit particular circumstances—such as an arrow that can point in multiple directions.
When moving through levels, level 0 represents the start angle (or smallest scale result). Level 10,000 represents the end of the transformation (the finish angle or highest scale). If you do not specify the image level, it will default to 0:
ImageView rotatingImage= findViewById(R.id.RotatingImageView);ImageView scalingImage= findViewById(R.id.ScalingImageView);// Rotate the image 50% of the way to its final orientation.rotatingImage.setImageLevel(5000);// Scale the image to 50% of its final size.scalingImage.setImageLevel(5000);
Layer Drawables
A
LayerDrawable
lets you composite several Drawable resources on top of one another. If you define an array of partially transparent Drawables, you can stack them on top of one another to create complex combinations of dynamic shapes and transformations.
Similarly, you can use Layer Drawables as the source for the transformative Drawable resources described in the preceding section, or the State List and Level List Drawables that follow.
Layer Drawables are defined via the
layer-list
node tag. Within that tag, create a new
item
node using the
drawable
attribute to specify each Drawables to add. Each Drawable will be stacked in index order, with the first item in the array at the bottom of the stack:
<?xml version="1.0" encoding="utf-8"?><layer-list xmlns_android="http://schemas.android.com/apk/res/android"><item android:drawable="@drawable/bottomimage"/><item android:drawable="@drawable/image2"/><item android:drawable="@drawable/image3"/><item android:drawable="@drawable/topimage"/></layer-list>
State List Drawables
A State List Drawable is a composite resource that enables you to specify a different Drawable to display based on the state of the View to which it has been assigned.
Most native Android Views use State List Drawables, including the image used on Buttons and the background used for standard List View items.
To define a State List Drawable, create an XML file containing a root
selector
tag. Add a series of item nodes, each of which uses an
android:state_
attribute and
android:drawable
attribute to assign a specific Drawable to a particular state:
<selector xmlns_android="http://schemas.android.com/apk/res/android"><item android:state_pressed="true"android:drawable="@drawable/widget_bg_pressed"/><item android:state_focused="true"android:drawable="@drawable/widget_bg_selected"/><item android:state_window_focused="false"android:drawable="@drawable/widget_bg_normal"/><item android:drawable="@drawable/widget_bg_normal"/></selector>
Each state attribute can be set to
true
or
false
, allowing you to specify a different Drawable for each combination of the following list View states:
-
android:state_pressed—Pressed or not pressed. -
android:state_focused—Has focus or does not have focus. -
android:state_hovered—Introduced in API Level 11, the cursor is hovering over the view or is not hovering. -
android:state_selected—Selected or not selected. -
android:state_checkable—Can or can’t be checked. -
android:state_checked—Is or isn’t checked. -
android:state_enabled—Enabled or disabled. -
android:state_activated—Activated or not activated. -
android:state_window_focused—The parent window has focus or does not have focus.
When deciding which Drawable to display for a given View, Android will apply the first item in the state list that matches the current state of the object. As a result, your default value should be the last in the list.
Level List Drawables
Using a Level List Drawable you can create an array of Drawable resources, assigning an integer index value for each layer. Use the
level-list
node to create a new Level List Drawable, using
item
nodes to define each layer, with
android:drawable
/
android:maxLevel
attributes defining the Drawable for each layer and its corresponding index:
<level-list xmlns_android="http://schemas.android.com/apk/res/android"><item android:maxLevel="0" android:drawable="@drawable/earthquake_0"/><item android:maxLevel="1" android:drawable="@drawable/earthquake_1"/><item android:maxLevel="2" android:drawable="@drawable/earthquake_2"/><item android:maxLevel="4" android:drawable="@drawable/earthquake_4"/><item android:maxLevel="6" android:drawable="@drawable/earthquake_6"/><item android:maxLevel="8" android:drawable="@drawable/earthquake_8"/><item android:maxLevel="10" android:drawable="@drawable/earthquake_10"/></level-list>
To select which image to display in code, call
setImageLevel
on the View displaying the Level List Drawable resource, passing in the index of the Drawable you want to display:
imageView.setImageLevel(5);
The View will display the image corresponding to the index with an equal or greater value to the one specified.
COPY, PASTE, AND THE CLIPBOARD
Android includes full support for copy and paste operations within (and between) Android applications using the Clipboard Manager:
ClipboardManager clipboard =(ClipboardManager)getSystemService(CLIPBOARD_SERVICE);
The clipboard supports text strings, URIs (typically directed at a Content Provider item), and Intents (for copying application shortcuts). To copy an object to the clipboard, create a new
ClipData
object that contains a
ClipDescription
that describes the metadata related to the copied object, and any number of
ClipData.Item
objects, as described in the following section. Add it to the clipboard using the
setPrimaryClip
method:
clipboard.setPrimaryClip(newClip);
The clipboard can contain only one Clip Data object at any time. Copying a new object replaces the previously held clipboard item. As a result, you can assume neither that your application will be the last to have copied something to the clipboard nor that it will be the only application that pastes it.
Copying Data to the Clipboard
The
ClipData
class includes a number of static convenience methods to simplify the creation of typical Clip Data objects. Use the
newPlainText
method to create a new Clip Data that includes the specified string, sets the description to the label provided, and sets the MIME type to
MIMETYPE_TEXT_PLAIN
:
ClipData newClip = ClipData.newPlainText("copied text","Hello, Android!");
For Content Provider-based items, use the
newUri
method, specifying a Content Resolver, label, and URI from which the data is to be pasted:
ClipData newClip = ClipData.newUri(getContentResolver(),"URI", myUri);
Pasting Clipboard Data
To provide a good user experience, you should enable and disable the paste option from your UI based on whether there is data copied to the clipboard. You can do this by querying the clipboard service using the
hasPrimaryClip
method:
if (!(clipboard.hasPrimaryClip())) {// TODO Disable paste UI option.}
It’s also possible to query the data type of the Clip Data object currently in the clipboard. Use the
getPrimaryClipDescription
method to extract the metadata for the clipboard data, using its
hasMimeType
method to specify the MIME type you support pasting into your application:
if (!(clipboard.getPrimaryClipDescription().hasMimeType(MIMETYPE_TEXT_PLAIN))){// TODO Disable the paste UI option if the content in// the clipboard is not of a supported type.}else{// TODO Enable the paste UI option if the clipboard contains data// of a supported type.}
To access the data itself, use the
getItemAt
method, passing in the index of the item you want to retrieve:
ClipData.Item item = clipboard.getPrimaryClip().getItemAt(0);
You can extract the text, URI, or Intent using the
getText
,
getUri
, and
getIntent
methods, respectively:
CharSequence pasteData = item.getText();Intent pastIntent = item.getIntent();Uri pasteUri = item.getUri();
It’s also possible to paste the content of any clipboard item, even if your application supports only text. Using the
coerceToText
method you can transform the contents of a
ClipData.Item
object into a string:
CharSequence pasteText = item.coerceToText(this);
15
Location, Contextual Awareness, and Mapping
ADDING LOCATION, MAPS, AND CONTEXTUAL AWARENESS TO YOUR APPLICATIONS
One of the defining features of mobile devices is their portability, so it’s not surprising that some of the most enticing APIs are those that enable you to find, contextualize, and map the user’s physical location, environment, and context. In this chapter you learn how to install and use Google Play services to take advantage of these powerful and efficient APIs.
Location Services enable you to find the device’s current location, and get updates as it changes. You’ll learn how to use the Fused Location Provider to take advantage of underlying GPS-, cell-, or Wi-Fi-based location-sensing technologies. You’ll also learn about the legacy platform location-based services (LBS) and how to use them when Google Play services aren’t available.
Using the Google Maps API, also included as part of the Google Play services library, you can create map-based Activities using Google Maps as a user interface element. You have full access to the map, which enables you to control the camera position, alter the zoom level, and annotate maps using markers, shapes, and image overlays—as well as handling user interactions.
Maps and location-based services use latitude and longitude to pinpoint geographic locations, but your users are more likely to think in terms of a street address. Android includes a geocoder that you can use to convert back and forth between latitude/longitude values and real-world addresses.
Finally, you are introduced to the Awareness API that helps you understand and react to changes in your user’s context. The Awareness API combines device state with the results from a dozen different sensors, and additional web-sourced environmental information such as weather. It provides access to this information through snapshots or “fences” in a way that’s fast and battery efficient.
INTRODUCING GOOGLE PLAY SERVICES
The Google Play services SDK (often referred to as Play Services or GMS ) is a set of libraries that you can include in your projects to access over 20 Google-proprietary features including Location Services, Google Maps, and the Awareness APIs—each of which is described within this chapter.
Like the support package introduced in Chapter 2 , “Getting Started,” Google Play services APIs often replace or extend framework API features, helping you provide a consistently updated user experience—as well as taking advantage of new features, bug fixes, and efficiencies.
Like the Android Support Library and SDK platform releases, new versions of the Google Play services client library are delivered through the Android SDK Manager. Note that like the support library, Google Play services are updated far more frequently than the Android platform SDK.
By downloading new versions of the SDK, and updating your dependencies to reference the newest releases, you can continue to incorporate bug fixes and improvements to your app as the Google Play services are updated. The Google Play services libraries interact with the Google Play services application, which is automatically distributed and updated through the Google Play store. The Google Play services app runs as a background service on supported devices.
Unlike the Android Support Library, Google Play services are not guaranteed to be available on all Android devices. Because the Google Play services SDK depends on the Google Play services APK, which is delivered through the Google Play Store, both must be installed on the host device in order for your app to successfully use the SDK.
It’s good practice to use the Google Play services SDK, rather than the framework API libraries, whenever the host device is capable of supporting them.
Adding Google Play Services to Your Application
To incorporate Google Play services into your project, start by downloading the Google Play services SDK.
Within Android Studio, open the SDK Manager ( Figure 15-1 ), which is available through a shortcut on the toolbar, or from within the Android Studio settings dialog. It offers a tab for SDK Platforms and SDK Tools.
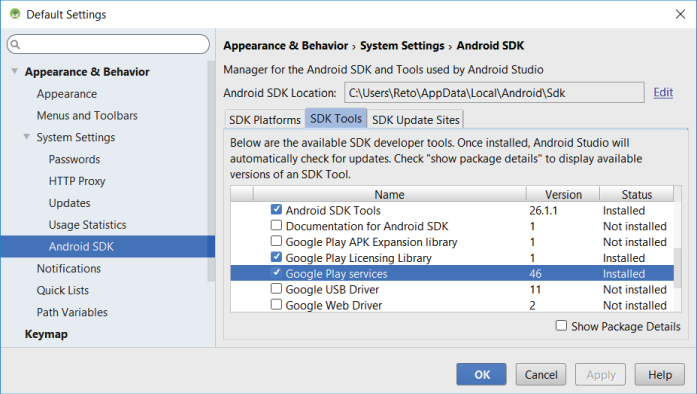
The SDK Tools tab shows which SDK, platform, and build tools you have downloaded, as well as the support repository, emulator, and Google Play services SDK.
Ensure the Google Play services check box is ticked, and click Apply or OK to download and install the SDK.
Once the SDK is installed, you can add it as a dependency to your application’s project using your application module’s
build.gradle
file within the dependencies node:
dependencies {…implementation 'com.google.android.gms:play-services:15.0.1'}
Alternatively, you can use Android Studio’s Project Structure UI as shown in
Figure 15-2
. Click File
![]() Project Structure, select “app” within the Modules section of the left navigation, and then choose the Dependencies tab. Add a new library by selecting the green “+” symbol and indicating the desired library.
Project Structure, select “app” within the Modules section of the left navigation, and then choose the Dependencies tab. Add a new library by selecting the green “+” symbol and indicating the desired library.

The Google Play services SDK contains more than 20 individual libraries, each of which offers an API related to a specific Google Service. The dependency declaration in the preceding code snippet includes all the Google Play services libraries, many of which you may not use.
Instead, it’s best practice to include only the libraries you plan to use within your application, as shown in Listing 15-1 , which adds only the Location, Maps, and Awareness libraries. Note again that the version number specified here should be updated to correspond to the SDK version you are developing against.
You can find a full list of the available Google Play services libraries and their
build.gradle
descriptions at
developers.google.com/android/guides/setup
.
Notice that we’re adding a dependency to a specific version of Google Play services. New releases of the Google Play services APK are regularly distributed, automatically, to all supported devices through the Google Play Store. It’s best practice to update your app dependencies to the latest version of Google Play services so that you can take advantage of bug fixes, new features, and efficiency improvements. To update the version of Google Play services used by your app, install the updated SDK and modify your dependency node accordingly.
Determining the Availability of Google Play Services
The Google Play services APK is delivered and updated on all Android devices running Google Play. However, updates can take time to roll out to all devices so it’s possible that a user’s device will receive your updated application before it receives the Google Play services update upon which your app depends.
If you are using the Google Maps or Location Services, or using the Google API Client to connect to any of the other Google Services, the API will handle situations where a compatible device is running an outdated, missing, or disabled Google Play services APK.
For issues that can be resolved by the user at run time, a dialog will be displayed with instructions on how to fix the error.
Should you choose to distribute your app outside the Google Play ecosystem, it may be installed and run on a device that doesn’t include, or support, Google Play services; in this case you will need to consider how to handle the missing libraries.
For some, such as location-based services, you may be able to fall back on platform functionality. In others, such as mapping, you may consider reverting to an alternative library such as Open Street Map. In the most extreme case, where critical functionality requires Google Play services, you may choose to display an error, disable functionality, or even force an exit of the application. You can detect the availability (or lack thereof) of Google Play services by looking for an unresolvable error using the
isGooglePlayServicesAvailable
method on the
GoogleApiAvailability
class as shown in
Listing 15-2
.
FINDING DEVICE LOCATION USING GOOGLE LOCATION SERVICES
The Location Services library, offered through Google Play services, provides a best-practice wrapper around a number of different platform technologies used to find and monitor a device’s location. In addition to dramatically simplifying the process of using location services within your app, the Google Play Location Services also offer a dramatic improvement in accuracy and battery efficiency.
Using the Location Service, you can do the following:
- Obtain your current location
- Follow movement
- Set geofences for detecting movement into and out of a specified area
Access to the Location Services is provided by the Google Play service location library, which must be added as a dependency to your app module’s
build.gradle
file after you’ve installed Google Play services as described earlier in this chapter:
dependencies {[… Existing dependencies …]implementation 'com.google.android.gms:play-services-location:15.0.1'}
Obtaining the current device location requires one of two
uses-permission
tags in your manifest, specifying the degree of location accuracy you require, where:
- Fine represents high accuracy, and will enable you to receive the most accurate possible location to the maximum resolution supported by the hardware.
- Coarse represents low accuracy, limiting the resolution of returned location results to approximately a city block.
The following snippet shows how to request the fine and coarse permissions in your application manifest; note that requesting/granting fine permission implicitly grants coarse permission:
<uses-permission android:name="android.permission.ACCESS_FINE_LOCATION"/><uses-permission android:name="android.permission.ACCESS_COARSE_LOCATION"/>
Both location permissions are marked as dangerous, meaning you need to check for—and if necessary request, and be granted—runtime user permission before you can receive location results, as shown in Listing 15-3 .
The
requestPermissions
method runs asynchronously, displaying a standard Android dialog that can’t be customized. You can receive a callback when the user has either accepted or denied your runtime request, by overriding the
onRequestPermissionsResult
handler:
@Overridepublic void onRequestPermissionsResult(int requestCode,@NonNull String[] permissions,@NonNull int[] grantResults) {super.onRequestPermissionsResult(requestCode, permissions, grantResults);// TODO React to granted / denied permissions.}
It’s common practice to listen for this callback, and if permission is granted, to execute the functionality that was previously protected by the permission check.
To find or follow the device location, use the Fused Location Provider (FLP). The FLP uses a combination of software and hardware (including Wi-Fi, GPS, and other sensors available on the device) to determine the current location in a way that optimizes both accuracy and battery power.
To access the Fused Location Provider, request an instance of the
FusedLocationProviderClient
by calling the static
getFusedLocationProviderClient
method from the
LocationServices
class, as shown in
Listing 15-4
.
Using the Emulator to Test Location-Based Functionality
All location-based functionality is dependent on the host hardware being able to determine the current location. When you develop and test with the emulator, your hardware is virtualized, and you’re likely to stay in pretty much the same location.
To compensate, Android includes hooks that enable you to emulate movement for testing location-based applications.
Updating the Emulator’s Virtual Location
Use the Location tab available from the emulator’s Extended Controls window, as shown in Figure 15-3 , to push a new location directly to the emulator.

You can specify a particular latitude/longitude pair in decimal or sexigesimal format along with an altitude value. Alternatively, click the Load GPX/KML button to import Keyhole Markup Language (KML) or GPS Exchange Format (GPX) files, respectively. After these load, you can jump to particular waypoints (locations) or play back each sequence of locations at up to 5x speed.
Enabling Location Services on the Emulator
The location results returned by the location APIs are not updated unless at least one application has requested location updates. Similarly, the techniques used to update the emulator’s location, described in the previous section, take effect only when at least one application has requested location updates from the GPS.
As a result, when the Emulator is first started, the result returned from the current location may be null.
To ensure all Location Services are enabled, and location updates are being received, you should start the Google Maps app within the emulator and accept the prompts regarding location as shown in Figure 15-4 .

Finding the Last Known Location
One of the most powerful uses of the Location Services is to find the physical location of the device. The accuracy of the returned location is dependent on the hardware available, the permissions requested by and granted to your application, and the user’s system location settings.
Using the Fused Location Provider, you can find the last location fix received by the device using the
getLastLocation
method.
The Location Service uses the Tasks API, which makes it easier to compose asynchronous operations, and handles the underlying connection process between your app and the Location Service—including the resolution for some connection failures.
As a result, to obtain the Location value, add an
OnSuccessListener
to the returned Task using the
addOnSuccessListener
method, as shown in
Listing 15-5
. The new
OnSuccessListener
should use a
Location
type, and implement the
onSuccess
handler.
Similarly, you can use the
addOnFailureListener
method to add an
OnFailureListener
whose
onFailure
method will be triggered if the Location Service is unable to successfully return a last known Location value:
fusedLocationClient.getLastLocation().addOnSuccessListener(this, new OnSuccessListener<Location>() {@Overridepublic void onSuccess(Location location) {// In some rare situations this can be null.if (location != null) {// TODO Do something with the returned location.}}}).addOnFailureListener(this, new OnFailureListener() {@Overridepublic void onFailure(@NonNull Exception e) {// TODO Failed to obtain the last location.}});
The Location object returned includes all the position information available from the provider that supplied it. This can include the time it was obtained, the accuracy of the coordinate found, and its latitude, longitude, bearing, altitude, and speed. All these properties are available via
get
methods on the Location object.
“Where Am I” Example
The following example—Where Am I—features a new Activity that finds the device’s last known location using the Fused Location Provider from the Google Play services Location Services library.
-
Create a new Where Am I project with an empty
WhereAmIActivity. This example will use fine accuracy, so you need to include theuses-permissiontag forACCESS_FINE_LOCATIONin your application manifest. We’ll also add theACCESS_COARSE_LOCATION:<?xml version="1.0" encoding="utf-8"?><manifest xmlns_android="http://schemas.android.com/apk/res/android"package="com.professionalandroid.apps.whereami"><uses-permissionandroid:name="android.permission.ACCESS_COARSE_LOCATION"/><uses-permissionandroid:name="android.permission.ACCESS_FINE_LOCATION"/><applicationandroid:allowBackup="true"android:icon="@mipmap/ic_launcher"android:label="@string/app_name"android:roundIcon="@mipmap/ic_launcher_round"android:supportsRtl="true"android:theme="@style/AppTheme"><activity android:name=".WhereAmIActivity"><intent-filter><action android:name="android.intent.action.MAIN"/><category android:name="android.intent.category.LAUNCHER"/></intent-filter></activity></application></manifest> -
Add a dependency to the Location library within the app module
build.gradlefile:dependencies {implementation fileTree(dir: 'libs', include: ['*.jar'])implementation 'com.android.support:appcompat-v7:27.1.1'implementation 'com.android.support.constraint:constraint-layout:1.1.0'testImplementation 'junit:junit:4.12'androidTestImplementation 'com.android.support.test:runner:1.0.2'androidTestImplementation 'com.android.support.test.espresso' +':espresso-core:3.0.2'implementation 'com.android.support:support-media-compat:27.1.1'implementation 'com.android.support:support-v4:27.1.1'implementation 'com.google.android.gms:play-services-location:15.0.1'} -
Modify the
activity_where_am_i.xmllayout resource to use a Linear Layout and add anandroid:idattribute for theTextViewcontrol so that you can access it from within the Activity:<?xml version="1.0" encoding="utf-8"?><LinearLayoutxmlns_android="http://schemas.android.com/apk/res/android"xmlns_app="http://schemas.android.com/apk/res-auto"xmlns_tools="http://schemas.android.com/tools"android:layout_width="match_parent"android:layout_height="match_parent"android:orientation="vertical"tools:context="com.professionalandroid.apps.whereami.WhereAmIActivity"><TextViewandroid:id="@+id/myLocationText"android:layout_width="match_parent"android:layout_height="wrap_content"android:padding="16dp"android:text="Hello World!"/></LinearLayout> -
Override the
onCreatemethod of the Where Am I Activity to confirm that Google Play services are (or could be) available on this device, and obtain a reference to the Text View from the layout:private static final String ERROR_MSG= "Google Play services are unavailable.";private TextView mTextView;@Overrideprotected void onCreate(Bundle savedInstanceState) {super.onCreate(savedInstanceState);setContentView(R.layout.activity_where_am_i);mTextView = findViewById(R.id.myLocationText);GoogleApiAvailability availability= GoogleApiAvailability.getInstance();int result = availability.isGooglePlayServicesAvailable(this);if (result != ConnectionResult.SUCCESS) {if (!availability.isUserResolvableError(result)) {Toast.makeText(this, ERROR_MSG, Toast.LENGTH_LONG).show();}}} -
We’ll update the current location each time the app becomes visible, so override the
onStartmethod to check for runtime permission to access fine location accuracy. Add the stub methodgetLastLocationto call when permission is granted or rejected:private static final int LOCATION_PERMISSION_REQUEST = 1;@Overrideprotected void onStart() {super.onStart();// Check if we have permission to access high accuracy fine location.int permission = ActivityCompat.checkSelfPermission(this,Manifest.permission.ACCESS_FINE_LOCATION);// If permission is granted, fetch the last location.if (permission == PERMISSION_GRANTED) {getLastLocation();} else {// If permission has not been granted, request permission.ActivityCompat.requestPermissions(this,new String[]{Manifest.permission.ACCESS_FINE_LOCATION},LOCATION_PERMISSION_REQUEST);}}@Overridepublic void onRequestPermissionsResult(int requestCode,@NonNull String[] permissions,@NonNull int[] grantResults) {super.onRequestPermissionsResult(requestCode, permissions,grantResults);if (requestCode == LOCATION_PERMISSION_REQUEST) {if (grantResults[0] != PERMISSION_GRANTED)Toast.makeText(this, "Location Permission Denied",Toast.LENGTH_LONG).show();elsegetLastLocation();}}private void getLastLocation() {} -
Now update the
getLastLocationstub. Get a reference to the Fused Location Provider and use thegetLastLocationmethod to find the last known location. Create a method stubupdateTextViewthat will take the returned Location and update the Text View. It’s worth noting that the Location Service is capable of detecting and resolving multiple potential issues with the Google Play services APK, so we don’t need to handle the connection or failure cases within our code:private void getLastLocation() {FusedLocationProviderClient fusedLocationClient;fusedLocationClient =LocationServices.getFusedLocationProviderClient(this);if (ActivityCompat.checkSelfPermission(this, ACCESS_FINE_LOCATION)==PERMISSION_GRANTED ||ActivityCompat.checkSelfPermission(this, ACCESS_COARSE_LOCATION)==PERMISSION_GRANTED) {fusedLocationClient.getLastLocation().addOnSuccessListener(this, new OnSuccessListener<Location>() {@Overridepublic void onSuccess(Location location) {updateTextView(location);}});}}private void updateTextView(Location location) {} -
Finally, update the
updateTextViewmethod stub to extract the latitude and longitude from each location and display it in the Text View:private void updateTextView(Location location) {String latLongString = "No location found";if (location != null) {double lat = location.getLatitude();double lng = location.getLongitude();latLongString = "Lat:" + lat + "\nLong:" + lng;}mTextView.setText(latLongString);} -
When running, your Activity should look like
Figure 15-5
.

Requesting Location Change Updates
In most circumstances, getting the last known Location is unlikely to be sufficient for your needs. Not only is the value likely to be quickly out of date, but most location-sensitive applications need to be reactive to user movement—and querying the Location Service for the last known Location does not force it to update.
The
requestLocationUpdates
method is used to request regular updates of the device’s location using a
LocationCallback
. The Location Callback also notifies you of changes to device location information availability.
The
requestLocationUpdates
method accepts a
LocationRequest
object that provides information the Fused Location Provider uses to determine the most efficient way to return results at the level of accuracy and precision required.
To optimize efficiency and minimize cost and power use, you can specify a number of criteria based on your application needs:
-
setPriority—Allows you to indicate the relative importance of reducing battery drain and getting accurate results, using one of the following constants:-
PRIORITY_HIGH_ACCURACY—Indicates that high accuracy is the priority. As a result the FLP will attempt to obtain the most precise location possible at a cost of increased battery drain. This can return results accurate to within a few feet and is typically used for mapping and navigation apps. -
PRIORITY_BALANCED_POWER_ACCURACY—Attempts to balance accuracy and power drain, resulting in precision to within a city block or approximately 100 meters. -
PRIORITY_LOW_POWER—Indicates that low battery drain is the priority. As a result, coarse location updates at city-level precision of approximately 10 kilometers are acceptable. -
PRIORITY_NO_POWER—Indicates that your app should not trigger location updates, but should receive location updates caused by other apps.
-
-
setInterval—Your preferred rate of updates in milliseconds. This will force the Location Service to attempt to update the location at this rate. Updates may be less frequent if it is unable to determine the location, or more frequent if other applications are receiving updates more often. -
setFastestInterval—The fastest update rate your application can support. Specify this if more frequent updates may cause UI issues or data overflow within your app.
Listing 15-6
shows the skeleton code for defining a Location Request that requires high accuracy updates every 5 seconds. Note that you can specify a
Looper
parameter, this allows you to schedule the callbacks on a particular thread—setting the parameter to null will force it to return on the calling thread.
When a new location update is received, the attached Location Callback executes its
onLocationResult
event.
Note that it’s possible to receive multiple Locations within a Location Result parameter; this occurs if you set the max wait time to more than twice the update interval:
LocationRequest request = new LocationRequest().setPriority(LocationRequest.PRIORITY_HIGH_ACCURACY).setInterval(5000) // Check for changes every 5s.setMaxWaitTime(25000); // App can wait up to 25s to receive updates.
The max wait time indicates the maximum amount of time your application can wait before receiving location updates, at which point it will receive a batch of all the new Locations received during that interval. This can be a useful way to improve the efficiency of your app if you need to receive updates in a short interval but don’t need to update the UI immediately, such as when tracking a path—for example, hiking or running.
To minimize the cost to battery life, you should disable updates whenever possible in your application, especially in cases where your application isn’t visible and Location updates are used only to update an Activity’s UI. You can improve performance further by making the minimum time and distance between updates as large as possible.
To remove a Location Request, call
removeLocationUpdates
, passing in the relevant Location Callback instance. It’s generally good practice to disable location updates within the
onStop
handler, as shown in
Listing 15-7
, which is triggered when your UI is no longer visible.
If you remove Location Requests when the Activity stops, you’ll need to keep track of when updates have been enabled to ensure they are restarted if the Activity is restarted due to a configuration change. You can find details for maintaining application state in Chapter 8 , “Files, Saving State, and User Preferences.”
Receiving Location Updates with Pending Intents
In rare cases, it may be necessary for your application to continue receiving location updates when it is in the background. To support this, the Fused Location Provider allows you to use Pending Intents to receive updates rather than the Location Callback.
When receiving location updates in the background, it’s important to minimize the impact on battery life. As such, it’s good practice to set the priority to low- or no-battery. To further improve battery life, on devices running Android 8.0 Oreo (API Level 26) or newer, the system strictly limits background location updates, and your app will receive updates only a few times each hour.
Rather than creating a Location Callback, you can specify a Pending Intent that will be triggered whenever the location changes or the location availability status changes. Pass the received Intent into the
hasResult
and
extractResult
methods to determine if it contains a new Location Result and to extract the Location Result, respectively.
Listing 15-8 shows how to create a Pending Intent that triggers a Broadcast Receiver to handle new location updates.
Listing 15-9 shows how to create a Broadcast Receiver that listens for changes in location broadcast using the Pending Intent as shown in Listing 15-8 .
Remember that you must add your Broadcast Receiver to the application manifest before it can begin receiving the Pending Intents.
To stop location updates, call
removeLocationUpdates
, as shown in the following code, passing in the Pending Intent that you no longer want to have broadcast:
fusedLocationClient.removeLocationUpdates(pendingIntent);
Defining Expiration Criteria for Updates
Not every app requires continuous location updates. In some cases only a single location fix is required, or updates may be required for only a short length of time to provide adequate context for the functionality they provide or information they display.
When defining your Location Request, you can indicate several additional criteria that will limit the number of location updates you receive, and will automatically remove the Location Request once the limit is reached:
-
setExpirationDuration—Updates will expire after the specified duration in milliseconds. -
setExpirationTime—Updates will expire when the elapsed real time since device boot (in milliseconds) is reached. -
setNumUpdates—Only the specified number of updates will be received.
The following snippet shows an (unlikely) Location Request that specifies an expiration duration, time, and fixed number of updates:
LocationRequest request = new LocationRequest().setExpirationDuration(3600000) // Expire in 1 hour.setExpirationTime(SystemClock.elapsedRealtime()+360000)) // Expire in 1 hour.setNumUpdates(10) // Receive 10 updates..setInterval(60000) // Update every minute..setPriority(LocationRequest.PRIORITY_NO_POWER);
If you want to start receiving more updates after an expiration condition is met, you must request location updates again.
Background Location Update Limits
In order to reduce the battery life impact of Location updates, Android 8.0 Oreo (API Level 26) introduced strict limits on the frequency at which apps can receive Location updates while they are in the background. Specifically, apps that have no active foreground Activities or Services will receive updates only a few times each hour. These new limits are applied to all apps on devices running Android 8.0 or above, irrespective of your apps’ target SDK.
Foreground apps continue to receive updates at the rate you specify. This includes apps with a visible Activity or with a running foreground Service. Location Requests that specify a max wait time will receive batches of updates at the reduced interval, making this a useful approach if your app requires frequent updates but doesn’t require them in real time.
Alternatively, the Geofencing API has been optimized for background operation and will receive transition events more frequently than Location updates from the Fused Location Provider. By comparison, Geofences are checked for transitions once every few minutes.
Changing Device Location Settings
The combination of the location accuracy permission you request and the priority of your Location Request indicates the level of location accuracy and precision your application requires. This typically corresponds to one or more hardware devices used to determine location—such as Wi-Fi and/or GPS.
For privacy and battery efficiency reasons, users can select their preferred Location mode, as shown in Figure 15-6 .

As a result, it’s possible that when your app makes a request to receive location updates, the system settings may prevent it from obtaining the accuracy of location data that it needs; for example, GPS or Wi-Fi scanning may be disabled.
To ensure your application receives Location results of the required accuracy, you can use the Google Play services Settings API to check the users’ current system-wide location settings and prompt them to modify their selection if required.
Use the static
LocationSettingsRequest.Builder
to add each of the Location Request objects your application will use to request location updates.
Get an instance of the Location Services
SettingsClient
using the
getSettingsClient
method, and use its
checkLocationSettings
method—passing in the Location Settings Request—to start a Task that will deliver a
LocationSettingsResponse
, as shown in
Listing 15-10
.
You can find the results of the Location Settings Response Task by adding
onSuccess
and
onFailure
handlers.
A successful response indicates that the location settings are sufficient for your application’s Location Request so you can initiate your location updates, as shown in Listing 15-11 .
When the
onFailure
handler of the
onFailureListener
is triggered, it indicates that the current system location settings may not be capable of satisfying the requirements you specified in your Location Requests. You can extract the status code from the returned exception to determine your next step. A status of
RESOLUTION_REQUIRED
indicates that the issue could be resolved through user action, while
SETTINGS_CHANGE_UNAVAILABLE
indicates that the issue can’t be resolved:
int statusCode = ((ApiException) e).getStatusCode();switch (statusCode) {case CommonStatusCodes.RESOLUTION_REQUIRED:// Issue can be user resolved.break;case LocationSettingsStatusCodes.SETTINGS_CHANGE_UNAVAILABLE:// Issue can't be user resolved.break;default: break;}
In the former case, you can prompt the user to change the location settings to meet your requirements by calling
startResolutionForResult
on the Resolvable API Exception received by the
onFailure
handler:
ResolvableApiException resolvable = (ResolvableApiException) e;resolvable.startResolutionForResult(MainActivity.this, CHECK_SETTINGS);
This will display a dialog, such as the one shown in Figure 15-7 , requesting the user’s permission to modify location settings as required.

The full skeleton code for an
onFailureListener
implementation that displays a user dialog requesting a change in location settings is shown in
Listing 15-12
.
The result of the user’s interaction with the dialog is returned within the
onActivityResult
handler as shown in
Listing 15-13
.
If the result is
RESULT_OK
it indicates the requested settings changes were applied, and you are free to request location updates. If
RESULT_CANCELED
is received, the user chose not to apply the requested changes.
If the user declines the requested settings changes you must decide how to respond. You could attempt to request location results knowing the accuracy is less than desired, disable the functionality that requires the updates, or—in extreme cases—display an error and exit the application.
To help decide on the best approach, you can extract additional Location Settings States from the Intent returned to the
onActivityResult
handler:
final LocationSettingsStates states =LocationSettingsStates.fromIntent(data);
The Location Settings States includes a number of methods indicating the availability and usability of location-related support including location itself, GPS, cell network/Wi-Fi, and BLE.
Updating the Location in the “Where Am I” Example
In the following example, the Where Am I project is enhanced to update your current location by listening for location changes with a 5-second interval:
-
Open the
WhereAmIActivityin the Where Am I project. Update theonCreatemethod to create a newLocationRequestthat prioritizes high accuracy and has a 5-second update interval:private LocationRequest mLocationRequest;@Overrideprotected void onCreate(Bundle savedInstanceState) {super.onCreate(savedInstanceState);setContentView(R.layout.activity_where_am_i);mTextView = findViewById(R.id.myLocationText);GoogleApiAvailability availability= GoogleApiAvailability.getInstance();int result = availability.isGooglePlayServicesAvailable(this);if (result != ConnectionResult.SUCCESS) {if (!availability.isUserResolvableError(result)) {Toast.makeText(this, ERROR_MSG, Toast.LENGTH_LONG).show();}}mLocationRequest = new LocationRequest().setInterval(5000).setPriority(LocationRequest.PRIORITY_HIGH_ACCURACY);} -
Create a new
LocationCallbackthat calls theupdateTextViewmethod to update the Text View whenever a new Location update is received:LocationCallback mLocationCallback = new LocationCallback() {@Overridepublic void onLocationResult(LocationResult locationResult) {Location location = locationResult.getLastLocation();if (location != null) {updateTextView(location);}}}; -
Create a new
requestLocationUpdatesmethod that will initiate a request to receive Location updates using the Location Request defined in Step 1 and the Location Callback from Step 2:private void requestLocationUpdates() {if (ActivityCompat.checkSelfPermission(this, ACCESS_FINE_LOCATION)==PERMISSION_GRANTED ||ActivityCompat.checkSelfPermission(this, ACCESS_COARSE_LOCATION)==PERMISSION_GRANTED) {FusedLocationProviderClient fusedLocationClient= LocationServices.getFusedLocationProviderClient(this);fusedLocationClient.requestLocationUpdates(mLocationRequest,mLocationCallback, null);}} -
Update the
onStartmethod to compare the system location settings with the requirements of our Location Request. If the settings are compatible, or if they can’t be resolved, call therequestLocationUpdatesmethod from Step 3. If they do not meet our requirements, but can be resolved through user action, display a dialog asking the users to change their settings accordingly:public static final String TAG = "WhereAmIActivity";private static final int REQUEST_CHECK_SETTINGS = 2;@Overrideprotected void onStart() {super.onStart();// Check if we have permission to access high accuracy fine location.int permission = ActivityCompat.checkSelfPermission(this,ACCESS_FINE_LOCATION);// If permission is granted, fetch the last location.if (permission == PERMISSION_GRANTED) {getLastLocation();} else {// If permission has not been granted, request permission.ActivityCompat.requestPermissions(this,new String[]{ACCESS_FINE_LOCATION},LOCATION_PERMISSION_REQUEST);}// Check of the location settings are compatible with our Location//Request.LocationSettingsRequest.Builder builder =new LocationSettingsRequest.Builder().addLocationRequest(mLocationRequest);SettingsClient client = LocationServices.getSettingsClient(this);Task<LocationSettingsResponse> task =client.checkLocationSettings(builder.build());task.addOnSuccessListener(this,new OnSuccessListener<LocationSettingsResponse>() {@Overridepublic void onSuccess(LocationSettingsResponselocationSettingsResponse) {// Location settings satisfy the requirements of the Location// Request.// Request location updates.requestLocationUpdates();}});task.addOnFailureListener(this, new OnFailureListener() {@Overridepublic void onFailure(@NonNull Exception e) {// Extract the status code for the failure from within the// Exception.int statusCode = ((ApiException) e).getStatusCode();switch (statusCode) {case CommonStatusCodes.RESOLUTION_REQUIRED:try {// Display a user dialog to resolve the location settings// issue.ResolvableApiException resolvable= (ResolvableApiException) e;resolvable.startResolutionForResult(WhereAmIActivity.this,REQUEST_CHECK_SETTINGS);} catch (IntentSender.SendIntentException sendEx) {Log.e(TAG, "Location Settings resolution failed.", sendEx);}break;case LocationSettingsStatusCodes.SETTINGS_CHANGE_UNAVAILABLE:// Location settings issues can't be resolved by user.// Request location updates anyway.Log.d(TAG, "Location Settings can't be resolved.");requestLocationUpdates();break;}}});} -
Override the
onActivityResulthandler to listen for a return from the dialog potentially displayed in Step 4. If the user accepts the requested changes, request location updates. If they are rejected, check to see if any location services are available—and request updates if so:@Overrideprotected void onActivityResult(int requestCode,int resultCode,Intent data){final LocationSettingsStates states =LocationSettingsStates.fromIntent(data);if (requestCode == REQUEST_CHECK_SETTINGS) {switch (resultCode) {case Activity.RESULT_OK:// Requested changes made, request location updates.requestLocationUpdates();break;case Activity.RESULT_CANCELED:// Requested changes were NOT made.Log.d(TAG, "Requested settings changes declined by user.");// Check if any location services are available, and if so// request location updates.if (states.isLocationUsable())requestLocationUpdates();elseLog.d(TAG, "No location services available.");break;default: break;}}}
If you run the application and start changing the device location, you see the Text View update accordingly.
Best Practices When Using Location
Incorporating user location within your application can add powerful personalization and contextualization features that improve the user experience and make unique features possible. These powerful features must be balanced against the impact on battery life and user privacy.
To take advantage of these features without draining the device battery, consider the following factors:
- Battery life versus accuracy —Carefully consider how accurate your location updates need to be, and consider modifying the requirements at run time to minimize the impact on battery life.
- Minimize update rate —Slower updates can reduce battery drain at the price of less timely updates.
- Modify the fastest interval —Increasing the fastest interval is useful when your application is performing a time-consuming operation that will prevent it from processing further location updates. Increase this value to allow the Location Services to buffer location updates until your app can process them. Once the long-running work is done, reset the fastest interval back to a faster value.
- Unsubscribe when appropriate —Your app should always unsubscribe from updates whenever they aren’t needed. This is especially important if location updates are updating your UI, and your Activity is no longer visible.
Access to the user’s current location introduces significant privacy considerations. As such, it’s important that your application treats location data in a way that respects user privacy:
- Obtain the current location and request location updates only when it is strictly necessary for your application to function. When possible, allow users to decline location-dependent features while still using the rest of your app.
- Inform users of how and why using their location is necessary.
- Notify users when you are tracking their location, and if and how that location information is used, transmitted, and stored.
- Avoid storing or transmitting user location; when storage and transmission is necessary, take every precaution to prevent other applications from accessing this information.
- Be careful not to leak location information through broadcast Intents or unsecured databases.
- Respect user settings and system location preferences. Allow users to disable location updates within your app, and provide as much functionality as possible even when users restrict location accuracy.
SETTING AND MANAGING GEOFENCES
Geofences are defined by a given latitude and longitude, combined with an effective radius. Using Geofences, you can set Pending Intents that are fired based on the user’s proximity to specified locations. Your app can specify up to 100 Geofences per device user.
The Geofence API is part of the Google Play service Location Services library, which must be added as a dependency to your app module’s
build.gradle
file after you’ve installed Google Play services as described earlier in this chapter:
dependencies {…implementation 'com.google.android.gms:play-services-location:15.0.1'}
The Geofence API requires the fine location permission to be defined in your application manifest:
<uses-permission android:name="android.permission.ACCESS_FINE_LOCATION" />
As a dangerous permission, fine location access must also be requested at run time prior to setting a Geofence:
// Check if we have permission to access high accuracy fine location.int permission = ActivityCompat.checkSelfPermission(this,Manifest.permission.ACCESS_FINE_LOCATION);// If permission is granted, fetch the last location.if (permission == PERMISSION_GRANTED) {setGeofence();} else {// If permission has not been granted, request permission.ActivityCompat.requestPermissions(this,new String[]{Manifest.permission.ACCESS_FINE_LOCATION},LOCATION_PERMISSION_REQUEST);}
To set a Geofence, request an instance of the
GeofencingClient
by calling the static
getGeofencingClient
method from the
LocationServices
class, as shown in
Listing 15-14
.
As shown in
Listing 15-15
, you can define a Geofence around a given location using the
Geofence .Builder
class. Specify a unique ID, the center point (using longitude and latitude values), a radius around that point, an expiry time-out, and the transition types that will cause the Pending Intent to fire: entry, exit, and/or dwell.
The loitering delay indicates the time (in milliseconds) that the device must be within the radius before the transition type moves from enter to dwell, while the notification responsiveness allows you to indicate your preferred latency between a transition and the firing of an Intent. This defaults to 0, but setting a large value here can significantly improve battery performance.
To add a Geofence you need to pass a
GeofencingRequest
and a Pending Intent to fire to the Geofencing Client.
Create the Geofencing Request using the
GeofencingRequest.Builder
, adding either a list of Geofences, or an individual one as shown in
Listing 15-16
. You can also specify the initial trigger, which can be useful if you’re triggering on entering the Geofence and want to receive a trigger if the device is already within the proximity radius when the Geofence is created.
To specify the Intent to fire, you use a
PendingIntent
, a class that wraps an Intent in a kind of method pointer, as described in
Chapter 6
, “Intents and Broadcast Receivers.”:
Intent intent = new Intent(this, GeofenceBroadcastReceiver.class);PendingIntent geofenceIntent = PendingIntent.getBroadcast(this, -1,intent, 0);
Listing 15-17 shows how to initiate a Geofencing Request with the Geofencing Client, indicating the specified Pending Intent to be broadcast when the Geofence is triggered. You can use On Success and On Failure Listeners to observe if the attempt to add the Geofence(s) was successful.
When the Location Service detects that you have crossed the Geofence radius boundary, the Pending Intent fires. Depending on your Pending Intent, the Intent fired when the Geofence is triggered can trigger a Broadcast Receiver, such as the one shown in Listing 15-18 .
You can extract the
GeofencingEvent
by passing the received Intent into the Geofencing Event’s
fromIntent
method. Using the Geofencing Event, you can determine what, if any, errors occurred—as well as the type of transition and List of the Geofences that triggered the Intent broadcast.
Geofences will automatically be removed once their time expires, or you can manually remove them using the Geofence Client’s
removeGeofences
method, passing in either a List of identifier strings or the Pending Intent associated with the Geofences you want to remove:
geofencingClient.removeGeofences(geofenceIntent);
Once added, Geofences are kept active within the Location Services process even if your app is closed or killed by the system. They will be persisted except in the cases of device reboot, uninstallation of your application, a user-initiated clear of your app data (or Google Play services app data), or if you receive a
GEOFENCE_NOT_AVAILABLE
error.
Android 8.0 Oreo (API Level 26) introduced strict limits on the frequency at which apps can receive Location updates while they are in the background. However, because the Geofencing API has been optimized for background operation, it receives transition events more frequently than Location updates from the Fused Location Provider while your app is in the background—typically once every few minutes.
Nonetheless, just as receiving location updates within your app can have a significant impact on power consumption, so too will setting multiple Geofences likely to trigger often. To minimize the associated battery impact, set the notification responsiveness to as slow a value as possible, and increase the size of your Geofence radius to at least 150 meters—reducing the need for the device to check its location.
USING THE LEGACY PLATFORM LOCATION-BASED SERVICES
In addition to the Google Play services Location Services, the Android framework includes location-based services that are available on all Android devices. The Google Play Location library utilizes these platform location APIs to implement its functionality.
The Fused Location provider implements many of the best practices described in this section, providing increased battery efficiency and location accuracy, making it the recommended API to use whenever possible.
“Location-based services” is an umbrella term that describes the different technologies used by the platform to find a device’s current location. The two main LBS elements are:
- Location Manager —Provides hooks to the location-based services.
- Location Providers —Each of these represents a different location-finding technology used to determine the device’s current location.
Using the Location Manager, you can do the following:
- Obtain your current location
- Follow movement
- Find available Location Providers
- Monitor the status of the GPS receiver
Access to the location-based services is provided by the Location Manager. To access the Location Manager, request a reference to it by passing in the
LOCATION_SERVICE
constant to the
getSystemService
method:
LocationManager= (LocationManager) getSystemService(Context.LOCATION_SERVICE);
As with the Google Play services Location Services library, the platform location-based services require one or more
uses-permission
tags in your manifest:
<uses-permission android:name="android.permission.ACCESS_FINE_LOCATION"/><uses-permission android:name="android.permission.ACCESS_COARSE_LOCATION"/>
As dangerous permissions, both fine and coarse location access require the user to accept runtime permissions before your app can retrieve location information using the location-based services.
Selecting a Location Provider
Depending on the device, you can use several technologies to determine the current location. Each technology, available as a Location Provider, offers different capabilities—including differences in power consumption, accuracy, and the ability to determine altitude, speed, or heading information.
Finding Location Providers
The
LocationManager
class includes static string constants that return the provider name for three Location Providers:
-
GPS_PROVIDER -
NETWORK_PROVIDER -
PASSIVE_PROVIDER
To get a list of the names of all the Providers available (based on hardware available on the device, and the permissions granted the application), call
getProviders
, using a Boolean to indicate if you want all, or only the enabled, Providers to be returned:
boolean enabledOnly = true;List<String> providers = locationManager.getProviders(enabledOnly);
Finding Location Providers by Specifying Criteria
In most scenarios it’s unlikely that you want to explicitly choose a Location Provider. It’s better practice to specify your requirements and let Android determine the best technology to use.
Use the
Criteria
class to dictate the requirements of a Provider in terms of accuracy, power use (low, medium, high), financial cost, and the ability to return values for altitude, speed, and heading:
Criteria criteria = new Criteria();criteria.setAccuracy(Criteria.ACCURACY_COARSE);criteria.setPowerRequirement(Criteria.POWER_LOW);criteria.setAltitudeRequired(false);criteria.setBearingRequired(false);criteria.setSpeedRequired(false);criteria.setCostAllowed(true);
The coarse/fine values passed in to the
setAccuracy
represent a subjective level of accuracy, where fine represents GPS or better and coarse represents any technology significantly less accurate than that.
It’s also possible to specify additional Criteria properties to get more control over the level of accuracy you require including horizontal (latitude/longitude), vertical (elevation), speed, and bearing accuracy:
criteria.setHorizontalAccuracy(Criteria.ACCURACY_HIGH);criteria.setVerticalAccuracy(Criteria.ACCURACY_MEDIUM);criteria.setBearingAccuracy(Criteria.ACCURACY_LOW);criteria.setSpeedAccuracy(Criteria.ACCURACY_LOW);
In terms of horizontal and vertical accuracy, high accuracy represents a requirement for results correct to within 100m. Low accuracy Providers are correct to more than 500m, whereas medium accuracy Providers represent accuracy between 100 and 500 meters.
When specifying accuracy requirements for bearing and speed, only
ACCURACY_LOW
and
ACCURACY_HIGH
are valid parameters.
Having defined the required Criteria, you can use
getBestProvider
to return the best matching Location Provider or
getProviders
to return all the possible matches. The following snippet demonstrates the use of
getBestProvider
to return the best Provider for your Criteria where the Boolean enables you restrict the result to currently enabled Providers:
String bestProvider = locationManager.getBestProvider(criteria, true);
In most cases, if more than one Location Provider matches your Criteria, the one with the greatest accuracy is returned. If no Location Providers meet your requirements, the Criteria are loosened, in the following order, until a Provider is found:
- Power use
- Accuracy of returned location
- Accuracy of bearing, speed, and altitude
- Availability of bearing, speed, and altitude
The criterion for allowing a device with monetary cost is never implicitly relaxed. If no Provider is found,
null
is returned.
To get a list of names for all the Providers matching your Criteria, use
getProviders
. It accepts a Criteria object and returns a List of Strings containing all Location Providers that match it. As with the
getBestProvider
call, if no matching providers are found, this method returns
null
or an empty List:
List<String> matchingProviders = locationManager.getProviders(criteria,false);
Determining Location Provider Capabilities
To get an instance of a specific Provider, call
getProvider
, passing in the name:
String providerName = LocationManager.GPS_PROVIDER;LocationProvider gpsProvider= locationManager.getProvider(providerName);
This is useful only for obtaining the capabilities of a particular Provider—specifically the accuracy and power requirements through the
getAccuracy
and
getPowerRequirement
methods.
In the following sections, most Location Manager methods require only a Provider name or a Criteria to perform location-based functions.
Finding the Last Known Location
You can find the last location fix obtained by a particular Location Provider using the
getLastKnownLocation
method, passing in the name of the Location Provider. The following example finds the last location fix taken by the GPS provider:
String provider = LocationManager.GPS_PROVIDER;Location location = locationManager.getLastKnownLocation(provider);
The Location object returned includes all the position information available from the provider that supplied it. This can include the time it was obtained, the accuracy of the location found, and its latitude, longitude, bearing, altitude, and speed. All these properties are available via
get
methods on the Location object.
Note that each device has multiple Location Providers, each of which may have been updated at a different time and different accuracy. To get the best last known location, you may need to query multiple Location Providers and compare their accuracies and timestamps. Alternatively, the Fused Location Provider described earlier in this chapter handles this for you with a single method call.
Requesting Location Change Updates
The Location Manager’s
requestLocationUpdates
methods are used to request regular updates of location changes using a
LocationListener
. Location Listeners also contain handlers that trigger based on changes in a provider’s status and availability.
The
requestLocationUpdates
method accepts either a specific Location Provider name or a set of Criteria to determine the provider to use. To optimize efficiency and minimize cost and power use, you can also specify the minimum time and the minimum distance between location change updates:
String provider = LocationManager.GPS_PROVIDER;int t = 5000; // millisecondsint distance = 5; // metersLocationListener myLocationListener = new LocationListener() {public void onLocationChanged(Location location) {// Update application based on new location.}public void onProviderDisabled(String provider){// Update application if provider disabled.}public void onProviderEnabled(String provider){// Update application if provider enabled.}public void onStatusChanged(String provider, int status,Bundle extras){// Update application if provider hardware status changed.}};locationManager.requestLocationUpdates(provider, t, distance,myLocationListener);
When the minimum time and distance values are exceeded, the attached Location Listener executes its
onLocationChanged
event.
It’s also possible to specify a Pending Intent that will be broadcast whenever the location changes or the location provider status or availability changes, rather than using a Location Listener. The new location is stored as an extra with the key
KEY_LOCATION_CHANGED
:
String provider = LocationManager.GPS_PROVIDER;int t = 5000; // millisecondsint distance = 5; // metersfinal int locationUpdateRC = 0;int flags = PendingIntent.FLAG_UPDATE_CURRENT;Intent intent = new Intent(this, MyLocationUpdateReceiver.class);PendingIntent pendingIntent = PendingIntent.getBroadcast(this,locationUpdateRC, intent, flags);locationManager.requestLocationUpdates(provider, t,distance, pendingIntent);
When broadcasting Pending Intents for location changes, you will need to create a Broadcast Receiver that listens for changes in location broadcast:
public class MyLocationUpdateReceiver extends BroadcastReceiver {@Overridepublic void onReceive(Context context, Intent intent) {String key = LocationManager.KEY_LOCATION_CHANGED;Location location = (Location)intent.getExtras().get(key);// TODO Do something with the new location}}
To stop location updates, call
removeUpdates
, as shown in the following code. Pass in either the Location Listener instance or Pending Intent that you no longer want to have triggered:
locationManager.removeUpdates(myLocationListener);locationManager.removeUpdates(pendingIntent);
To minimize the cost to battery life, you should disable updates whenever possible in your application, especially in cases where your application isn’t visible and location changes are used only to update an Activity’s UI. You can improve performance further by making the minimum time and distance between updates as large as possible.
Where timeliness is not a significant factor, you might consider using the Passive Location Provider, as shown in the following snippet:
String passiveProvider = LocationManager.PASSIVE_PROVIDER;locationManager.requestLocationUpdates(passiveProvider, 0, 0,myLocationListener);
The Passive Location Provider receives location updates if, and only if, another application requests them, letting your application passively receive updates without activating a Location Provider.
Because the updates may come from any Location Provider, your application must request the
ACCESS_FINE_LOCATION
permission to use the Passive Location Provider. Call
getProvider
on the Location received by the registered Location Listener to determine which Location Provider generated each update.
Best Practice for Using the Legacy Location-Based Services
When using the platform location-based services within your application, you should consider the same factors as described earlier in “Best Practices when Using Location.” In addition, the platform location-based services require you to consider the following additional factors that are handled automatically by the Fused Location Provider:
- Startup time —In a mobile environment the time taken to get an initial location can have a dramatic effect on the user experience—particularly if your app requires a location to be used. GPS, for example, can have a significant startup time, which you may need to mitigate.
- Provider availability —Users can toggle the availability of Location Providers, so your application needs to monitor changes in Location Provider status to ensure the best alternative is used at all times.
Having used Criteria to select the best Provider available for receiving location updates, you need to monitor changes in the availability of Location Providers to ensure that the one selected remains available and the best alternative.
The following snippet shows how to monitor the status of your selected Provider, dynamically switching to a new Provider should it become unavailable and switching to a better alternative should one be enabled:
public class DynamicProvidersActivity extends Activity {private LocationManager locationManager;private final Criteria criteria = new Criteria();private static final int minUpdateTime = 30*1000; // 30 Secondsprivate static final int minUpdateDistance = 100; // 100mprivate static final String TAG = "DYNAMIC_LOCATION";private static final int LOCATION_PERMISSION_REQUEST = 1;@Overridepublic void onCreate(Bundle savedInstanceState) {super.onCreate(savedInstanceState);setContentView(R.layout.activity_dynamic_providers);// Get a reference to the Location ManagerlocationManager= (LocationManager)getSystemService(Context.LOCATION_SERVICE);// Specify Location Provider criteriacriteria.setAccuracy(Criteria.ACCURACY_FINE);criteria.setPowerRequirement(Criteria.POWER_LOW);criteria.setAltitudeRequired(true);criteria.setBearingRequired(true);criteria.setSpeedRequired(true);criteria.setCostAllowed(true);criteria.setHorizontalAccuracy(Criteria.ACCURACY_HIGH);criteria.setVerticalAccuracy(Criteria.ACCURACY_MEDIUM);criteria.setBearingAccuracy(Criteria.ACCURACY_LOW);criteria.setSpeedAccuracy(Criteria.ACCURACY_LOW);}@Overrideprotected void onStop() {super.onStop();unregisterAllListeners();}@Overrideprotected void onStart() {super.onStart();registerListener();}private void registerListener() {unregisterAllListeners();String bestProvider =locationManager.getBestProvider(criteria, false);String bestAvailableProvider =locationManager.getBestProvider(criteria, true);Log.d(TAG, bestProvider + " / " + bestAvailableProvider);// Check permissions.if (ActivityCompat.checkSelfPermission(this, ACCESS_FINE_LOCATION) !=PERMISSION_GRANTED ||ActivityCompat.checkSelfPermission(this, ACCESS_COARSE_LOCATION) !=PERMISSION_GRANTED) {permissionsRequest();}if (bestProvider == null)Log.d(TAG, "No Location Providers exist.");else if (bestProvider.equals(bestAvailableProvider))locationManager.requestLocationUpdates(bestAvailableProvider,minUpdateTime, minUpdateDistance,bestAvailableProviderListener);else {locationManager.requestLocationUpdates(bestProvider,minUpdateTime, minUpdateDistance, bestProviderListener);if (bestAvailableProvider != null)locationManager.requestLocationUpdates(bestAvailableProvider,minUpdateTime, minUpdateDistance,bestAvailableProviderListener);else {List<String> allProviders = locationManager.getAllProviders();for (String provider : allProviders)locationManager.requestLocationUpdates(provider, 0, 0,bestProviderListener);Log.d(TAG, "No Location Providers available.");}}}private void unregisterAllListeners() {locationManager.removeUpdates(bestProviderListener);locationManager.removeUpdates(bestAvailableProviderListener);}private void permissionsRequest() {if (ActivityCompat.shouldShowRequestPermissionRationale(this, ACCESS_FINE_LOCATION)) {// TODO: Display additional rationale for the requested permission.}ActivityCompat.requestPermissions(this,new String[]{ACCESS_FINE_LOCATION, ACCESS_COARSE_LOCATION},LOCATION_PERMISSION_REQUEST);}@Overridepublic void onRequestPermissionsResult(int requestCode,@NonNull String[] permissions,@NonNull int[] grantResults) {super.onRequestPermissionsResult(requestCode, permissions, grantResults);if (requestCode == LOCATION_PERMISSION_REQUEST) {if (grantResults[0] != PERMISSION_GRANTED) {Log.d(TAG, "Location Permission Denied.");// TODO React to denied permission.} else {registerListener();}}}private void reactToLocationChange(Location location) {// TODO [ React to location change ]}private LocationListener bestProviderListener= new LocationListener() {public void onLocationChanged(Location location) {reactToLocationChange(location);}public void onProviderDisabled(String provider) {}public void onProviderEnabled(String provider) {registerListener();}public void onStatusChanged(String provider,int status, Bundle extras) {}};private LocationListener bestAvailableProviderListener =new LocationListener() {public void onProviderEnabled(String provider) {}public void onProviderDisabled(String provider) {registerListener();}public void onLocationChanged(Location location) {reactToLocationChange(location);}public void onStatusChanged(String provider,int status, Bundle extras) {}};}
USING THE GEOCODER
Geocoding enables you to translate in both directions between street addresses and longitude/latitude map coordinates. This can give you a recognizable context for the locations and coordinates used in location-based services and map-based Activities.
The
Geocoder
class provides access to two geocoding functions:
- Forward geocoding —Finds the latitude and longitude of an address
- Reverse geocoding —Finds the street address for a given latitude and longitude
The results from these calls are contextualized by means of a locale (used to define your usual location and language). The following snippet shows how you set the locale when creating your Geocoder. If you don’t specify a locale, it assumes the device’s default:
Geocoder geocoder = new Geocoder(this, Locale.getDefault());
Both geocoding functions return a list of
Address
objects. Each list can contain several possible results, up to a limit you specify when making the call.
Each Address is populated with as much detail as the Geocoder is able to resolve. This can include the latitude, longitude, phone number, and increasingly granular address details from country to street and house number.
The Geocoder uses a web service to implement its lookups that may not be included on all Android devices. Use the
isPresent
method to determine if a Geocoder implementation exists on a given device:
boolean geocoderExists = Geocoder.isPresent();
If no Geocoder implementation exists on the device, the forward and reverse geocoding queries described in the following sections will return an empty list.
As the geocoding lookups are done on the server, your app also requires the Internet uses-permission in your manifest:
<uses-permission android:name="android.permission.INTERNET"/>
The web service used to implement the Geocoder can vary by device, but is most commonly the Google Maps API. Note that these backend services may have limits to the number and frequency of requests. The limits of the Google Maps-based service include:
- A maximum of 2,500 requests per day per device
- No more than 50 QPS (queries per second)
The Google Maps geocoding API limitations are described in more detail at
developers.google.com/maps/documentation/geocoding/geocoding-strategies?csw=1#quota-limits
. In order to minimize the chance of exceeding your quota it’s best practice to use techniques such as caching to reduce the number of geocoding requests made.
Reverse Geocoding
Reverse geocoding returns street addresses for physical locations specified by latitude/longitude pairs. It’s a useful way to get a recognizable context for the Locations returned by location-based services.
To perform a reverse lookup, pass the target latitude and longitude to a Geocoder object’s
getFromLocation
method and it will return a list of possible address matches. If the Geocoder could not resolve any addresses for the specified coordinate, it returns null.
Listing 15-19 shows how to reverse-geocode a given Location, limiting the number of possible addresses to the top 10.
The accuracy and granularity of reverse lookups are entirely dependent on the quality of data in the geocoding database; as a result, the quality of the results may vary widely between different countries and locales.
Forward Geocoding
Forward geocoding (or just geocoding) determines map coordinates for a given location.
To geocode an address, call
getFromLocationName
on a Geocoder object. Pass in a string that describes the address you want the coordinates for, the maximum number of results to return, and optionally provide a geographic bounding box within which to restrict your search results:
List<Address> result = geocoder.getFromLocationName(streetAddress, 5);
The returned list of Addresses may include multiple possible matches for the named location. Each Address includes latitude and longitude and any additional address information available for those coordinates. This is useful to confirm that the correct location was resolved, and for providing location specifics in searches for landmarks.
When you do forward lookups, the Locale specified when instantiating the Geocoder is particularly important. The Locale provides the geographical context for interpreting your search requests because the same location names can exist in multiple areas.
Where possible, consider selecting a regional Locale to help avoid place-name ambiguity, and try to provide as many address details as possible, as shown in Listing 15-20 .
For even more specific results, you can restrict your search to within a geographical area by specifying the lower-left and upper-right latitude and longitude as shown here:
List<Address> locations = null;try {locations = geocoder.getFromLocationName(streetAddress, 10,llLat, llLong, urLat, urLong);} catch (IOException e) {Log.e(TAG, "IO Exception", e);}
This overload is particularly useful when working with a map, letting you restrict the search to the visible area.
Geocoding Where Am I
In this example you extend the Where Am I project to include and update the current street address whenever the device moves.
-
Start by modifying the manifest to include the Internet uses-permission:
<uses-permission android:name="android.permission.ACCESS_COARSE_LOCATION"/><uses-permission android:name="android.permission.ACCESS_FINE_LOCATION"/><uses-permission android:name="android.permission.INTERNET"/> -
Then open the
WhereAmIActivity. Create a newgeocodeLocationmethod that takes a Location and returns a String:private String geocodeLocation(Location location) {String returnString = "";return returnString;} -
Within the new method, check if the Geocoder is available, and if so instantiate a new
Geocoderobject and pass the Location parameter into the Geocoder’sgetFromLocationmethod to find and return the street address:private String geocodeLocation(Location location) {String returnString = "";if (location == null) {Log.d(TAG, "No Location to Geocode");return returnString;}if (!Geocoder.isPresent()) {Log.e(TAG, "No Geocoder Available");return returnString;} else {Geocoder gc = new Geocoder(this, Locale.getDefault());try {List<Address> addresses= gc.getFromLocation(location.getLatitude(),location.getLongitude(),1); // One ResultStringBuilder sb = new StringBuilder();if (addresses.size() > 0) {Address address = addresses.get(0);for (int i = 0; i < address.getMaxAddressLineIndex(); i++)sb.append(address.getAddressLine(i)).append("\n");sb.append(address.getLocality()).append("\n");sb.append(address.getPostalCode()).append("\n");sb.append(address.getCountryName());}returnString = sb.toString();} catch (IOException e) {Log.e(TAG, "I/O Error Geocoding.", e);}return returnString;}} -
Update the
updateTextViewmethod to geocode each Location and append the result to our Text View:private void updateTextView(Location location) {String latLongString = "No location found";if (location != null) {double lat = location.getLatitude();double lng = location.getLongitude();latLongString = "Lat:" + lat + "\nLong:" + lng;}String address = geocodeLocation(location);String outputText = "Your Current Position is:\n" + latLongString;if (!address.isEmpty())outputText += "\n\n" + address;mTextView.setText(outputText);}
If you run the example now, it should appear as shown in Figure 15-8 .
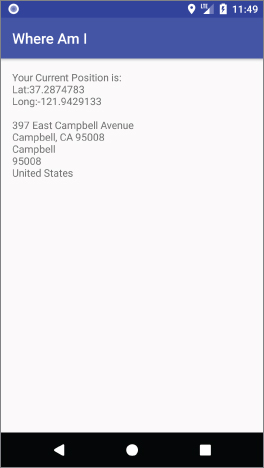
CREATING MAP-BASED ACTIVITIES
One of the most intuitive ways to provide context for a physical location or address is to use a map. Using a
GoogleMap
from within a
MapFragment
, you can create Activities that include an interactive map.
Google Maps support annotation using markers, shapes, and image overlays that can be pinned to geographical locations. Google Maps offer full programmatic control of the map display, letting you control camera angle, zoom, location target, and display modes—including the option to display a satellite or terrain view, and to style the appearance of the map.
Access to the Google Maps API is provided by the Google Play services Maps library, which must be added as a dependency to your app module’s
build.gradle
file after you’ve installed Google Play services (as described earlier in this chapter):
dependencies {…implementation 'com.google.android.gms:play-services-maps:15.0.1'}
Getting Your Maps API Key
To use a Google Map within your application, you must first obtain an API key from the Google API Console. Navigate to
developers.google.com/maps/documentation/android-api/signup
and click Get a Key, after which you’ll be asked to select an existing, or create a new, project for your Android app. Follow the guide to register your project and activate the Google Maps Android API to receive a generic, unrestricted key for your app development, as shown in
Figure 15-9
.

Copy the key value, as you’ll need to add it to your project before you can use the Google Map.
Once you’ve obtained your API key, add it to your application manifest by adding a new meta-data node immediately prior to the closing application tag, as shown in Listing 15-21 .
Creating a Map-Based Activity
To use maps in your application, you need to create an Activity that includes a
MapFragment
or
SupportMapFragment
within its layout (the latter allows you to include a Map Fragment when using the Support Library Fragment Manager, which is best practice and the approach we’ll use in all our examples).
The Map Fragment includes a
GoogleMap
with which you’ll interact to modify the map UI.
The simplest way to add a new map-based Activity to your project within Android Studio is by selecting menu option File
![]() New
New
![]() Activity
Activity
![]() Gallery and selecting the
Google Maps Activity
, as highlighted in
Figure 15-10
.
Gallery and selecting the
Google Maps Activity
, as highlighted in
Figure 15-10
.

The wizard will create a layout that includes a Support Map Fragment, and an Activity that includes the boilerplate code needed to inflate the Fragment and prepare the map for display and use.
Alternatively, you can create your own layout, and include a Support Map Fragment element as shown in Listing 15-22 .
The Activity that inflates the layout containing the Support Map Fragment must extend
FragmentActivity
and implement
OnMapReadyCallback
. Within its
onCreate
handler, get a reference to the Map Fragment and call
getMapAsync
to initiate an asynchronous request for access to the Google Map; then implement the
onMapReady
handler to be notified when the Google Map is ready to be used—as shown in
Listing 15-23
.
Configuring Google Maps
By default the Map View shows the standard street map as shown in Figure 15-11 .

Alternatively, you can choose to display one of satellite, terrain, or hybrid views—as well as optionally display 3D buildings, indoor maps, and a traffic overlay as indicated by the following code snippet:
mMap.setMapType(GoogleMap.MAP_TYPE_NORMAL);// mMap.setMapType(GoogleMap.MAP_TYPE_SATELLITE);// mMap.setMapType(GoogleMap.MAP_TYPE_TERRAIN);// mMap.setMapType(GoogleMap.MAP_TYPE_HYBRID);mMap.setBuildingsEnabled(true);mMap.setIndoorEnabled(true);mMap.setTrafficEnabled(true);
You can also use the
getUiSettings
to obtain the current map UI settings and customize them as required:
mMap.getUiSettings().setCompassEnabled(false);mMap.getUiSettings().setAllGesturesEnabled(false);mMap.getUiSettings().setIndoorLevelPickerEnabled(false);mMap.getUiSettings().setMapToolbarEnabled(false);mMap.getUiSettings().setRotateGesturesEnabled(false);mMap.getUiSettings().setScrollGesturesEnabled(false);mMap.getUiSettings().setTiltGesturesEnabled(false);mMap.getUiSettings().setZoomControlsEnabled(false);mMap.getUiSettings().setZoomGesturesEnabled(false);
Changing the Camera Position with Camera Updates
The perspective of the map display can best be described in terms of an artificial camera pointing at a Mercator projection of the Earth’s surface. Users can move, rotate, and tilt the camera using a series of gestures to modify what part of the map they’re viewing, at what zoom level, orientation, and angle.
You can modify the camera perspective programmatically using the
CameraUpdateFactory
and
CameraPosition.Builder
to produce
CameraUpdates
that can be passed to the Google Map’s
moveCamera
or
animateCamera
methods.
The camera’s target is the latitude/longitude coordinate at the center of the displayed map. You can create a Camera Update that will modify the camera’s target using the Camera Update Factory’s static
newLatLng
method, passing in a
LatLng
object indicating the new latitude and longitude coordinates:
Double lat = 37.422006;Double lng = -122.084095;LatLng latLng = new LatLng(lat, lng);CameraUpdate cameraUpdate = CameraUpdateFactory.newLatLng(latLng);
You can adjust how much of the world is visible on the Google Map by adjusting the camera’s zoom level, indicated as a float between 1, representing the widest (or most distant) zoom, and 21, representing the tightest (nearest) view.
Each integer increase in the zoom level doubles the width of the visible world; however, the zoom level doesn’t need to be an integer. The maximum zoom level available for a specific location depends on a number of factors, including the resolution of Google’s maps and the available imagery for the visible area, map type, and screen size. You can find the max zoom by calling the Google Map’s
getMaxZoomLevel
method.
The following list shows the approximate level of detail corresponding with a range of zoom levels:
- 1 —World
- 5 —Landmass/continent
- 10 —City
- 15 —Streets
- 20 —Buildings
To modify the camera zoom level, use the Camera Update Factory’s static
zoomIn
or
zoomOut
methods to increase or decrease the zoom level by 1, or
zoomTo
to set the zoom to a specific level. Alternatively, you can use the
newLatLngZoom
method to create a Camera Update that targets a new location at a specific zoom level:
Double lat = 37.422006;Double lng = -122.084095;LatLng latLng = new LatLng(lat, lng);CameraUpdate cameraUpdate = CameraUpdateFactory.newLatLngZoom(latLng, 16);
If you want to display a particular area bound by a latitude and longitude span, you can use the Camera Update Factory’s
newLatLngBounds
method to specify a pair of latitude/longitude points that define the total area to be displayed. Alternatively, you can use the
LatLngBounds.Builder
to add multiple points and generate the smallest bounding box that includes all of them:
mMap.setOnMapLoadedCallback(new GoogleMap.OnMapLoadedCallback() {@Overridepublic void onMapLoaded() {Double firstLat = 20.288193;Double firstLng = -155.881057;LatLng firstLatLng = new LatLng(firstLat, firstLng);Double secondLat = 18.871097;Double secondLng = -154.747620;LatLng secondLatLng = new LatLng(secondLat, secondLng);LatLngBounds llBounds = LatLngBounds.builder().include(firstLatLng).include(secondLatLng).build();int padding = 16;CameraUpdate bUpdate = CameraUpdateFactory.newLatLngBounds(llBounds,padding);}});
Because this method must know the size of the Map in order to determine the correct bounding box and zoom level, the View containing the Map must have been layed out before this method can be called. To ensure layout has completed, you can add a handler to listen for the
OnMapLoadedCallback
callback on the Map object, once the
onMapReady
handler has been triggered.
To modify the heading (rotation) or tilt (angle) of the camera, use the Camera Position Builder to generate a new Camera Position, to be passed into the Camera Update Factory’s static
newCameraPosition
method:
CameraPosition cameraPosition = CameraPosition.builder().bearing(0).target(latLng).tilt(10).zoom(15).build();CameraUpdate posUpdate= CameraUpdateFactory.newCameraPosition(cameraPosition);
The Camera Position Builder enables you to specify every aspect of the camera’s position including the target, zoom, heading, and tilt. Conversely, you can get the current Camera Position using the Google Maps’s
getCameraPosition
method and extract the position elements.
Once you’ve created a new Camera Update, you must apply it using either the
moveCamera
or
animateCamera
methods on the Google Map object as shown in
Listing 15-24
.
The
moveCamera
method will cause the camera to immediately “jump” to the new position and orientation, while
animateCamera
will smoothly transition from the current Camera Position to the new one; you can optionally choose to specify the duration of the animation.
Animated camera updates can be interrupted, either by a user gesture or through a call to
stopAnimation
. If you want to be notified of a successful completion or interruption, you can pass in an optional
CancelableCallback
as shown in
Listing 15-25
.
Mapping Where Am I
The following code example extends the Where Am I project again. This time you will add mapping functionality by adding a Map Fragment. As the device location changes, the map automatically re-centers on the new position.
-
Modify your app module
build.gradlefile to include a dependency on the Google Play service Maps library:dependencies {implementation fileTree(dir: 'libs', include: ['*.jar'])implementation 'com.android.support:appcompat-v7:27.1.1'implementation 'com.android.support.constraint:constraint-layout:1.1.0'testImplementation 'junit:junit:4.12'androidTestImplementation 'com.android.support.test:runner:1.0.2'androidTestImplementation 'com.android.support.test.espresso' +':espresso-core:3.0.2'implementation 'com.android.support:support-media-compat:27.1.1'implementation 'com.android.support:support-v4:27.1.1'implementation 'com.google.android.gms:play-services-location:15.0.1'implementation 'com.google.android.gms:play-services-maps:15.0.1'} -
Navigate to
developers.google.com/maps/documentation/android-api/signupto create a new project and obtain an API key. Modify the application manifest to include a new meta-data node and enter your API key accordingly:<?xml version="1.0" encoding="utf-8"?><manifest xmlns_android="http://schemas.android.com/apk/res/android"package="com.professionalandroid.apps.whereami"><uses-permissionandroid:name="android.permission.ACCESS_COARSE_LOCATION"/><uses-permissionandroid:name="android.permission.ACCESS_FINE_LOCATION"/><uses-permission android:name="android.permission.INTERNET"/><applicationandroid:allowBackup="true"android:icon="@mipmap/ic_launcher"android:label="@string/app_name"android:roundIcon="@mipmap/ic_launcher_round"android:supportsRtl="true"android:theme="@style/AppTheme"><activity android:name=".WhereAmIActivity"><intent-filter><action android:name="android.intent.action.MAIN"/><category android:name="android.intent.category.LAUNCHER"/></intent-filter></activity><meta-dataandroid:name="com.google.android.geo.API_KEY"android:value="[YOUR_API_KEY]"/></application></manifest> -
Modify the
WhereAmIActivityto implementOnMapReadyCallback, and add theonMapReadyhandler accordingly. It should assign the passed-in Google Map to a member variable:public class WhereAmIActivity extends AppCompatActivityimplements OnMapReadyCallback{private GoogleMap mMap;@Overridepublic void onMapReady(GoogleMap googleMap) {mMap = googleMap;}[ … existing Activity code … ]} -
Modify the
activity_where_am_i.xmllayout resource to include aSupportMapFragmentbeneath the existing Text View:<?xml version="1.0" encoding="utf-8"?><LinearLayoutxmlns_android="http://schemas.android.com/apk/res/android"xmlns_app="http://schemas.android.com/apk/res-auto"xmlns_tools="http://schemas.android.com/tools"android:layout_width="match_parent"android:layout_height="match_parent"android:orientation="vertical"tools:context="com.professionalandroid.apps.whereami.WhereAmIActivity"><TextViewandroid:id="@+id/myLocationText"android:layout_width="match_parent"android:layout_height="wrap_content"android:padding="16dp"android:text="Hello World!"/><fragmentandroid:id="@+id/map"android:name="com.google.android.gms.maps.SupportMapFragment"android:layout_width="match_parent"android:layout_height="match_parent"/></LinearLayout> -
Returning to the
WhereAmIActivity, update theonCreatehandler to find a reference to the Map Fragment and request a reference to the Google Map:@Overrideprotected void onCreate(Bundle savedInstanceState) {super.onCreate(savedInstanceState);setContentView(R.layout.activity_where_am_i);mTextView = findViewById(R.id.myLocationText);// Obtain the SupportMapFragment and request the Google Map object.SupportMapFragment mapFragment =(SupportMapFragment)getSupportFragmentManager().findFragmentById(R.id.map);mapFragment.getMapAsync(this);GoogleApiAvailability availability= GoogleApiAvailability.getInstance();int result = availability.isGooglePlayServicesAvailable(this);if (result != ConnectionResult.SUCCESS) {if (!availability.isUserResolvableError(result)) {Toast.makeText(this, ERROR_MSG, Toast.LENGTH_LONG).show();}}mLocationRequest = new LocationRequest().setInterval(5000).setPriority(LocationRequest.PRIORITY_HIGH_ACCURACY);} -
Running the application now should display the original address text with a
MapViewbeneath it, as shown in Figure 15-12 .
-
Now update the
onMapReadyhandler to display the satellite view and zoom in to building level:@Overridepublic void onMapReady(GoogleMap googleMap) {mMap = googleMap;mMap.setMapType(GoogleMap.MAP_TYPE_SATELLITE);mMap.animateCamera(CameraUpdateFactory.zoomTo(17));} -
The final step is to modify the Location Callback to re-center the map on the current location:
LocationCallback mLocationCallback = new LocationCallback() {@Overridepublic void onLocationResult(LocationResult locationResult) {Location location = locationResult.getLastLocation();if (location != null) {updateTextView(location);if (mMap != null) {LatLng latLng = new LatLng(location.getLatitude(),location.getLongitude());mMap.animateCamera(CameraUpdateFactory.newLatLng(latLng));}}}};
Displaying the Current Location with the My Location Layer
The My Location layer is designed to show the device’s current location on the Google Map, represented as a flashing blue marker. Adding the My Location layer also enables the My Location button, displayed as crosshairs at the upper right of the map, as shown in Figure 15-13 .

Selecting the My Location button will re-center the camera target on the device’s last known location.
The My Location layer depends on the Fused Location Provider to provide the device location, and as such requires either coarse or fine location permissions to be requested in your application manifest, and to have been granted at runtime by the user, before the layer can be enabled:
if (ActivityCompat.checkSelfPermission(this,Manifest.permission.ACCESS_FINE_LOCATION)== PackageManager.PERMISSION_GRANTED ||ActivityCompat.checkSelfPermission(this,Manifest.permission.ACCESS_COARSE_LOCATION)== PackageManager.PERMISSION_GRANTED) {mMap.setMyLocationEnabled(true);}
For more details on the location permissions, refer to the earlier section “Finding the Location Using Google Location Services.”
Displaying Interactive Map Markers
You can add interactive, customizable markers to a Google Map (
Figure 15-14
) using the
addMarker
method, passing in a
MarkerOptions
object that specifies a latitude/longitude position at which to place the Marker:
Double lat = -32.0;Double lng = 115.5;LatLng position = new LatLng(lat, lng);Marker newMarker = mMap.addMarker(new MarkerOptions().position(position));

When a Marker is selected, the map toolbar is displayed, providing the user with a shortcut to display, or navigate to, the Marker location in the Google Maps app. To disable the toolbar modify the Google Map UI settings:
mMap.getUiSettings().setMapToolbarEnabled(false);
By providing a title and snippet text, as shown in Listing 15-26 , markers can become interactive.
When a user selects a given Marker, an information window with the associated title and snippet text is displayed, as shown in Figure 15-15 .
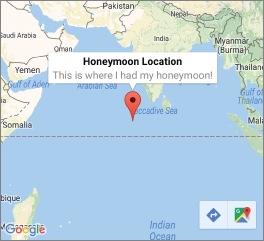
The Google Map handles the drawing, placement, click handling, focus control, and layout optimization of each marker for you. To remove a Marker, you must maintain a reference to it when it’s added and call its
remove
method:
newMarker.remove();
By default, the Marker displays the standard “Google Maps” icon, which can be customized by altering its color, or replacing the icon entirely with a custom image.
To alter the color of a Marker icon, or to use a custom Marker icon, use the
icon
method of the Marker Options. It takes a
BitmapDescriptor
that can be created using the
BitmapDescriptorFactory
.
To change the color of the default Marker icon, use the
defaultMarker
method passing in the hue, either as a value between 0 and 360, or one of the predefined hues available as constants from the Bitmap Descriptor Factory:
BitmapDescriptor icon= BitmapDescriptorFactory.defaultMarker(BitmapDescriptorFactory.HUE_GREEN);Marker newMarker = mMap.addMarker(new MarkerOptions().position(latLng).icon(icon));
To change the Marker opacity, use the alpha method to indicate an opacity value between 0 (transparent) and 1 (opaque):
Marker newMarker = mMap.addMarker(new MarkerOptions().position(latLng).alpha(0.6f));
Alternatively, if you want to replace the Marker icon entirely, you can use the various
from[source]
methods from the Bitmap Descriptor Factory to select a Bitmap from a file, path, resource, asset, or Bitmap object:
BitmapDescriptor icon= BitmapDescriptorFactory.fromResource(R.mipmap.ic_launcher);Marker newMarker = mMap.addMarker(new MarkerOptions().position(latLng).icon(icon));
By default, Markers will be displayed with respect to the screen, meaning that rotating, tilting, or zooming the Map won’t change the appearance of the Marker.
Using the flat method, you can set the orientation of the Marker to be flat against the Map, causing it to rotate and change perspective as the map is rotated or tilted:
Marker newMarker = mMap.addMarker(new MarkerOptions().position(latLng).flat(true));
It’s also possible to rotate a Marker around a specified anchor point, using a combination of the
anchor
and
rotation
methods within the Marker Options. Rotation is measured in degrees clockwise, and anchor represents the center of rotation in terms of a proportion of the size of the image in the horizontal and vertical directions:
Marker newMarker = mMap.addMarker(new MarkerOptions().position(latLng).anchor(0.5, 0.5).rotation(90));
It’s also possible to customize the behavior of a Marker when selected, and the appearance of the info window that’s displayed.
To alter the Marker selection behavior, add an
OnMarkerClickListener
to the Google Map. The
onMarkerClick
handler will receive an instance of the Marker selected. Return true if your handler should replace the default behavior, or false if the info window should still be displayed:
mMap.setOnMarkerClickListener(new GoogleMap.OnMarkerClickListener() {@Overridepublic boolean onMarkerClick(Marker marker) {if (marker.equals(newMarker)) {// TODO React to marker selection.}// Return false to display the Info Window.return false;}});
To modify the info window appearance, use the Google Map’s
setInfoWindowAdapter
method, passing in an implementation of the
InfoWindowAdapter
interface to define a populated View that should be used for the Marker passed in as a parameter:
mMap.setInfoWindowAdapter(new GoogleMap.InfoWindowAdapter() {@Overridepublic View getInfoWindow(Marker marker) {// TODO Define a view to entirely replace the default info window.return myView;}@Overridepublic View getInfoContents(Marker marker) {// TODO Define a view to replace the interior of the info window.return myView;}});
Returning a View from the
getInfoWindow
handler will replace the info window in its entirety, while returning a View only from the
getInfoContents
handler will keep the same frame and background as the default info window, replacing only the contents. If
null
is returned from both handlers the default info window will be displayed.
Adding Shapes to Google Maps
In addition to Markers, Google Maps allows you to overlay lines, polygons, and circles onto the map surface. You can set the visibility, z-order, fill color, line caps, joint types, and the stroke (outline) width, style, and color for each shape.
You can draw multiple shapes on top of each map, and optionally choose to have user touches handled by one or more of them. All three shape types (Circles, Polygons, and Polylines) are mutable, meaning that they can be adjusted (or deleted) after they’ve been created and added to the map.
The simplest available shape is a circle, represented as a target latitude/longitude with a radius in meters. The circle is drawn as a geographically accurate projection on the Earth’s surface. Depending on the size and location of the circle, and the current zoom—the Mercator project used by the Google Map may result in the circle appearing as an ellipse.
To add a circle to your map, create a new
CircleOptions
object, specifying the center and radius of the circle and any additional settings such as fill color or stroke:
CircleOptions circleOptions = new CircleOptions().center(new LatLng(37.4, -122.1)).radius(1000) // 1000 meters.fillColor(Color.argb(50, 255, 0, 0)).strokeColor(Color.RED);
Pass the Circle Options into the Google Map’s
addCircle
method. Note that it will return a mutable
Circle
object that can be modified at run time:
Circle circle = mMap.addCircle(circleOptions);
You can create an irregular enclosed shape by defining a polygon using the
PolygonOptions
class. Use the
add
method to define a series of latitude/longitude pairs that each define a node in the shape. The default fill is transparent, so specify the fill, stroke, and joint types as needed to modify the shape’s appearance:
PolygonOptions polygonOptions = new PolygonOptions().add(new LatLng(66.992803, -26.369462),new LatLng(51.540138, -2.990557),new LatLng(50.321568, -6.066729),new LatLng(49.757089, -5.231768),new LatLng(50.934844, 1.425947),new LatLng(52.873063, 2.107099),new LatLng(56.124692, -1.738115),new LatLng(67.569820, -13.625322)).fillColor(Color.argb(44,00,00,44));
Note that the polygon will automatically join the last point to the first, so there’s no need to close it yourself. You can also use the Polygon Options
addAll
method to supply a List of
LatLng
objects.
Using the
addHole
method, you can create complex shapes such as filled rings or donuts by composing multiple paths. After defining the outer shape, use the
addHole
method to define a second, fully enclosed, smaller path:
List<LatLng> holePoints = new ArrayList<>();holePoints.add(new LatLng(53.097936, -2.331377));holePoints.add(new LatLng(52.015946, -2.067705));holePoints.add(new LatLng(52.117943, 0.383657));holePoints.add(new LatLng(53.499125, -1.088511));mMap.addPolygon(new PolygonOptions().add(new LatLng(66.992803, -26.369462),new LatLng(51.540138, -2.990557),new LatLng(50.321568, -6.066729),new LatLng(49.757089, -5.231768),new LatLng(50.934844, 1.425947),new LatLng(52.873063, 2.107099),new LatLng(56.124692, -1.738115),new LatLng(67.569820, -13.625322)).fillColor(Color.argb(44,00,00,44)).addHole(holePoints);
When drawn, it will appear as though a section of the surrounding polygon has been removed.
By default, the Polygon is drawn as straight lines on the Mercator projection used to display the Google Map. You can use the
geodesic
method within the Polygon Options to request each segment be drawn such that it represents the shortest path along the Earth’s surface. Geodesic segments will typically appear as curved lines when observed on the Google Map:
PolygonOptions polygonOptions = new PolygonOptions().add(new LatLng(66.992803, -26.369462),new LatLng(51.540138, -2.990557),new LatLng(50.321568, -6.066729),new LatLng(49.757089, -5.231768),new LatLng(50.934844, 1.425947),new LatLng(52.873063, 2.107099),new LatLng(56.124692, -1.738115),new LatLng(67.569820, -13.625322)).fillColor(Color.argb(44,00,00,44)).geodesic(true);
Add each Polygon to your Google Map using its
addPolygon
method, passing in the Polygon Options. It will return a mutable Polygon object that can be modified at run time:
Polygon polygon = mMap.addPolygon(polygonOptions);
Finally, if you don’t want to enclose an area, you can create a Polyline, which will draw a series of connected line segments based on a series of latitude/longitude pairs.
A Polyline is defined in much the same way as a Polygon; however, the ends won’t be connected and the shape can’t be filled. Create a new
PolyLineOptions
object, specifying the points individually, or as a List, using the
add
method as described for Polygons:
PolylineOptions polylineOptions = new PolylineOptions().add(new LatLng(66.992803, -26.369462),new LatLng(51.540138, -2.990557),new LatLng(50.321568, -6.066729),new LatLng(49.757089, -5.231768),new LatLng(50.934844, 1.425947),new LatLng(52.873063, 2.107099),new LatLng(56.124692, -1.738115),new LatLng(67.569820, -13.625322)).geodesic(true);
Polyline segments can be geodesic, and you can define the color and style of the stroke, the joint types, and end caps. Once defined, use the
addPolyline
method to add the Polyline Options to your Google Map:
Polyline polyline = mMap.addPolyline(polylineOptions);
By default, none of the shapes respond to user touches; however, each shape class includes a
setClickable
method that can make them clickable:
polyline.setClickable(true);circle.setClickable(true);polygon.setClickable(true);
To respond to shape clicks, use the Google Map’s
setOnCircleClickListener
,
setOnPolygonClickListener
, and
setOnPolylineClickListener
to add Circle, Polygon, and Polyline Click Listeners. The click handlers for each Listener receive an instance of the shape that was clicked:
mMap.setOnCircleClickListener(new OnCircleClickListener() {@Overridepublic void onCircleClick(Circle circle) {// TODO React to the cicle being clicked.}});
If multiple shapes or Markers overlap at the touch point, the click event is sent first to the markers, then to each shape (in z-index order) until a marker or shape with a click handler is found—note that at most one handler will be triggered.
Adding Image Overlays to Google Maps
In addition to Markers and shapes, it’s also possible to create a
GroundOverlay
, which will place an image tied to latitude/longitude coordinates over a section of the map.
To add a Ground Overlay, create a new
GroundOverlayOptions
, specifying the image to overlay as a
BitmapDescriptor
as well as the position at which to place the image. The image position can be specified as either a
LatLng
anchor at the South West point with a width (and optionally height), or as a
LatLngBounds
that contains both the South West and North East anchors:
LatLng rottnest = new LatLng(40.714086, -74.228697);GroundOverlayOptions rottnestOverlay = new GroundOverlayOptions().image(BitmapDescriptorFactory.fromResource(R.drawable.rottnest_wa_1902)).position(rottnest, 8600f, 6500f);
To apply the Ground Overlay to the Google Map, call the
addGroundOverlay
method, passing in the Ground Overlay Options:
GroundOverlay groundOverlay = mMap.addGroundOverlay(rottnestOverlay);
You can remove a Ground Overlay at any time by calling its
remove
method:
groundOverlay.remove();
Adding Markers and Shapes to Where Am I
This final modification to the Where Am I example adds a new marker each time the location changes, and updates a Polyline connecting each marker.
We’ll also take this opportunity to enable the My Location layer to show the current device position.
-
Create new member variables to store a List of Markers and the polyline:
private List<Marker> mMarkers = new ArrayList<>();private Polyline mPolyline; -
Update the
onMapReadyhandler to enable the My Location layer and create a new Polyline without any points:@Overridepublic void onMapReady(GoogleMap googleMap) {mMap = googleMap;mMap.setMapType(GoogleMap.MAP_TYPE_SATELLITE);mMap.animateCamera(CameraUpdateFactory.zoomTo(17));if (ActivityCompat.checkSelfPermission(this,Manifest.permission.ACCESS_FINE_LOCATION)== PackageManager.PERMISSION_GRANTED ||ActivityCompat.checkSelfPermission(this,Manifest.permission.ACCESS_COARSE_LOCATION)== PackageManager.PERMISSION_GRANTED) {mMap.setMyLocationEnabled(true);}PolylineOptions polylineOptions = new PolylineOptions().color(Color.CYAN).geodesic(true);mPolyline = mMap.addPolyline(polylineOptions);} -
Update the Location Callback to add a new Marker at each location, using the info window to display the date and time it was added and its place in the sequence:
LocationCallback mLocationCallback = new LocationCallback() {@Overridepublic void onLocationResult(LocationResult locationResult) {Location location = locationResult.getLastLocation();if (location != null) {updateTextView(location);if (mMap != null) {LatLng latLng = new LatLng(location.getLatitude(),location.getLongitude());mMap.animateCamera(CameraUpdateFactory.newLatLng(latLng));Calendar c = Calendar.getInstance();String dateTime= DateFormat.format("MM/dd/yyyy HH:mm:ss",c.getTime()).toString();int markerNumber = mMarkers.size()+1;mMarkers.add(mMap.addMarker(new MarkerOptions().position(latLng).title(dateTime).snippet("Marker #" + markerNumber +" @ " + dateTime)));}}}}; -
Make a final update to the Location Callback that modifies the Polyline to connect each Marker location:
LocationCallback mLocationCallback = new LocationCallback() {@Overridepublic void onLocationResult(LocationResult locationResult) {Location location = locationResult.getLastLocation();if (location != null) {updateTextView(location);if (mMap != null) {LatLng latLng = new LatLng(location.getLatitude(),location.getLongitude());mMap.animateCamera(CameraUpdateFactory.newLatLng(latLng));Calendar c = Calendar.getInstance();String dateTime= DateFormat.format("MM/dd/yyyy HH:mm:ss",c.getTime()).toString();int markerNumber = mMarkers.size()+1;mMarkers.add(mMap.addMarker(new MarkerOptions().position(latLng).title(dateTime).snippet("Marker #" + markerNumber +" @ " + dateTime)));List<LatLng> points = mPolyline.getPoints();points.add(latLng);mPolyline.setPoints(points);}}}};
When run, your application displays your current device location with a blue dot using the My Location overlay, with Markers at each location received, connected with a blue Polyline, as shown in Figure 15-16 .

MAPPING THE EARTHQUAKE EXAMPLE
The following step-by-step guide demonstrates how to add a map to the Earthquake project you last saw in Chapter 13 . The map will be used to display the recent earthquakes.
-
Start by downloading the Google Play services SDK, and adding a dependency to the Maps library within the app module
build.gradlefile:dependencies {[… Existing Dependencies …]implementation 'com.google.android.gms:play-services-maps:15.0.1'} -
Navigate to
developers.google.com/maps/documentation/android-api/signupto create a new project and obtain an API key. Modify the application manifest to include a new meta-data node immediately before the closingapplicationtag, and enter your API key accordingly:<meta-dataandroid:name="com.google.android.geo.API_KEY"android:value="[Your API Key Goes Here]"/> -
Modify the
EarthquakeMapFragmentto implementOnMapReadyCallback, and add theonMapReadyhandler accordingly. It should assign the passed-in Google Map to a member variable:public class EarthquakeMapFragment extends Fragmentimplements OnMapReadyCallback {private GoogleMap mMap;@Overridepublic void onMapReady(GoogleMap googleMap) {mMap = googleMap;}[ … existing Fragment code … ]} -
Modify the
fragment_earthquake_map.xmllayout resource, replacing the existing Frame Layout and Text View with aSupportMapFragment:<fragmentxmlns_android="http://schemas.android.com/apk/res/android"xmlns_map="http://schemas.android.com/apk/res-auto"xmlns_tools="http://schemas.android.com/tools"android:id="@+id/map"android:name="com.google.android.gms.maps.SupportMapFragment"android:layout_width="match_parent"android:layout_height="match_parent"/> -
Return to the
EarthquakeMapFragmentand override theonViewCreatedhandler to find a reference to the Map Fragment and request a reference to the Google Map:@Overridepublic void onViewCreated(@NonNull View view,Bundle savedInstanceState) {super.onViewCreated(view, savedInstanceState);// Obtain the SupportMapFragment and request the Google Map object.SupportMapFragment mapFragment= (SupportMapFragment)getChildFragmentManager().findFragmentById(R.id.map);mapFragment.getMapAsync(this);}At this point, starting your application should make the Map View visible either in the tablet view or when the Map tab is selected on a phone.
-
Create a new
updateFromPreferencesmethod, identical to the same method from the Earthquake List Fragment, which finds the current user preference for the minimum magnitude of earthquake to display:private int mMinimumMagnitude = 0;private void updateFromPreferences() {SharedPreferences prefs =PreferenceManager.getDefaultSharedPreferences(getContext());mMinimumMagnitude = Integer.parseInt(prefs.getString(PreferencesActivity.PREF_MIN_MAG, "3"));} -
Create a new
setEarthquakeMarkersmethod that iterates over a List of Earthquakes and creates a Marker for each, and then removes any previous Markers that should no longer be displayed:Map<String, Marker> mMarkers = new HashMap<>();List<Earthquake> mEarthquakes;public void setEarthquakeMarkers(List<Earthquake> earthquakes) {updateFromPreferences();mEarthquakes = earthquakes;if (mMap == null || earthquakes == null) return;Map<String, Earthquake> newEarthquakes = new HashMap<>();// Add Markers for each earthquake above the user threshold.for (Earthquake earthquake : earthquakes) {if (earthquake.getMagnitude() >= mMinimumMagnitude) {newEarthquakes.put(earthquake.getId(), earthquake);if (!mMarkers.containsKey(earthquake.getId())) {Location location = earthquake.getLocation();Marker marker = mMap.addMarker(new MarkerOptions().position(new LatLng(location.getLatitude(),location.getLongitude())).title("M:" + earthquake.getMagnitude()));mMarkers.put(earthquake.getId(), marker);}}}// Remove any Markers representing earthquakes that should no longer// be displayed.for (Iterator<String> iterator = mMarkers.keySet().iterator();iterator.hasNext();) {String earthquakeID = iterator.next();if (!newEarthquakes.containsKey(earthquakeID)) {mMarkers.get(earthquakeID).remove();iterator.remove();}}} -
Override the
onMapReadyhandler to observe the Live Data from the Earthquake View Model, which represents changes in the underlying Earthquake database; call thesetEarthquakeMarkersmethod from Step 7 to update the map Markers accordingly:@Overridepublic void onMapReady(GoogleMap googleMap) {mMap = googleMap;// Retrieve the Earthquake View Model for this Fragment.earthquakeViewModel = ViewModelProviders.of(getActivity()).get(EarthquakeViewModel.class);// Get the data from the View Model, and observe any changes.earthquakeViewModel.getEarthquakes().observe(this, new Observer<List<Earthquake>>() {@Overridepublic void onChanged(@Nullable List<Earthquake> earthquakes) {// Update the UI with the updated database results.if (earthquakes != null)setEarthquakeMarkers(earthquakes);}});} -
Create a new On Shared Preference Change Listener that refreshes the Markers whenever the user alters their minimum Earthquake magnitude value, and register it within the
onActivityCreatedhandler:@Overridepublic void onActivityCreated(Bundle savedInstanceState) {super.onActivityCreated(savedInstanceState);// Register an OnSharedPreferenceChangeListenerSharedPreferences prefs =PreferenceManager.getDefaultSharedPreferences(getContext());prefs.registerOnSharedPreferenceChangeListener(mPListener);}private SharedPreferences.OnSharedPreferenceChangeListener mPListener= new SharedPreferences.OnSharedPreferenceChangeListener() {@Overridepublic void onSharedPreferenceChanged(SharedPreferencessharedPreferences,String key) {if (PreferencesActivity.PREF_MIN_MAG.equals(key)) {// Repopulate the Markers.List<Earthquake> earthquakes= earthquakeViewModel.getEarthquakes().getValue();if (earthquakes != null)setEarthquakeMarkers(earthquakes);}}};
If you run the application and view the Map tab, your application should appear, as shown in Figure 15-17 .

ADDING CONTEXTUAL AWARENESS
The Awareness API combines multiple signals including location, user context, and the environment to provide a mechanism that allows you to add context-based functionality to your app, with minimal impact on system resources.
There are two variations of the Awareness API: Snapshots and Fences; both are optimized for efficiency—particularly battery life—through caching and cross-app optimizations.
The Snapshot API offers a snapshot of the user’s current environment. Awareness Fences—similar to Geofences (described earlier in this chapter)—let you receive callbacks based on a combination of specific context signals whose specified conditions must be met.
The Awareness API currently supports up to seven different context signals:
- Time —The local time window during which a fence can trigger, defined as specific time or semantic descriptions (that is, “holidays” or “Tuesdays”).
- Location —The physical user location defined as distance from a specific latitude/longitude target.
- User Activity —What activity the user is engaged in.
- Nearby Beacons —The physical proximity of specific Beacons.
- Places —Nearby businesses and points of interest as defined by the Google Places API.
- Device state —Currently limited to headphone connection state.
- Environmental conditions —Currently limited to the local weather.
Access to the Awareness API is provided by the Google Play services Awareness library, which must be added as a dependency to your app module’s
build.gradle
file after you’ve installed Google Play services, as described earlier in this chapter:
dependencies {[… Existing Dependencies …]implementation 'com.google.android.gms:play-services-awareness:15.0.1'}
As a dynamic API available through Google Play services, you should expect that the range of available signals will increase over time.
Connecting to the Google Play Services API Client and Obtaining API Keys
The Awareness API, like many of the Google APIs available from the Google Play services library, requires you to create and connect an instance of the
GoogleApiClient
. The Google API Client manages the network connection between the user’s device and the Google Services you want to use.
You can manage the Google API Client’s connection yourself; however, it’s best practice to use the automatic connection management mechanism instead.
When your auto-managed Google API Client attempts to connect to the Google APIs, it will display user dialogs as needed to attempt to fix any user resolvable connection failures.
For issues that can’t be resolved, have your Activity implement the
OnConnectionFailedListener
interface, whose
onConnectionFailed
handler will be used to notify you of any user-unresolvable errors.
Create an instance of the Google API Client using the
GoogleApiClient.Builder
within your Activity’s
onCreate
handler, specifying the Google APIs you want to use, along with the Activity and On Connection Failed Listener for the auto-manage functionality, as shown in the skeleton code in
Listing 15-27
.
When auto-managed, your Google API Client will automatically connect during
onStart
and disconnect after
onStop
.
The Awareness API takes advantage of multiple Google Services. To extract Snapshots or create fences using data from these services, you must obtain API keys for each, and include them in your application manifest.
First and foremost you’ll need to obtain a key for the Awareness API from
developers.google.com/awareness/android-api/get-a-key
.
Once obtained, add it to your application manifest immediately before the closing
application
tag enclosed within a
meta-data
node as shown in the following snippet:
<meta-dataandroid:name="com.google.android.awareness.API_KEY"android:value="[YOUR_API_KEY]"/>
The preceding URL also provides details for obtaining API keys for the Places and Nearby (beacons) APIs, which can be added in the same way as the Awareness API key:
<meta-dataandroid:name="com.google.android.geo.API_KEY"android:value="[YOUR_API_KEY]"/><meta-dataandroid:name="com.google.android.nearby.messages.API_KEY"android:value="[YOUR_API_KEY]"/>
Using Awareness Snapshots
Awareness Snapshots allow you to retrieve details about the user’s current context from multiple Services. It’s optimized to return results quickly while minimizing battery drain and memory impact.
The Awareness API uses cached values for the data associated with each Service; if there is no data—or the data is stale—it will use sensing and inference to return fresh values.
To obtain snapshot context signal values, use one of the
get
methods on the
Awareness .SnapshotApi
class, passing in your Google API Client.
Attach a
ResultCallBack
, parameterized with the result type. The returned value will be passed to the
onResult
handler. Call
getStatus
to determine if the lookup was successful, and if so extract the result using the getter, as shown in
Listing 15-28
.
The Snapshot API includes static
get
methods corresponding to each of the context signals available. The returned values for each are consistent with the classes and values returned if you were to query the underlying Services directly. Note also that several of these methods require manifest and runtime permissions:
-
getBeaconState—Provides the state of nearby beacons by returning aBeaconStateResult. CallgetBeaconStateto extract Beacon details. Requires theACCESS_FINE_LOCATIONmanifest and runtime permission. -
getDetectedActivity—Returns the user’s detected physical Activity (running, walking, and so on) by returning aDetectedActivityResult. Extract the activity recognition results by callinggetActivityRecognitionResult. Requires theACTIVITY_RECOGNITIONmanifest permission. -
getHeadphoneState—Indicates if the headphones are currently plugged in by returning aHeadphoneStateResultobject, on which you must callgetStateto determine if the headphones arePLUGGED_INorUNPLUGGED. -
getLocation—Returns the user’s last known Location using aLocationResult. The Location value can be extracted withgetLocation. Requires theACCESS_FINE_LOCATIONmanifest and runtime permission. -
getPlaces—Returns a list of nearby places , such as businesses and points of interest, within aPlacesResult. CallgetPlaceLikelihoodsfor a list of potential places ranked by likelihood. Requires theACCESS_FINE_LOCATIONmanifest and runtime permission. -
getWeather—Returns the weather conditions in your current location within aWeatherResult. CallgetWeatherto extract aWeatherobject that includes the temperature, “feels like” temperature, humidity, dew point, and an array of descriptive weather conditions. Requires theACCESS_FINE_LOCATIONmanifest and runtime permission.
You can find full details on each of the Snapshot methods, with examples of how to extract the data, on the Google Developer’s site at
developers.google.com/awareness/android-api/snapshot-get-data
.
Setting and Monitoring Awareness Fences
Awareness Fences allow your app to adapt to the user’s changing environment by defining a series of conditions that, when met, will trigger a callback, even while your app is in the background.
The concept of an Awareness “fence” is an expansion of the Geofences described earlier in this chapter in the section “Setting and Managing Geofences.” Whereas a Geofence is based on the user’s proximity to a specific location, Awareness Fences expand the trigger to include contextual conditions including time, nearby Beacons, headphone state, and the user’s current activity.
Each of these signals can be combined using logical operators, allowing you to define custom fences based on combinations of criteria, such as:
- Starting to run while your headphones are plugged in on a weekend afternoon
- Starting to drive away from a given location on a weekday morning
- Moving within range of a beacon on your bicycle between 8am and 9am on Wednesdays
Awareness Fences are stored as instances of the
AwarenessFence
class. You can create new Awareness Fences for each of the available context triggers using the static methods available in the following classes:
-
BeaconFence—Use thefound,lost, andnearmethods to specify that one or more Beacons matching the specifiedTypeFilterobjects are initially detected, just lost, or nearby, respectively. Requires theACCESS_FINE_LOCATIONpermission. -
DetectedActivityFence—Use thestarting,stopping, andduringmethods to indicate the user has just begun, just stopped, or is currently performing a given activity. Detectable activities includeIN_VEHICLE,ON_BICYCLE,ON_FOOT,RUNNING,WALKING, orSTILL. Requires theACTIVITY_RECOGNITIONpermission. -
HeadphoneFence—Use thepluggingIn,unplugging, andduringmethods to indicate the headphones have just been connected, just unplugged, or are currently plugged in. -
LocationFence—Works like the Geofence. Use theentering,exiting, andinmethods specifying a latitude, longitude, radius, and dwell time to indicate the user has entered, exited, or remained within the given area for the specified dwell time. -
TimeFence—Provides a variety of static methods allowing you to indicate semantic and specific days and times:-
aroundTimeInstant—Specify a time instant, currently sunset or sunrise, and a start and stop offset around that time. -
inDailyInterval—Specify a daily start and stop time within a given time zone. -
inInterval—Specify an absolute one-off start and stop time. -
inIntervalofDay—Specify a repeating start and stop time for a given day of the week in a given time zone. -
inTimeInterval—Specify a specific semantic time interval such as day of the week, morning, afternoon, evening, night, weekday, weekend, or holiday.
-
For example, Listing 15-29 shows Awareness Fences based on each of the context signals.
To combine multiple Awareness Fences, use the static
and
,
or
, and
not
methods within the
AwarenessFence
class as shown in
Listing 15-30
.
Like Geofences, when triggered an Awareness Fence will broadcast a Pending Intent that can be used to trigger a Broadcast Receiver. If you have multiple Awareness Fences, you could create a unique Pending Intent for each; however, for efficiency reasons it’s best practice to use a single Pending Intent each with a unique key String, specified when registering the fence:
int flags = PendingIntent.FLAG_UPDATE_CURRENT;Intent intent = new Intent(this, WalkFenceReceiver.class);PendingIntent awarenessIntent = PendingIntent.getBroadcast(this, -1,intent, flags);
To add an Awareness Fence you need to create a
FenceUpdateRequest
that includes the Fences you want to add, the Pending Intent to be broadcast when the Awareness Fence is triggered, and a unique identifier.
Create the Fence Update Request using the
FenceUpdateRequest.Builder
, adding one or more Awareness Fences as shown in
Listing 15-31
.
Listing 15-32
shows how to update your app’s Awareness Fences by passing in your Fence Update Request to the Fence API’s
updateFences
method. You can use the
setResultCallback
to receive an
onResult
callback indicating the success or failure of the update request.
When the Awareness Service detects that each of your conditions has been met, the Pending Intent fires. The Pending Intent will also be fired immediately after it has been added, regardless of the state of each condition; this allows you to extract the initial state.
When the Pending Intent has been received, you can examine the current state of the Fence using the
FenceState
class, which you can extract from the Intent using the
FenceState.extract
method:
FenceState fenceState = FenceState.extract(intent);
To receive Awareness Fence trigger notifications, create and register a Broadcast Receiver to listen for the broadcast Intent, such as the one shown in Listing 15-33 .
To remove an Awareness Fence use the
removeFence
method within the Fence Update Request, specifying either the unique key or the Pending Intent associated with a Fence. Pass the resulting Fence Update Request to the
updateFences
method of the Fence API as shown in
Listing 15-34
.
Awareness Best Practices
Adding contextual awareness to your app means asking your users to trust you with that information. The more context you ask for, the more trust you’re requesting — remember that it’s hard to build that trust but very easy to lose it — even if what you’re doing is confusing or obscure rather than malicious.
To maintain that trust, it’s important to use contextual information responsibly, in a way that maximizes user control and privacy. While aiming for delight, it’s important not to miss and shock or surprise users.
The following is a selection of best practices to help ensure you maintain that trust:
- Tell your users what you’re doing, why you’re doing it, and whenever possible let them say no.
- Always explain how you’re using their context, and what you’re doing with the data — both on the device, and especially if that data is being stored or transmitted.
- Don’t transmit or store location or contact details unless that’s clear to the user, and a critical part of your app’s functionality.
- If you are storing any context data, make it simple and easy for users to erase it — both on their device and on your servers.
- Have a clear privacy policy that’s easy for users to find and understand.
- Your app should be an intuitive friend, not a creepy stalker; use Awareness to improve the quality of notifications, not to spam your users.
16
Hardware Sensors
INTRODUCING ANDROID SENSORS
Android devices are much more than simple communications and web browsing platforms; they’re extra-sensory input devices using movement, the environment, and body sensors to extend your users’ perceptions.
Sensors that detect physical and environmental properties offer an exciting avenue for innovations that enhance the user experience of mobile applications. The incorporation of an increasingly rich array of sensor hardware in modern devices provides new possibilities for user interaction and application development, including augmented or virtual reality, movement-based input, and environmental customizations.
This chapter introduces you to the sensors currently available in Android and how to use the Sensor Manager to monitor them.
You take a closer look at how to determine movement, and changes in the device orientation—regardless of the natural orientation of the host device.
You also explore the environmental sensors, including how to use the barometer to detect the current altitude, the light Sensor to determine the level of cloud cover, and the temperature Sensor to measure the ambient temperature.
Finally, you learn about body sensors, which are attached directly to the user and can be used to determine vital signs, such as heart rate, and to use the Activity Recognition APIs to monitor the users current physical activity.
Using the Sensor Manager
The Sensor Manager is used to manage the sensor hardware available on Android devices. Use
getSystemService
to return a reference to the Sensor Manager Service:
SensorManager sensorManager= (SensorManager)getSystemService(Context.SENSOR_SERVICE);
Rather than interact with the sensor hardware directly, you work with a series of
Sensor
objects that represent that hardware. These
Sensor
objects describe the properties of the hardware sensor they represent, including the type, name, manufacturer, and details on accuracy and range.
The
Sensor
class includes a set of constants that describe which type of hardware sensor is being represented by a particular
Sensor
object. These constants take the form of
Sensor.TYPE_
followed by the name of a supported Sensor. The following section describes each supported Sensor type, after which you learn how to find and use these Sensors.
Understanding the Android Sensors
The availability of specific Sensors varies based on the platform version and the hardware available in the host device. The section, “Discovering and Identifying Sensors” describes how to identify which sensors are available to your application on a given host device.
Sensors can generally be divided into two categories: physical hardware sensors and virtual sensors.
Hardware Sensors, such as the light and barometric pressure Sensors, report results directly from a physical hardware sensor designed for that purpose. These hardware-based Sensors typically work independently of each other, each reporting the results obtained from a particular piece of hardware and generally don’t apply any filtering or smoothing.
Virtual Sensors are used to present simplified, corrected, or composite sensor data in a way that makes them easier to use within some applications. Sensors such as the rotation vector and linear-acceleration Sensors are examples of virtual Sensors that may use a smoothed and filtered combination of accelerometers, magnetic-field Sensors, and gyroscopes, rather than the output of one specific hardware sensor.
In some circumstances, Android offers virtual sensors based on a particular hardware sensor. For example, there are virtual gyroscope and orientation Sensors that attempt to improve the quality and performance of their respective hardware; this involves using filters and the output of multiple Sensors to smooth, correct, or filter the raw output.
Environmental Sensors
Environmental Sensors are used to monitor the surrounding physical environment, including the current temperature, light levels, and atmospheric pressure.
-
Sensor.TYPE_AMBIENT_TEMPERATURE—Introduced in Android 4.0 (API Level 14), this is a thermometer that returns the ambient room temperature in degrees Celsius. -
Sensor.TYPE_GRAVITY—A three-axis gravity sensor that returns the current direction and magnitude of gravity along three axes in m/s 2 . The gravity sensor typically is implemented as a virtual sensor by applying a low-pass filter to the accelerometer results. -
Sensor.TYPE_LIGHT—An ambient light sensor that returns a single value describing the ambient illumination in lux. A light sensor is typically used by the system to alter the screen brightness dynamically. -
Sensor.TYPE_MAGNETIC_FIELD—A magnetometer that finds the current magnetic field in microteslas (μT) along three axes. -
Sensor.TYPE_PRESSURE—An atmospheric pressure sensor (barometer) that returns the current atmospheric pressure in millibars (mbars) as a single value. The pressure Sensor can be used to determine altitude using thegetAltitudemethod on the Sensor Manager to compare the atmospheric pressure in two locations. Barometers can also be used in weather forecasting by measuring changes in atmospheric pressure in the same location over time. -
Sensor.TYPE_PROXIMITY—A proximity sensor that indicates the distance between the device and the target object in centimeters. How a target object is selected, and the distances supported, will depend on the hardware implementation of the proximity detector. -
Sensor.TYPE_RELATIVE_HUMIDITY—A relative humidity sensor that returns the relative humidity as a percentage. This Sensor was introduced in Android 4.0 (API Level 14).
Device Movement and Orientation Sensors
Device movement and orientation sensors help you to track device movement and changes in the device’s physical orientation. Using these sensors, you can determine the device’s relative orientation on all three axes, acceleration, and device movement (or lack thereof).
-
Sensor.TYPE_ACCELEROMETER—A three-axis accelerometer that returns the current acceleration along three axes in m/s 2 (meters per second, per second.) The accelerometer is explored in greater detail later in this chapter. -
Sensor.TYPE_GYROSCOPE—A three-axis gyroscope that returns the rate of device rotation along three axes in radians/second. You can integrate the rate of rotation over time to determine the current orientation of the device; however, it generally is better practice to use this in combination with other sensors (typically the accelerometers) to provide a smoothed and corrected orientation. You learn more about the gyroscope later in this chapter. -
Sensor.TYPE_LINEAR_ACCELERATION—A three-axis linear acceleration Sensor that returns the acceleration, minus gravity, along three axes in m/s 2 . Like the gravity sensor, the linear acceleration is typically implemented as a virtual sensor using the accelerometer output. In this case, to obtain the linear acceleration, a high-pass filter is applied to the accelerometer output. -
Sensor.TYPE_ROTATION_VECTOR—Returns the orientation of the device as a combination of an angle around an axis. It typically is used as an input to thegetRotationMatrixFromVectormethod from the Sensor Manager to convert the returned rotation vector into a rotation matrix. The rotation vector is typically implemented as a virtual sensor that can combine and correct the results obtained from multiple sensors, such as the accelerometers and gyroscope, to provide a smoother rotation matrix. -
Sensor.TYPE_GEOMAGNETIC_ROTATION_VECTOR—An alternative to the rotation vector, implemented as a virtual Sensor using the magnetometer rather than gyroscope. As a result, it uses lower power but is noisier and best used outdoors. Introduced in Android 4.4 (API Level 19). -
Sensor.TYPE_POSE_6DOF—A pose sensor with 6 degrees of freedom; similar to the rotation vector, but with an additional delta translation from an arbitrary reference point. This is a high-power sensor that is expected to be more accurate than the rotation vector. Introduced in Android 7.0 (API Level 24). -
Sensor.TYPE_MOTION_DETECT—A virtual Sensor that returns a value of 1.0 if it determines that the device has been in motion for at least 5 seconds, with a maximum latency of another 5 seconds. Introduced in Android 7.0 (API Level 24). -
Sensor.TYPE_STATIONARY_DETECT—A virtual Sensor that returns a value of 1.0 if it determines that the device has been stationary for at least 5 seconds, with a maximum latency of another 5 seconds. Introduced in Android 7.0 (API Level 24). -
Sensor.TYPE_SIGNIFICANT_MOTION—A one-shot Sensor that is triggered when a significant device movement is detected, and then automatically disables itself to prevent further results. This is a wakeup sensor, meaning that it will continue to monitor for changes while the device is asleep, and will wake the device when motion is detected. Introduced in Android 4.3 (API Level 18).
Body and Exercise Sensors
With new hardware such as watches and fitness monitors available through devices including Android Wear, a new set of external sensors is available. Body Sensors are typically placed on—or in proximity to—the user’s body, allowing you to detect body and health data such as heart beat, heart rate, and step count.
-
Sensor.TYPE_HEART_BEAT—A Sensor that monitors heart-beats, returning a single value whenever a heart-beat-peak is detected, corresponding to the positive peak in the QRS complex of an ECG signal. Introduced in Android 7.0 (API Level 24). -
Sensor.TYPE_HEART_RATE—A heart-rate monitor that returns a single value describing the user’s heart rate in beats-per-minute (bpm). Introduced in Android 4.4 (API Level 20). -
Sensor.TYPE_LOW_LATENCY_OFFBODY_DETECT—Returns a single value whenever a wearable device transitions from being in contact/not in contact with a person’s body. Introduced in Android 8.0 (API Level 26.) -
Sensor.TYPE_STEP_COUNTER—Returns the cumulative number of steps detected while active since the last device reboot. This sensor is implemented as a low-power hardware Sensor that can be used to continuously track steps over a long period of time. Unlike most of the Sensors described, you should not unregister this Sensor when your Activity is stopped if you want to continue counting steps while your app is in the background. Introduced in Android 4.4 (API Level 19). -
Sensor.TYPE_STEP_DETECTOR—Returns a single value of 1.0 whenever a step is taken, corresponding with the foot touching the ground. If you want to track the number of steps, the step counter sensor is more appropriate. Introduced in Android 4.4 (API Level 19).
Discovering and Identifying Sensors
You can determine if a particular type of Sensor is available on the host device using the Sensor Manager’s
getDefaultSensor
method, passing in the relevant
Sensor.TYPE_
constant. If no Sensor of that type is available,
null
will be returned; if one or more Sensors are available, the default implementation will be returned.
Listing 16-1 shows how to determine if an atmospheric pressure Sensor is available.
As the name suggests, the
getDefaultSensor
method returns the
default
sensor of a given type, so it’s worth noting that some Android devices may have multiple independent hardware sensors, or virtual Sensors, of a given type.
To discover every Sensor available on the host platform, you can use the
getSensorList
method on the Sensor Manager, passing in a Sensor type, or
Sensor.TYPE_ALL
to return a list of every Sensor:
List<Sensor> allSensors = sensorManager.getSensorList(Sensor.TYPE_ALL);
To find a list of all the available Sensors of a particular type, use the Sensor constants to indicate the type of Sensor you require, as shown in the following code that returns all the available gyroscopes:
List<Sensor> gyroscopes = sensorManager.getSensorList(Sensor.TYPE_GYROSCOPE);
By convention, any hardware Sensor implementations are returned at the top of the list, followed by virtual implementations, though this is not guaranteed. Since Android 5.0 (API Level 21), the default Sensor is the first Sensor in this list that isn’t a wakeup Sensor (unless the Sensor is by definition a wakeup sensor). The difference between wakeup and non-wakeup Sensors is described in the “Wakeup and Non-Wakeup Sensors” section,
You can also use an overloaded implementation of
getDefaultSensor
that takes both a Sensor type, and a Boolean indicating if you specifically require a wakeup sensor:
Sensor wakeupProximitySensor =sensorManager.getDefaultSensor(Sensor.TYPE_PROXIMITY, TRUE);
Android 7.0 Nougat (API Level 24) introduced the concept of dynamic Sensors, primarily to support the Android Things platform. Dynamic Sensors behave like traditional Sensors but can be connected or disconnected at run time.
You can determine if dynamic Sensors are available on the current host platform using the Sensor Manager’s
isDynamicSensorDiscoverySupported
method. To determine if a specific Sensor is dynamic, call its
isDynamicSensor
method.
To return a list of the available dynamic Sensors you can use
getDynamicSensorList
in the same way as described previously for all Sensors, specifying
Sensor.TYPE_ALL
to return all the dynamic Sensors, or the Sensor type constants for a particular Sensor type:
if (sensorManager.isDynamicSensorDiscoverySupported()) {List<Sensor> allDynamicSensors= sensorManager.getDynamicSensorList(Sensor.TYPE_ALL);// TODO Do something with the dynamic sensor list.}
Because they can be added or removed at run time, the result of the
getDynamicSensor
call may change while your app is running.
To track the addition or removal of dynamic Sensors, you can implement the
DynamicSensorCallback
, and register it with the Sensor Manager, as shown in the following code:
SensorManager.DynamicSensorCallback dynamicSensorCallback =new SensorManager.DynamicSensorCallback() {@Overridepublic void onDynamicSensorConnected(Sensor sensor) {super.onDynamicSensorConnected(sensor);// TODO React to the new Sensor being connected.}@Overridepublic void onDynamicSensorDisconnected(Sensor sensor) {super.onDynamicSensorDisconnected(sensor);// TODO React to the Sensor being disconnected.}};sensorManager.registerDynamicSensorCallback(dynamicSensorCallback);
Determining Sensor Capabilities
If there are multiple Sensor implementations for a given sensor type, you may want to decide which of the returned Sensors to use by querying the returned Sensors and comparing their capabilities.
Each Sensor provides methods to report its name, power use while active (in mA), minimum delay latency (minimum delay between two subsequent events in microseconds), maximum range and resolution (in the units of its return values), module version, and vendor string:
String name = sensor.getName();float power = sensor.getPower();float maxRange = sensor.getMaximumRange();float resolution = sensor.getResolution();float minLatency = sensor.getMinDelay();int version = sensor.getVersion();String vendor = sensor.getVendor();Log.d(TAG, "Sensor " + name + " (" + vendor + ":" + version +") Power:" + power + ", Range: " + maxRange +", Resolution: " + resolution + ", Latency: " + minLatency);
It can be useful to examine and experiment with the available Sensors in order to utilize the most appropriate implementation for your needs. In many cases the smoothing, filtering, and corrections applied to the virtual Sensors may provide better results for your applications than the default hardware results.
The following code snippet shows how to select a light Sensor with the highest maximum range and lowest power requirement:
List<Sensor> lightSensors= sensorManager.getSensorList(Sensor.TYPE_LIGHT);Sensor bestLightSensor= sensorManager.getDefaultSensor(Sensor.TYPE_LIGHT);if (bestLightSensor != null)for (Sensor lightSensor : lightSensors) {float range = lightSensor.getMaximumRange();float power = lightSensor.getPower();if (range >= bestLightSensor.getMaximumRange())if (power < bestLightSensor.getPower() ||range > bestLightSensor.getMaximumRange())bestLightSensor = lightSensor;}
Android 5.0 Lollipop (API Level 21) introduced support for finding the maximum delay latency, which returns the slowest frequency supported by a sensor—typically corresponding to when the batch FIFO (first-in-first-out) queue will be full. Ignore this value if it returns zero or a negative value:
float maxLatency = sensor.getMaxDelay();
API Level 21 also introduced the concept of a reporting mode for each sensor. By calling a Sensor’s
getReportingMode
method, you can determine how it reports its results, represented as one of the following return constants:
-
REPORTING_MODE_CONTINUOUS—Events are returned at least at the constant rate defined by the rate parameter used when you register a listener (as described in the following section). -
REPORTING_MODE_ON_CHANGE—Events are returned only when the value changes, limited to be no more often than the rate parameter used when registering a listener. -
REPORTING_MODE_ONE_SHOT—Events are reported only once, when the event is detected. Sensors of this type are monitored by requesting a trigger listener rather than an event listener, as described in the following section. -
REPORTING_MODE_SPECIAL_TRIGGER—Used by Sensors that have special triggers that aren’t continuous, one-off, nor change-triggered. For example, step detectors, which return results when a step is detected.
Wakeup and Non-Wakeup Sensors
Typically, if your application is not holding a Wake Lock, a period of non–user-interaction will result in the system’s application processor entering a low-power suspend mode to preserve battery (Wake Locks can be used to force the processor to remain active).
When the processor goes into low-power mode, non-wakeup Sensors will continue to consume power and generate events, but they will not wake the processor in order for your application to receive and process them. Instead, they will be placed into their hardware FIFO data queue, if one is available.
Older events will be lost when the maximum queue sized is reached, meaning you risk losing data that has been collected at significant battery cost. As a result, it’s best practice to start and stop listening to Sensor results within the
onResume
and
onPause
methods of your Activities, respectively. This ensures your non-wakeup Sensors are drawing power only when the Activity is active.
Conversely, wakeup Sensors will wake the processor when their FIFO buffer is full or when it reaches the maximum latency you specify when requesting updates. Waking the processor will significantly increase battery use, so the larger the latency you specify, the lower the battery impact from your Sensor use. The process for requesting updates is described in the following section.
You can determine if a particular Sensor is a wakeup Sensor using the
isWakeupSensor
method:
boolean isWakeup = sensor.isWakeUpSensor();
You can find the maximum FIFO queue size for a Sensor using its
maxFifoEventCount
method.
Monitoring Sensor Results
How you monitor the values observed by a Sensor depends on the reporting mode used by that Sensor.
For most Sensors—those that report results continuously, on change, or caused by a special trigger—you receive Sensor Events by implementing a
SensorEventListener
, and registering it using the Sensor Manager’s
registerListener
method.
Override the
onSensorChanged
handler to receive new Sensor values, and
onAccuracyChanged
to react to changes in a Sensor’s accuracy, as shown in the skeleton code in
Listing 16-2
.
The
SensorEvent
parameter received by the
onSensorChanged
method includes the following four properties to describe each Sensor Event:
-
sensor—The Sensor object that triggered the event. -
accuracy—The accuracy of the Sensor when the event occurred (as described in the next list). -
values—A float array that contains the new value(s) observed. The following section explains the values returned for each Sensor type. -
timestamp—The time (in nanoseconds) at which the Sensor Event occurred.
You can monitor changes in the accuracy of a Sensor separately, using the
onAccuracyChanged
method.
In both handlers the
accuracy
value represents the Sensor’s accuracy, using one of the following Sensor Manager constants:
-
SENSOR_STATUS_ACCURACY_LOW—Indicates that the Sensor is reporting with low accuracy and needs to be calibrated. -
SENSOR_STATUS_ACCURACY_MEDIUM—Indicates that the Sensor data is of average accuracy and that calibration might improve the accuracy of the reported results. -
SENSOR_STATUS_ACCURACY_HIGH—Indicates that the Sensor is reporting with the highest possible accuracy. -
SENSOR_STATUS_UNRELIABLE—Indicates that the Sensor data is unreliable, meaning that either calibration is required or readings are not currently possible. -
SENSOR_STATUS_NO_CONTACT—Indicates that the Sensor data is unreliable because the Sensor has lost contact with what it measures (for example, the heart rate monitor is not in contact with the user).
To listen for Sensor Events, register your Sensor Event Listener with the Sensor Manager. Specify the Sensor to observe, and the minimum frequency at which you want to receive updates, either in microseconds or using one of the
SensorManager.SENSOR_DELAY_
constants, as shown in
Listing 16-3
.
The rate you select is not binding; the Sensor Manager may return results faster or slower than you specify, though it will tend to be faster. To minimize the associated resource cost of using the Sensor in your application, it is best practice to select the slowest acceptable rate.
You can (and must) unregister your Sensor Event Listeners when your application no longer needs to receive updates:
sensorManager.unregisterListener(mySensorEventListener);
Android 4.4 KitKat (API Level 19) introduced an overloaded
registerListener
method, as shown in
Listing 16-4
, that also allows you to indicate a maximum reporting latency, representing the longest time (in microseconds) that events can be delayed before being returned to the handler.
Specifying a large reporting latency is an effective way to reduce battery use when using wakeup Sensors .
For one-shot Sensors, such as the significant motion detector, you should monitor updates by implementing a
TriggerEventListener
, rather than the Sensor Event Listener, and overriding the
onTrigger
handler as shown in
Listing 16-5
.
The
TriggerEvent
parameter received by the
onTrigger
handler includes the following properties to describe each Trigger Event:
-
sensor—The Sensor object that triggered the event. -
values—A float array that contains the new value(s) observed. The following section explains the values returned for each sensor type. -
timestamp—The time (in nanoseconds) at which the Sensor Event occurred.
To listen for Sensor Events, register your Trigger Event Listener with the Sensor Manager, specifying the Sensor to observe, as shown in Listing 16-6 .
Unlike continuous or on-change Sensors, which deliver multiple events as their values change, one-shot trigger Sensors return an event only once. When the Sensor detects the trigger condition the Trigger Event Listener will be fired, and the trigger Sensor request automatically cancelled.
To receive additional Trigger Events for the same Sensor, you must call
requestTriggerSensor
again. Alternatively, if you have not received a Trigger Event, and your application no longer needs to respond to it, you should cancel your Trigger Event Listeners manually:
sensorManager.cancelTriggerSensor(triggerEventListener, sensor);
Android 7.0 Nougat (API Level 24) also introduced support for Sensors to return information beyond the accuracy status and value arrays described earlier. You can determine if a Sensor is capable of reporting this additional information using the
isAdditionalInfoSupported
method.
If a Sensor is capable of returning Sensor Additional Info, you can use the new
SensorEventCallback
, an extension of the Sensor Event Listener that includes additional callback handlers, as shown in the skeleton code of
Listing 16-7
.
The
onSensorChanged
and
onAccuracyChanged
handlers for the Sensor Event Callback behave identically to the Sensor Event Listener described previously. Additionally, you can override the
onFlushCompleted
and
onSensorAdditionalInfo
handlers.
Use the
onFlushCompleted
handler to be notified when the Sensor Manager’s
flush
method has been called and completed:
sensorManager.flush(sensorEventCallback);
When called, this method will flush the FIFO of any Sensors associated with the passed-in Sensor Event Listener. As a result, if there are events currently in Sensor’s FIFO queue, they will be returned to the listener as though the specified maximum report latency has expired.
The
onSensorAdditionalInfo
handler returns a
SensorAdditionalInfo
object that includes additional information regarding the current state of the sensor, including:
-
intValuesandfloatValues—Integer and float arrays that may contain payload value(s) for the Sensor, as described by the information type. -
type—Sensors can return multiple types of additional sensor information. They are grouped together within a frame of data. Each frame is bound by theTYPE_FRAME_BEGINandTYPE_FRAME_ENDtypes, between which data for multiple additional types can be returned, and the results made available using the integer or float value arrays. The type of the current data returned can be identified using thetypevalue, corresponding to one of the following:-
TYPE_FRAME_BEGINandTYPE_FRAME_END—Mark the beginning and end of this frame of additional information. -
TYPE_INTERNAL_TEMPERATURE—The internal Sensor temperature, returned in degrees Celsius as the first value in thefloatValuesarray. -
TYPE_SAMPLING—The raw sampling period, in seconds, returned as the first value in the float array; and the estimated sample time-jitter returned as the standard deviation, available in the second value in the float array. -
TYPE_SENSOR_PLACEMENT—The physical location and angle of the Sensor relative to the device’s geometric Sensor. The values are returned as a homogeneous matrix in the first twelve values in the float array. -
TYPE_UNTRACKED_DELAY—The delays to the Sensor results introduced by data processing (such as filtering or smoothing), which have not been taken into account in the Sensor Event timestamps. The first float array value is the estimated delay, the second value is the estimated standard deviation in estimated delays. -
TYPE_VEC3_CALIBRATION—The vector calibration parameter, representing the calibration applied to a Sensor with three-element vector output. Returns a homogeneous matrix in the first 12 values in the float array describing any linear transformation, including rotation, scaling, shear, and shift.
-
-
serial—Each information type returned within a frame is numbered sequentially, with the serial value identifying the sequence number within the frame.
A Sensor may return multiple Sensor Additional Info values for each new Sensor value, corresponding to the multiple possible info types. The collection of values is referred to as a frame. As a result, the
onSensorAdditionalInfo
handler is likely to be triggered many times for each
onSensorChanged
trigger.
Interpreting Sensor Values
The length and composition of the
values
array within the Sensor Event parameter returned to the
onSensorChanged
handler vary depending on the type of Sensor being monitored. The details are summarized in
Table 16-1
. You can find further details on the use of the accelerometer, orientation, magnetic field, gyroscopic, and environmental Sensors in the following sections.
TABLE 16-1 Sensor Return Values
| SENSOR TYPE | VALUE COUNT | VALUE COMPOSITION | COMMENTARY |
TYPE_ACCELEROMETER
|
3 |
value[0]
: X-axis (Lateral)
value[1]
: Y-axis (Longitudinal)
value[2]
: Z-axis (Vertical)
|
Acceleration along three axes in m/s 2 . Note that when at rest, these values will include the acceleration due to gravity. |
TYPE_GRAVITY
|
3 |
value[0]
: X-axis (Lateral)
value[1]
: Y-axis (Longitudinal)
value[2]
: Z-axis (Vertical)
|
Force of gravity along three axes in m/s
2
. The Sensor Manager includes a set of gravity constants of the form
SensorManager.GRAVITY_
|
TYPE_RELATIVE_HUMIDITY
|
1 |
value[0]
: Relative humidity
|
Relative humidity as a percentage (%). |
TYPE_LINEAR_ACCELERATION
|
3 |
value[0]
: X-axis (Lateral)
value[1]
: Y-axis (Longitudinal)
value[2]
: Z-axis (Vertical)
|
Linear acceleration along three axes in m/s 2 without the force of gravity. |
TYPE_GYROSCOPE
|
3 |
value[0]
: X-axis
value[1]
: Y-axis
value[2]
: Z-axis
|
Rate of rotation around three axes in radians/second (rad/s). |
TYPE_ROTATION_VECTOR
and
TYPE_GEOMAGNETIC_ROTATION_VECTOR
|
4 |
values[0]
: x*sin(θ/2)
values[1]
: y*sin(θ/2)
values[2]
: z*sin(θ/2)
values[3]
: cos(θ/2)
values[4]
: Estimated heading accuracy (in radians)
|
Device orientation described as an angle of rotation around an axis (°).
Note that the third value was optional, and the fourth unavailable, until API 18. Both will now always be returned. |
TYPE_MAGNETIC_FIELD
|
3 |
value[0]
: X-axis (Lateral)
value[1]
: Y-axis (Longitudinal)
value[2]
: Z-axis (Vertical)
|
Ambient magnetic field measured in microteslas (μT) across three axes. |
TYPE_LIGHT
|
1 |
value[0]
: Illumination
|
Ambient light measured in lux (lx). The Sensor Manager includes a set of constants representing different standard illuminations of the form
SensorManager.LIGHT_
|
TYPE_PRESSURE
|
1 |
value[0]
: Atmospheric Pressure
|
Atmospheric pressure measured in millibars/hectopascals (hPa). |
TYPE_PROXIMITY
|
1 |
value[0]
: Distance
|
Distance from target measured in centimeters (cm). Some sensors are capable only of returning binary “far” or “near” values, which are represented as the maximum range for the former, and a lesser value for the latter. |
TYPE_AMBIENT_TEMPERATURE
|
1 |
value[0]
: Temperature
|
Ambient temperature measured in degrees Celsius (°C). |
TYPE_POSE_6DOF
|
15 |
value[0]
: x*sin(θ/2)
value[1]
: y*sin(θ/2)
value[2]
: z*sin(θ/2)
value[3]
: cos(θ/2)
value[4]
: Translation along x-axis from an arbitrary origin.
value[5]
: Translation along y-axis from an arbitrary origin.
value[6]
: Translation along z-axis from an arbitrary origin.
value[7]
: Delta quaternion rotation x*sin(θ/2)
value[8]
: Delta quaternion rotation y*sin(θ/2)
value[9]
: Delta quaternion rotation z*sin(θ/2)
value[10]
: Delta quaternion rotation cos(θ/2)
value[11]
: Delta translation along x-axis.
value[12]
: Delta translation along y-axis.
value[13]
: Delta translation along z-axis.
value[14]
: Sequence number
|
A rotation expressed as a quaternion and a translation expressed in SI units. Also includes rotation and translation deltas indicating the change in pose since the previous pose. |
TYPE_STATIONARY_DETECT
|
1 |
value[0]
: 1.0
|
Event indicating the device has been stationary for at least 5 seconds. |
TYPE_MOTION_DETECT
|
1 |
value[0]
: 1.0
|
Event indicating the device has been in motion for at least 5 seconds. |
TYPE_HEART_BEAT
|
1 |
value[0]
: Correctness confidence
|
Confidence (0 to 1) that the associated timestamp correctly represents the positive peak in the QRS complex of an ECG signal indicating a heart beat. |
TYPE_LOW_LATENCY_OFFBODY_DETECT
|
1 |
value[0]
: Off-body state
|
Indication if the device is in contact with a body. 1.0 indicates on-body, 0.0 indicates off-body. |
TYPE_SIGNIFICANT_MOTION
|
1 |
value[0]
: 1.0
|
Event indicating the device has registered a significant movement. |
TYPE_HEART_RATE
|
1 |
value[0]
: Heart rate
|
The user’s heart rate in beats-per-minute (bpm). |
TYPE_STEP_COUNTER
|
1 |
value[0]
: Step count
|
Cumulative number of steps detected since the last device reboot. |
TYPE_STEP_DETECTOR
|
1 |
value[0]
: 1.0
|
Event corresponding with the moment a foot touches the ground. |
TESTING SENSORS WITH THE ANDROID VIRTUAL DEVICE AND EMULATOR
The availability of particular Sensors is heavily dependent on the physical hardware available on particular devices. To help with testing, the Android Virtual Device and emulator include a set of virtual sensor controls that emulate physical hardware sensors, returning values through the Sensor Manager.
You can control the values returned by the emulator’s sensors using the extended controls screen, as shown in Figure 16-1 .

The emulator currently supports virtualized sensors to simulate movement and rotation through the accelerometer, magnetometer, and rotation vector Sensors, as well as environmental Sensors including ambient temperature, proximity, light level, atmospheric pressure, and relative humidity.
BEST PRACTICES FOR WORKING WITH SENSORS
Using Sensors in your applications can be incredibly powerful; like all good things, their use comes at a price—primarily the cost of increased battery drain.
You should follow several best practices to ensure you make the most of the device Sensors, without having a negative overall impact on the user experience:
- Always verify Sensors exist before attempting to use them —The Android framework doesn’t require Android devices to include any particular Sensor. The wide variety of devices, form-factors, and manufacturers ensures that you can’t assume any particular Sensor is available.
- Provide alternatives to Sensor input —If you are using Sensors to provide user-input to your app, it’s good practice to offer an alternative mechanism to account for devices that don’t support those Sensors.
- Don’t use deprecated Sensor types —For historical and legacy reasons, the framework includes several Sensor types and convenience methods that have since been deprecated and replaced with more accurate and efficient alternatives.
- Be conservative when selecting Sensor reporting frequencies —Always opt for the slowest possible update rate. If your app isn’t using every received Sensor result, it’s wasting resources and battery.
-
Don’t block the
onSensorChangedhandler —The high frequency at which some sensors are capable of returning new values means you should limit the work being done within theonSensorChangedhandler to ensure you aren’t blocking it from receiving new results. - Unregister your Sensor Event Listeners —The most important pattern to follow is ensuring all your Sensor Listeners are unregistered when you no longer need them to continue collecting data. If you are using Sensor data to alter the UI, you should always unregister the listener when the Activity is paused.
MONITORING A DEVICE’S MOVEMENT AND ORIENTATION
Sensors such as accelerometers, compasses, and gyroscopes make it possible to use the device’s direction, orientation, and movement to offer new and innovative input mechanisms.
The availability of specific Sensors depends on the hardware and software platform on which your application is running. A 70” flat screen is difficult to lift and awkward to maneuver, so as a result Android TVs are unlikely to include orientation and movement Sensors.
Where they are available, movement and orientation sensors can be used by your application to:
- Determine the device orientation
- React to changes in orientation
- React to movement or acceleration
- Understand which direction the user is facing
- Monitor gestures based on movement, rotation, or acceleration
This opens some intriguing possibilities for your applications. By monitoring orientation, direction, and movement, you can:
- Use the device’s heading or orientation with a map, camera, and location-based service to create augmented-reality apps.
- Use the rotation vector and pose Sensors to create low-latency virtual reality applications.
- Monitor for rapid acceleration to detect if a device has been dropped, thrown, or picked up.
- Measure movement or vibration.
- Create app interfaces that use physical gestures and movement as input.
- Use orientation and linear acceleration Sensors to monitor physical activity and movement to track fitness.
Determining the Natural Orientation of a Device
Before calculating the device’s orientation, you must first understand its “at rest” (natural) orientation. The natural orientation of a device is the position at which the orientation is 0 on all three axes. The natural orientation can be either portrait or landscape, but it typically is identifiable by the placement of branding and hardware buttons.
For a typical smartphone, the natural orientation is with the device laying on its back on a desk, with the top of the device pointing due north.
More creatively, you can imagine yourself perched on top of a jet fuselage during level flight. An Android device has been strapped to the fuselage in front of you. In its natural orientation the screen is pointing up into space, the top of the device pointing toward the nose of the plane, and the plane is heading due north, as shown in Figure 16-2 .

Android can rotate the display for your convenience; however, the Sensor axes described in Table 16-1 do not change as the device rotates. As a result, the display orientation and device orientation can be different.
Sensor values are always returned relative to the natural orientation of the device, whereas your application is likely to want the current orientation relative to the display orientation. As a result, if your application uses device orientation or linear acceleration as an input, it may be necessary to adjust your Sensor inputs based on the display orientation relative to the natural orientation. This is particularly important because the natural orientation of most early Android phones was portrait; however, with the range of Android devices having expanded to also include tablets and televisions, many Android devices (including smartphones) are naturally oriented when the display is in landscape.
You can find the current screen rotation using the
getRotation
method on the default Display object, as shown in
Listing 16-8
.
Note that in some cases Android will not rotate the screen to accommodate the device being upside down. As a result, the user may be holding the phone upside down, but the screen will still be displayed at (and report as) the same relative orientation.
Introducing Accelerometers
Acceleration is defined as the rate of change of velocity; that means accelerometers measure how quickly the speed of the device is changing in a given direction. Using an accelerometer you can detect movement and, more usefully, the rate of change of the speed of that movement in a given direction (also known as linear acceleration ).
Generally, you’ll be interested in acceleration changes relative to a rest state, or rapid movement (signified by rapid changes in acceleration), such as gestures used for user input. In the former case you’ll often need to calibrate the device to calculate the initial acceleration to take those effects into account for future results.
Detecting Acceleration Changes
Acceleration is a measure of the rate of change in velocity, where velocity is the speed of movement in a particular direction. The rate of acceleration can tell you how much faster (or slower) you are moving, but by itself offers no information on the current speed or the direction of travel.
As a result, at a given moment deceleration in a given direction will produce the same result as acceleration in the opposite direction.
Acceleration can be measured along three directional axes:
- Left-right (lateral)
- Forward-backward (longitudinal)
- Up-down (vertical)
The Sensor Manager reports accelerometer sensor changes along all three axes.
The sensor values returned through the
values
property of the Sensor Event Listener’s Sensor Event parameter represent lateral, longitudinal, and vertical acceleration, in that order.
Figure 16-3 illustrates the mapping of the three directional acceleration axes in relation to the device at rest in its natural orientation. Note that for the remainder of this section, I will refer to the movement of the device in relation to its natural orientation, which may be either landscape or portrait.

- x-axis (lateral) —Sideways (left or right) acceleration, for which positive values represent acceleration toward the right (or deceleration to the left), and negative values indicate acceleration toward the left (or deceleration toward the right).
- y-axis (longitudinal) —Forward or backward acceleration, for which forward acceleration, such as the device being pushed in the direction of the top of the device, is represented by a positive value and acceleration backward represented by negative values. Deceleration in either direction is reversed—deceleration while moving forward results in negative results, and while moving backwards results in positive numbers.
- z-axis (vertical) —Upward or downward acceleration, for which positive represents upward acceleration, such as the device being lifted. While at rest at the device’s natural orientation, the vertical accelerometer will register –9.8m/s 2 as a result of gravity.
As described earlier, you can monitor changes in acceleration using a Sensor Event Listener. Register an implementation of
SensorEventListener
with the Sensor Manager, using a Sensor object of type
Sensor.TYPE_ACCELEROMETER
to request accelerometer updates.
Listing 16-9
registers the default accelerometer using the default update rate.
Your Sensor Listener should implement the
onSensorChanged
method, which will be fired when acceleration in any direction is measured.
The
onSensorChanged
method receives a
SensorEvent
that includes a
values
float-array parameter, containing the acceleration measured along all three axes. When a device is held in its natural orientation, the first element represents lateral acceleration; the second element represents longitudinal acceleration; and the final element represents vertical acceleration, as shown in the following extension to
Listing 16-9
:
final SensorEventListener mySensorEventListener = new SensorEventListener() {public void onSensorChanged(SensorEvent sensorEvent) {if (sensorEvent.sensor.getType() == Sensor.TYPE_ACCELEROMETER) {float xAxis_lateralA = sensorEvent.values[0];float yAxis_longitudinalA = sensorEvent.values[1];float zAxis_verticalA = sensorEvent.values[2];// TODO apply the acceleration changes to your application.}}public void onAccuracyChanged(Sensor sensor, int accuracy) {}};
Creating a Gravitational Force Meter
In the following example you create a simple device to measure gravitational force (g-force) using the accelerometers to determine the current force being exerted on the device.
The acceleration force exerted on the device at rest is 9.8 m/s
2
toward the center of the Earth. In this example you’ll negate the force of gravity by accounting for it using the
SensorManager.STANDARD_GRAVITY
constant. If you plan to use this application on another planet, you can use an alternative gravity constant, as appropriate.
-
Start by creating a new GForceMeter project that includes a backwards compatible blank
ForceMeterActivityActivity. Modify the new Activity’s layout resource to display two centered lines of large, bold text that will be used to display the current g-force and maximum observed g-force:<?xml version="1.0" encoding="utf-8"?><LinearLayoutxmlns_android="http://schemas.android.com/apk/res/android"android:orientation="vertical"android:layout_width="match_parent"android:layout_height="match_parent"><TextViewandroid:id="@+id/acceleration"android:gravity="center"android:layout_width="match_parent"android:layout_height="wrap_content"android:textStyle="bold"android:textSize="32sp"android:text="Current Acceleration"android:layout_margin="10dp"/><TextViewandroid:id="@+id/maxAcceleration"android:gravity="center"android:layout_width="match_parent"android:layout_height="wrap_content"android:textStyle="bold"android:textSize="40sp"android:text="Maximum Acceleration"android:layout_margin="10dp"/></LinearLayout> -
Within the
ForceMeterActivity, create instance variables to store references to the Text Views and the Sensor Manager. Also create variables to record the current and maximum detected acceleration values:private SensorManager mSensorManager;private TextView mAccelerationTextView;private TextView mMaxAccelerationTextView;private float mCurrentAcceleration = 0;private float mMaxAcceleration = 0; -
Add a calibration constant that represents the acceleration due to gravity:
private final double calibration = SensorManager.STANDARD_GRAVITY; -
Create a new
SensorEventListenerimplementation that sums the acceleration detected along each axis and negates the acceleration due to gravity. It should update the current (and possibly maximum) acceleration whenever a change in acceleration is detected:private final SensorEventListener mSensorEventListener= new SensorEventListener() {public void onAccuracyChanged(Sensor sensor, int accuracy) { }public void onSensorChanged(SensorEvent event) {double x = event.values[0];double y = event.values[1];double z = event.values[2];double a = Math.round(Math.sqrt(Math.pow(x, 2) +Math.pow(y, 2) +Math.pow(z, 2)));mCurrentAcceleration = Math.abs((float)(a-calibration));if (mCurrentAcceleration > mMaxAcceleration)mMaxAcceleration = mCurrentAcceleration;}}; -
Update the
onCreatemethod to get a reference to the two Text Views and the Sensor Manager:@Overrideprotected void onCreate(Bundle savedInstanceState) {super.onCreate(savedInstanceState);setContentView(R.layout.activity_force_meter);mAccelerationTextView = findViewById(R.id.acceleration);mMaxAccelerationTextView = findViewById(R.id.maxAcceleration);mSensorManager =(SensorManager) getSystemService(Context.SENSOR_SERVICE);} -
Override the
onResumehandler to register your new Listener for accelerometer updates using theSensorManager:@Overrideprotected void onResume() {super.onResume();Sensor accelerometer= mSensorManager.getDefaultSensor(Sensor.TYPE_ACCELEROMETER);mSensorManager.registerListener(mSensorEventListener,accelerometer,SensorManager.SENSOR_DELAY_FASTEST);} -
Also override the corresponding
onPausemethod to unregister the Sensor Event Listener when the Activity is no longer active:@Overrideprotected void onPause() {super.onPause();mSensorManager.unregisterListener(mSensorEventListener);} -
The accelerometers can update hundreds of times a second, so updating the Text Views for every change in acceleration would quickly flood the UI event queue. Instead, create a new
updateGUImethod that synchronizes with the GUI thread and updates the Text Views. This will be executed regularly using a Timer introduced in the next step:private void updateGUI() {runOnUiThread(new Runnable() {public void run() {String currentG = mCurrentAcceleration /SensorManager.STANDARD_GRAVITY+ "Gs";mAccelerationTextView.setText(currentG);mAccelerationTextView.invalidate();String maxG = mMaxAcceleration/SensorManager.STANDARD_GRAVITY+ "Gs";mMaxAccelerationTextView.setText(maxG);mMaxAccelerationTextView.invalidate();}});} -
Update the
onCreatemethod to create a timer that triggers the UI update method defined in Step 8 every 100 milliseconds:@Overrideprotected void onCreate(Bundle savedInstanceState) {super.onCreate(savedInstanceState);setContentView(R.layout.activity_force_meter);mAccelerationTextView = findViewById(R.id.acceleration);mMaxAccelerationTextView = findViewById(R.id.maxAcceleration);mSensorManager =(SensorManager) getSystemService(Context.SENSOR_SERVICE);Timer updateTimer = new Timer("gForceUpdate");updateTimer.scheduleAtFixedRate(new TimerTask() {public void run() {updateGUI();}}, 0, 100);} -
Finally, because this application is functional only when the host device features an accelerometer sensor, modify the manifest to include a
uses-featurenode specifying the requirement for accelerometer hardware:<uses-feature android:name="android.hardware.sensor.accelerometer" />
When finished, you’ll want to test this out. Ideally, you can do this in an F16 while Maverick performs high-g maneuvers over the Atlantic. That’s been known to end badly, so, failing that, you can experiment with spinning around in circles while holding your phone at arm’s length. Remember to grip your phone tightly.
The Sensor processing performed within this example is effectively the same as the preprocessing performed by the linear acceleration Sensor. As an exercise, update this sample to use the linear acceleration Sensor rather than processing the raw accelerometer results.
Determining a Device’s Orientation
You typically calculate a device’s orientation using the combined output of the magnetic field, accelerometers, and gyroscope.
If you’ve done a bit of trigonometry, you’ve got the skills required to calculate the device orientation based on the results from these three Sensors. If you enjoyed trig as much as I did, you’ll be happy to learn that Android can do these calculations for you.
Understanding the Standard Reference Frame
Using the standard reference frame, the device orientation is reported along three dimensions, as shown in Figure 16-4 .

The standard reference frame is described relative to the device’s natural orientation, as described earlier in this chapter.
Continuing the airplane analogy, imagining yourself perched on top of a jet fuselage during level flight, the z-axis comes out of the screen toward space; the y-axis comes out of the top of the device toward the nose of the plane; and the x-axis heads out toward the starboard wing. Relative to that, pitch, roll, and azimuth can be described as follows:
- Pitch —The angle of the device around the x-axis. During level flight, the pitch will be 0; as the nose angles upward, the pitch increases. It will hit 90 when the jet is pointed straight up. Conversely, as you angle the nose downward past level, the pitch will decrease until it reaches –90 as you hurtle toward imminent death. If the plane flips onto its back the pitch will report either +/–180.
- Roll —The device’s sideways rotation between –90 and 90 degrees around the y-axis. During level flight the roll is zero. As you execute a roll toward the starboard (right) side, the roll will increase, reaching 90 when the wings are perpendicular to the ground. As you continue, you will reach 180 when the plane is upside down. Rolling from level toward port (left) will decrease the roll in the same way.
- Azimuth —The azimuth (also referred to as heading or yaw) is the direction the device is facing around the z-axis, where 0/360 degrees is magnetic north, 90 east, 180 south, and 270 west. Changes in the plane’s heading will be reflected in changes in the azimuth value.
Determining Orientation Using the Rotation Vector Sensors
The Android framework offers a number of virtual orientation Sensors implemented to combine and correct the results obtained from multiple hardware sensors—including accelerometers, magnetometers, and gyroscopes—to provide smoother, more accurate orientation results.
The rotation vector Sensors return the orientation of the device as a vector describing an angle around an axis. This vector can be passed into the
getRotationMatrixFromVector
method from the Sensor Manager to convert a rotation vector into a rotation matrix, from which you can extract the orientation along each axis using the
getOrientation
method.
The three variations of the rotation vector sensor, each with subtle differences, are:
-
Sensor.TYPE_ROTATION_VECTOR—The basic rotation vector Sensor introduced in Android 2.3 (API Level 9), which uses the accelerometer and gyroscope to calculate orientation changes. -
Sensor.TYPE_GEOMAGNETIC_ROTATION_VECTOR—An alternative to the rotation vector, implemented using the magnetometer rather than gyroscope. It uses lower power but is noisier and best used outdoors. Introduced in Android 4.4 (API Level 19). -
Sensor.TYPE_GAME_ROTATION_VECTOR—Identical to the rotation vector Sensor, except that the y-axis doesn’t point north, but instead to some other reference, which is allowed to drift by the same order of magnitude as the gyroscope drift around the z-axis. Introduced in Android 4.3 (API Level 18).
Listing 16-10
shows how to use the
getRotationMatrixFromVector
and
getOrientation
methods to extract the current device orientation from the results of a rotation vector Sensor.
Note that
getOrientation
returns its results in radians, not degrees, with positive values representing anticlockwise rotation around the axis:
-
values[0]—The azimuth, or rotation around the z-axis, is zero when the device is heading magnetic north. -
values[1]—The pitch, or rotation around the x-axis. -
values[2]—The roll, or rotation around the y-axis.
Calculating Orientation Using the Accelerometer, Magnetometer, and Gyroscope
It’s also possible to determine the current device orientation using the unfiltered results provided directly by the accelerometer, magnetometer, and gyroscope.
Because you’re using multiple sensors, you need to create and register a Sensor Event Listener to monitor each of them. Within the
onSensorChanged
methods for each Sensor Event Listener, record the
values
array property received in separate field variables, as shown in
Listing 16-11
.
Register each Sensor with the Sensor Manager, as shown in the following code extension to Listing 16-11 ; this snippet uses the default hardware and UI update rate for both Sensors:
SensorManager sm = (SensorManager)getSystemService(Context.SENSOR_SERVICE);Sensor aSensor = sm.getDefaultSensor(Sensor.TYPE_ACCELEROMETER);Sensor mfSensor = sm.getDefaultSensor(Sensor.TYPE_MAGNETIC_FIELD);sm.registerListener(mCombinedSensorListener,aSensor,SensorManager.SENSOR_DELAY_UI);sm.registerListener(mCombinedSensorListener,mfSensor,SensorManager.SENSOR_DELAY_UI);
To calculate the current orientation from these Sensor values, use the
getRotationMatrix
and
getOrientation
methods from the Sensor Manager, as shown in
Listing 16-12
.
As in the previous section, the
getOrientation
method returns its results in radians, with positive values representing anticlockwise rotation around the axis in order of azimuth, pitch, and roll around the z-, x-, and y-axes, respectively.
Many Android devices also feature a gyroscope in addition to the accelerometer and magnetometer sensors. The gyroscope is used to measure angular speed around a given axis in radians per second, using the same coordinate system as described for the acceleration Sensor.
Android gyroscopes return the rate of rotation around three axes, where their sensitivity and high-frequency update rates provide extremely smooth and accurate updates. This makes them particularly good candidates for applications that use changes in orientation (as opposed to absolute orientation) as an input mechanism.
Because gyroscopes measure speed rather than direction, their results must be integrated over time in order to determine the current orientation, as shown in Listing 16-13 . The calculated result will represent a change in orientation around a given axis, so you will need to either calibrate or use additional Sensors in order to determine the initial orientation.
It’s worth noting that orientation values derived solely from a gyroscope can become increasingly inaccurate due to calibration errors and noise. To account for this effect, gyroscopes are often used in combination with other sensors—particularly accelerometers—to provide smoother and more accurate orientation results.
Remapping the Orientation Reference Frame
To measure the device orientation using a reference frame other than the natural orientation, use the
remapCoordinateSystem
method from the Sensor Manager. This typically is done to simplify the calculations required to create applications that can be used on devices whose natural orientation is portrait, as well as those that are landscape.
The
remapCoordinateSystem
method accepts four parameters:
-
The initial rotation matrix, found using
getRotationMatrix, as described earlier - A variable used to store the output (transformed) rotation matrix
- The remapped x-axis
- The remapped y-axis
The Sensor Manager provides a set of constants that let you specify the remapped x- and y-axes relative to the reference frame:
AXIS_X
,
AXIS_Y
,
AXIS_Z
,
AXIS_MINUS_X
,
AXIS_MINUS_Y
, and
AXIS_MINUS_Z
.
Listing 16-14 shows how to remap the reference frame so that the current display orientation (either portrait or landscape) is used as the reference frame for calculating the current device orientation. This is useful for games or applications that are locked to either landscape or portrait mode, as the device will report either 0 or 90 degrees based on the natural orientation of the device. By modifying the reference frame, you can ensure that the orientation values you use already take into account the orientation of the display relative to the natural orientation.
Creating a Compass and Artificial Horizon
In
Chapter 14
, “Advanced Customization of Your User Interface,” you improved the
CompassView
to display pitch, roll, and heading. In this example, you finally connect your Compass View to the hardware sensors to display the device orientation.
-
Open the Compass project you last changed in
Chapter 14
and open the
CompassActivity. Use the Sensor Manager to listen for orientation changes using the rotation vector Sensor. Start by adding local variables to store theCompassView,SensorManager, screen rotation value, and latest Sensor results:private CompassView mCompassView;private SensorManager mSensorManager;private int mScreenRotation;private float[] mNewestValues; -
Create a new
updateOrientationmethod that uses new heading, pitch, and roll values to update theCompassView:private void updateOrientation(float[] values) {if (mCompassView!= null) {mCompassView.setBearing(values[0]);mCompassView.setPitch(values[1]);mCompassView.setRoll(-values[2]);mCompassView.invalidate();}} -
Update the
onCreatemethod to get references to theCompassViewandSensorManager. Also determine the current screen orientation relative to the natural device orientation and initialize the heading, pitch, and roll:@Overridepublic void onCreate(Bundle savedInstanceState) {super.onCreate(savedInstanceState);setContentView(R.layout.main);mCompassView = findViewById(R.id.compassView);mSensorManager= (SensorManager) getSystemService(Context.SENSOR_SERVICE);WindowManager wm= (WindowManager) getSystemService(Context.WINDOW_SERVICE);Display display = wm.getDefaultDisplay();mScreenRotation = display.getRotation();mNewestValues = new float[] {0, 0, 0};} -
Create a new
calculateOrientationmethod to evaluate the device orientation using the last received rotation vector values. Remember to account for the natural orientation of the device by remapping the reference frame, if necessary:private float[] calculateOrientation(float[] values) {float[] rotationMatrix = new float[9];float[] remappedMatrix = new float[9];float[] orientation = new float[3];// Determine the rotation matrixSensorManager.getRotationMatrixFromVector(rotationMatrix, values);// Remap the coordinates based on the natural device orientation.int x_axis = SensorManager.AXIS_X;int y_axis = SensorManager.AXIS_Y;switch (mScreenRotation) {case (Surface.ROTATION_90):x_axis = SensorManager.AXIS_Y;y_axis = SensorManager.AXIS_MINUS_X;break;case (Surface.ROTATION_180):y_axis = SensorManager.AXIS_MINUS_Y;break;case (Surface.ROTATION_270):x_axis = SensorManager.AXIS_MINUS_Y;y_axis = SensorManager.AXIS_X;break;default: break;}SensorManager.remapCoordinateSystem(rotationMatrix,x_axis, y_axis,remappedMatrix);// Obtain the current, corrected orientation.SensorManager.getOrientation(remappedMatrix, orientation);// Convert from Radians to Degrees.values[0] = (float) Math.toDegrees(orientation[0]);values[1] = (float) Math.toDegrees(orientation[1]);values[2] = (float) Math.toDegrees(orientation[2]);return values;} -
Create a new
updateGUImethod that synchronizes with the GUI thread and callsupdateOrientationto update the Compass View. This will be executed regularly using a Timer introduced in the next step:private void updateGUI() {runOnUiThread(new Runnable() {public void run() {updateOrientation(mNewestValues);}});} -
Update the
onCreatemethod to create a Timer that triggers the UI update method defined in Step 5 sixty times a second:@Overridepublic void onCreate(Bundle savedInstanceState) {super.onCreate(savedInstanceState);setContentView(R.layout.main);mCompassView = findViewById(R.id.compassView);mSensorManager= (SensorManager) getSystemService(Context.SENSOR_SERVICE);WindowManager wm= (WindowManager) getSystemService(Context.WINDOW_SERVICE);Display display = wm.getDefaultDisplay();mScreenRotation = display.getRotation();mNewestValues = new float[] {0, 0, 0};Timer updateTimer = new Timer("compassUpdate");updateTimer.scheduleAtFixedRate(new TimerTask() {public void run() {updateGUI();}}, 0, 1000/60);} -
Implement a
SensorEventListeneras a field variable. Within itsonSensorChangedit should update the latest Sensor result array based on sending the received Sensor values tocalculateOrientation, created in Step 4:private final SensorEventListener mSensorEventListener= new SensorEventListener() {public void onSensorChanged(SensorEvent sensorEvent) {mNewestValues = calculateOrientation(sensorEvent.values);}public void onAccuracyChanged(Sensor sensor, int accuracy) {}}; -
Override
onResumeandonPauseto register and unregister theSensorEventListenerwhen the Activity becomes active and inactive, respectively:@Overrideprotected void onResume() {super.onResume();Sensor rotationVector= mSensorManager.getDefaultSensor(Sensor.TYPE_ROTATION_VECTOR);mSensorManager.registerListener(mSensorEventListener,rotationVector,SensorManager.SENSOR_DELAY_FASTEST);}@Overrideprotected void onPause() {super.onPause();mSensorManager.unregisterListener(mSensorEventListener);}
If you run the application now, you should see the Compass View “centered” at 0, 0, 0 when the device is laying flat on a table with the top of the device pointing North. Moving the device should result in the Compass View dynamically updating as the orientation of the device changes.
You will also find that as you rotate the device through 90 degrees, the screen will rotate and the Compass View will reorient accordingly. You can extend this project by disabling automatic screen rotation.
USING THE ENVIRONMENTAL SENSORS
Like orientation Sensors, the availability of specific environmental Sensors depends on the host hardware. Where they are available, environmental Sensors can be used by your application to:
- Improve location detection and track movement based on altitude
- Alter the screen brightness or functionality based on ambient light
- Make environmental weather observations
- Determine on which planetary body the device is currently located
Using the Barometer Sensor
A barometer is used to measure atmospheric pressure. The inclusion of this Sensor in some Android devices makes it possible for users to determine their current altitude and, potentially, to forecast weather changes.
To monitor changes in atmospheric pressure, register an implementation of
SensorEventListener
with the Sensor Manager, using a Sensor object of type
Sensor.TYPE_PRESSURE
. The current atmospheric pressure is returned as the first (and only) value in the returned values array in hectopascals (hPa), which is an equivalent measurement to millibars (mbar).
To calculate the current altitude in meters, you can use the static
getAltitude
method from the Sensor Manager, as shown in
Listing 16-15
, supplying it with the current pressure and the local pressure at sea level.
It’s important to note that
getAltitude
calculates altitude using the current atmospheric pressure relative to local sea-level values, not two arbitrary atmospheric pressure values. As a result, to calculate the difference in altitude represented by two observed pressure values, you need to determine the altitude for each pressure and find the difference between those results, as shown in the following snippet:
float altitudeChange =SensorManager.getAltitude(SensorManager.PRESSURE_STANDARD_ATMOSPHERE,newPressure) -SensorManager.getAltitude(SensorManager.PRESSURE_STANDARD_ATMOSPHERE,initialPressure);
Creating a Weather Station
To fully explore the environmental Sensors available to Android devices, the following project implements a simple weather station that monitors barometric pressure, ambient temperature, relative humidity, and ambient light levels.
-
Start by creating a new WeatherStation project that includes a blank, backwards compatible
WeatherStationActivityActivity. Modify the resultingactivity_weather_stationlayout resource to display four centered lines of large, bold text that will be used to display the current temperature, barometric pressure, humidity, and cloud level:<?xml version="1.0" encoding="utf-8"?><LinearLayoutxmlns_android="http://schemas.android.com/apk/res/android"android:orientation="vertical"android:layout_width="match_parent"android:layout_height="match_parent"><TextViewandroid:id="@+id/temperature"android:gravity="center"android:layout_width="match_parent"android:layout_height="wrap_content"android:textStyle="bold"android:textSize="28sp"android:text="Temperature"android:layout_margin="10dp"/><TextViewandroid:id="@+id/pressure"android:gravity="center"android:layout_width="match_parent"android:layout_height="wrap_content"android:textStyle="bold"android:textSize="28sp"android:text="Pressure"android:layout_margin="10dp"/><TextViewandroid:id="@+id/humidity"android:gravity="center"android:layout_width="match_parent"android:layout_height="wrap_content"android:textStyle="bold"android:textSize="28sp"android:text="Humidity"android:layout_margin="10dp"/><TextViewandroid:id="@+id/light"android:gravity="center"android:layout_width="match_parent"android:layout_height="wrap_content"android:textStyle="bold"android:textSize="28sp"android:text="Light"android:layout_margin="10dp"/></LinearLayout> -
Within the
WeatherStationActivity, create instance variables to store references to each of the Text Views, and the Sensor Manager. Also create variables to record the last recorded value obtained from each sensor:private SensorManager mSensorManager;private TextView mTemperatureTextView;private TextView mPressureTextView;private TextView mHumidityTextView;private TextView mLightTextView;private float mLastTemperature = Float.NaN;private float mLastPressure = Float.NaN;private float mLastLight = Float.NaN;private float mLastHumidity = Float.NaN; -
Update the
onCreatemethod to get a reference to the Text Views and the Sensor Manager:@Overridepublic void onCreate(Bundle savedInstanceState) {super.onCreate(savedInstanceState);setContentView(R.layout.activity_weather_station);mTemperatureTextView = findViewById(R.id.temperature);mPressureTextView = findViewById(R.id.pressure);mLightTextView = findViewById(R.id.light);mHumidityTextView = findViewById(R.id.humidity);mSensorManager= (SensorManager) getSystemService(Context.SENSOR_SERVICE);} -
Create a new
SensorEventListenerimplementation that records results from each of the pressure, temperature, humidity, and light sensors. It should simply record the last observed value:private final SensorEventListener mSensorEventListener= new SensorEventListener() {public void onAccuracyChanged(Sensor sensor, int accuracy) { }public void onSensorChanged(SensorEvent event) {switch (event.sensor.getType()) {case (Sensor.TYPE_AMBIENT_TEMPERATURE):mLastTemperature = event.values[0];break;case (Sensor.TYPE_RELATIVE_HUMIDITY):mLastHumidity = event.values[0];break;case (Sensor.TYPE_PRESSURE):mLastPressure = event.values[0];break;case (Sensor.TYPE_LIGHT):mLastLight = event.values[0];break;default: break;}}}; -
Override the
onResumehandler to register your new Listener for updates using theSensorManager. Atmospheric and environmental conditions are likely to change slowly over time, so you can choose a relatively slow update rate. You should also check to confirm a default Sensor exists for each of the conditions being monitored, notifying the user where one or more Sensors are unavailable:@Overrideprotected void onResume() {super.onResume();Sensor lightSensor = mSensorManager.getDefaultSensor(Sensor.TYPE_LIGHT);if (lightSensor != null)mSensorManager.registerListener(mSensorEventListener,lightSensor,SensorManager.SENSOR_DELAY_NORMAL);elsemLightTextView.setText("Light Sensor Unavailable");Sensor pressureSensor =mSensorManager.getDefaultSensor(Sensor.TYPE_PRESSURE);if (pressureSensor != null)mSensorManager.registerListener(mSensorEventListener,pressureSensor,SensorManager.SENSOR_DELAY_NORMAL);elsemPressureTextView.setText("Barometer Unavailable");Sensor temperatureSensor =mSensorManager.getDefaultSensor(Sensor.TYPE_AMBIENT_TEMPERATURE);if (temperatureSensor != null)mSensorManager.registerListener(mSensorEventListener,temperatureSensor,SensorManager.SENSOR_DELAY_NORMAL);elsemTemperatureTextView.setText("Thermometer Unavailable");Sensor humiditySensor =mSensorManager.getDefaultSensor(Sensor.TYPE_RELATIVE_HUMIDITY);if (humiditySensor != null)mSensorManager.registerListener(mSensorEventListener,humiditySensor,SensorManager.SENSOR_DELAY_NORMAL);elsemHumidityTextView.setText("Humidity Sensor Unavailable");} -
Override the corresponding
onPausemethod to unregister the Sensor Event Listener when the Activity is no longer active:@Overrideprotected void onPause() {super.onPause();mSensorManager.unregisterListener(mSensorEventListener);} -
Create a new
updateGUImethod that synchronizes with the GUI thread and updates the Text Views. This will be executed regularly using a Timer introduced in the next step:private void updateGUI() {runOnUiThread(new Runnable() {public void run() {if (!Float.isNaN(mLastPressure)) {mPressureTextView.setText(mLastPressure + "hPa");mPressureTextView.invalidate();}if (!Float.isNaN(mLastLight)) {String lightStr = "Sunny";if (mLastLight <= SensorManager.LIGHT_CLOUDY)lightStr = "Night";else if (mLastLight <= SensorManager.LIGHT_OVERCAST)lightStr = "Cloudy";else if (mLastLight <= SensorManager.LIGHT_SUNLIGHT)lightStr = "Overcast";mLightTextView.setText(lightStr);mLightTextView.invalidate();}if (!Float.isNaN(mLastTemperature)) {mTemperatureTextView.setText(mLastTemperature + "C");mTemperatureTextView.invalidate();}if (!Float.isNaN(mLastHumidity)) {mHumidityTextView.setText(mLastHumidity + "% Rel. Humidity");mHumidityTextView.invalidate();}}});} -
Update the
onCreatemethod to create a Timer that triggers the UI update method defined in Step 7 once every second:@Overridepublic void onCreate(Bundle savedInstanceState) {super.onCreate(savedInstanceState);setContentView(R.layout.activity_weather_station);mTemperatureTextView = findViewById(R.id.temperature);mPressureTextView = findViewById(R.id.pressure);mLightTextView = findViewById(R.id.light);mHumidityTextView = findViewById(R.id.humidity);mSensorManager =(SensorManager) getSystemService(Context.SENSOR_SERVICE);Timer updateTimer = new Timer("weatherUpdate");updateTimer.scheduleAtFixedRate(new TimerTask() {public void run() {updateGUI();}}, 0, 1000);}
USING BODY SENSORS
The launch of Android Wear introduced the concept of Android Sensors that aren’t physically incorporated into the primary Android device. Instead, they are available through peripherals, such as an Android Wear device, or attached remotely using Bluetooth LE.
This made it possible to incorporate
body sensors
—such as the heart rate monitor—into the Android framework. Body sensors require physical contact with the user in order to operate. Because they monitor and report sensitive personal information from the user, they require the
BODY_SENSORS
permission be granted before they will be returned from
getDefaultSensor
or
getSensorsList
:
<uses-permission android:name="android.permission.BODY_SENSORS" />
As a dangerous permission, in addition to a manifest entry, it requires explicit approval from the user when first used, by way of a run-time permission requests.
Before attempting to find a body sensor, use the
ActivityCompat.checkSelfPermission
method, passing in the
Manifest.permission.BODY_SENSORS
constant to determine if you have been granted access, in which case it will return
PERMISSION_GRANTED
:
int permission = ActivityCompat.checkSelfPermission(this,Manifest.permission.BODY_SENSORS);if (permission==PERMISSION_GRANTED) {// Access the body sensor} else {if (ActivityCompat.shouldShowRequestPermissionRationale(this,Manifest.permission.BODY_SENSORS)) {// TODO: Display additional rationale for the requested permission.}// Request the permission or display a dialog// showing why the function is unavailable.}
To display the permission request dialog, call the
ActivityCompat.requestPermission
method, specifying the required permissions:
ActivityCompat.requestPermissions(this,new String[]{Manifest.permission.BODY_SENSORS},BODY_SENSOR_PERMISSION_REQUEST);
This function runs asynchronously, displaying a standard Android dialog that can’t be customized. You will receive a callback when the user has either accepted or denied your runtime request, received by the
onRequestPermissionsResult
handler:
@Overridepublic void onRequestPermissionsResult(int requestCode,@NonNull String[] permissions,@NonNull int[] grantResults) {super.onRequestPermissionsResult(requestCode, permissions, grantResults);// TODO React to granted / denied permissions.}
Body Sensors are only accurate and useful when in physical contact with the body whose vital signs are being monitored. As a result, it’s important to always monitor the accuracy of body sensors. If the Sensor is not in contact with a body, it will return
SENSOR_STATUS_NO_CONTACT
:
if (sensorEvent.accuracy == SensorManager.SENSOR_STATUS_NO_CONTACT ||sensorEvent.accuracy == SensorManager.SENSOR_STATUS_UNRELIABLE) {// TODO Ignore Sensor results.
Listing 16-16 shows the skeleton code for connecting a Sensor Event Listener to a heart rate Sensor that returns a single value describing the user’s heart rate in beats-per-minute (bpm). Remember that in addition to this code, you also need to add the body sensor permission to the application manifest.
USER ACTIVITY RECOGNITION
Google’s Activity Recognition API enables you to understand what activity your users are performing in the physical world. By periodically analyzing short bursts of data received from device Sensors, Activity Recognition attempts to detect what activities the user is performing, including walking, driving, cycling, and running.
Access to the Activity Recognition API is provided by the Google Play services Location library, which must be added as a dependency to your app module’s
build.gradle
file (after you’ve installed Google Play services as described in
Chapter 15
, “Location, Contextual Awareness, and Mapping”):
dependencies {…implementation 'com.google.android.gms:play-services-location:11.8.0'}
You must also include the
ACTIVITY_RECOGNITION
permission in your manifest:
<uses-permissionandroid:name="com.google.android.gms.permission.ACTIVITY_RECOGNITION"/>
To receive updates on the user’s current activity, first get an instance of the
ActivityRecognitionClient
using the
ActivityRecognition.getClient
static method, and passing in a Context:
ActivityRecognitionClient activityRecognitionClient= ActivityRecognition.getClient(this);
To request updates, use the
requestActivityUpdates
method, passing in a preferred detection interval in milliseconds and a Pending Intent that will be fired when a change in user activity is detected. Typically, the Pending Intent is used to start an Intent Service that will respond to the change in user activity:
long updateFreq = 1000*60;Intent startServiceIntent = new Intent(this, MyARService.class);PendingIntent pendingIntent= PendingIntent.getService(this, ACTIVITY_RECOGNITION_REQUEST_CODE,startServiceIntent, 0);Task task= activityRecognitionClient.requestActivityUpdates(updateFreq,pendingIntent);
Any subsequent request using the same Pending Intent will remove and replace earlier requests.
The specified update frequency determines the rate at which changes in the user’s activity are returned; larger values result in fewer updates, which improves battery life by waking the device and turning on the Sensors less often. Like all Sensors, it’s best practice to request updates as infrequently as possible.
The requested update rate is used as a guide by the Activity Recognition API; in some circumstances you may receive updates more often (for example, if other apps have requested more frequent updates). More often, you may receive less frequent updates. The API may pause updates to conserve battery when it detects that the device has remained stationary for an extended period, or when the screen is off and the device is in power saver mode.
To extract the Activity Recognition Result from the Intent fired when a new user activity has been detected, use the
extractResult
method.
ActivityRecognitionResult activityResult = extractResult(intent);
The returned Activity Recognition Result includes the
getMostProbableActivity
method that returns a
DetectedActivity
that describes the activity type for which it has the highest confidence that it’s being performed:
DetectedActivity detectedActivity = activityResult.getMostProbableActivity();
Alternately, you can use the
getProbableActivities
method to return a list of all the likely activities:
List<DetectedActivity> allActivities = activityResult.getProbableActivities();
For any Detected Activity, use the
getType
and
getConfidence
methods to find the type of activity detected and the percent confidence in that result, respectively:
@Overrideprotected void onHandleIntent(@Nullable Intent intent) {ActivityRecognitionResult activityResult = extractResult(intent);DetectedActivity detectedActivity = activityResult.getMostProbableActivity();int activityType = detectedActivity.getType();int activityConfidence = detectedActivity.getConfidence(); /* Pecent */switch (activityType) {case (DetectedActivity.IN_VEHICLE): /* TODO Driving */ break;case (DetectedActivity.ON_BICYCLE): /* TODO Cycling */ break;case (DetectedActivity.ON_FOOT) : /* TODO On Foot */ break;case (DetectedActivity.STILL) : /* TODO Still */ break;case (DetectedActivity.WALKING) : /* TODO Walking */ break;case (DetectedActivity.RUNNING) : /* TODO Running */ break;case (DetectedActivity.UNKNOWN) : /* TODO Unknown */ break;case (DetectedActivity.TILTING) : {// TODO Device angle changed significantlybreak;}default : break;}}
When you no longer need to receive activity change updates, call
removeActivityUpdates
, passing in the Pending Intent used to request the update results:
activityRecognitionClient.removeActivityUpdates(pendingIntent);
Note that active requests for updates will keep the Google Play services connection active, so it’s important to explicitly remove the request for updates when they are no longer needed—both to reduce battery drain and to maintain the advantages of automatic connection management with Google Play services.
17
Audio, Video, and Using the Camera
PLAYING AUDIO AND VIDEO, AND USING THE CAMERA
Smartphones and tablets have become so popular that for many people they have entirely replaced all other portable electronics—including cameras, music players, and audio recorders. As a result Android’s media APIs, which allow us to build apps that offer a rich audio, video, and camera experiences, have become increasingly powerful and important.
This chapter introduces you to the Android APIs for controlling audio and video recording and playback, controlling the audio focus of the device, and reacting appropriately when other applications take focus or the output channel is changed (for example, when headphones are unplugged).
You also learn how to use the Media Session APIs to communicate information about your media playback to the system and to other apps as well as receive play, pause, and other media events from Notifications, headsets, and connected devices including Wear OS and Android Auto.
You learn how to build an audio playback service, and how to keep your UI synchronized with the current audio state. You also explore the importance of the life cycle and foreground status for audio playback, and how to build Media Style Notifications.
The best camera is the one that’s with you, and for most people that’s their smartphone camera. You learn to use the Android camera APIs to take photos and record video, as well as how to display the live camera feed.
PLAYING AUDIO AND VIDEO
Android 8.1 Oreo (API Level 27) supports the following multimedia formats for playback as part of the framework. Note that some devices may support playback of additional file formats:
-
Audio
- AAC LC
- HE-AACv1 (AAC+)
- HE-AACv2 (Enhanced AAC+)
- AAC ELD (Enhanced Low Delay AAC)
- AMR-NB
- AMR-WB
- FLAC
- MP3
- MIDI
- Ogg Vorbis
- PCM/WAVE
- Opus
-
Image
- JPEG
- PNG
- WEBP
- GIF
- BMP
-
Video
- H.263
- H.264 AVC
- H.265 HEVC
- MPEG-4 SP
- VP8
- VP9
The following network protocols are supported for streaming media:
- RTSP (RTP, SDP)
- HTTP/HTTPS progressive streaming
- HTTP/HTTPS live streaming (on devices running Android 3.0 or above)
Introducing the Media Player
Using the Media Player, you can play audio and video stored in application resources, local files, Content Providers, or streamed from a network URL. The
MediaPlayer
class is available as part of the Android framework on all devices for supporting audio and video playback.
The Media Player’s management of audio/video files and streams is handled as a state machine. In the most simplistic terms, transitions through the state machine can be described as follows:
- Initialize the Media Player with media to play.
- Prepare the Media Player for playback.
- Start the playback.
- Pause or stop the playback prior to it completing.
- The playback is complete.
To play a media resource, you need to create a new
MediaPlayer
instance, initialize it with a media source, and prepare it for playback.
MediaPlayer
contains a number of static
create
methods that combine all three of these steps.
Alternatively, you can use the
setDataSource
method on an existing Media Player instance, as shown in
Listing 17-1
. This method accepts a file path, Content Provider URI, streaming media URL path, or File Descriptor.
Because preparing the data source involves potentially expensive operations like fetching data over the network and decoding the data stream, you should never call the
prepare
method on the UI thread. Instead set a
MediaPlayer.OnPreparedListener
and use
prepareAsync
to keep your UI responsive while preparing for media playback.
To stream Internet media using the Media Player, your application manifest must include the
INTERNET
permission:
<uses-permission android:name="android.permission.INTERNET"/>
When a Media Player has finished preparing, the associated on Prepared Listener handler will be triggered, and you can call
start
to begin playback of the associated media:
private MediaPlayer.OnPreparedListener myOnPreparedListener =new MediaPlayer.OnPreparedListener() {@Overridepublic void onPrepared(MediaPlayer mp) {mp.start();}};
Once playback has begun, you can use the Media Player’s
stop
and
pause
methods to stop and pause playback, respectively.
The Media Player also provides the
getDuration
method to find the length of the media being played and the
getCurrentPosition
method to find the playback position. Use the
seekTo
method to jump to a specific position in the media.
Using Media Player for Video Playback
The steps of initializing, setting a playback source, and preparing for playback apply to both audio and video playback. In addition, video playback requires that you also must have a
Surface
on which to display the video.
This is generally handled using a
SurfaceView
object. The Surface View class is a wrapper around a Surface Holder, which, in turn, is a wrapper around the Surface that is used to support visual updates from background threads.
To include a Surface Holder in your UI layout, use the
SurfaceView
class:
<?xml version="1.0" encoding="utf-8"?><LinearLayoutxmlns_android="http://schemas.android.com/apk/res/android"android:layout_width="match_parent"android:layout_height="match_parent"android:orientation="vertical" ><SurfaceViewandroid:id="@+id/surfaceView"android:layout_width="match_parent"android:layout_height="match_parent"android:layout_weight="30"/><LinearLayoutandroid:id="@+id/linearLayout1"android:layout_width="match_parent"android:layout_height="wrap_content"android:layout_weight="1"><Buttonandroid:id="@+id/buttonPlay"android:layout_width="wrap_content"android:layout_height="wrap_content"android:text="Play"/><Buttonandroid:id="@+id/buttonPause"android:layout_width="wrap_content"android:layout_height="wrap_content"android:text="Pause"/><Buttonandroid:id="@+id/buttonSkip"android:layout_width="wrap_content"android:layout_height="wrap_content"android:text="Skip"/></LinearLayout></LinearLayout>
Use the Media Player’s
setDisplay
method to assign a
SurfaceHolder
object that will display your video content.
Listing 17-2 shows the skeleton code used to initialize a Surface View within your Activity, and assigns it as a display target for a Media Player.
Note that Surface Holders are created asynchronously, so you must wait until the
surfaceCreated
handler has been fired, before assigning the returned Surface Holder object to the Media Player, by implementing the
SurfaceHolder.Callback
interface.
As shown in
Listing 17-2
,
setDataSource
is used to specify either a path, URL, or Content Provider URI of a video resource to play.
After you select your media source, call
prepare
to initialize the Media Player in preparation for playback.
Using ExoPlayer for Video Playback
For applications supporting Android 4.1 (API Level 16) or later, the Media Player API can be replaced with the ExoPlayer library. ExoPlayer has been built by Google to provide a consistent experience, better extensibility, and additional format support for media playback on all devices running Android 4.1 (API Level 16) or higher.
The
exoplayer-core
library is the only required dependency for integrating ExoPlayer into your app; however, ExoPlayer also provides a number of subcomponents that offer additional functionality. For example, the
exoplayer-ui
library provides pre-built UI components that greatly simplify common operations including playback controls.
To use ExoPlayer for video playback, you must add the ExoPlayer core and UI libraries as dependencies to your app module’s
build.gradle
file:
implementation "com.google.android.exoplayer:exoplayer-core:2.8.2"implementation "com.google.android.exoplayer:exoplayer-ui:2.8.2"
The ExoPlayer UI library provides a
PlayerView
class that encapsulates both the playback surface and playback controls including play, pause, fast forward, rewind, and a seek bar for skipping through the video, and which can be added to your Activity or Fragment layout:
<?xml version="1.0" encoding="utf-8"?><FrameLayoutxmlns_android="http://schemas.android.com/apk/res/android"android:layout_width="match_parent"android:layout_height="match_parent"><com.google.android.exoplayer2.ui.PlayerViewandroid:id="@+id/player_view"android:layout_width="match_parent"android:layout_height="match_parent"/></FrameLayout>
Listing 17-3 shows the skeleton code used to initialize a Player View within your Activity, and start video playback.
You can learn more about ExoPlayer at
github.com/google/ExoPlayer
.
Requesting and Managing Audio Focus
Audio focus is the implementation of the concept that only one app can be the focus of what the user is listening to at any given time. This could be an ongoing phone call, a video being played, or transient sounds such as a notification sound or navigation directions.
Sound output is an inherently shared channel—like sitting in a room and having multiple simultaneous conversions, having multiple apps simultaneously playing audio would quickly become unintelligible. A critical portion of being a good citizen when playing audio is in sharing and respecting audio focus.
For your app, that means always requesting audio focus before beginning audio playback, holding audio only until your playback is finished, and relinquishing focus when another app requests it.
Requesting Audio Focus
To request audio focus before beginning playback, use the Audio Manager’s
requestAudioFocus
method. When requesting the audio focus, you can specify which stream you require (typically
STREAM_MUSIC
), and for how long you expect to require focus—either ongoing (such as when playing music) or transiently (such as when providing navigation instructions). In the latter case you can also specify if your transient interruption can be handled by the currently focused application “ducking” (lowering its volume) until your interruption is complete.
Specifying the nature of the audio focus you require allows other applications to better react to losing the audio focus, as described later in this section.
Listing 17-4
shows the skeleton code for an Activity that requests ongoing audio focus for the music stream. You must also specify an
OnAudioFocusChangeListener
object, which lets you monitor for loss of audio focus and respond accordingly (and is described in more detail later in this section).
There are cases—such as when the user is in a phone call—when a request for audio focus will fail. As a result, you should be careful to only start playback if you receive
AUDIOFOCUS_REQUEST_GRANTED
after making the request.
Responding to Audio Focus Changes
Audio focus is assigned to each application that requests it. That means that if another application requests audio focus, your application will lose it.
You will be notified of the loss of audio focus through the
onAudioFocusChange
handler of the Audio Focus Change Listener you registered when requesting the audio focus, as shown in
Listing 17-5
.
The
focusChange
parameter indicates the nature of the focus loss—either transient or ongoing—and whether ducking is permitted.
It’s best practice to pause your media playback whenever you lose audio focus, or, in the case of a transient loss that supports ducking, to lower the volume of your audio output.
In the case of a transient focus loss, you will be notified when you have regained focus by receiving an
AudioManager.AUDIOFOCUS_GAIN
event, at which point you can return to playing your audio at the previous volume.
For a permanent focus loss, you should stop playback and it should only be restarted through a user interaction (such as pressing the play button within your UI). You will not receive any further callbacks to your
OnAudioFocusChangeListener
after permanently losing audio focus.
For cases where your app is requesting transient audio focus, consider using Media Player’s
OnCompletionListener
to know when your audio has finished so that you can abandon audio focus in a timely manner.
Pausing Playback When the Output Changes
If the current output stream is a headset, disconnecting it will result in the system automatically switching output to the device’s speakers. It’s considered good practice to pause (or reduce the volume of) your audio output in these circumstances.
To do so, create a Broadcast Receiver that listens for the
AudioManager.ACTION_AUDIO_BECOMING_NOISY
broadcast and pauses your playback:
private class NoisyAudioStreamReceiver extends BroadcastReceiver {@Overridepublic void onReceive(Context context, Intent intent) {if (AudioManager.ACTION_AUDIO_BECOMING_NOISY.equals(intent.getAction())) {pauseAudioPlayback();}}}
Because this broadcast is only needed when your app is actively playing audio/video, it is not appropriate to register this receiver in your manifest. Instead, you should create an instance of your
BroadcastReceiver
and register it programmatically when you start playback (after receiving audio focus) and unregister it when you pause playback:
// Create the Receiver.NoisyAudioStreamReceiver mNoisyAudioStreamReceiver =new NoisyAudioStreamReceiver();// On Playpublic void registerNoisyReceiver() {IntentFilter filter = newIntentFilter(AudioManager.ACTION_AUDIO_BECOMING_NOISY);registerReceiver(mNoisyAudioStreamReceiver, filter);}// On Pausepublic void unregisterNoisyReceiver() {unregisterReceiver(mNoisyAudioStreamReceiver);}
Responding to the Volume Controls
To ensure a consistent user experience, it’s important that your application correctly handles users pressing the volume keys.
By default, using the volume keys, on either the device or an attached headset, changes the volume of whichever audio stream is currently playing.
Using the Activity’s
setVolumeControlStream
method—typically within its
onCreate
method—allows you to specify which audio stream should be controlled by the volume keys while the current Activity is active:
@Overridepublic void onCreate(Bundle savedInstanceState) {super.onCreate(savedInstanceState);setContentView(R.layout.audioplayer);setVolumeControlStream(AudioManager.STREAM_MUSIC);}
You can specify any of the available audio streams, but when using the Media Player, you should specify the
STREAM_MUSIC
stream to make it the focus of the volume keys.
Working with a Media Session
The Media Session API offers a consistent interface for your app to provide metadata and playback controls for the media being played by your app through any media playback mechanism available to the system.
By creating a Media Session and responding to its user-initiated commands, your app will support playback and control from connected devices such as Bluetooth-enabled cars or headsets, WearOS, and Android Auto—all of which can retrieve metadata about your media, and allow users to control playback without needing to interact directly with their mobile device, or by opening your app.
Controlling Playback with Media Session
The Media Session API is provided as part of the Android Support Library. To create and initialize a Media Session, create a new instance of the
MediaSessionCompat
class from within the
onCreate
method of your Activity, passing in a
Context
and a
String
for logging error messages:
MediaSessionCompat mMediaSession = new MediaSessionCompat(context, LOG_TAG);
To receive media controls from devices such as Bluetooth headsets, Wear OS, and Android Auto, you must then call
setFlags
, indicating that you wish the Media Session to handle media buttons and transport controls:
mMediaSession.setFlags(MediaSessionCompat.FLAG_HANDLES_MEDIA_BUTTONS |MediaSessionCompat.FLAG_HANDLES_TRANSPORT_CONTROLS);
The final step is to create and set an instance of the
MediaSessionCompat.Callback
class. The callback methods you implement within this class will receive the media button requests and allow you to respond to them appropriately:
mMediaSession.setCallback(new MediaSessionCompat.Callback() {@Overridepublic void onPlay() {mediaPlayer.start();}@Overridepublic void onPause() {mediaPlayer.pause();}@Overridepublic void onSeekTo(long pos) {mediaPlayer.seekTo((int) pos);}});
To start receiving callbacks, you must first indicate which actions your Media Session supports. You can do this by building a
PlaybackStateCompat
and passing it in using the
setPlaybackState
method:
public void updatePlaybackState() {PlaybackStateCompat.Builder playbackStateBuilder =new PlaybackStateCompat.Builder();playbackStateBuilder// Available actions.setActions(PlaybackStateCompat.ACTION_PLAY_PAUSE |PlaybackStateCompat.ACTION_PLAY |PlaybackStateCompat.ACTION_PAUSE |PlaybackStateCompat.ACTION_STOP |PlaybackStateCompat.ACTION_SEEK_TO)// Current playback state.setState(PlaybackStateCompat.STATE_PLAYING,0, // Track position in ms1.0f); // Playback speedmMediaSession.setPlaybackState(playbackStateBuilder.build());}
You must always update your Media Session playback state whenever your Media Player state changes, to ensure they remain synchronized. It’s also considered best practice to maintain the
PlaybackStateCompat.Builder
object, and only perform incremental updates rather than rebuilding it from scratch each time.
Finally, you need to activate your Media Session by calling
setActive(true)
, typically after receiving audio focus:
mMediaSession.setActive(true);
Correspondingly, call
setActive(false)
after stopping playback and abandoning audio focus. When you’ve finished playback, call
release
on your Media Session object to free the associated resources:
mMediaSession.release();
Sharing Metadata Using Media Session
In addition to controlling playback, you can use the Media Session API to surface metadata about the media your application is playing, including album art, track names, and durations, using the
setMetadata
method.
Use the
MediaMetadataCompat.Builder
to create the
MediaMetadataCompat
object that contains the metadata for your media.
Using the builder object, use the
putBitmap
method to specify an associated bitmap using the
MediaMetadataCompat.METADATA_KEY_ART
or
MediaMetadataCompat.METADATA_KEY_ALBUM_ART
keys:
builder.putBitmap(MediaMetadataCompat.METADATA_KEY_ART, artworkthumbnail);builder.putString(MediaMetadataCompat.METADATA_KEY_ART_URI,fullSizeArtworkUri);
public void updateMetadata() {MediaMetadataCompat.Builder builder = new MediaMetadataCompat.Builder();builder.putString(MediaMetadataCompat.METADATA_KEY_ART_URI,fullSizeArtworkUri);mMediaSession.setMetadata(builder.build());
You can also indicate the track number, CD number, year of recording, and duration using the
putLong
method with the respective
MediaMetadataCompat.METADATA_KEY_
constants:
builder.putLong(MediaMetadataCompat.METADATA_KEY_DURATION, duration);
Similarly, using the
putString
method you can specify the album name, album artist, track title, author, compilation, composer, release date, genre, and writer of the current media:
builder.putString(MediaMetadataCompat.METADATA_KEY_ALBUM, album);builder.putString(MediaMetadataCompat.METADATA_KEY_ARTIST, artist);builder.putString(MediaMetadataCompat.METADATA_KEY_TITLE, title);
Connecting Your Application’s Media Controls to the Media Session Using the Media Controller
Using the Media Session callbacks to receive the media button requests, as described earlier, helps you to centralize all your media control code—and ensures that the system can display consistent media controls across multiple possible interfaces (including Notifications, Wear OS, and Android Auto).
As a result, it’s considered best practice to have the media playback controls within your own UI use the same Media Session callback mechanism as other parts of the system, such that they send commands to the Media Session rather than controlling your Media Player directly.
You can do this using the
MediaControllerCompat
class. Create a new Media Controller using the Media Session you’ve constructed:
// After creating your Media Sessionfinal MediaControllerCompat mediaController =new MediaControllerCompat(context, mMediaSession);
Then connect the media control buttons in your UI, such that when they are clicked, they use the Media Controller to send commands to the Media Session, rather than directly modifying the media playback:
// Connect a play button.Button playButton = findViewById(R.id.buttonPlay);playButton.setOnClickListener(new OnClickListener() {public void onClick(View v) {mediaController.getTransportControls().play();}});// Connect a pause button.Button pauseButton = findViewById(R.id.buttonPause);pauseButton.setOnClickListener(new OnClickListener() {public void onClick(View v) {mediaController.getTransportControls().pause();}});
USING THE MEDIA ROUTER AND CAST APPLICATION FRAMEWORK
The Media Router APIs provide a consistent mechanism that can be used to enable your users to redirect video display and audio playback to remote devices wirelessly. This is most commonly implemented as Google Cast, a Google Play services API that allows you to “cast” video or audio to Google Cast, Google TV, and Google Home devices.
To add support for Google Cast to your app, you must add dependencies for appcompat, Media Router, and the Google Play services Cast framework to your App Module
build.gradle
file:
dependencies {compile 'com.android.support:appcompat-v7:25.1.0'compile 'com.android.support:mediarouter-v7:25.1.0'compile 'com.google.android.gms:play-services-cast-framework:10.0.1'}
To add Cast functionality to an Activity, start by creating a new
OptionsProvider
implementation that will define the Google Cast options, and return them via a
CastOptions
object from the
getCastOptions
handler:
public class CastOptionsProvider implements OptionsProvider {@Overridepublic CastOptions getCastOptions(Context context) {CastOptions castOptions = new CastOptions.Builder().setReceiverApplicationId(CastMediaControlIntent.DEFAULT_MEDIA_RECEIVER_APPLICATION_ID).build();return castOptions;}@Overridepublic List<SessionProvider> getAdditionalSessionProviders(Context context) {return null;}}
Only the receiver application ID is a required option, as it’s used to filter the list of available destinations and to launch the receiver app on the selected target device when a Cast session is started.
The destination for your app’s routed media is a Cast receiver application, an HTML5/JavaScript application running on a receiver device, which provides the UI to display your app’s content and handle media control messages.
The Cast Application Framework includes a pre-built receiver application hosted by Google that can be used by providing
CastMediaControlIntent.DEFAULT_MEDIA_RECEIVER_APPLICATION_ID
as the application ID.
It is also possible to create your own custom Media Receiver, although that is beyond the scope of this book. Instructions for building a custom receiver can be found at
developers.google.com/cast/docs/android_sender_setup
.
Once your Options Provider has been defined, declare it within your Application manifest using a meta-data tag:
<meta-dataandroid:name="com.google.android.gms.cast.framework.OPTIONS_PROVIDER_CLASS_NAME"android:value="com.professionalandroid.CastOptionsProvider"/>
All of your application’s interactions with the Cast Application Framework are coordinated through the
CastContext
object, accessed by calling
getSharedInstance
on the
CastContext
class—typically within the
onCreate
handler of the Activity from which you plan to Cast media:
CastContext mCastContext;@Overridepublic void onCreate() {super.onCreate(savedInstanceState);setContentView(R.layout.activity_layout);mCastContext = CastContext.getSharedInstance(this);}
The Cast Application Framework provides several user interface elements that you can use to initiate, and interact with, a Cast session—including the Cast Button and Mini and Expanded Controllers.
The Cast Button is displayed when Cast discovers an available Receiver to which your app can cast. When the user clicks the Cast Button, a dialog is displayed listing either all the available remote devices to cast to or the metadata associated with the currently cast content.
The Cast Button can be added to the app bar of your Activity as Media Route Action Provider:
<menu xmlns_app="http://schemas.android.com/apk/res-auto"xmlns_android="http://schemas.android.com/apk/res/android"><itemandroid:id="@+id/media_route_menu_item"android:title="@string/media_route_menu_title"app:actionProviderClass="android.support.v7.app.MediaRouteActionProvider"app:showAsAction="always" /></menu>
Then within the Fragments or Activities from which you want to Cast, override the
onCreateOptionsMenu
handler to setup the Media Route Button:
@Override public boolean onCreateOptionsMenu(Menu menu) {super.onCreateOptionsMenu(menu);getMenuInflater().inflate(R.menu.main, menu);CastButtonFactory.setUpMediaRouteButton(getApplicationContext(),menu,R.id.media_route_menu_item);return true;}
Alternatively, you can add a Media Route Button to your Activity Layout:
<android.support.v7.app.MediaRouteButtonandroid:id="@+id/media_route_button"android:layout_width="wrap_content"android:layout_height="wrap_content"android:layout_weight="1"android:mediaRouteTypes="user"android:visibility="gone"/>
Connect the Media Route Button to the Cast Application Framework within your Activity’s
onCreate
handler:
CastContext mCastContext;MediaRouteButton mMediaRouteButton;@Overrideprotected void onCreate(Bundle savedInstanceState) {super.onCreate(savedInstanceState);setContentView(R.layout.activity_layout);mCastContext = CastContext.getSharedInstance(this);mMediaRouteButton = findViewById(R.id.media_route_button);CastButtonFactory.setUpMediaRouteButton(getApplicationContext(),mMediaRouteButton);}
Once the Cast Button has been added to your app, you will use a Cast Session to specify the media (and its associated metadata) that your app will cast.
Each Cast Session starts when the user selects a remote receiver from the Cast destination selection dialog, and ends when they choose to stop casting (or another sender casts to the same device).
Sessions are managed by the
SessionManager
; you can access the current
CastSession
using the
getCurrentCastSession
method on the
CastContext
, typically within the
onResume
handler of your Activity.
CastContext mCastContext;MediaRouteButton mMediaRouteButton;CastSession mCastSession;SessionManager mSessionManager;@Overrideprotected void onCreate(Bundle savedInstanceState) {super.onCreate(savedInstanceState);setContentView(R.layout.activity_layout);mCastContext = CastContext.getSharedInstance(this);mMediaRouteButton = findViewById(R.id.media_route_button);CastButtonFactory.setUpMediaRouteButton(getApplicationContext(),mMediaRouteButton);mSessionManager = mCastContext.getSessionManager();}@Overrideprotected void onResume() {super.onResume();mCastSession = mSessionManager.getCurrentCastSession();}@Overrideprotected void onPause() {super.onPause();mCastSession = null;}
You can also attach a
SessionManagerListener
to your Session Manager instance to listen for creation, suspension, resumption, and termination of new Cast Sessions.
Once the user has established a Cast Session, a new instance of the
RemoteMediaClient
will be created, which can be accessed by calling
getRemoteMediaClient
on the current Cast Session.
You can use the Remote Media Client to set the content to stream to the remote device, and the metadata that describes it using the
MediaMetadata
class:
MediaMetadata movieMetadata =new MediaMetadata(MediaMetadata.MEDIA_TYPE_MOVIE);movieMetadata.putString(MediaMetadata.KEY_TITLE, mCurrentMovie.getTitle());movieMetadata.addImage(new WebImage(Uri.parse(mCurrentMovie.getImage(0))));
Define the media to be played on the remote device using the
MediaInfo.Builder
, specifying a URL to the selected content, details of the format and type of stream, and the Media Metadata defined above:
private void castMovie() {MediaInfo mediaInfo = new MediaInfo.Builder(mCurrentMovie.getUrl()).setStreamType(MediaInfo.STREAM_TYPE_BUFFERED).setContentType("videos/mp4").setMetadata(movieMetadata).setStreamDuration(mCurrentMovie.getDuration()* 1000).build();RemoteMediaClient remoteMediaClient = mCastSession.getRemoteMediaClient();remoteMediaClient.load(mediaInfo, autoPlay, currentPosition);}
You can then control media playback on the remote device using the Remote Media Client.
The Cast design checklist requires your sender app provide a mini controller that’s displayed whenever the user navigates away from the primary content page, and an expanded controller that displays a full-screen UI when the user clicks the media Notification or the mini controller.
The mini controller is available as a Fragment that can be added to the bottom of your Activities:
<fragmentandroid:id="@+id/castMiniController"android:layout_width="fill_parent"android:layout_height="wrap_content"android:layout_alignParentBottom="true"android:visibility="gone"class="com.google.android.gms.cast.framework.media.widget.MiniControllerFragment"/>
The expanded controller is provided as the abstract
ExpandedControllerActivity
, which you must subclass to add a Cast Button, as described at
developers.google.com/cast/docs/android_sender_integrate#add_expanded_controller
.
Detailed instructions for customizing the controllers and integrating Cast control through Notifications can be found in the Google Cast SDK reference documentation at
developers.google.com/cast/docs/android_sender_setup
.
BACKGROUND AUDIO PLAYBACK
When playing video, there’s a good chance users will have an Activity visible in the foreground. For audio playback, it’s much more likely to happen while your app is in the background.
To support this, your Media Player and Media Session must be part of a Service that will continue to run when your Activity isn’t visible (or even running).
Android provides the
MediaBrowserServiceCompat
and
MediaBrowserCompat
APIs, to simplify the separation of your audio playback Service from any connected clients—including your playback Activity.
Building an Audio Playback Service
Listing 17-6 provides the minimal implementation of a new Media Browser Service.
Once the Media Session is created, use
setSessionToken
to pass its session token to our Media Browser Service, and implement the two abstract methods
onGetRoot
and
onLoadChildren
.
The
onGetRoot
and
onLoadChildren
methods are used to provide support for Android Auto and Wear OS. They provide a list of media items that users can select from the Auto and Wear UIs in order to start playback of specific songs, albums, or artists. A minimal implementation, as shown in the previous listing, should return a non-null result in
onGetRoot
, because a null result will cause connections to fail.
Note that we initialize our Media Session within the Service’s
onCreate
method rather than the playback Activity. The same should be done for all the media playback mechanisms described previously as we move control of media playback to this Service.
Once your Media Browser Service has been constructed, in order for your Activities and other potential media playback clients to connect to it, you must add it, with a corresponding
android.media.browse.MediaBrowserService
Intent Filter to your manifest, as shown in
Listing 17-7
.
Using a Media Browser to Connect Your Activity to a Media Browser Service
Once you’ve moved your Media Session to a Media Browser Service, it’s important to ensure the media playback and control UI within your Activity is kept in sync.
While your Activity no longer has direct access to the underlying Media Player, your Activity can connect to your Media Browser Service, and create a new Media Controller using the
MediaBrowserCompat
API as shown in
Listing 17-8
.
Within your Activity, you can now use the Media Controller to send media commands such as play and pause to the Media Session as described in the previous section. The Media Session will then, in turn, send your commands to the associated Media Browser Service.
The Media Controller also provides APIs for retrieving the Media Metadata and Playback State from the Media Session using the
getMetadata
and
getPlaybackState
methods, respectively.
To ensure your UI stays in sync with your Service, register a
MediaControllerCompat.Callback
using the
registerCallback
method on the Media Controller, as shown in
Listing 17-9
. This will ensure you receive a callback whenever the metadata or playback state changes, allowing you to keep your UI updated at all times.
Life Cycle of a Media Browser Service
When a Media Browser connects to your Media Browser Service, it binds to it—creating it if necessary. This allows you to prepare your media playback, and to minimize the latency between the user selecting media to play and hearing the audio. Note, however, that a bound service does not begin running until it’s started.
Because we have decoupled the playback controls in our Activity from the Service that handles media playback, the Service will handle starting and stopping itself, based on the callbacks it receives from its Media Session, triggered when the Activity UI sends playback commands via the Media Controller.
In Listing 17-10 , you can see how the Media Browser Service starts itself after receiving a play command, successfully gaining audio focus, and beginning media playback.
Once started, your Service will continue playback even if the playback Activity is closed. Once the Service receives the command to stop playback—from any source—it terminates itself using
stopSelf
.
Similarly, if your playback Activity is closed by the user before media playback is started, your Service would be destroyed. This ensures that your app is not unnecessarily taking up resources in the background when there is no media being played.
Playing Audio as a Foreground Service
As described in Chapter 11 , “Working in the Background,” by default, Services run in the background and can be killed to free resources as needed. Interruptions in audio playback is very noticeable to users, so it’s good practice to give your Service foreground priority when you begin media playback, to minimize the possibility of interrupted playback.
Your Service should only maintain foreground priority when it is actively playing audio, as described by the following process:
-
Call
startForeground(passing in a Media Style Notification) when you begin media playback. -
Call
stopForeground(false)when playback is paused to remove the foreground status, but maintain the notification. -
Call
stopForeground(true)when playback has stopped, to remove the foreground status and remove the notification.
This flow can be seen in Listing 17-11 , which updates Listing 17-10 to set the started Service as a foreground Service.
Creating Media Style Notifications
Notifications are one of the most convenient, and therefore frequently used, mechanisms for users to control media playback.
As described in
Chapter 11
, Android provides a number of templates or “styles” for notifications—with the
MediaStyle
specifically designed for controlling media playback.
Media Style Notifications embed the media playback controls directly within the Notification, making it possible for users to control media playback in both the collapsed and expanded form of the Notification, as shown in Figure 17-1 .

You construct your Notification using the
NotificationCompat.Builder
. The primary source for constructing your Notification is the media metadata available from your Media Session; this ensures a consistent display of media information across all mechanisms (including Wear OS and Android Auto).
Use the
getDescription
method to extract the title, subtitle, description, and icon from the Media Metadata, and pass each into the corresponding set methods on the Notification Builder.
You can specify which (if any) playback controls should appear in the collapsed mode using
setShowActionsInCompactView
.
It is important that you also pass the token associated with your Media Session into
setMediaSession
or actions taken on Wear OS devices will not be received by your app.
Listing 17-12 shows the creation of a typical Media Style Notification.
When a Notification, or any of its associated controls, is selected by the user, it fires Pending Intents that must be handled by your application. This can be done using the
MediaButtonReceiver
from the Android Support Library, and its
buildMediaButtonPendingIntent
method.
Add the
MediaButtonReceiver
to your manifest:
<receiver android:name="android.support.v4.media.session.MediaButtonReceiver" ><intent-filter><action android:name="android.intent.action.MEDIA_BUTTON" /></intent-filter></receiver>
Within your Media Browser Service implementation, call the
MediaButtonReceiver
’s
handleIntent
method in the
onStartCommand
handler:
@Overridepublic int onStartCommand(Intent intent, int flags, int startId) {MediaButtonReceiver.handleIntent(mMediaSession, intent);return super.onStartCommand(intent, flags, startId);}
This technique will route Notification commands into your Media Session and Media Controller, allowing you to handle them as you would playback controls within your Activity.
USING THE MEDIA RECORDER TO RECORD AUDIO
Most Android devices have a microphone and, in many cases, multiple microphones to ensure clear audio input (important for legacy device uses such as “making phone calls”). The microphone is also available to Android apps that hold the
RECORD_AUDIO
permission:
<uses-permission android:name="android.permission.RECORD_AUDIO"/>
You can use the
MediaRecorder
class to record audio files that can be used in your own applications or added to the Media Store.
The Media Recorder lets you specify the audio source, the output file format, and the audio encoders to use when recording your file.
Much like the Media Player, the Media Recorder manages recording as a state machine. This means that the order in which you configure and manage the Media Recorder is important. In the simplest terms, the transitions through the state machine can be described as follows:
- Create a new Media Recorder.
- Specify the input sources to record from.
- Specify the output format and audio encoder.
- Select an output file.
- Prepare the Media Recorder for recording.
- Record.
- End the recording.
When you finish recording your media, call
release
on your Media Recorder object to free the associated resources:
mediaRecorder.release();
Configuring the Audio Recorder
As described in the preceding section, before recording you must specify the input source, choose the output format and audio encoder, and assign an output file—in that order.
The
setAudioSource
method lets you specify a
MediaRecorder.AudioSource.
static constant that defines the audio source. For audio recording, this is almost always
MediaRecorder.AudioSource.MIC
.
After selecting your input source, you need to select the output format using the
setOutputFormat
method with a
MediaRecorder.OutputFormat
constant, and use the
setAudioEncoder
methods with an audio encoder constant from the
MediaRecorder.AudioEncoder
class.
Finally, assign a file to store the recorded media using the
setOutputFile
method before calling
prepare
.
Listing 17-13 shows how to configure a Media Recorder to record audio from the microphone and save it to a file in your application’s external media folder (which makes it available to other apps).
Controlling the Recording
After configuring the Media Recorder and preparing, you can begin recording at any time by calling the
start
method:
mediaRecorder.start();
When you finish recording, call
stop
to end the playback, followed by
reset
and
release
to free the Media Recorder resources, as shown in
Listing 17-14
.
The resulting file can then be played with a
MediaPlayer
, as described earlier in this chapter.
USING THE CAMERA FOR TAKING PICTURES
With the quality and capabilities of camera hardware available on Android devices improving dramatically, taking full advantage of that hardware can be an important differentiator for apps using the camera.
The following sections demonstrate the ways in which you can configure and control the camera, and to take photos programmatically within your applications.
Using Intents to Take Pictures
The easiest way to take a picture from within your application is to fire an Intent using the
MediaStore.ACTION_IMAGE_CAPTURE
action:
startActivityForResult(new Intent(MediaStore.ACTION_IMAGE_CAPTURE), TAKE_PICTURE);
This launches a camera application to take the photo, providing your users with the full suite of camera functionality without you having to rewrite the native camera application yourself.
Once users are satisfied with the image, the result is returned to your application within the Intent received by the
onActivityResult
handler.
By default, the picture taken will be returned as a thumbnail, available as a raw bitmap within the
data
extra within the returned Intent.
To obtain a full image, you must specify a target URI in which to store it using the
MediaStore.EXTRA_OUTPUT
extra in the launch Intent, as shown in
Listing 17-15
.
The full-size image taken by the camera will then be saved to the specified location. No thumbnail will be returned in the Activity result callback, and the received Intent’s data will be null.
Listing 17-16
shows how to use
getParcelableExtra
to extract a thumbnail where one is returned, or to decode the saved file when a full-size image is saved.
To make photos you save available to other applications, it’s good practice to add them to the Media Store—as described in the section “Adding Media to the Media Store.”
Controlling the Camera Directly
To access the camera hardware directly, you need to add the
CAMERA
permission to your application manifest:
<uses-permission android:name="android.permission.CAMERA"/>
The
CameraManager
allows you to enumerate all of the connected cameras, query their characteristics, and open one or more camera devices:
CameraManager cameraManager =(CameraManager) getSystemService(Context.CAMERA_SERVICE);
You can retrieve the list of identifiers for the currently connected camera devices using
getCameraIdList
:
String[] cameraIds = cameraManager.getCameraIdList();
Android 5.0 (API Level 21) introduced the Camera2 API, which replaced the now deprecated Camera API. For the remainder of this chapter, we will focus on the features provided within the Camera2 API, meaning the required API Level to use these features is 21.
Camera Characteristics
Each camera device has a set of immutable properties called the
characteristics
of the device. These characteristics are stored using the
CameraCharacteristics
class, accessible by calling the
getCameraCharacteristics
method of
CameraManager
and passing in the camera’s identifier:
CameraCharacteristics characteristics =cameraManager.getCameraCharacteristics(cameraId);
The Camera Characteristics contain the capabilities of the camera device, including the direction of the lens, auto-exposure modes, auto-focus modes, focal lengths, noise reduction modes, and the ISO sensitivity range.
Use the
LENS_FACING
characteristic to determine if a given camera faces the back, front, or if the camera is external to the device, as shown in
Listing 17-17
.
This information is extremely useful in selecting the appropriate camera and rotating any taken pictures as needed (for example, the front-facing camera is mirrored).
Other Camera Characteristics include:
-
SCALER_STREAM_CONFIGURATION_MAP—Returns aStreamConfigurationMap, which stores the output formats and sizes supported by this camera that you can use to set the appropriate preview size and image capture size. -
CONTROL_AF_AVAILABLE_MODES—Returns the auto-focus modes that are available whereCONTROL_AF_MODE_OFFmeans unavailable andCONTROL_AF_MODE_CONTINUOUS_PICTUREandCONTROL_AF_MODE_CONTINUOUS_VIDEOwould be appropriate for picture or video capture, respectively. -
SENSOR_ORIENTATION—Returns the orientation of the sensor that the output image needs to be rotated to be upright on the device screen in its native orientation. This will always be a multiple of 90.
You can find the full list of Camera Characteristics on the Android developer documentation:
developer.android.com/reference/android/hardware/camera2/CameraCharacteristics.html
Opening a Connection to a Camera Device
To take a picture you must open a connection to the camera device you wish to use. Once you’ve identified a camera to use, open a connection with the
openCamera
method of
CameraManager
, as shown in
Listing 17-18
.
Opening a camera is an asynchronous operation, so
openCamera
also takes a
CameraDevice.StateCallback
in addition to the
cameraId
associated with the camera you want to open.
The
onOpened
callback is returned when the connection is open, and you have access to a
CameraDevice
ready for use. Make sure you override
onError
and
onDisconnected
to properly handle error cases.
Camera Capture Requests and the Camera Preview
Once you have an open connection to a
CameraDevice
, you can request image data by creating a
CameraCaptureSession
.
The Android Camera2 API offers a number of different session types and configurations, including high-speed (120fps) video recording, but the most common session type can be created using the
createCaptureSession
method.
Creating a session is an expensive operation, often taking hundreds of milliseconds as the camera hardware is powered on and configured to handle the
List
of
Surface
objects that will receive the camera output. You must make sure each Surface is set to the appropriate size (using the values from the
SCALER_STREAM_CONFIGURATION_MAP
characteristic) before creating your session.
At a minimum, you should display a preview of what’s being captured by the camera to allow users to compose their photos. The camera preview is typically displayed on a
SurfaceView
within your UI hierarchy.
To display a preview, you must implement a
SurfaceHolder.Callback
that listens for the construction of a valid Surface (and ideally set its size with
setFixedSize
):
SurfaceHolder.Callback surfaceHolderCallback = new SurfaceHolder.Callback() {@Overridepublic void surfaceCreated(SurfaceHolder holder) {startCameraCaptureSession();}@Overridepublic void surfaceDestroyed(SurfaceHolder holder) {}@Overridepublic void surfaceChanged(SurfaceHolder holder, int format,int width, int height) {}};mHolder.addCallback(surfaceHolderCallback);mHolder.setFixedSize(400, 300);try {cameraManager.openCamera(cameraId, cameraDeviceCallback, null);} catch (Exception e) {Log.e(TAG, "Unable to open the camera", e);}
Once your session is configured and you receive a callback to
onConfigured
, you can proceed to display data by passing in a
CaptureRequest
to
setRepeatingRequest
, which indicates that you’d like to repeatedly capture new frames.
The Camera Device’s
createCaptureRequest
method allows you to retrieve a
CaptureRequest.Builder
based on a number of predefined templates. For a display preview, you’d use
CameraDevice.TEMPLATE_PREVIEW
and use
addTarget
with the same
Surface
you used to create your session:
CameraCaptureSession mCaptureSession;CaptureRequest mPreviewCaptureRequest;private void startCameraCaptureSession() {// We require both the surface and camera to be readyif (mCamera == null || mHolder.isCreating()) {return;}Surface previewSurface = mHolder.getSurface();// Create our preview CaptureRequest.BuildermPreviewCaptureRequest = mCamera.createCaptureRequest(CameraDevice.TEMPLATE_PREVIEW);mPreviewCaptureRequest.setTarget(previewSurface);CameraCaptureSession.StateCallback captureSessionCallback= new CameraCaptureSession.StateCallback() {@Overridepublic void onConfigured(@NonNull CameraCaptureSession session) {mCaptureSession = session;try {mCaptureSession.setRepeatingRequest(mPreviewCaptureRequest.build(),null, // optional CaptureCallbacknull); // optional Handler} catch (CameraAccessException | IllegalStateException e) {Log.e(TAG, "Capture Session Exception", e);// Handle failures}}};try {mCamera.createCaptureSession(Arrays.asList(previewSurface),captureSessionCallback,null); // optional Handler} catch (CameraAccessException e) {Log.e(TAG, "Camera Access Exception", e);}}
While the template
CaptureRequest.Builder
provides a set of common defaults, this is also where you can set the auto-focus mode (
CaptureRequest.CONTROL_AF_MODE
) or flash mode (
CaptureRequest.CONTROL_AE_MODE_ON
and
CaptureRequest.FLASH_MODE
) with
set
making sure to only use values returned by the Camera Characteristics. Note that you will need to call
setRepeatingRequest
again after changing the Capture Request values.
Taking a Picture
Displaying a camera preview is an expected feature of any camera app, but it’s normally not sufficient. If you want to take the extra step and take a picture, you’ll need to pass in an additional Surface when creating your capture session.
This Surface can be created with the help of
ImageReader
, which provides a
Surface
that can be used with a
CameraDevice.TEMPLATE_STILL_CAPTURE
Capture Request and the
capture
method that returns the raw bytes captured by the camera.
Listing 17-19 shows the skeleton code for taking a picture and saving the JPEG image to external storage.
Reading and Writing JPEG EXIF Image Details
The
ExifInterface
class provides mechanisms for you to read and modify the Exchangeable Image File Format (EXIF) metadata stored within a JPEG file. Create a new
ExifInterface
instance by passing the full filename of the target JPEG in to the constructor:
ExifInterface exif = new ExifInterface(jpegfilename);
EXIF data is used to store a wide range of metadata on photographs, including date and time, camera settings (such as make and model), and image settings (such as aperture and shutter speed), as well as image descriptions and locations.
To read an EXIF attribute, call
getAttribute
on the
ExifInterface
object, passing in the name of the attribute to read. The
Exifinterface
class includes a number of static
TAG_
constants that can be used to access common EXIF metadata. To modify an EXIF attribute, use
setAttribute
, passing in the name of the attribute to read and the value to set it to.
Listing 17-20 shows how to read the camera model from a file stored on the external storage, before modifying the camera manufacturer details.
RECORDING VIDEO
Android offers two options for recording video within your application.
The simplest technique is to use an Intent to launch the video camera application. This option lets you specify the output location and video recording quality, while letting another video recording application handle the user experience and error handling. This is the best practice approach and should be used in most circumstances, unless you are building your own replacement video recorder.
In cases where you want to replace the default video camera application, or simply need more fine-grained control over the video capture UI or recording settings, you can use the
MediaRecorder
class.
Using Intents to Record Video
The easiest, and best practice, way to initiate video recording is using the
MediaStore.ACTION_VIDEO_CAPTURE
action Intent.
Starting a new Activity with this Intent launches a video recorder app that’s capable of allowing users to start, stop, review, and retake their video. When they’re satisfied, a URI to the recorded video is provided to your Activity as the data parameter of the returned Intent:
A video capture action Intent can contain the following three optional extras:
-
MediaStore.EXTRA_OUTPUT—By default, the video recorded by the video capture action will be stored in the default Media Store. If you want to record it elsewhere, you can specify an alternative URI using this extra. -
MediaStore.EXTRA_VIDEO_QUALITY—The video capture action allows you to specify an image quality using an integer value. There are currently two possible values:0for low (MMS) quality videos, or1for high (full resolution) videos. By default, the high-resolution mode is used. -
MediaStore.EXTRA_DURATION_LIMIT—The maximum length of the recorded video (in seconds).
Listing 17-21 shows how to use the video capture action to record a new video.
Using the Media Recorder to Record Video
Recording a video within your app uses the same basic framework as displaying a camera preview and taking a picture. However, instead of using an
ImageReader
to read a single image, the
MediaRecorder
class is used to record video files with audio that can be used in your own applications or added to the Media Store.
In addition to the
CAMERA
permission needed to access the camera, your application manifest needs to include the
RECORD_AUDIO
and/or
RECORD_VIDEO
permissions:
<uses-permission android:name="android.permission.RECORD_AUDIO"/><uses-permission android:name="android.permission.RECORD_VIDEO"/><uses-permission android:name="android.permission.CAMERA"/>
The Media Recorder state machine described in the “Using the Media Recorder to Record Audio” also applies to video recording. To add video recording, you must set the video source with
setVideoSource
and set the video encoder with
setVideoEncoder
before setting the output file, as shown in
Listing 17-22
.
Because video recording is a continuous operation, it functions very similarly to setting up the camera preview, but instead of creating a
CameraCaptureSession
and
CaptureRequest
that only outputs to a single
Surface
representing the camera display, you also output to the
MediaRecorder
’s
Surface
, which can be retrieved via
getSurface
.
It’s best practice to use the
CameraDevice.TEMPLATE_RECORD
template when you create your
CaptureRequest
. Once the
CaptureRequest
is started with
setRepeatingRequest
, you can start recording video by calling
start
on your
MediaRecorder
, as shown in
Listing 17-23
.
When recording is stopped, you must call
stop
and
reset
on the
MediaRecorder
. You should then start a new
CameraCaptureSession
for continuing to display the preview until a new video recording is started. This ensures that the camera output is no longer sent to the Media Recorder’s Surface and allows you to set a new output file for the next video.
When you finish recording, or previewing, all videos (typically in
onStop
), call
release
on your
MediaRecorder
to free the associated resources:
mediaRecorder.release();
ADDING MEDIA TO THE MEDIA STORE
By default, media files created by your application that are stored in private application folders will be unavailable to other applications, with the exception of the files added to the
getExternalMediaDirs
directories.
To make files in other folders visible, you need to insert them into the Media Store. Android provides two options for this. The preferred approach is to use the Media Scanner to interpret your file and insert it automatically. Alternatively, you can manually insert a new record in the appropriate Content Provider.
Inserting Media Using the Media Scanner
If you have recorded new media of any kind, the
MediaScannerConnection
class provides the
scanFile
method as a simple way for you to add it to the Media Store without needing to construct the full record for the Media Store Content Provider.
Before you can use the
scanFile
method to initiate a content scan on your file, you must call
connect
and wait for the connection to the Media Scanner to complete. This call is asynchronous, so you will need to implement a
MediaScannerConnectionClient
to notify you when the connection has been made. You can use this same class to notify you when the scan is complete, at which point you can disconnect your Media Scanner Connection.
Listing 17-24
shows the skeleton code for creating a new
MediaScannerConnectionClient
that defines a
MediaScannerConnection
, which is used to add a new file to the Media Store.
Inserting Media Manually
Rather than relying on the Media Scanner, you can add new media to the Media Store directly by creating a new
ContentValues
object and inserting it into the appropriate Media Store Content Provider yourself.
The metadata you specify here can include the title, timestamp, and geocoding information for your new media file:
ContentValues content = new ContentValues(3);content.put(Audio.AudioColumns.TITLE, "TheSoundandtheFury");content.put(Audio.AudioColumns.DATE_ADDED,System.currentTimeMillis() / 1000);content.put(Audio.Media.MIME_TYPE, "audio/amr");
You must also specify the absolute path of the media file being added:
content.put(MediaStore.Audio.Media.DATA, "/sdcard/myoutputfile.mp4");
Get access to the application’s
ContentResolver
, and use it to insert this new row into the Media Store:
ContentResolver resolver = getContentResolver();Uri uri = resolver.insert(MediaStore.Video.Media.EXTERNAL_CONTENT_URI,content);
After inserting the media file into the Media Store, you should announce its availability using a Broadcast Intent, as follows:
sendBroadcast(new Intent(Intent.ACTION_MEDIA_SCANNER_SCAN_FILE, uri));
18
Communicating with Bluetooth, NFC, and Wi-Fi Peer-to-Peer
NETWORKING AND PEER-TO-PEER COMMUNICATION
This chapter explores Android’s hardware communications features by examining the Bluetooth, Wi-Fi Peer-to-Peer, Near Field Communication (NFC), and Android Beam APIs.
The Android SDK includes a full Bluetooth stack, which enables you to manage and monitor your Bluetooth settings, control discoverability, discover nearby Bluetooth devices, and use Bluetooth as a proximity-based peer-to-peer transport layer for your applications using Bluetooth and Bluetooth LE (Low Energy).
For situations requiring faster or higher-bandwidth data transfers, Wi-Fi Peer-To-Peer (or Wi-Fi Direct) offers a solution for peer-to-peer communication between two or more devices over Wi-Fi without the need of an intermediary access point.
Android also provides support for NFC, including reading smart tags, and using Android Beam to communicate directly between two NFC-enabled Android devices.
TRANSFERRING DATA USING BLUETOOTH
Bluetooth is a communications protocol designed for short-range, low-bandwidth peer-to-peer communications.
Using the Bluetooth APIs you can search for, and connect to, other Bluetooth devices within range. By initiating a communications link using Bluetooth Sockets, you can then transmit and receive streams of data between devices from within your applications.
Managing the Local Bluetooth Device Adapter
The local Bluetooth adapter is controlled via the
BluetoothAdapter
class, which represents the host Android device on which your application is running.
To access the default Bluetooth Adapter, call
getDefaultAdapter
, as shown in
Listing 18-1
. Some Android devices feature multiple Bluetooth adapters, though it is currently only possible to access the default device.
The Bluetooth Adapter offers methods for reading and setting properties of the local Bluetooth hardware.
To read any of the local Bluetooth Adapter properties, initiate discovery, or find bonded devices, you need to include the
BLUETOOTH
permission in your application manifest:
<uses-permission android:name="android.permission.BLUETOOTH"/>
Bluetooth scans can be used to gather information about the user’s current location, so use of Bluetooth also requires the
ACCESS_COARSE_LOCATION
or
ACCESS_FINE_LOCATION
permissions to be declared in your manifest:
<uses-permission android:name="android.permission.ACCESS_COARSE_LOCATION"/>
You must also request at least one location permission at runtime, as described in Chapter 15 .
To modify any of the local device properties, the
BLUETOOTH_ADMIN
permission is also required:
<uses-permission android:name="android.permission.BLUETOOTH_ADMIN"/>
The Bluetooth Adapter properties can be read and changed only if the Bluetooth Adapter is currently turned on—that is, if its device state is enabled.
Use the
isEnabled
method to confirm the device is enabled, after which you can access the Bluetooth Adapter’s
friendly name
(an arbitrary string that users can set to identify a particular device) and hardware address, using the
getName
and
getAddress
methods, respectively:
if (bluetooth.isEnabled()) {String address = bluetooth.getAddress();String name = bluetooth.getName();}
If the device is off, these methods will return
null
.
If you have the
BLUETOOTH_ADMIN
permission, you can change the friendly name of the Bluetooth Adapter using the
setName
method:
bluetooth.setName("Blackfang");
To find a more detailed description of the current Bluetooth Adapter state, use the
getState
method, which will return one of the following
BluetoothAdapter
constants:
-
STATE_TURNING_ON -
STATE_ON -
STATE_TURNING_OFF -
STATE_OFF
If Bluetooth is currently disabled, you can request the user enable it by using the
BluetoothAdapter.ACTION_REQUEST_ENABLE
static constant as a
startActivityForResult
action:
startActivityForResult(new Intent(BluetoothAdapter.ACTION_REQUEST_ENABLE), ENABLE_BLUETOOTH);
Figure 18-1 shows the resulting system dialog.

Use the result code parameter returned in the
onActivityResult
handler of your Activity to determine the success of this request, as shown in
Listing 18-2
.
Being Discoverable and Remote Device Discovery
The process of two devices finding each other to connect is called discovery . Before you can establish a Bluetooth Socket for communications, the local Bluetooth Adapter must bond with the remote device. Before two devices can bond and connect, they first need to discover each other.
Making Your Device Discoverable
For another Android device to find your local Bluetooth Adapter during a discovery scan, you need to ensure that your Bluetooth Adapter is discoverable. Discoverability is indicated by the scan mode, found using the
getScanMode
method on the
BluetoothAdapter
object.
It will return one of the following
BluetoothAdapter
constants:
-
SCAN_MODE_CONNECTABLE_DISCOVERABLE—Inquiry scan and page scan are both enabled, meaning that the device is discoverable from any Bluetooth device performing a discovery scan. -
SCAN_MODE_CONNECTABLE—Page scan is enabled but inquiry scan is not. This means that devices that have previously connected and bonded to the local device’s Bluetooth Adapter can find it now, but new devices can’t discover it. -
SCAN_MODE_NONE—Discoverability is turned off. No remote devices can find the local Bluetooth Adapter.
For privacy reasons, Android devices will default to having discoverability disabled. To turn on discovery, you need to obtain explicit permission from the user; you do this by starting a new Activity using the
ACTION_REQUEST_DISCOVERABLE
action, as shown in
Listing 18-3
.
By default, discoverability will be enabled for 2 minutes. You can modify this setting by adding an
EXTRA_DISCOVERABLE_DURATION
extra to the launch Intent, specifying the number of seconds you want discoverability to last.
The user will be prompted by a system dialog, as shown in Figure 18-2 , to turn on discoverability for the specified duration.

To learn if the user has allowed or rejected your discovery request, override the
onActivityResult
handler, as shown in
Listing 18-4
. The returned
resultCode
parameter indicates the duration of discoverability, or the
RESULT_CANCELED
constant if the user has rejected the request.
Discovering Remote Devices
Once a device has been made discoverable, it can then be discovered by another device. To discover a new device, initiate a discovery scan from your local Bluetooth Adapter.
Knowledge of which Bluetooth Device’s are nearby may provide information that can be used to determine the user’s current location. Accordingly, you must include the
ACCESS_COARSE_LOCATION
permission in the application manifest and request it as a runtime permission before performing device discovery.
You can check if the local Bluetooth Adapter is already performing a discovery scan by using the
isDiscovering
method.
To initiate the discovery process, call
startDiscovery
on the Bluetooth Adapter:
if (mBluetooth.isEnabled() && !mBluetooth.isDiscovering())mBluetooth.startDiscovery();
The discovery process is asynchronous. Android broadcasts Intents to notify you of the start and end of discovery, as well as notifying you of remote devices discovered during the scan.
You can monitor changes in the discovery process by creating Broadcast Receivers to listen for the
ACTION_DISCOVERY_STARTED
and
ACTION_DISCOVERY_FINISHED
Broadcast Intents:
private void monitorDiscovery() {registerReceiver(discoveryMonitor,new IntentFilter(BluetoothAdapter.ACTION_DISCOVERY_STARTED));registerReceiver(discoveryMonitor,new IntentFilter(BluetoothAdapter.ACTION_DISCOVERY_FINISHED));}BroadcastReceiver discoveryMonitor = new BroadcastReceiver() {@Overridepublic void onReceive(Context context, Intent intent) {if (BluetoothAdapter.ACTION_DISCOVERY_STARTED.equals(intent.getAction())) {// Discovery has started.Log.d(TAG, "Discovery Started…");}else if (BluetoothAdapter.ACTION_DISCOVERY_FINISHED.equals(intent.getAction())) {// Discovery has completed.Log.d(TAG, "Discovery Complete.");}}};
Discovered Bluetooth Devices are returned via Broadcast Intents using the
ACTION_FOUND
broadcast action.
As shown in
Listing 18-5
, each Broadcast Intent includes the name of the remote device in an extra indexed as
BluetoothDevice.EXTRA_NAME
, and an immutable representation of the remote Bluetooth Device as a
BluetoothDevice
Parcelable object stored under the
BluetoothDevice.EXTRA_DEVICE
extra.
Each
BluetoothDevice
object returned through the discovery broadcasts represents a remote Bluetooth Device that has been discovered.
The discovery process consumes significant resources, so you should be sure to cancel a discovery in progress using the
cancelDiscovery
method, prior to attempting to connect with any discovered devices.
Bluetooth Communications
The Android Bluetooth communications APIs are wrappers around RFCOMM, the Bluetooth radio frequency communications protocol. RFCOMM supports RS232 serial communication over the Logical Link Control and Adaptation Protocol (L2CAP) layer.
In practice, this alphabet soup provides a mechanism for opening communication sockets between two paired Bluetooth devices.
You can establish an RFCOMM communication channel for bidirectional communications using the following classes:
-
BluetoothServerSocket—Used to establish a listening socket for initiating a link between devices. To establish a handshake, one device acts as a server to listen for, and accept, incoming connection requests. -
BluetoothSocket—Used to create a new client to connect to a listening Bluetooth Server Socket. Also returned by the Bluetooth Server Socket after a connection is established. Once a connection is established, Bluetooth Sockets are used by both the server and client to transfer data streams.
When creating an application that uses Bluetooth as a peer-to-peer transport layer across devices, you’ll need to implement both a Bluetooth Server Socket to listen for connections and a Bluetooth Socket to initiate a new channel and handle communications.
When connected, the Bluetooth Server Socket returns a
BluetoothSocket
that can be used to send and receive data. This server-side Bluetooth Socket is used in exactly the same way as the client socket. The designations of
server
and
client
are relevant only to how the connection is established; they don’t affect how data flows after that connection is made.
Opening a Bluetooth Server Socket Listener
A Bluetooth Server Socket is used to listen for incoming Bluetooth Socket connection requests from remote Bluetooth Devices. In order for two Bluetooth Devices to be connected, one must act as a server (listening for and accepting incoming requests) and the other as a client (initiating the request to connect to the server). After the two are connected, the communications between the server and host device are handled through a
BluetoothSocket
instance at both ends.
To have your Bluetooth Adapter act as a server, call its
listenUsingRfcommWithServiceRecord
method to listen for incoming connection requests. Pass in a name to identify this server, along with a universally unique identifier (UUID):
String name = "mybluetoothserver";UUID uuid = UUID.randomUUID();final BluetoothServerSocket btserver =bluetooth.listenUsingRfcommWithServiceRecord(name, uuid);
The method will return a
BluetoothServerSocket
object—note that the client Bluetooth Socket that is to connect to this server will need to know the server’s UUID in order to connect.
Call
accept
on the Server Socket, optionally passing in a timeout duration, to have it start listening for connections. The Server Socket will now block until a remote Bluetooth Socket client with a matching UUID attempts to connect:
// Block until client connection established.BluetoothSocket serverSocket = btserver.accept();
If a connection request is made from a remote device that is not yet paired with the local Bluetooth Adapter, the users on each devices will be prompted to accept a pairing request before the accept call returns. This prompt is made via a Notification, as shown in Figure 18-3 .

If an incoming connection request is successful,
accept
will return a Bluetooth Socket connected to the client device. You can use this socket to transfer data, as shown later in this section.
It’s also important to note that your Bluetooth Adapter must be discoverable for remote Bluetooth Devices to connect to it.
Listing 18-6
shows some typical skeleton code that uses the
ACTION_REQUEST_DISCOVERABLE
broadcast to request that the device be made discoverable, before listening for incoming connection requests for the returned discoverability duration.
Selecting Remote Bluetooth Devices for Communications
To create a client-side Bluetooth Socket, you utilize a
BluetoothDevice
object that represents the target remote server.
You can obtain a reference to a remote Bluetooth Device in a number of ways, with some important caveats regarding the devices with which you can create a communications link.
For a Bluetooth Socket to establish a connection to a remote Bluetooth Device, the following conditions must be true:
- The remote device must be discoverable.
- The remote device must be accepting connections through a Bluetooth Server Socket.
- The local and remote devices must be paired (bonded). If the devices are not paired, the users of each device will be prompted to pair them when the connection request is initiated.
Bluetooth Device objects are proxies that represent remote devices. You can query them for the properties of the remote devices they represent, and to initiate Bluetooth Socket connections.
You have several ways to obtain
BluetoothDevice
s in code. In each case you should check to ensure that the device you intend to connect to is discoverable and (optionally) determine whether you are bonded to it. If you can’t discover the remote device, you should prompt the user to enable discoverability on it.
You learned one technique for finding discoverable Bluetooth Devices earlier in this section. Using the
startDiscovery
method and monitoring
ACTION_FOUND
broadcasts allows you to receive Broadcast Intents that include a
BluetoothDevice.EXTRA_DEVICE
extra containing the discovered Bluetooth Device.
You can also use the
getRemoteDevice
method on your local Bluetooth Adapter, specifying the hardware address of the remote Bluetooth Device you want to connect to:
BluetoothDevice device = mBluetooth.getRemoteDevice("01:23:97:35:2F:AA");
This is particularly useful when you know the hardware address of the target device, such as when using a technology such as Android Beam to share this information between devices.
To find the set of currently paired devices, call
getBondedDevices
on the local Bluetooth Adapter. You can query the returned set to find out if the target Bluetooth Device is already paired with the local Bluetooth Adapter:
Set<BluetoothDevice> bondedDevices = mBluetooth.getBondedDevices();if (bondedDevices.contains(knownDevice)) {// TODO Target device is bonded / paired with the local device.}
Opening a Client Bluetooth Socket Connection
To initiate a communications channel with a remote device, create a Bluetooth Socket by calling
createRfcommSocketToServiceRecord
on the Bluetooth Device object representing the target remote device, passing in the UUID of the corresponding open Bluetooth Server Socket listener.
The returned Bluetooth Socket can then be used to initiate the connection with a call to
connect
, as shown in
Listing 18-7
.
If you attempt to connect to a Bluetooth Device that has not yet been paired (bonded) with the host device, the users will be prompted to accept a pairing request on both the server and client devices before the
connect
(and
accept
) calls return.
Transmitting Data Using Bluetooth Sockets
After a connection has been established, you will have an open Bluetooth Socket on both the client and the server devices. From this point onward there is no significant distinction between them; you can send and receive data using the Bluetooth Socket on either device.
Data transfer across Bluetooth Sockets is handled via
InputStream
and
OutputStream
objects, which you can obtain from a Bluetooth Socket using the appropriately named
getInputStream
and
getOutputStream
methods, respectively.
Listing 18-8 shows two simple skeleton methods—the first used to send a string to a remote device using an Output Stream, and the second to listen for incoming strings using an Input Stream. The same technique can be used to transfer any streamable data.
Bluetooth Profiles
In addition to the generic approach described in the previous section, the Bluetooth API also includes profiles . Profiles provide a specialized interface for communicating between devices of specific types and purposes. The Android Bluetooth API includes support for the following profiles:
-
Headset
—Facilitates communication between the host device and Bluetooth headsets via the
BluetoothHeadsetclass. -
A2DP
—The Advanced Audio Distribution Profile (A2DP) profile facilitates the streaming of high-quality audio between devices via the
BluetoothA2dpclass. - Health Device —The Bluetooth Health Device Profile (HDP) lets you communicate with health devices such as heart-rate monitors.
To utilize a profile within your app, call
getProfileProxy
on your Bluetooth Adapter, passing in a
BluetoothProfile.ServiceListener
implementation. When the corresponding remote device connects, the Service Listener’s
onServiceConnected
handler will be triggered, providing a proxy object that can be used to interact with the remote device:
private BluetoothAdapter mBluetooth;private BluetoothHeadset mBluetoothHeadset;private BluetoothProfile.ServiceListener mProfileListener =new BluetoothProfile.ServiceListener() {public void onServiceConnected(int profile, BluetoothProfile proxy) {if (profile == BluetoothProfile.HEADSET) {mBluetoothHeadset = (BluetoothHeadset) proxy;// TODO Utilize proxy to interact with the remote headset.}}public void onServiceDisconnected(int profile) {if (profile == BluetoothProfile.HEADSET) {// TODO Stop using proxy to interact with remote headset.mBluetoothHeadset = null;}}};private void connectHeadsetProfile () {// Get the default adaptermBluetooth = BluetoothAdapter.getDefaultAdapter();// Establish connection to the proxy.mBluetooth.getProfileProxy(this, mProfileListener,BluetoothProfile.HEADSET);}private void closeHeadsetProxy() {// Close proxy connection after use.mBluetooth.closeProfileProxy(BluetoothProfile.HEADSET, mBluetoothHeadset);}
Once connected, you can utilize vendor-specific AT commends to control the remote device, and correspondingly register to receive system broadcasts of vendor-specific AT commands sent by the device.
Additional detail on how to utilize each of these profiles with different hardware implementations are beyond the scope of this book.
Bluetooth Low Energy
Bluetooth Low Energy (BLE) is designed to provide similar functionality to regular Bluetooth, but with significantly less power consumption. BLE is optimized for transferring small amounts of data between nearby devices, making it ideal for interaction between an Android device and low-power devices such as proximity sensors, heart-rate monitors, and fitness devices.
Unlike classic Bluetooth, where each device can be considered a peer, BLE connections are based around a central device that looks for peripheral devices, and the peripherals that advertise their existence.
As a result, peripheral devices require a central device to communicate with—they can’t communicate with each other directly.
To connect your device to BLE peripherals, the BLE APIs use the same Bluetooth Adapter described in the previous sections for classic Bluetooth communications. To search for peripherals, use
getBluetoothLeScanner
to receive a
BluetoothLeScanner
object, and begin a scan for BLE devices by calling
startScan
, passing in a
ScanCallback
implementation:
private void leScan() {mBluetooth.getBluetoothLeScanner().startScan(scanCallback);}// Device scan callback.private ScanCallback scanCallback =new ScanCallback() {@Overridepublic void onScanResult(int callbackType, ScanResult result) {BluetoothDevice device = result.getDevice();}};
The
onScanResult
handler receives a
ScanResult
object that can be queried for the Bluetooth Device object you’ll use to interact with the discovered remote BLE peripheral.
Once you’ve discovered peripherals, connections and communications are coordinated through the use of Generic Attribute Profiles (GATT). The Bluetooth SIG defines many profiles for Low Energy devices, where each profile specifies how each device works to fulfill a profile’s requirements.
As such, each GATT profile defines a specification for sending and receiving attributes between BLE devices. Each attribute is optimized for size, and is formatted as characteristics and services .
Each characteristic is a single value with optional descriptors that describe a characteristic value (such as by providing a description, acceptable range, or a unit of measure) that is specific to a characteristic’s value.
A service is a collection of one or more characteristics that fully describe the functionality provided by the peripheral device—for example, a “Heart Rate Monitor” service would include a “heart rate measurement” characteristic.
A comprehensive list of existing GATT-based profiles and services is available at
www.bluetooth.com/specifications/gatt/services
.
To connect to a discovered peripheral, call
connectGatt
passing in a
BluetoothGattCallback
implementation:
BluetoothGatt mBluetoothGatt;private void connectToGattServer(BluetoothDevice device) {mBluetoothGatt = device.connectGatt(this, false, mGattCallback);}private final BluetoothGattCallback mGattCallback =new BluetoothGattCallback() {};
The returned
BluetoothGatt
instance can be used to execute GATT operations on the peripheral device, while overriding the
onConnectionStateChanged
handler allows you to track when the connection has successfully been made, at which point you can use the
discoverServices
method to query the device for available GATT services:
@Overridepublic void onConnectionStateChange(BluetoothGatt gatt,int status, int newState) {super.onConnectionStateChange(gatt, status, newState);if (newState == BluetoothProfile.STATE_CONNECTED) {mBluetoothGatt.discoverServices();} else if (newState == BluetoothProfile.STATE_DISCONNECTED) {Log.d(TAG, "Disconnected from GATT server.");}}
The services query is returned through the
onServicesDiscovered
handler:
@Overridepublic void onServicesDiscovered(BluetoothGatt gatt, int status) {super.onServicesDiscovered(gatt, status);for (BluetoothGattService service: gatt.getServices()) {Log.d(TAG, "Service: " + service.getUuid());for (BluetoothGattCharacteristic characteristic :service.getCharacteristics()) {Log.d(TAG, "Value: " + characteristic.getValue());for (BluetoothGattDescriptor descriptor :characteristic.getDescriptors()) {Log.d(TAG, descriptor.getValue().toString());}}}// TODO New services have been discovered.}
The preceding snippet iterates over each of the characteristics for each service available on the BLE peripheral. For most peripherals, the values for each characteristic are likely to change over time; rather than poll each value, it’s good practice to request notification when a particular characteristic changes using the
setCharacteristicNotification
method on the Bluetooth Gatt proxy object, passing in the characteristic to be monitored:
mBluetoothGatt.setCharacteristicNotification(characteristic, enabled);
Notifications for modified values are delivered to the
onCharacteristicChanged
callback within your Bluetooth Gatt Callback:
@Overridepublic void onCharacteristicChanged(BluetoothGatt gatt,BluetoothGattCharacteristic characteristic) {super.onCharacteristicChanged(gatt, characteristic);// TODO An updated value has been received for a characteristic.}
Once your app has finished interacting with a BLE device, call
close
on its Bluetooth Gatt proxy object to allow the system to recover its resources:
mBluetoothGatt.close();
TRANSFERRING DATA USING WI-FI PEER-TO-PEER
Wi-Fi Peer-to-Peer (P2P), compatible with the Wi-Fi Direct communications protocol, is designed for medium-range, high-bandwidth peer-to-peer communications via Wi-Fi without an intermediate access point. Compared to Bluetooth, Wi-Fi Peer-to-Peer is faster, more reliable, and works over greater distances.
Using the Wi-Fi P2P APIs, you can search for, and connect to, other Wi-Fi P2P devices within range. By initiating a communications link using sockets, you can then transmit and receive streams of data between supported devices (including some printers, scanners, cameras, and televisions) and between instances of your application running on different devices without needing to connect to the same network.
As a high-bandwidth alternative to Bluetooth, Wi-Fi P2P is particularly suitable for operations such as media sharing and live media streaming.
Initializing the Wi-Fi Peer-to-Peer Framework
To use Wi-Fi P2P, your application requires the following manifest permissions:
<uses-permission android:name="android.permission.CHANGE_NETWORK_STATE" /><uses-permission android:name="android.permission.ACCESS_NETWORK_STATE" /><uses-permission android:name="android.permission.ACCESS_WIFI_STATE"/><uses-permission android:name="android.permission.CHANGE_WIFI_STATE"/><uses-permission android:name="android.permission.INTERNET"/>
Wi-Fi Direct connections are initiated and managed using the
WifiP2pManager
system service:
wifiP2pManager =(WifiP2pManager)getSystemService(Context.WIFI_P2P_SERVICE);
Before you can use the Wi-Fi P2P Manager, you must create a channel to the Wi-Fi Direct framework using the Wi-Fi P2P Manager’s
initialize
method. Pass in the current Context, the Looper on which to receive Wi-Fi Direct events, and a
ChannelListener
to listen for the loss of your channel connection, as shown in
Listing 18-9
.
You will use the returned Wi-Fi P2P Channel whenever you interact with the Wi-Fi P2P framework, so initializing the Wi-Fi P2P Manager is done within the
onCreate
handler of your Activity.
Most actions performed using the Wi-Fi P2P Manager (such as peer discovery and connection attempts) will immediately indicate their success (or failure) using an
ActionListener
, as shown in
Listing 18-10
. When successful, the return values associated with those actions are obtained by receiving Broadcast Intents, as described in the following sections.
You can monitor the Wi-Fi P2P status by registering a Broadcast Receiver that receives the
WifiP2pManager.WIFI_P2P_STATE_CHANGED_ACTION
action:
IntentFilter p2pEnabledFilter = newIntentFilter(WifiP2pManager.WIFI_P2P_STATE_CHANGED_ACTION);registerReceiver(p2pStatusReceiver, p2pEnabledFilter);
The Intent received by the associated Broadcast Receiver, as shown in
Listing 18-11
, will include a
WifiP2pManager.EXTRA_WIFI_STATE
extra that will be set to either
WIFI_P2P_STATE_ENABLED
or
WIFI_P2P_STATE_DISABLED
.
Within the
onReceive
handler, you can modify your UI accordingly based on the change in state.
After creating a channel to the Wi-Fi P2P framework and enabling Wi-Fi P2P on the host and its peer device(s), you can begin the process of discovering and connecting to peers.
Discovering Peers
To initiate a scan for peers, call the Wi-Fi P2P Manager’s
discoverPeers
method, passing in the active channel and an Action Listener. Changes to the peer list will be broadcast as Intents using the
WifiP2pManager.WIFI_P2P_PEERS_CHANGED_ACTION
action. Peer discovery will remain active until a connection is established or peer discovery is cancelled.
When you receive an Intent notifying you of a change to the peer list, you can request the current list of discovered peers using the
WifiP2pManager.requestPeers
method, as shown in
Listing 18-12
.
The
requestPeers
method accepts a
PeerListListener
whose
onPeersAvailable
handler will execute when the peer list has been retrieved. The list of peers will be available as a
WifiP2pDeviceList
, which you can then query to find the name and address of all the available peer devices.
Connecting with Peers
To form a Wi-Fi P2P connection with a peer device, use the Wi-Fi P2P Manager’s
connect
method, passing in the active channel, an Action Listener, and a
WifiP2pConfig
object that specifies the address of a peer from our Wi-Fi P2P Device List to connect to, as shown in
Listing 18-13
.
When you attempt to establish a connection, the remote device will be prompted to accept it. On Android devices this requires the user to manually accept the connection request using the dialog shown in Figure 18-4 .

If the device accepts the connection request, the successful connection is broadcast on
both
devices using the
WifiP2pManager.WIFI_P2P_CONNECTION_CHANGED_ACTION
Intent action.
The Broadcast Intent will include a
NetworkInfo
object parceled within the
WifiP2pManager.EXTRA_NETWORK_INFO
extra. You can query the Network Info to confirm whether the change in connection status represents a new connection or a disconnection:
NetworkInfo networkInfo= (NetworkInfo)intent.getParcelableExtra(WifiP2pManager.EXTRA_NETWORK_INFO);boolean connected = networkInfo.isConnected();
In the former case, you can request further details on the connection using the
WifiP2pManager.requestConnectionInfo
method, passing in the active channel and a
ConnectionInfoListener
, as shown in
Listing 18-14
.
The
ConnectionInfoListener
will fire its
onConnectionInfoAvailable
handler when the connection details become available, passing in a
WifiP2pInfo
object that includes those details.
When a collection is established, a group consisting of the peers connected is formed. The initiator of the connection will be returned as the group owner and would typically (but not necessarily) take on the role of server for further communications.
Having established a connection, you can use standard TCP/IP sockets to transmit data between devices.
Transferring Data Between Peers
Although the specifics of any particular data transfer implementation is beyond the scope of this book, this section describes the basic process of transmitting data between connected devices using Sockets.
To establish a Socket connection, one device must create a
ServerSocket
that listens for connection requests, and the other device must create a client
Socket
that makes connection requests. This distinction is relevant only in terms of establishing the connection—after that connection is established, the data can flow in either direction.
Create a new server-side socket using the
ServerSocket
class, specifying a port on which to listen for requests. Call its
accept
method asynchronously, to listen for incoming requests, as shown in
Listing 18-15
.
To request a connection from the client device, create a new
Socket
and asynchronously use its
connect
method, specifying the host address of the target device, a port to connect on, and a timeout for the connection request, as shown in
Listing 18-16
.
Like the Server Socket call to
accept
, the call to
connect
is a blocking call that will return after the Socket connection has been established, so both must always be called from background Threads.
After the sockets have been established, you can create Input Streams and Output Streams on either the server- or client-side Sockets to transmit and receive data bidirectionally.
USING NEAR FIELD COMMUNICATION
NFC is a contactless technology used to transmit small amounts of data across very short distances (typically less than 4 centimeters).
NFC transfers can occur between two NFC-enabled devices, or between a device and an NFC “tag.” Tags can range from passive tags that transmit a URL when scanned, to complex systems such as those used in NFC payment solutions, such as Google Pay.
NFC messages in Android are handled using the NFC Data Exchange Format (NDEF).
To read, write, or broadcast NFC messages, your application requires the NFC manifest permission:
<uses-permission android:name="android.permission.NFC" />
Reading NFC Tags
When an Android device is used to scan an NFC tag, the system will decode the incoming payload using its own tag dispatch system, which analyzes the tag, categorizes the data, and uses an Intent to launch an application to receive the data.
For an application to receive NFC data, you need to add an Activity Intent Filter that listens for one of the following Intent actions:
-
NfcAdapter.ACTION_NDEF_DISCOVERED—The highest priority, and most specific, of the NFC messages. Intents using this action include MIME types and/or URI data. It’s best practice to listen for this broadcast whenever possible because the extra data allows you to be more specific in defining which tags to respond to. -
NfcAdapter.ACTION_TECH_DISCOVERED—This action is broadcast when the NFC technology is known but the tag contains no data—or contains data that can’t be mapped to a MIME type or URI. -
NfcAdapter.ACTION_TAG_DISCOVERED—If a tag is received from an unknown technology, it will be broadcast using this action.
Listing 18-17 shows how to register an Activity that will respond only to NFC tags that correspond to a URI that points to my blog.
It’s good practice to make your NFC Intent Filters as specific as possible to minimize the number of applications available to respond to a given NFC tag and provide the best, fastest user experience.
In many cases the Intent data/URI and MIME type are sufficient for your application to respond accordingly. However, if required, the payload delivered from an NFC message is available through extras within the Intent that started your Activity.
The
NfcAdapter.EXTRA_TAG
extra includes a raw
Tag
object that represents the scanned tag. The
NfcAdapter.EXTRA_TNDEF_MESSAGES
extra contains an array of NDEF Messages, as shown in
Listing 18-18
.
Using the Foreground Dispatch System
By default, the tag dispatch system will determine which application should receive a particular tag based on the standard process of Intent resolution. In that process, the foreground Activity has no priority over other applications; so, if several applications are all registered to receive a tag of the type scanned, the user will be prompted to select which to use, even if your application is in the foreground at the time.
Using the foreground dispatch system, you can specify a particular Activity as having priority, allowing it to become the default receiver when it is in the foreground. Foreground dispatching can be toggled using the
enable/disableForegroundDispatch
methods on the NFC Adapter.
Foreground dispatching can be used only while an Activity is in the foreground, so it should be enabled and disabled from within your
onResume
and
onPause
handlers, respectively, as shown in
Listing 18-19
. The parameters to
enableForegroundDispatch
are described following the example.
The Intent Filters array should declare the URIs or MIME types you want to intercept—any received tags that don’t match these criteria will be handled using the standard tag dispatching system. To ensure a good user experience, it’s important that you specify only the tag content your application handles.
You can further refine the tags you receive by explicitly indicating the technologies you want to handle—typically represented by adding the
NfcF
class.
Finally, the Pending Intent will be populated by the NFC Adapter to transmit the received tag directly to your application.
Listing 18-20 shows the Pending Intent, MIME type array, and technologies array used to enable the foreground dispatching in Listing 18-19 .
USING ANDROID BEAM
Android Beam provides a simple API for an application to transmit data between two Android devices using NFC, simply by placing them back-to-back. For example, the native contacts, browser, and YouTube applications use Android Beam to share the currently viewed contact, web page, and video, respectively.
By enabling Android Beam within your application, you can define the payload of the beamed message. If you don’t customize the message, the default action for your application will be to launch it on the target device. If your application isn’t installed on the target device, the Google Play Store will launch and display your application’s details page.
To define the message your application beams, you need to request the NFC permission in the manifest:
<uses-permission android:name="android.permission.NFC"/>
The process to define your own custom payload is described as follows:
-
Create an
NdefMessageobject that contains anNdefRecordthat contains your message payload. - Assign your Ndef Message to the NFC Adapter as your Android Beam payload.
- Configure your application to listen for incoming Android Beam messages.
Creating Android Beam Messages
To create a new Ndef Message, create a new
NdefMessage
object that contains at least one
NdefRecord
containing the payload you want to beam to your application on the target device.
When creating a new Ndef Record, you must specify the type of record it represents, a MIME type, an ID, and a payload. You can use several common types of Ndef Record to transmit data using Android Beam; note that they should always be the first record added to each beamed message.
Using the
NdefRecord.TNF_MIME_MEDIA
type, you can transmit an absolute URI:
NdefRecord uriRecord = new NdefRecord(NdefRecord.TNF_ABSOLUTE_URI,"http://blog.radioactiveyak.com".getBytes(Charset.forName("US-ASCII")),new byte[0], new byte[0]);
This is the most common Ndef Record transmitted using Android Beam because the received Intent will be of the same form as any Intent used to start an Activity. The Intent Filter used to decide which NFC messages a particular Activity should receive can use the
scheme
,
host
, and
pathPrefix
attributes.
If you need to transmit messages that contain information that can’t be easily interpreted as a URI, the
NdefRecord.TNF_MIME_MEDIA
type supports the creation of an application-specific MIME type and the inclusion of associated payload data:
String mimeType = "application/com.professionalandroid.apps.nfcbeam";String payload = "Not a URI";byte[] tagId = new byte[0];NdefRecord mimeRecord= new NdefRecord(NdefRecord.TNF_MIME_MEDIA,mimeType.getBytes(Charset.forName("US-ASCII")),tagId,payload.getBytes(Charset.forName("US-ASCII")));
You can find a more complete examination of the available Ndef Record types and how to use them in the Android Developer Guide at
d.android.com/guide/topics/nfc/nfc.html#creating-records
.
When constructing your Ndef Message, it’s good practice to include an Ndef Record in the form of an Android Application Record (AAR) in addition to your payload record. This guarantees that your application will be launched on the target device, and that if your application isn’t installed, the Google Play Store will be launched for the user to install it.
To create an AAR Ndef Record, use the
createApplicationRecord
static method on the Ndef Record class, specifying the package name of your application:
NdefRecord.createApplicationRecord("com.professionalandroid.apps.nfcbeam")
When your Ndef Records have been created, create a new Ndef Message, passing in an array of your Ndef Records, as shown in Listing 18-21 .
Assigning the Android Beam Payload
You specify your Android Beam payload using the NFC adapter. You can access the default NFC adapter using the static
getDefaultAdapter
method on the
NfcAdapter
class:
NfcAdapter nfcAdapter = NfcAdapter.getDefaultAdapter(this);
You have two alternatives for specifying the NDEF Message created in
Listing 18-21
as your application’s Android Beam payload. The simplest way is to use the
setNdefPushMessage
method to assign a message that should
always
be sent from the current Activity if Android Beam is initiated. You would typically make this assignment once, from within your Activity’s
onResume
method:
nfcAdapter.setNdefPushMessage(nfcMessage, this);
A better alternative is to use the
setNdefPushMessageCallback
method. This handler will fire immediately before your message is beamed, allowing you to dynamically set the payload content based on the application’s current context—for example, which video is being watched, which web page is being browsed, or which map coordinates are centered, as shown in
Listing 18-22
.
If you set both a static message and a dynamic message using the callback handler, only the latter will be transmitted.
Receiving Android Beam Messages
Android Beam messages are received much like NFC tags, as described earlier in this chapter. To receive the payloads you packaged in Listing 18-21 and Listing 18-22 , start by adding a new Intent Filter to your Activity, as shown in Listing 18-23 .
The corresponding Activity will be launched on the recipient device when an Android Beam has been initiated, or, if your application isn’t installed, the Google Play Store will be launched to allow the user to download it.
The beam data will be delivered to your Activity using an Intent with the
NfcAdapter.ACTION_NDEF_DISCOVERED
action and the payload available as an array of
NdfMessages
stored against the
NfcAdapter.EXTRA_NDEF_MESSAGES
extra, as shown in
Listing 18-24
.
Typically, the payload string will be in the form of a URI, allowing you to extract and handle it as you would the data encapsulated within an Intent to display the appropriate video, web page, or map coordinates.
19
Invading the Home Screen
CUSTOMIZING THE HOME SCREEN
Widgets, Live Wallpaper, and App Shortcuts let you add a piece of your application directly onto the user’s device home screen. By incorporating these features into your app:
- Users get instant access to priority functionality.
- Users can see important information without needing to open an application.
- You get an entry point to your applications directly on the home screen.
A useful home screen Widget, Live Wallpaper, or App Shortcut increases user engagement, can decrease the chance that an application will be uninstalled, and increases the likelihood of its being used.
INTRODUCING HOME SCREEN WIDGETS
Home screen Widgets, more properly
AppWidgets
, are visual application components that can be added to other applications. The most common feature of App Widgets is that they can be used to enable users to embed an interactive piece of your application directly within the home screen. A good App Widget provides useful, concise, and timely information with minimal battery drain.
Widgets can be standalone applications, but are more commonly a feature of a larger application—such as the Calendar and Gmail App Widgets.
Figure 19-1 shows an example of App Widgets from some of Google’s applications, added to the home screen.
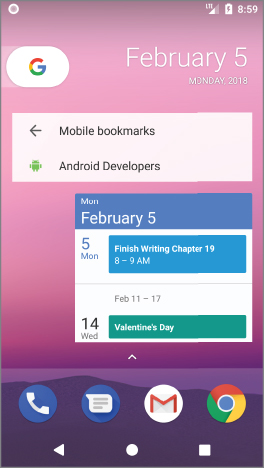
App Widgets are implemented as Broadcast Receivers. You use
RemoteViews
to modify the Widget UI, which you define within a View hierarchy, that’s hosted within another application process.
A new App Widget requires three components:
- An XML layout resource to define the UI
- An XML file to describe the App Widget meta data
-
A
BroadcastReceiverextension to implement the Widget
You can create as many Widgets as you want for a single application, or you can have an application that consists of only one Widget. It’s even possible to have an application consisting of no Widgets, which is a particularly simple pattern to implement that we’ll leave as an exercise for the reader.
When a Widget is hosted within another application—such as the home screen—it’s run within that parent application’s process. Widgets will wake the device from low-power sleep mode based on the update rate, to ensure it’s up to date when it’s next visible. This can have a significant impact on battery life, so as a developer you need to take special care when creating your Widgets to set the update rate as low as possible, and that the code executed within the update method is lightweight and efficient.
Defining the Widget Layout
The first step in creating your Widget is to design and implement its user interface (UI) layout.
UI design guidelines exist for controlling both a Widget’s layout size and its visual styling. The former is enforced rigidly, whereas the latter is a guide only. Visually, Widgets are often displayed alongside other native and third-party Widgets, so it’s important that yours conform to design standards—particularly because Widgets are most often used on the home screen. You can find the details at the Android Developers Widget Design Guidelines site, at
developer.android.com/guide/practices/ui_guidelines/widget_design.html
, and the material design Widget guidelines at
material.io/design/platform-guidance/android-widget.html#behavior
.
App Widgets fully support transparent backgrounds and allow the use of NinePatches and partially transparent Drawable resources. It’s beyond the scope of this book to describe the Widget style promoted by Google in detail, but note the descriptions available at the Widget UI guidelines links provided above.
You construct your Widget’s UI as you would other visual components in Android, as described in
Chapter 5
, “Building User Interfaces,” with some restrictions. Best practice is to define your Widget layout using XML as an external layout resource, but it’s also possible to lay out your UI programmatically within the Broadcast Receiver’s
onCreate
method.
For security and performance reasons, App Widget layouts are inflated in the host Activity as
RemoteViews
that support a limited set of layouts and Views.
Supported layouts are limited to:
-
FrameLayout -
LinearLayout -
RelativeLayout -
GridLayout
The Views they contain are restricted to the following:
-
Button -
Chronometer -
ImageButton -
ImageView -
ProgressBar -
TextView -
ViewFlipper
In the section “Introducing Collection View Widgets” you’ll also learn how to use the following collection-based Views within your Widget layouts:
-
AdapterViewFlipper -
GridView -
ListView -
StackView
Listing 19-1
shows an XML layout resource used to define the UI of an App Widget. Note that padding is automatically added to your Widget layouts, so you shouldn’t add additional padding. Also note that we’re setting the width and height of the layout to
match_parent
. You learn how to define the minimum size of your Widget in the following section.
Defining Your Widget Size and Other Metadata
The Android home screen is divided into a grid of cells, varying in size and number depending on the device. It’s best practice to specify a minimum height and width for your Widget that is required to ensure it is displayed in a good default state.
Where your minimum dimensions don’t match the exact dimensions of the home screen cells, your Widget’s size will be rounded up to fill the cells into which it extends.
To determine the approximate minimum height and width limits required to ensure your Widget fits within a given number of cells, you can use the following formula:
Min height or width = 70dp * (cell count) – 30dp
You specify the minimum Widget size, allocate a layout, specify the update rate, and define other Widget settings and metadata in the Widget definition XML resource, stored in the
res/xml
folder of your project.
Use the
appwidget-provider
tag to describe the Widget metadata using the following attributes:
-
initialLayout—The layout resource to use to define the Widget’s UI layout. -
minWidthandminHeight—The minimum width and minimum height of the Widget. -
resizeMode—Setting the resize mode allows you to specify the direction in which the Widget can be resized, using a combination ofhorizontalandvertical, or disabling resizing by setting it tonone. It’s best practice to support all resizing modes for your Widget. -
label—The title used by your Widget in the App Widget picker. -
updatePeriodMillis—The minimum period between Widget updates in milliseconds. Android will wake the device to update your Widget at this rate, so you should specify at least an hour. The App Widget Manager won’t deliver updates more frequently than once every 30 minutes. More details on this and other update techniques are provided later in this chapter. -
configure—You can optionally specify a fully qualified Activity to be launched when your Widget is added to the home screen. This Activity can be used to specify Widget settings and user preferences. Using a configuration Activity is described in the section “Creating and Using a Widget Configuration Activity.” -
icon—By default Android will use your application’s icon when presenting your Widget within the App Widget picker. Specify a Drawable resource to use a different icon. -
previewImage—A Drawable resource that accurately depicts how your Widget will appear when added to the home screen. This will be displayed by the App Widget picker as a preview.
Listing 19-2 shows the Widget definition resource file for a minimum two-cell-by-two-cell Widget that updates once every hour, and uses the layout resource defined in the previous section.
Implementing Your Widget
Widgets are implemented as Broadcast Receivers, which specify Intent Filters that listen for the Broadcast Intent actions
AppWidget.ACTION_APPWIDGET_[UPDATE
,
DELETED
,
ENABLED
, and
DISABLED]
and perform the appropriate actions accordingly.
The
AppWidgetProvider
class encapsulates the Intent processing and provides you with event handlers for each Intent action, as shown in the skeleton code in
Listing 19-3
.
Like all application components, Widgets must be added to the application manifest. As they are implemented as Broadcast Receivers, use the
receiver
tag and add the following two elements, as shown in
Listing 19-4
:
-
An Intent Filter for the
android.appwidget.action.APPWIDGET_UPDATEaction -
A metadata node associating the
android.appwidget.providername with theappwidget-providerXML resource file that describes your Widget settings
Updating the Widget UI Using the App Widget Manager and Remote Views
The
RemoteViews
class is used as a proxy to a View hierarchy hosted within another application’s process. This adds a layer of security by letting you change a property or run a method on a View while it’s running within another application—but without being able to interact with it directly.
To update the appearance of Views within your Widgets at run time, you must create and modify Remote Views to represent them, and then apply those changes using the
AppWidgetManager
. Supported modifications include changing a View’s visibility, text, or image values, and adding Click Listeners.
Creating and Manipulating Remote Views
To create a new Remote Views object, pass the name of your application’s package, and the layout resource you plan to manipulate, into the Remote Views constructor, as shown in Listing 19-5 .
Remote Views include a series of methods that provide access to many of the properties and methods available on the Views they represent.
The most versatile of these is a collection of
set
methods that let you specify a target method name to execute on a remotely hosted View. These methods support the passing of a single-value parameter, one for each primitive type, including Boolean, integer, byte, char, and float, as well as strings, bitmaps, Bundles, and URI parameters:
// Set the image level for an ImageView.views.setInt(R.id.widget_image_view, "setImageLevel", 2);// Show the cursor of a TextView.views.setBoolean(R.id.widget_text_view, "setCursorVisible", true);// Assign a bitmap to an ImageButton.views.setBitmap(R.id.widget_image_button, "setImageBitmap", myBitmap);
The modifications you apply here will not affect the running instances of your Widgets until you apply them, as described in the following section.
A number of methods specific to certain View classes are also available, including methods to modify Text Views, Image Views, and Progress Bars:
// Update a Text Viewviews.setTextViewText(R.id.widget_text, "Updated Text");views.setTextColor(R.id.widget_text, Color.BLUE);// Update an Image Viewviews.setImageViewResource(R.id.widget_image, R.drawable.icon);// Update a Progress Barviews.setProgressBar(R.id.widget_progressbar, 100, 50, false);
You can set the visibility of any View hosted within a Remote Views layout by calling
setViewVisibility
:
views.setViewVisibility(R.id.widget_text, View.INVISIBLE);
So far you have modified the Remote Views object that represents the View hierarchy within the App Widget, but you have not applied it. For your changes to take effect, you must use the App Widget Manager to apply your updates, as shown in the next section.
Applying Remote Views to App Widgets
To apply the changes made to Remote Views to Widgets at runtime, use the App Widget Manager’s
updateAppWidget
method, passing in the identifiers of one or more Widgets to update and the Remote View to apply:
appWidgetManager.updateAppWidget(appWidgetIds, remoteViews);
Override the
onEnabled
handler of your App Widget Provider to apply changes to your Widget UI when it’s first instantiated and placed on the user’s homescreen, as shown in
Listing 19-6
.
Similarly, to apply scheduled updates to your Widgets override the
onUpdate
handler; this handler receives the App Widget Manager, and the array of App Widget instance IDs due to be updated, as parameters. It’s best practice to iterate over the Widget ID array, enabling you to apply different UI values to each Widget based on its identifier and any associated configuration settings, as shown in the pattern in
Listing 19-6
.
You can also update your Widgets directly from a Service, Activity, or Broadcast Receiver. To do so, get a reference to the App Widget Manager by calling its static
getInstance
method, passing in the current context:
// Get the App Widget Manager.AppWidgetManager appWidgetManager= AppWidgetManager.getInstance(this);
You can then use the
getAppWidgetIds
method on your App Widget Manager instance to find identifiers representing each currently running instance of the specified App Widget:
// Retrieve the identifiers for each instance of your chosen widget.ComponentName thisWidget = new ComponentName(this, SkeletonAppWidget.class);int[] appWidgetIds = appWidgetManager.getAppWidgetIds(thisWidget);
To update the active Widgets, you can follow the same pattern described in Listing 19-6 :
// Iterate through each widget, creating a RemoteViews object and// applying the modified RemoteViews to each widget.for (int appWidgetId : appWidgetIds)SkeletonAppWidget.updateAppWidget(this, appWidgetManager, appWidgetId);
Notice that the code used to modify the Widget UI is kept within the
updateAppWidget
method of the Widget implementation. This is done to ensure any manual changes you might apply aren’t reverted the next time the Widget is refreshed.
In all cases, it’s best practice to have the Widget handle its own UI updates based on changes to underlying data, such as a Room database or Shared Preferences.
Adding Interactivity to Widgets
App Widgets inherit the permissions of the processes within which they run, and most home screen apps run with full permissions, making the potential security risks significant. As a result of these security implications, Widget interactivity is carefully controlled.
Widget interaction is generally limited to the following:
- Adding a Click Listener to one or more Views
- Changing the UI based on selection changes
- Transitioning between Views within a Collection View Widget
The simplest and most powerful way to add interactivity to your Widget is by adding a Click Listener to its Views. You do this using the
setOnClickPendingIntent
method on the corresponding Remote Views object. Use the App Widget Manager’s
updateAppWidget
method to apply the updated Remote Views to your Widgets, as you would for any UI change.
Use this method to specify a Pending Intent that will be fired when the user clicks the specified View, as shown in Listing 19-7 .
Pending Intents (described in more detail in Chapter 6 , “Intents and Broadcast Receivers”) allow other applications to fire an Intent on your app’s behalf. In this case, it allows the host application to start Activities or Services, or to broadcast an Intent as though it was fired from your application directly.
Using this technique you can add Click Listeners to one or more of the Views used within your Widget, potentially providing support for multiple actions.
Forcing Refreshes of Your Widget Data and UI
Widgets are most commonly displayed on the home screen, so it’s important that they’re kept relevant and up to date. It’s just as important to balance that relevance with your Widget’s impact on system resources—particularly battery life. Several techniques exist for managing your Widget’s refresh rate.
The simplest approach is to set the minimum update rate for a Widget using the
updatePeriodMillis
attribute in the Widget’s XML
appwidget-provider
definition. This is demonstrated in
Listing 19-8
, where the Widget is updated once every hour.
Setting this value will schedule a repeating Broadcast Intent that will trigger the
onUpdate
handler of your Widget at the rate specified.
This technique should be used to define the absolute minimum rate at which your Widget must be updated to remain useful. Generally, the best practice approach is to use a server push—typically initiated through Firebase Cloud Messaging, as described in Chapter 11 , “Working in the Background.” Where updates are required due to client-side changes or time-based triggers, the update rate should be a minimum of an hour and ideally not more than once or twice a day.
App Widgets are implemented as Broadcast Receivers, so you can trigger updates and UI refreshes by targeting them with explicit Broadcast Intents from within your application. If your Widget requires frequent updates, you should implement an event/Intent-driven model to update it as needed, rather than increasing the minimum polling frequency.
Listing 19-9 creates a new Broadcast Intent that explicitly targets the Widget defined earlier, while including an action that will allow it to understand how to respond.
By updating the Widget’s
onReceive
method handler, as shown in
Listing 19-10
, you can listen for this new Broadcast Intent and use it to update your Widget.
This approach is particularly useful for reacting to data updates from within your application, or a user action such as clicking buttons on the Widget itself.
In order to refresh the data displayed in your Widget, you may need to asynchronously load data—such as that stored in a SQL or Room database. Because App Widgets are implemented as Broadcast Receivers, you can use the same techniques used to execute Receiver tasks asynchronously to update your Widget.
Specifically, you can call
goAsync
to signal that you will be performing an asynchronous operation, and pass the resulting Pending Result to your static update method, as shown in
Listing 19-11
.
Creating and Using a Widget Configuration Activity
It’s often useful to provide users with the opportunity to configure a Widget before adding it to their home screen. Done properly, you can make it possible for users to add multiple instances of the same Widget, each with a slightly different purpose—for example, the weather in different locations or the contents of different e-mail inboxes.
An App Widget configuration Activity is launched immediately when a Widget is added to the home screen. It can be any Activity within your application, provided it has an Intent Filter for the
APPWIDGET_CONFIGURE
action, as shown in
Listing 19-12
.
To assign a configuration Activity to a Widget, you must add it to the Widget’s App Widget Provider settings file using the
configure
tag. The activity must be specified by its fully qualified package name, as shown here:
<?xml version="1.0" encoding="utf-8"?><appwidget-providerxmlns_android="http://schemas.android.com/apk/res/android"android:initialLayout="@layout/widget_layout"android:minWidth="110dp"android:minHeight="110dp"android:label="@string/widget_label"android:updatePeriodMillis="360000"android:resizeMode="horizontal|vertical"android:previewImage="@mipmap/ic_launcher"android:configure="com.professionalandroid.apps.widgetsnippets.MyWidgetConfigurationActivity"/>
The Intent that launches the configuration Activity will include an
EXTRA_APPWIDGET_ID
extra that provides the ID of the App Widget being configured.
Within the Activity, provide a UI to allow the user to complete the configuration and confirm. At this stage the Activity should set result to
RESULT_OK
and return an Intent. The returned Intent must include an extra that describes the ID of the Widget being configured using the
EXTRA_APPWIDGET_ID
constant. This skeleton pattern is shown in
Listing 19-13
.
It’s your responsibility to save the configuration options selected by the user, and apply them based on the Widget ID when updating Widgets.
CREATING AN EARTHQUAKE WIDGET
The following instructions, which extend the Earthquake example, show you how to create a new home screen Widget to display details for the latest earthquake. The UI for this Widget is simple; we leave it as an exercise for the reader to update it to properly conform to the Widget style guidelines.
When completed and added to the home screen, your Widget will appear, as shown in Figure 19-2 .
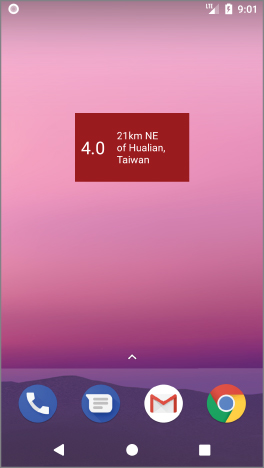
Using a combination of the update techniques described previously, this Widget listens for broadcast Intents that announce an update has been performed and sets the minimum update rate to ensure it is updated at least once per day.
-
Start by creating new String resources for when no Earthquake is being displayed:
<resources>[… Existing resources …]<string name="widget_blank_magnitude">---</string><string name="widget_blank_details">No Earthquakes</string></resources> -
Create a layout for the Widget UI as an XML resource. Save the
quake_widget.xmlfile in theres/layoutfolder. Use a Linear Layout to configure Text Views that display the quake magnitude and location:<?xml version="1.0" encoding="utf-8"?><LinearLayoutxmlns_android="http://schemas.android.com/apk/res/android"android:orientation="horizontal"android:layout_width="match_parent"android:layout_height="match_parent"android:background="@color/colorPrimaryDark"><TextViewandroid:id="@+id/widget_magnitude"android:text="@string/widget_blank_magnitude"android:textColor="#FFFFFFFF"android:layout_width="wrap_content"android:layout_height="match_parent"android:textSize="24sp"android:padding="8dp"android:gravity="center_vertical"/><TextViewandroid:id="@+id/widget_details"android:layout_width="match_parent"android:layout_height="match_parent"android:gravity="center_vertical"android:padding="8dp"android:text="@string/widget_blank_details"android:textColor="#FFFFFFFF"android:textSize="14sp"/></LinearLayout> -
Create a stub for a new
EarthquakeWidgetclass that extendsAppWidgetProvider. You’ll return to this class to update your Widget with the latest quake details:public class EarthquakeWidget extends AppWidgetProvider {} -
Create a new Widget definition file,
quake_widget_info.xml, and place it in theres/xmlfolder. Set the minimum update rate to once a day and set the Widget dimensions to two cells wide and one cell high—110dp × 40dp. Use the Widget layout you created in Step 2 for the initial layout:<?xml version="1.0" encoding="utf-8"?><appwidget-providerxmlns_android="http://schemas.android.com/apk/res/android"android:initialLayout="@layout/quake_widget"android:minHeight="40dp"android:minWidth="110dp"android:resizeMode="horizontal|vertical"android:updatePeriodMillis="86400000"></appwidget-provider> -
Add your Widget to the application manifest, including a reference to the Widget definition resource you created in Step 4, and registering an Intent Filter for the App Widget update action:
<receiver android:name=".EarthquakeWidget"><intent-filter><action android:name="android.appwidget.action.APPWIDGET_UPDATE" /></intent-filter><meta-dataandroid:name="android.appwidget.provider"android:resource="@xml/quake_widget_info"/></receiver> -
Update the
EarthquakeDAOclass, adding a new method to query the Earthquake database for the newest Earthquake:@Query("SELECT * FROM earthquake ORDER BY mDate DESC LIMIT 1")Earthquake getLatestEarthquake(); -
Return to the
EarthquakeWidgetclass from Step 2, and create a staticupdateAppWidgetsmethod that will create a background thread to update Widgets using the result from Step 6. Note that we call finish on thePendingResultparameter to notify the Receiver that the asynchronous work is complete:static void updateAppWidgets(final Context context,final AppWidgetManager appWidgetManager,final int[] appWidgetIds,final PendingResult pendingResult) {Thread thread = new Thread() {public void run() {Earthquake lastEarthquake= EarthquakeDatabaseAccessor.getInstance(context).earthquakeDAO().getLatestEarthquake();pendingResult.finish();}};thread.start();} -
Still within the
updateAppWidgetmethod, create a newRemoteViewsobject to set the text displayed by the Widget’s Text View elements to show the magnitude and location of the latest earthquake. Also use thesetOnClickPendingIntentmethod to open the Earthquake Main Activity when the widget is clicked:static void updateAppWidgets(final Context context,final AppWidgetManager appWidgetManager,final int[] appWidgetIds,final PendingResult pendingResult) {Thread thread = new Thread() {public void run() {Earthquake lastEarthquake= EarthquakeDatabaseAccessor.getInstance(context).earthquakeDAO().getLatestEarthquake();boolean lastEarthquakeExists = lastEarthquake != null;String lastMag = lastEarthquakeExists ?String.valueOf(lastEarthquake.getMagnitude()) :context.getString(R.string.widget_blank_magnitude);String details = lastEarthquakeExists ?lastEarthquake.getDetails() :context.getString(R.string.widget_blank_details);RemoteViews views = new RemoteViews(context.getPackageName(),R.layout.quake_widget);views.setTextViewText(R.id.widget_magnitude, lastMag);views.setTextViewText(R.id.widget_details, details);// Create a Pending Intent that will open the main Activity.Intent intent = new Intent(context, EarthquakeMainActivity.class);PendingIntent pendingIntent =PendingIntent.getActivity(context, 0, intent, 0);views.setOnClickPendingIntent(R.id.widget_magnitude,pendingIntent);views.setOnClickPendingIntent(R.id.widget_details,pendingIntent);// Update all the added widgetsfor (int appWidgetId : appWidgetIds)appWidgetManager.updateAppWidget(appWidgetId, views);pendingResult.finish();}};thread.start();} -
Override the
onUpdatehandler. Use thegoAsyncmethod to indicate the updates will be handled asynchronously, and callupdateAppWidgetsto update each widget that requires an update:@Overridepublic void onUpdate(Context context,AppWidgetManager appWidgetManager,int[] appWidgetIds) {PendingResult pendingResult = goAsync();updateAppWidgets(context, appWidgetManager,appWidgetIds, pendingResult);} -
Also override the
onEnabledhander. This will be triggered when the first Widget is added, and subsequently when all available Widgets for an application are enabled after having been disabled. CallgoAsyncbefore callingupdateAppWidgets, passing in all the currently placed instances of this Widget:@Overridepublic void onEnabled(Context context) {final PendingResult pendingResult = goAsync();AppWidgetManager appWidgetManager =AppWidgetManager.getInstance(context);ComponentName earthquakeWidget =new ComponentName(context, EarthquakeWidget.class);int[] appWidgetIds =appWidgetManager.getAppWidgetIds(earthquakeWidget);updateAppWidgets(context, appWidgetManager,appWidgetIds, pendingResult);}Your Widget is now ready to be used and will update with new earthquake details when added to the home screen and once every 24 hours thereafter.
-
Further enhance the Widget to update whenever the earthquake database is updated. Still within the
EarthquakeWidgetclass, create a new action string that will be used within an Intent to indicate a new earthquake has been added to the database. Override theonReceivemethod to add a check for this action when a new Intent is received, and useupdateAppWidgetsto update each placed Widget. Be sure to call through to the super class to ensure that the standard Widget event handlers are still triggered:public static final String NEW_QUAKE_BROADCAST ="com.paad.earthquake.NEW_QUAKE_BROADCAST";@Overridepublic void onReceive(Context context, Intent intent){super.onReceive(context, intent);if (NEW_QUAKE_BROADCAST.equals(intent.getAction())) {PendingResult pendingResult = goAsync();AppWidgetManager appWidgetManager =AppWidgetManager.getInstance(context);ComponentName earthquakeWidget =new ComponentName(context, EarthquakeWidget.class);int[] appWidgetIds =appWidgetManager.getAppWidgetIds(earthquakeWidget);updateAppWidgets(context, appWidgetManager,appWidgetIds, pendingResult);}} -
Within the Earthquake Update Job Service, modify the
onRunJobmethod to broadcast an Intent to the Earthquake Widget with the action String defined in Step 11. Note that since API 26, a Broadcast Receiver can’t register to listen for an implicit Intent within the manifest—so ensure the Intent explicitly targets theEarthquakeWidgetclass, as well as setting the action string:@Overridepublic int onRunJob(final JobParameters job) {// Result ArrayList of parsed earthquakes.ArrayList<Earthquake> earthquakes = new ArrayList<>(0);URL url;try {[… Download and parse the earthquake XML feed][… Handle Notifications …]EarthquakeDatabaseAccessor.getInstance(getApplicationContext()).earthquakeDAO().insertEarthquakes(earthquakes);// Update the Earthquake WidgetIntent newEarthquake = new Intent(this, EarthquakeWidget.class);newEarthquake.setAction(EarthquakeWidget.NEW_QUAKE_BROADCAST);sendBroadcast(newEarthquake);[ …Handle future scheduling … ]return RESULT_SUCCESS;}[… Exception Handling …]}
INTRODUCING COLLECTION VIEW WIDGETS
Collection View Widgets are designed to display collections of data represented as lists, grids, or stacks using one of three supported Views:
-
ListView—A traditional scrolling list of items. Each item in the associated collection is displayed as a row in a vertical list. -
GridView—A two-dimensional scrolling grid where each item is displayed within a cell. You can control the number of columns, their width, and relevant spacing. -
StackView—A flip-card style View that displays its child Views as a stack. The stack will automatically rotate through its collection, moving the topmost item to the back to reveal the one beneath it. Users can manually transition between items by swiping up or down to reveal the previous or next items, respectively.
Figure 19-3 shows Widgets added to the home screen.

Each of these Views extends the Adapter View class. As a result, the UI used to display each item in the collection is defined using whatever layout you provide; however, the UI for each item is restricted to the same Views and layouts supported by App Widgets:
-
FrameLayout -
LinearLayout -
RelativeLayout -
Button -
ImageButton -
ImageView -
ProgressBar -
TextView -
ViewFlipper
Collection View Widgets can be used to display any collection of data, but they’re particularly useful for creating dynamic Widgets that display data from a database.
Collection View Widgets are implemented in much the same way as regular App Widgets—using App Widget Provider Info files to configure the Widget settings,
BroadcastReceivers
to define their behavior, and
RemoteViews
to modify the Widgets at run time.
In addition, collection-based App Widgets require the following components:
- An additional layout resource that defines the layout for each item displayed within the collection.
-
A
RemoteViewsFactorythat acts as an Adapter for your Widget by populating the item Views. It creates the Remote Views using the item layout definition and populates its elements using the underlying data you want to display. -
A
RemoteViewsServicethat instantiates and manages the Remote Views Factory.
Using these components, you can use the Remote Views Factory to create and update each of the Views that will represent the items in your collection. This process is described in the section “Populating Collection View Widgets Using a Remote Views Service.”
Creating Collection View Widget Layouts
Collection View Widgets require two layout definitions—one that includes either a Stack, List, or Grid View, and another that describes the layout to be used by each item within the stack, list, or grid.
As with regular App Widgets, it’s best practice to define your layouts as external XML layout resources, as shown in Listing 19-14 .
Listing 19-15 shows an example layout resource used to describe the UI of each card displayed by the Stack View Widget.
The Widget layout is used within the App Widget Provider Info resource as it would be for any App Widget. The item layout is used by a Remote Views Factory to create the Views used to represent each item in the underlying collection.
Updating Collection View Items with a Remote Views Factory
The
RemoteViewsFactory
creates and populates the Views that will be displayed in the Collection View Widget—effectively binding them to the underlying data collection.
To implement your Remote Views Factory, extend the
RemoteViewsFactory
class.
Your implementation should mirror that of a custom Adapter that will populate the Stack, List, or Grid View. Listing 19-16 shows a simple implementation of a Remote Views Factory that uses a static Array List to populate its Views. Note that the Remote Views Factory doesn’t need to know what kind of Collection View Widget will be used to display each item.
Updating Collection View Items with a Remote Views Service
The Remote Views Service is used as a wrapper that instantiates and manages your Remote Views Factory, which, in turn, is used to supply each of the Views displayed within the Collection View Widget as described in the previous section.
To create a Remote Views Service, extend the
RemoteViewsService
class and override the
onGetViewFactory
handler to return a new instance of a Remote Views Factory, as shown in
Listing 19-17
.
As with any Service, you’ll need to add your Remote Views Service to your application manifest using a
service
tag. To prevent other applications from accessing your Widgets, you must specify the
android.permission.BIND_REMOTEVIEWS
permission, as shown in
Listing 19-18
.
Populating Collection View Widgets Using a Remote Views Service
With your Remote Views Factory and Remote Views Service complete, all that remains is to bind the List, Grid, or Stack View within your App Widget Layout to the Remote Views Service. You do this using a Remote View, typically within a static
update
method that’s called from within the
onUpdate
and
onEnabled
handlers of your App Widget implementation.
Create a new Remote View instance as you would when updating the UI of a standard App Widget. Use the
setRemoteAdapter
method to bind your Remote Views Service to the particular List, Grid, or Stack View within the Widget layout.
The Remote Views Service is specified using an Intent that includes an extra value that defines the ID of the Widget to which it is being associated:
Intent intent = new Intent(context, MyRemoteViewsService.class);intent.putExtra(AppWidgetManager.EXTRA_APPWIDGET_ID, appWidgetId);views.setRemoteAdapter(R.id.widget_stack_view, intent);
This Intent is received by the
onGetViewFactory
handler within the Remote Views Service, enabling you to pass additional parameters into the Service and the Factory it contains.
The
setEmptyView
method provides a means of specifying a View that should be displayed in place of the Collection View if (and only if) the underlying data collection is empty:
views.setEmptyView(R.id.widget_stack_view, R.id.widget_empty_text);
After completing the binding process, use the App Widget Manager’s
updateAppWidget
method to apply the binding to the specified Widget.
Listing 19-19
shows the standard pattern for binding a Widget to a Remote Views Service.
Adding Interactivity to the Items Within a Collection View Widget
For efficiency reasons, it’s not possible to assign a unique
onClickPendingIntent
to each item displayed as part of a Collection View Widget. Instead, use the
setPendingIntentTemplate
to assign a template Intent to your Widget when updating the Remote Views, as shown in
Listing 19-20
.
This Pending Intent can then be “filled-in” within the
getViewAt
handler of your Remote Views Service implementation using the
setOnClickFillInIntent
method of your Remote Views object, as shown in
Listing 19-21
.
The fill-in Intent is applied to the template Intent using the
Intent.fillIn
method. It copies the contents of the fill-in Intent into the template Intent, replacing any undefined fields with those defined by the fill-in Intent. Fields with existing data will
not
be overridden.
The resulting Pending Intent will be broadcast when a user clicks that particular item from within your collection Widget.
Refreshing Your Collection View Widgets
The App Widget Manager includes the
notifyAppWidgetViewDataChanged
method, which allows you to specify a Widget ID (or array of IDs) to update, along with the resource identifier for the collection View within that Widget whose underlying data source has changed:
appWidgetManager.notifyAppWidgetViewDataChanged(appWidgetIds,R.id.widget_stack_view);
This will cause the
onDataSetChanged
handler within the associated Remote Views Factory to be executed, followed by the meta-data calls, including
getCount
, before each of the Views is re-created.
Creating an Earthquake Collection View Widget
In this example you add a second Widget to the Earthquake application. This one uses a ListView-based Collection View Widget to display a list of the recent earthquakes.
-
Start by creating a layout for the Collection View Widget UI as an XML resource. Save the
quake_collection_widget.xmlfile in theres/layoutfolder. Use a Frame Layout that includes the List View for displaying the earthquakes and a Text View to display when the collection is empty:<?xml version="1.0" encoding="utf-8"?><FrameLayoutxmlns_android="http://schemas.android.com/apk/res/android"android:layout_width="match_parent"android:layout_height="match_parent"><ListViewandroid:id="@+id/widget_list_view"android:layout_width="match_parent"android:layout_height="match_parent"/><TextViewandroid:id="@+id/widget_empty_text"android:layout_width="match_parent"android:layout_height="match_parent"android:gravity="center"android:text="@string/widget_blank_details"/></FrameLayout> -
Create a new
EarthquakeListWidgetclass that extendsAppWidgetProviderand implements the standard pattern for enabling and updating Widgets. You’ll return to this class to bind your Widget to the Remote Views Service that will provide the Views that display each earthquake:public class EarthquakeListWidget extends AppWidgetProvider {@Overridepublic void onUpdate(Context context,AppWidgetManager appWidgetManager,int[] appWidgetIds) {PendingResult pendingResult = goAsync();updateAppWidgets(context, appWidgetManager,appWidgetIds, pendingResult);}@Overridepublic void onEnabled(Context context) {final PendingResult pendingResult = goAsync();AppWidgetManager appWidgetManager =AppWidgetManager.getInstance(context);ComponentName earthquakeListWidget =new ComponentName(context, EarthquakeListWidget.class);int[] appWidgetIds =appWidgetManager.getAppWidgetIds(earthquakeListWidget);updateAppWidgets(context, appWidgetManager,appWidgetIds, pendingResult);}static void updateAppWidgets(final Context context,final AppWidgetManager appWidgetManager,final int[] appWidgetIds,final PendingResult pendingResult) {Thread thread = new Thread() {public void run() {// TODO Set Widget Remote Viewsif (pendingResult != null)pendingResult.finish();}};thread.start();}} -
Create a new Widget definition file,
quake_list_widget_info.xml, in theres/xmlfolder. Set the minimum update rate to once a day, set the Widget dimensions to two cells wide and one cell high (110dp × 40dp), and make it resizable. Use the Widget layout you created in Step 1 for the initial layout:<?xml version="1.0" encoding="utf-8"?><appwidget-providerxmlns_android="http://schemas.android.com/apk/res/android"android:initialLayout="@layout/quake_collection_widget"android:minWidth="110dp"android:minHeight="40dp"android:updatePeriodMillis="8640000"android:resizeMode="vertical|horizontal"/> -
Add your Widget to the application manifest, including a reference to the Widget definition resource you created in Step 3. It should also include an Intent Filter for the App Widget update action:
<receiverandroid:name=".EarthquakeListWidget"android:label="Earthquake List"><intent-filter><action android:name="android.appwidget.action.APPWIDGET_UPDATE" /></intent-filter><meta-dataandroid:name="android.appwidget.provider"android:resource="@xml/quake_list_widget_info"/></receiver> -
Create a new
EarthquakeRemoteViewsServiceclass that extendsRemoteViewsService. It should include an internalEarthquakeRemoteViewsFactoryclass that extendsRemoteViewsFactory, which should be returned from the Earthquake Remote Views Service’sonGetViewFactoryhandler:public class EarthquakeRemoteViewsService extends RemoteViewsService {@Overridepublic RemoteViewsFactory onGetViewFactory(Intent intent) {return new EarthquakeRemoteViewsFactory(this);}class EarthquakeRemoteViewsFactory implements RemoteViewsFactory {private Context mContext;public EarthquakeRemoteViewsFactory(Context context) {mContext = context;}public void onCreate() {}public void onDataSetChanged() {}public int getCount() {return 0;}public long getItemId(int index) {return index;}public RemoteViews getViewAt(int index) {return null;}public int getViewTypeCount() {return 1;}public boolean hasStableIds() {return true;}public RemoteViews getLoadingView() {return null;}public void onDestroy() {}}} -
Update the
onDataSetChangedhandler to query the database:private List<Earthquake> mEarthquakes;public void onDataSetChanged() {mEarthquakes = EarthquakeDatabaseAccessor.getInstance(mContext).earthquakeDAO().loadAllEarthquakesBlocking();} -
The Earthquake Remote Views Factory supplies the Views that represent each Earthquake in the Widget’s List View. Populate each of the method stubs to use the data from the Earthquake List to populate the View that represent each item.
-
7.1 Start by updating the
getCountandgetItemIdmethods to return the number of Earthquakes in the List, and a unique numeric identifier associated with each Earthquake, respectively:public int getCount() {if (mEarthquakes == null) return 0;return mEarthquakes.size();}public long getItemId(int index) {if (mEarthquakes == null) return index;return mEarthquakes.get(index).getDate().getTime();} -
7.2 Then update the
getViewAtmethod. This is where the Views used to represent each Earthquake in the List View are created and populated. Create a new Remote Views object using the layout definition you created for the previous Earthquake Widget, and populate it with data from the specified Earthquake:public RemoteViews getViewAt(int index) {if (mEarthquakes != null) {// Extract the requested Earthquake.Earthquake earthquake = mEarthquakes.get(index);// Extract the values to be displayed.String id = earthquake.getId();String magnitude = String.valueOf(earthquake.getMagnitude());String details = earthquake.getDetails();// Create a new Remote Views object and use it to populate the// layout used to represent each earthquake in the list.RemoteViews rv = new RemoteViews(mContext.getPackageName(),R.layout.quake_widget);rv.setTextViewText(R.id.widget_magnitude, magnitude);rv.setTextViewText(R.id.widget_details, details);// Create a Pending Intent that will open the main Activity.Intent intent = new Intent(mContext, EarthquakeMainActivity.class);PendingIntent pendingIntent =PendingIntent.getActivity(mContext, 0, intent, 0);rv.setOnClickPendingIntent(R.id.widget_magnitude, pendingIntent);rv.setOnClickPendingIntent(R.id.widget_details, pendingIntent);return rv;} else {return null;}}
-
7.1 Start by updating the
-
Add the Earthquake Remote Views Service to your application manifest, including a requirement for the
BIND_REMOTEVIEWSpermission:<serviceandroid:name=".EarthquakeRemoteViewsService"android:permission="android.permission.BIND_REMOTEVIEWS"></service> -
Return to the Earthquake List Widget class and override the
updateAppWidgetsmethod to attach the Earthquake Remote Views Service to each Widget:static void updateAppWidgets(final Context context,final AppWidgetManager appWidgetManager,final int[] appWidgetIds,final PendingResult pendingResult) {Thread thread = new Thread() {public void run() {for (int appWidgetId: appWidgetIds) {// Set up the intent that starts the Earthquake// Remote Views Service, which will supply the views// shown in the List View.Intent intent =new Intent(context, EarthquakeRemoteViewsService.class);// Add the app widget ID to the intent extras.intent.putExtra(AppWidgetManager.EXTRA_APPWIDGET_ID,appWidgetId);// Instantiate the RemoteViews object for the App Widget layout.RemoteViews views= new RemoteViews(context.getPackageName(),R.layout.quake_collection_widget);// Set up the RemoteViews object to use a RemoteViews adapter.views.setRemoteAdapter(R.id.widget_list_view, intent);// The empty view is displayed when the collection has no items.views.setEmptyView(R.id.widget_list_view,R.id.widget_empty_text);// Notify the App Widget Manager to update the widget using// the modified remote view.appWidgetManager.updateAppWidget(appWidgetId, views);}if (pendingResult != null)pendingResult.finish();}};thread.start();} -
As a final step, enhance the Widget to update whenever a new Earthquake is added to the database. Within the Earthquake Update Job Service, modify the
onRunJobmethod to broadcast an Intent to the new Widget:@Overridepublic int onRunJob(final JobParameters job) {// Result ArrayList of parsed earthquakes.ArrayList<Earthquake> earthquakes = new ArrayList<>(0);URL url;try {[… Download and parse the earthquake XML feed][… Handle Notifications …]EarthquakeDatabaseAccessor.getInstance(getApplicationContext()).earthquakeDAO().insertEarthquakes(earthquakes);// Update the Earthquake WidgetIntent newEarthquake = new Intent(this, EarthquakeWidget.class);newEarthquake.setAction(EarthquakeWidget.NEW_QUAKE_BROADCAST);sendBroadcast(newEarthquake);// Update the Earthquake List WidgetIntent newListEarthquake = new Intent(this,EarthquakeListWidget.class);newListEarthquake.setAction(EarthquakeWidget.NEW_QUAKE_BROADCAST);sendBroadcast(newListEarthquake);[ …Handle future scheduling … ]return RESULT_SUCCESS;}[… Exception Handling …]} -
Then override the
OnReceivehandler within the Earthquake List Widget to listen for the update-request Intent, and use the App Widget Manager’snotifyAppWigetViewDataChangedmethod to trigger an update of the List View:@Overridepublic void onReceive(final Context context, final Intent intent) {super.onReceive(context, intent);if (EarthquakeWidget.NEW_QUAKE_BROADCAST.equals(intent.getAction())) {AppWidgetManager appWidgetManager =AppWidgetManager.getInstance(context);ComponentName earthquakeListWidget =new ComponentName(context, EarthquakeListWidget.class);int[] appWidgetIds =appWidgetManager.getAppWidgetIds(earthquakeListWidget);// Notify the Earthquake List Widget that it should be refreshed.final PendingResult pendingResult = goAsync();appWidgetManager.notifyAppWidgetViewDataChanged(appWidgetIds,R.id.widget_list_view);}}
Figure 19-4 shows the Earthquake Collection View Widget added to the home screen.
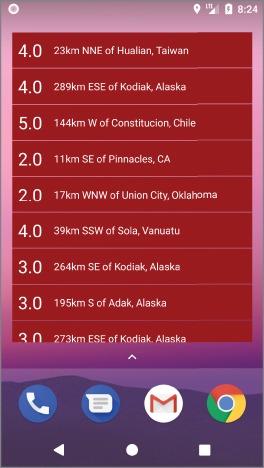
CREATING LIVE WALLPAPER
Live Wallpaper enables you to create dynamic, interactive home screen backgrounds. Live Wallpapers use a Surface View to render a dynamic display that changes, and can be interacted with, in real time. Your Live Wallpaper can listen for, and react to, screen touch events—letting users engage directly with the background of their home screen.
To create a new Live Wallpaper, you need the following three components:
- An XML resource that describes the metadata associated with the Live Wallpaper—specifically its author, description, and a thumbnail used to represent it from the Live Wallpaper picker.
- A Wallpaper Service implementation that will wrap, instantiate, and manage your Wallpaper Service Engine.
- A Wallpaper Service Engine implementation (returned through the Wallpaper Service) that defines the UI and interactive behavior of your Live Wallpaper. The Wallpaper Service Engine is where the bulk of your Live Wallpaper implementation will live.
Creating a Live Wallpaper Definition Resource
The Live Wallpaper resource definition is an XML file stored in the
res/xml
folder. Its resource identifier is its filename without the XML extension. Use attributes within a
wallpaper
tag to define the author name, description, and thumbnail to display in the Live Wallpaper gallery.
Listing 19-22 shows a sample Live Wallpaper resource definition.
Note that you
must
use references to string resources for the
author
and
description
attribute values. String literals are not valid.
You can also use the
settingsActivity
tag to specify an Activity that should be launched to configure the Live Wallpaper’s settings, much like the configuration Activity used to configure App Widget settings:
<wallpaper xmlns_android="http://schemas.android.com/apk/res/android"android:author="@string/author"android:description="@string/description"android:thumbnail="@drawable/wallpapericon"android:settingsActivity="com.paad.mylivewallpaper.WallpaperSettings"/>
This Activity will be launched immediately before the Live Wallpaper is added to the home screen, allowing the user to configure the Wallpaper settings.
Creating a Wallpaper Service Engine
The
WallpaperService.Engine
class is where you define the behavior of your Live Wallpaper. The Wallpaper Service Engine includes a Surface View onto which you will draw your Live Wallpaper, and handlers notifying you of touch events and home screen offset changes.
The Surface View is a specialized drawing canvas that supports updates from background threads, making it ideal for creating smooth, dynamic, and interactive graphics.
To implement your own Wallpaper Service Engine, extend the
WallpaperService.Engine
class, as shown in the skeleton code in
Listing 19-23
. Note that it must be implemented within the scope of a
WallpaperService
class. We’ll explore the Wallpaper Service in more detail in the following section.
You must wait for the Surface to complete its initialization—indicated by the
onSurfaceCreated
handler being called—before you can begin drawing on it.
After the Surface has been created, you can begin the drawing loop that updates the Live Wallpaper’s UI. The code in Listing 19-23 does this by scheduling a new frame to be drawn at the completion of the drawing of the previous frame. The rate of redraws in this example is determined by the specified frame rate.
You can also override the
onTouchEvent
and the
onOffsetsChanged
handlers to add interactivity to your Live Wallpapers.
Creating a Wallpaper Service
While all the drawing and interaction for Live Wallpaper is handled in the Wallpaper Service Engine, the
WallpaperService
class is used to instantiate, host, and manage that Engine.
Extend the
WallpaperService
class, and override the
onCreateEngine
handler to return a new instance of your custom Wallpaper Service Engine, as shown in
Listing 19-24
.
After creating the Wallpaper Service, add it to your application manifest using a
service
tag.
A Wallpaper Service must include an Intent Filter to listen for the
android.service.wallpaper.WallpaperService
action and a
meta-data
node that specifies
android.service.wallpaper
as the
name
attribute and associates it with the resource file described in the previous section using a
resource
attribute.
A Wallpaper Service must also include the
android.permission.BIND_WALLPAPER
permission. Listing 19-35 shows how to add the Wallpaper Service from Listing 19-34 to the manifest.
CREATING APP SHORTCUTS
Introduced in Android 7.1 Nougat (API Level 25), App Shortcuts allow you to create shortcuts that link directly from the home screen or app launcher to functionality within your application.
When supported and available for a given app, App Shortcuts are revealed by long-pressing the app icon in the launcher or home screen; they appear, as shown in Figure 19-5 .

Once visible, a user can “pin” an App Shortcut directly to the home screen by long pressing, dragging, and then dropping a specific shortcut.
Selecting an App Shortcut will launch its associated Intent, effectively becoming a shortcut to a task, action, or functionality within your application. Each application can offer up to five shortcuts at any given time, though the design guidelines strongly recommend offering only four.
By providing an easily discoverable shortcut to important app functionality, App Shortcuts are a powerful technique for increasing user engagement. When creating shortcuts, you should focus on exposing your app’s key functionality—particularly actions that might require complex, multiple steps, or that are time sensitive.
For example, Google offers App Shortcuts within its own apps for sending a new text message, navigating to work/home, taking a selfie, and calling a specific contact.
App Shortcuts are displayed within the launcher and home screen, alongside the icons and App Shortcuts of the system and other third-party apps. As a result, it’s important to follow the design guidelines to ensure the icons used by your Shortcuts are visually consistent with other Shortcuts. You can find Google’s App Shortcut design guidelines at
commondatastorage.googleapis.com/androiddevelopers/shareables/design/app-shortcuts-design-guidelines.pdf
.
Android supports two alternatives for defining App Shortcuts: static and dynamic, which are described in the following sections.
Static Shortcuts
Static Shortcuts are used to provide links to generic, core functionality that is always relevant—such as composing a new message or remotely arming an alarm. As the name suggests, static Shortcuts can’t be modified from within your app at run time. Given the limited number of App Shortcuts available, you should ensure your static Shortcuts are always useful and relevant, and consider using dynamic Shortcuts if that’s not the case.
Static App Shortcuts are defined as resources, stored as XML files. By convention, this resource is named
shortcuts.xml
. App Shortcuts were introduced at API Level 25, so it’s good practice to store them in the
res/xml-v25
folder.
Create your App Shortcuts using the
shortcuts
tag as the root node, with one or more
shortcut
tags, each specifying a static App Shortcut.
As shown in Listing 19-26 , this includes a unique Shortcut identifier, icon, labels, a disabled message, and the Intent to launch when the Shortcut is selected. Note that you must also specify a category—at the time of writing only one category, conversation, was valid.
The icon and labels are displayed by the launcher to represent each available Shortcut, as shown previously in Figure 19-5 . The short title should be approximately 10 characters, while the long title can be up to 25 characters. The long title is displayed when there is enough space.
If a static Shortcut is pinned, and then subsequently removed from the app in a later version of your app, any pinned instances of your static Shortcuts will remain on the desktop, but it will be automatically disabled with the specified disabled message displayed.
Once you’ve defined your App Shortcuts resource, you must add them to your application by associating the App Shortcuts resource to your launch Activity using a
meta-data
tag with the
android.app.shortcuts
name, as shown in
Listing 19-27
.
Dynamic Shortcuts
Dynamic Shortcuts can be generated, modified, and removed at run time using the
ShortcutManager
system Service:
ShortcutManager shortcutManager = getSystemService(ShortcutManager.class);
You should ensure your dynamic Shortcuts represent the most likely useful piece of functionality given the current context, such as calling a specific contact or navigating to a particular location.
To alter the list of available dynamic App Shortcuts at run time, use the following Shortcut Manager methods:
-
setDynamicShortcuts—Replace the existing List of dynamic App Shortcuts with a new Shortcut List. -
addDynamicShortcuts—Add one or more new dynamic Shortcuts to the existing List. -
updateShortcuts—Update the dynamic Shortcuts in the existing List, based on the identifiers of the passed in List. -
removeDynamicShortcuts—Remove the dynamic Shortcuts in the existing List, corresponding to the passed-in List of identifiers. -
removeAllDynamicShortcuts—Remove all currently set dynamic App Shortcuts.
To create a new Shortcut to add or update, use the
ShortcutInfo.Builder
, as shown in
Listing 19-28
, to specify the icon, labels, and launch Intent. Note that the launch Intent must include an action, but can use Intent resolution rather than targeting a specific Activity.
If you pass a Shortcut to the set or add dynamic Shortcuts method that already exists in the active list, it will be updated accordingly.
When updating dynamic Shortcuts it’s important to ensure that the semantic meaning of the Shortcut is maintained. For example, if your Shortcut sends a message to a specific person, it could be updated to reflect an updated profile image for that person, but not to send a message to a different person. If the semantic meaning changes, you should instead remove the previous Shortcut and add a new one with a new unique identifier.
This process is important, because while you can only have five Shortcuts available for users to select at any given time, users can pin Shortcuts to their desktop, as shown in Figure 19-6 .
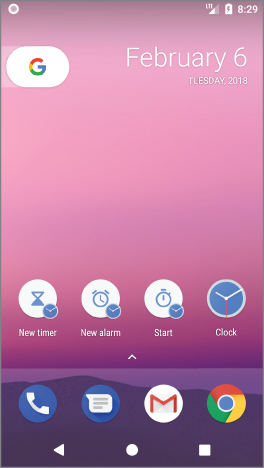
Users can add as many pinned Shortcuts to their desktops as they want, and you can’t remove them programmatically. Once pinned, a Shortcut will continue to look and behave as originally defined, even if you remove it from the dynamic list at run time; however, a call to
updateShortcuts
can still be used to modify a pinned Shortcut even if it’s no longer available from the dynamic list.
While you can’t remove a pinned Shortcut for users, in circumstances where a previously pinned Shortcut is no longer valid—for example, if the Shortcut’s target functionality or associated content has been removed from your app—you can disable it using the
disableShortcuts
method, passing in a List of identifiers to disable, and optionally a disables message to be displayed:
shortcutManager.disableShortcuts(Arrays.asList("Id1", "Id2"),"Functionality Removed");
Tracking App Shortcut Use
The order, and in some cases availability, of your App Shortcuts can vary based on the launcher or home screen’s prediction of which Shortcuts are most likely to be used at a given time.
These predictions are based on the usage history of each Shortcut, or the underlying functionality they provide a shortcut to.
Use the Shortcut Manager’s
reportShortcutUsed
method, passing in the relevant Shortcut ID, to indicate that the user has manually initiated an action that is also represented by a Shortcut:
shortcutManager.reportShortcutUsed("Id1");
You should make this call no matter how the action was initiated, to ensure the prediction-engine has a full record of the usage pattern of actions for which there are shortcuts, allowing it to promote and display the most appropriate Shortcuts at the right time.
20
Advanced Android Development
ADVANCED ANDROID
This chapter returns to some of the possibilities touched on in previous chapters and introduces some of the more advanced options available for Android developers.
The chapter starts by taking a closer look at security—in particular, how permissions work and how to define your own permissions and use them to secure your own applications and the data they contain.
Next, the chapter examines how to build applications that are backward and forward compatible across a range of hardware and software platforms, as well as investigating the use of Strict Mode for discovering inefficiencies within your applications.
You are also introduced to Android’s telephony APIs and learn to use them to make outgoing calls, monitor phone state, and receive broadcast Intents for incoming calls. Finally, you explore Android’s SMS functionality, which enables you to send and receive SMS messages from within your applications. Using the Android APIs, you can create your own SMS client application to replace the native clients available as part of the software stack. Alternatively, you can incorporate the messaging functionality within your own applications.
PARANOID ANDROID
Much of Android’s security is supplied by its underlying Linux kernel. Application files and resources are sandboxed to their owners, making them inaccessible by other applications. Android uses Intents, Services, and Content Providers to let you relax these strict process boundaries, using permissions to maintain application-level security.
You’ve already used the permission system to request access to native system services—including location-based services, native Content Providers, and the camera—using
uses-permission
manifest tags and runtime permission requests.
The following sections provide a more detailed look at the Linux security model and the Android permission system. For a comprehensive view, the Android documentation provides an excellent resource that describes the security features in depth:
d.android.com/training/articles/security-tips.html
.
Linux Kernel Security
Each Android package has a unique Linux user ID assigned to it during installation. This has the effect of sandboxing the process and the resources it creates, so that it can’t affect (or be affected by) other applications.
Because of this kernel-level security, you need to take additional steps to communicate between applications, or access the files and resources they contain. Content Providers, Intents, Services, and AIDL interfaces are designed to open tunnels through which information can flow between applications. To ensure information doesn’t “leak” beyond the intended recipients, you can use Android permissions to act as border guards at either end to control the traffic flow.
Re-introducing Permissions
Permissions are an application-level security mechanism that lets you restrict access to application components. Permissions are used to prevent malicious applications from corrupting data, gaining access to sensitive information, or making excessive (or unauthorized) use of hardware resources or external communication channels.
As you learned in earlier chapters, many of Android’s native components have permission requirements. The native permission strings used by native Android Activities and Services can be found as static constants in the
android.Manifest.permission
class.
To use permission-protected components, you need to add
uses-permission
tags to your application manifest, specifying the permission strings your application requires.
When a package is installed, the permissions requested in its manifest are analyzed and granted (or denied) by checks with trusted authorities and user feedback.
In Android 6.0 Marshmallow (API Level 23), an additional requirement was added for permissions marked as dangerous —including those that guard access to potentially sensitive information such as PII (personally identifiable information) and location data.
Dangerous permissions require explicit approval by way of runtime permission requests accepted by the user when first accessed by your app.
Each time you attempt to access information protected by a dangerous permission, you must use the
ActivityCompat.checkSelfPermission
method, passing in the appropriate permission constant to determine if access has been granted. It will return
PERMISSION_GRANTED
if user permission is granted, or
PERMISSION_DENIED
if the user has declined (or not yet granted) access:
int permission = ActivityCompat.checkSelfPermission(this,Manifest.permission.READ_CONTACTS);if (permission==PERMISSION_GRANTED) {// Access the Content Provider} else {// Request the permission or// display a dialog showing why the function is unavailable.}
To display the system’s runtime permission request dialog, call the
ActivityCompat.requestPermission
method, specifying the required permissions:
ActivityCompat.requestPermissions(this,new String[]{Manifest.permission.READ_CONTACTS},CONTACTS_PERMISSION_REQUEST);
This function displays a standard Android dialog that can’t be customized. You will receive a callback when the user has either accepted or denied your runtime request, returned to the
onRequestPermissionsResult
handler:
@Overridepublic void onRequestPermissionsResult(int requestCode,@NonNull String[] permissions,@NonNull int[] grantResults) {super.onRequestPermissionsResult(requestCode, permissions, grantResults);// TODO React to granted / denied permissions.}
Declaring and Enforcing Permissions
It’s also possible for you to define your own permissions and assign them to protect your own application components.
Before you can assign a new permission to an application component, you need to define it within your manifest using the
permission
tag, as shown in the
Listing 20-1
.
Within the
permission
tag, you can specify the level of access that the permission will permit:
-
normal—Can be granted at installation time when included in auses-permissionnode within an application’s manifest - dangerous—Must be explicitly granted by the user the first time it’s used within an application
- signature—Can only be granted to an application signed with the same signing certificate
You can also supply a label, and an external resource containing the description that explains the risks of granting this permission.
To define custom permissions for components within your application, add a
permission
attribute to their manifest nodes. Permission constraints can be enforced throughout your application, most usefully at application interface boundaries—for example:
- Activities —Add a permission to limit the ability of other applications to launch a particular Activity.
- Broadcast Receivers —Add a permission to control which applications can send Intents to your Receiver.
- Intents —Add a permission to control which Broadcast Receivers can receive a particular Intent.
- Content Providers —Add a permission to limit read access and/or write operations on your Content Providers.
- Services —Add a permission to limit the ability of other applications to start or bind to a Service.
In each case, you can add a
permission
attribute to the application component in the manifest, specifying a required permission string to access each component.
Listing 20-2
shows a manifest excerpt that requires the permission defined in
Listing 20-1
to start an Activity, Service, and Broadcast Receiver.
Content Providers let you set
readPermission
and
writePermission
attributes to offer more granular control over read/write access:
<providerandroid:name=".HitListProvider"android:authorities="com.professionalandroid.hitlistprovider"android:writePermission="com.professionalandroid.ASSIGN_KILLER"android:readPermission="com.professionalandroid.LICENSED_TO_KILL"/>
Enforcing Permissions when Broadcasting Intents
In addition to requiring permissions for Intents to be received by your Broadcast Receivers, you can attach a permission requirement to each Intent you broadcast. This is good practice when broadcasting Intents that contain sensitive information.
In such cases it’s best practice to require a
signature
permission to ensure that only applications signed with the same signature as the host application can receive the broadcast:
<permissionandroid:name="com.professionalandroid.SECRET_DATA"android:protectionLevel="signature"android:label="Secret Data Transfer"android:description="@string/secret_data_description"></permission>
When calling
sendBroadcast
, you can supply the permission string required for a Broadcast Receivers to receive the Intent:
sendBroadcast(myIntent, "com.professionalandroid.SECRET_DATA");
Storing Keys in the Android Keystore
The Android Keystore system provides a container in which applications can safely store sensitive cryptographic keys, protecting them from unauthorized access and use. The keystore is designed to prevent the extraction of keys from application processes, and from the Android device.
As a further protection against the potential for unauthorized use of keys, apps are required to specify the authorized uses of keys stored in the keystore including requirements for cryptography, limited times during which a key is authorized, and requiring that a user has been recently authenticated before providing access.
Access to the Android Keystore is provided via two APIs: the Keychain API and Android Keystore Provider. The Keychain API is designed to support the storage and access of system-wide credentials, allowing multiple applications to use the same set of credentials with user consent.
Alternatively, the Android Keystore Provider is designed for applications to store their own credentials, limiting access to the app storing the key. Unlike the Keychain API, apps using the Keystore Provider don’t require user interaction to retrieve the credentials they’ve stored.
Details for creating, storing, and retrieving keys to be stored in the Android Keystore are beyond the scope of this book. You can find more details on these topics and the Android Keystore system at
d.android.com/training/articles/keystore.html
.
Using the Fingerprint Sensor
Android 6.0 Marshmallow (API Level 23) introduced a new API to support user authentication using on-device fingerprint scanners.
To include fingerprint authentication within your app, you must first add the
USE_FINGERPRINT
permission to your manifest:
<uses-permission android:name="android.permission.USE_FINGERPRINT"/>
Within your application, get an instance of the
FingerprintManager
class using the
getSystemService
method, passing in
FingerPrintManager.class
.
Alternatively, you can use the
FingerprintManagerCompat
class to provide backward-compatible support, using its
from
method to retrieve an instance based on a Context:
mFingerprintManager = FingerprintManagerCompat.from(this);
Use the Fingerprint Manager to authenticate users with the authenticate method, passing in optional Crypto Object and Cancellation Signal objects along with an Authentication Callback implementation:
mFingerprintManager.authenticate(null, /* or mCryptoObject*/0, /* flags */null, /* or mCancellationSignal */mAuthenticationCallback,null);
A Cancellation Signal can be provided to support cancellation of an ongoing authentication. A Crypto Object can be passed in, if you wish to use fingerprint authentication to mark the related keystore key as authenticated. If a Crypto Object parameter is provided, it will be authenticated and returned within the Authentication Result of the Authentication Callback.
The results will be returned to an implementation of the
FingerprintManagerCompat.AuthenticationCallback
class using the
onAuthenticationError
,
onAuthenticationHelp
,
onAuthenticationFailed
, and
onAuthenticationSucceeded
handlers:
FingerprintManagerCompat.AuthenticationCallback mAuthenticationCallback= new FingerprintManagerCompat.AuthenticationCallback() {@Overridepublic void onAuthenticationError(int errMsgId, CharSequence errString) {// TODO Handle authentication error.Log.e(TAG, "Fingerprint authentication error: " + errString);}@Overridepublic void onAuthenticationHelp(int helpMsgId, CharSequence helpString) {// TODO Handle authentication help.Log.d(TAG, "Fingerprint authentication help required: " + helpString);}@Overridepublic void onAuthenticationFailed() {// TODO Handle authentication failure.Log.d(TAG, "Fingerprint authentication failed.");}@Overridepublic void onAuthenticationSucceeded(FingerprintManagerCompat.AuthenticationResult result) {super.onAuthenticationSucceeded(result);// TODO Handle authentication success.Log.d(TAG, "Fingerprint authentication succeeded.");}};
Your application must implement the UI for fingerprint authentication using the standard Android fingerprint icon.
A complete example of using the Fingerprint API to authenticate a purchase flow, including the Android fingerprint icon (
ic_fp_40px.png
), is available as the Fingerprint Dialog sample at
github.com/googlesamples/android-FingerprintDialog/
.
DEALING WITH DIFFERENT HARDWARE AND SOFTWARE AVAILABILITY
From smartphones and tablets to wearables and televisions, Android is now being used on an increasingly diverse collection of hardware. Each new device potentially represents a variation in hardware configuration or software platform. This flexibility is a significant factor in Android’s success, but as a result, you can’t make assumptions regarding the hardware or software available on the device on which your app is installed and running.
To mitigate this, Android platform releases are forward compatible—meaning that in many cases applications designed before a particular hardware or software innovation is available will still be able to take advantage of it, without requiring changes.
Android platform releases are also backward compatible, meaning your application will continue to work on new hardware and platform releases—again without you needing to upgrade it each time.
By combining forward and backward compatibility, your Android application will continue to work, and even potentially take advantage of new hardware and software features, as the platform evolves.
That said, each platform release includes new APIs and platform features. Similarly, new hardware may become available. Either advance could provide features that might improve the features and user experience of your application.
To take advantage of these new features without losing support for hardware running earlier platforms, you need to ensure your application is also backward compatible.
Similarly, the wide range of different Android device hardware platforms means that you can’t make assumptions over what hardware might be available.
The following sections explain how to specify certain hardware as required, check for hardware availability at run time, and build applications that are backward compatible.
Specifying Required Hardware
Application hardware requirements generally fall into two categories: hardware that is required for your application to have utility, and hardware that is useful if it is available but isn’t strictly necessary. The former accounts for applications built around a particular piece of hardware—for example, a replacement camera application isn’t useful on a device without a camera.
To specify a particular hardware feature as a requirement to install your application, add a
uses-feature
node to its manifest:
<uses-feature android:name="android.hardware.sensor.compass"/><uses-feature android:name="android.hardware.camera"/>
This can also be used for applications that don’t necessarily require a particular piece of hardware, but which haven’t been designed to support certain hardware configurations—for example, a game that requires tilt sensors or a touch screen to control.
Confirming Hardware Availability
For hardware that would be useful but isn’t necessary, you need to query the host hardware platform at run time to determine what hardware is available. The Package Manager includes a
hasSystemFeature
method that accepts
PackageManager.FEATURE_
static constants:
PackageManager pm = getPackageManager();pm.hasSystemFeature(PackageManager.FEATURE_SENSOR_COMPASS);
The Package Manager includes a constant for every piece of optional hardware, making it possible to customize your UI and functionality based on the hardware available.
Building Backward-Compatible Applications
Each new Android SDK release brings with it a new hardware support, APIs, bug fixes, and performance improvements. It’s best practice to update your applications as soon as possible following a new SDK release in order to take advantage of these new features and ensure the best possible user experience for new Android-device owners.
At the same time, ensuring your applications are backward compatible is critical to ensure users of devices running earlier Android platform versions can continue to use them—particularly as this is likely to be a significantly larger share of the market than that held by brand new devices.
Many of the Android APIs—particularly convenience classes and UI classes—are distributed within the standalone Android support and Android Architecture Components libraries or, in some cases, the Google Play services APIs. Where features aren’t available as part of a standalone library, you’ll need to incorporate new features using the techniques described here to support multiple platform versions within the same package.
For each technique described, it’s important to know the API level associated with the underlying platform.
To find this at run time, you can use the
android.os.Build.VERSION.SDK_INT
constant:
private static boolean nfc_beam_supported =android.os.Build.VERSION.SDK_INT > 14;
The easiest way to determine which API level is required for a given class or method is to progressively lower your project’s build target and note which classes break the build.
Parallel Activities
The simplest, though least efficient, alternative for ensuring backward compatibility is to create separate sets of parallel Activities, Services, and Broadcast Receivers, based on a base class compatible with the minimum Android platform version you support.
When using explicit Intents to start Services or Activities, you can select the right set of components at run time by checking the platform version and targeting the appropriate Services and Activities accordingly:
private static boolean nfc_beam_supported =android.os.Build.VERSION.SDK_INT > 14;Intent startActivityIntent = null;if (nfc_beam_supported)startActivityIntent = new Intent(this, NFCBeamActivity.class);elsestartActivityIntent = new Intent(this, NonNFCBeamActivity.class);startActivity(startActivityIntent);
In the case of implicit Intents and Broadcast Receivers, you can add an
android:enabled
tag to their manifest entries that refers to a Boolean resource:
<receiverandroid:name=".MediaControlReceiver"android:enabled="@bool/supports_remote_media_controller"><intent-filter><action android:name="android.intent.action.MEDIA_BUTTON"/></intent-filter></receiver>
You can then create alternative resource entries based on API level:
res/values/bool.xml<bool name="supports_remote_media_controller">false</bool>res/values-v14/bool.xml<bool name="supports_remote_media_controller">true</bool>
Interfaces and Fragments
Interfaces are the traditional way to support multiple implementations of the same functionality. For functionality that you want to implement differently based on newly available APIs, create an interface that defines the action to be performed, and then create API level–specific implementations.
At run time, check the current platform version and instantiate the appropriate class and use its methods:
IP2PDataXfer dataTransfer;if (android.os.Build.VERSION.SDK_INT > 14)dataTransfer = new NFCBeamP2PDataXfer();elsedataTransfer = new NonNFCBeamP2PDataXfer();dataTransfer.initiateP2PDataXfer();
Fragments provide a more encapsulated alternative to parallelized components. Rather than duplicating Activities, use Fragments—combined with the resource hierarchy—to create a consistent UI that’s optimized for different platform releases and hardware configurations.
Most of the UI logic for your Activities should be contained within individual Fragments rather than the Activity itself. As a result, you need only create alternative Fragments to expose and utilize different functionality and inflate different versions of the same layout stored within their respective
res/layout-v[API level]
folders.
Interaction between and within Fragments is usually maintained within each Fragment, so only code related to missing APIs will need to be changed within the Activity. If each variation of a Fragment implements the same interface definition and ID, you shouldn’t need to create multiple Activities to support multiple layouts and Fragment definitions.
OPTIMIZING UI PERFORMANCE WITH STRICT MODE
The resource-constrained nature of mobile devices amplifies the effect of performing time-consuming operations on the main application thread. Accessing network resources, reading or writing files, or accessing databases while blocking the UI thread can have a dramatic impact on the user experience, causing your application to become less smooth, more laggy, and, in the most extreme case, unresponsive.
You learned how to move such time-consuming operations onto background threads in Chapter 11 . Strict Mode is a tool that helps you identify cases you may have missed.
Using the Strict Mode APIs, you can assign a set of policies that monitor actions within your application and define how you should be alerted. You can define policies related to either the current application thread or to your application’s virtual machine (VM) process. The former is perfect for detecting slow operations being performed on the UI thread, whereas the latter helps you detect memory and Context leaks.
To use Strict Mode, create a new
ThreadPolicy
class and a new
VmPolicy
class, using their static builder classes with the
detect
methods to define the actions to monitor. The corresponding
penalty
methods control how the system should react to detecting those actions.
The Thread Policy can be used to detect disk reads/writes and network access, whereas the Vm Policy can monitor your application for Activity, SQLite, and closeable object leaks.
The penalties available to both policies include logging or application death, while the Thread Policy also supports displaying an on-screen dialog or flashing screen border.
Both builder classes also include a
detectAll
method that includes all the possible monitoring options supported by the host platform. You can also use the
StrictMode.enableDefaults
method to apply the default monitoring and penalty options.
To enable Strict Mode across your entire application, you should extend the Application class, as shown in Listing 20-3 .
To enable Strict Mode (or customize its settings) for a particular Activity, Service, or other application component, simply use the same pattern within that component’s
onCreate
method.
TELEPHONY AND SMS
Android includes telephony communication APIs, which enable you to monitor phone state and phone calls, as well as to initiate calls and monitor incoming call details.
Android also offers a full suite of SMS functionality, letting you send and receive SMS messages from within your applications. Using the Android APIs, you can create your own SMS client application to replace the native clients available as part of the software stack. Alternatively, you can incorporate some SMS messaging functionality within your own applications.
With the arrival of Wi-Fi-only Android devices, you can no longer assume that telephony hardware will be available on every device on which your application may be available.
Some applications don’t make sense on devices that don’t have telephony support. An application that provides reverse-number lookup for incoming calls or a replacement SMS client simply won’t work on a Wi-Fi-only device.
To specify that your application requires telephony support to function, you can add a
uses-feature
node to your application manifest:
<uses-feature android:name="android.hardware.telephony"android:required="true"/>
If you use telephony APIs but they aren’t strictly necessary for your application to be used, you can check for the existence of telephony hardware before attempting to make use of the related APIs.
Use the Package Manager’s
hasSystemFeature
method, specifying the
PackageManager.FEATURE_TELEPHONY
String. The Package Manager also includes constants to query the existence of CDMA- and GSM-specific hardware.
PackageManager pm = getPackageManager();boolean telephonySupported =pm.hasSystemFeature(PackageManager.FEATURE_TELEPHONY);boolean gsmSupported =pm.hasSystemFeature(PackageManager.FEATURE_TELEPHONY_CDMA);boolean cdmaSupported =pm.hasSystemFeature(PackageManager.FEATURE_TELEPHONY_GSM);
Telephony
The Android telephony APIs let your applications access the underlying telephone hardware stack, making it possible to create your own dialer—or integrate call handling and phone state monitoring into your applications.
Initiating Phone Calls Using Intents
Best practice for initiating phone calls is to use an
Intent.ACTION_DIAL
Intent, specifying the number to dial by setting the Intents data using a
tel:
schema:
Intent whoyougonnacall = new Intent(Intent.ACTION_DIAL,Uri.parse("tel:555-2368"));startActivity(whoyougonnacall);
This will start a dialer Activity that will be pre-populated with the number you specified as the Intent data. The default dialer Activity allows the user to change the number before explicitly initiating the call. As a result, using the
ACTION_DIAL
Intent action doesn’t require any special permissions.
By using an Intent to announce your intention to dial a number, your application stays decoupled from the dialer implementation used to initiate the call. For example, if users have installed a new dialer that supports IP-based telephony, using Intents to dial a number from your application lets users use this new dialer to place the call.
Creating a New Phone Dialer
Creating a new dialer application, potentially to replace the native phone dialer app, involves two steps. Your app must:
- Intercept Intents serviced by the native dialer.
- Initiate and manage outgoing calls.
The native dialer application responds to Intent actions corresponding to a user pressing a hardware call button, asking to view data using the
tel:
schema, or making an
ACTION_DIAL
request using the
tel:
schema, as shown in the previous section.
To intercept these requests, include
intent-filter
tags on the manifest entries for your replacement dialer Activity that listens for the following actions:
-
Intent.ACTION_CALL_BUTTON—This action is broadcast when the device’s hardware call button is pressed. Create an Intent Filter that listens for this action as a default action. -
Intent.ACTION_DIAL—This Intent action, described in the previous section, is used by applications that want to initiate a phone call. The Intent Filter used to capture this action should be both default and browsable (to support dial requests from the browser) and must specify thetel:schema to replace existing dialer functionality (though it can support additional schemes). -
Intent.ACTION_VIEW—The view action is used by applications wanting to view a piece of data. Ensure that the Intent Filter specifies thetel:schema to allow your new Activity to be used to view telephone numbers.
The manifest snippet in Listing 20-4 shows an Activity with Intent Filters that will capture each of these actions.
After your Activity has been started, it should provide a UI that allows users to enter or modify the number to dial and to initiate the outgoing call. At that point you need to place the call—using either the existing telephony stack or your own alternative.
The simplest technique is to use the existing telephony stack using the
Intent.ACTION_CALL
action. This will initiate a call using the system in-call Activity and will let the system manage the dialing, connection, and voice handling.
To use this action, your application must request the
CALL_PHONE
uses-permission:
<uses-permission android:name="android.permission.CALL_PHONE"/>
As a dangerous permission, you must also request—and check for acceptance—at runtime as shown in Listing 20-5 .
Alternatively, you can completely replace the outgoing telephony stack by implementing your own dialing and voice-handling framework. This is the perfect alternative if you are implementing a VOIP (voice over IP) application.
Accessing Telephony Properties and Phone State
Access to the telephony APIs is managed by the Telephony Manager, accessible using the
getSystemService
method:
String srvcName = Context.TELEPHONY_SERVICE;TelephonyManager telephonyManager =(TelephonyManager)getSystemService(srvcName);
The Telephony Manager provides direct access to many of the phone properties, including device, network, subscriber identity module (SIM), and data state details. You can also access some connectivity status information, although this is usually done using the Connectivity Manager, as described in Chapter 18 , “Bluetooth, NFC, Networks, and Wi-Fi.”
Almost all Telephony Manager methods require the
READ_PHONE_STATE
uses-permission be included in the application manifest:
<uses-permission android:name="android.permission.READ_PHONE_STATE"/>
The
READ_PHONE_STATE
permission is also marked as dangerous, so you need to check / request the runtime user permission before you can receive phone state detail results, as shown in
Listing 20-6
.
Android Lollipop (API Level 22) added support for multiple telephony subscriptions (such as dual SIM devices that support multiple active SIM cards). To access the list of active subscriptions, use the Subscription Manager’s
getActiveSubscriptionInfoList
method. Note that like the Telephony Manager, all Subscription Manager methods require the
READ_PHONE_STATE
permission:
SubscriptionManager subscriptionManager = (SubscriptionManager)getSystemService(Context.TELEPHONY_SUBSCRIPTION_SERVICE);List<SubscriptionInfo> subscriptionInfos= subscriptionManager.getActiveSubscriptionInfoList();
By default, the Telephony Manager methods will return properties related to the default subscriber. Android Nougat (API Level 24) introduced the
createForSubscriptionId
method to the Telephone Manager, which returns a new Telephony Manager corresponding to the specified subscription Id:
for (SubscriptionInfo subscriptionInfo : subscriptionInfos) {int id = subscriptionInfo.getSubscriptionId();TelephonyManager manager = telephonyManager.createForSubscriptionId(subId);[ … Query properties …]}
Once you have a Telephony Manager, you can obtain the phone type (GSM CDMA, or SIP), unique ID (IMEI or MEID), software version, and the phone’s phone number as shown in Listing 20-6 .
When your device is connected to a network, you can use the Telephony Manager to read the Mobile Country Code and Mobile Network Code (MCC+MNC), the country ISO code, the network operator name, and the type of network you’re connected to using the
getNetworkOperator
,
getNetworkCountryIso
,
getNetworkOperatorName
, and
getNetworkType
methods.
These commands work only when you are connected to a mobile network and can be unreliable if it is a CDMA network. Use the
getPhoneType
method to determine which phone type is being used.
Monitoring Changes in Phone State Using the Phone State Listener
The Android telephony APIs let you monitor changes to phone state and associated details such as incoming phone numbers. Changes to the phone state are monitored using the
PhoneStateListener
class, with some state changes also broadcast as Intents.
To monitor and manage phone state, your application must specify the
READ_PHONE_STATE
uses-permission, including runtime permission checks as described in the previous section.
Create a new class that extends the abstract Phone State Listener class to monitor, and respond to, phone state change events, including call state (ringing, off hook, and so on), cell location changes, voice-mail and call-forwarding status, phone service changes, and changes in mobile signal strength.
Within your Phone State Listener implementation, override the event handlers of the events you want to react to. Each handler receives parameters that indicate the new phone state, such as the current cell location, call state, or signal strength:
PhoneStateListener phoneStateListener = new PhoneStateListener() {public void onCallForwardingIndicatorChanged(boolean cfi){}public void onCallStateChanged(int state, String incomingNumber){}public void onCellInfoChanged(List<CellInfo> cellInfo){}public void onCellLocationChanged(CellLocation location){}public void onDataActivity(int direction){}public void onDataConnectionStateChanged(int state, int networkType){}public void onMessageWaitingIndicatorChanged(boolean mwi){}public void onServiceStateChanged(ServiceState serviceState){}public void onSignalStrengthsChanged(SignalStrength signalStrength) {}};
After creating your own Phone State Listener, register it with the Telephony Manager using a bitmask to indicate the events you want to listen for:
telephonyManager.listen(phoneStateListener,PhoneStateListener.LISTEN_CALL_FORWARDING_INDICATOR|PhoneStateListener.LISTEN_CALL_STATE |PhoneStateListener.LISTEN_CELL_LOCATION |PhoneStateListener.LISTEN_DATA_ACTIVITY |PhoneStateListener.LISTEN_DATA_CONNECTION_STATE |PhoneStateListener.LISTEN_MESSAGE_WAITING_INDICATOR |PhoneStateListener.LISTEN_SERVICE_STATE |PhoneStateListener.LISTEN_SIGNAL_STRENGTHS);
To unregister a listener, call
listen
and pass in
PhoneStateListener.LISTEN_NONE
as the bitmask parameter:
telephonyManager.listen(phoneStateListener,PhoneStateListener.LISTEN_NONE);
For example, if you want your application to respond to incoming phone calls, you can override the
onCallStateChanged
method in your Phone State Listener implementation, and register it to receive notifications when the call state changes:
PhoneStateListener callStateListener = new PhoneStateListener() {public void onCallStateChanged(int state, String incomingNumber) {String callStateStr = "Unknown";switch (state) {case TelephonyManager.CALL_STATE_IDLE :callStateStr = "Idle"; break;case TelephonyManager.CALL_STATE_OFFHOOK :callStateStr = "Offhook (In Call)"; break;case TelephonyManager.CALL_STATE_RINGING :callStateStr = "Ringing. Incoming number is: "+ incomingNumber;break;default : break;}Toast.makeText(MyActivity.this,callStateStr, Toast.LENGTH_LONG).show();}};telephonyManager.listen(callStateListener,PhoneStateListener.LISTEN_CALL_STATE);
The
onCallStateChanged
handler receives the phone number associated with incoming calls, and the
state
parameter represents the current call state as one of the following three values:
-
TelephonyManager.CALL_STATE_IDLE—When the phone is neither ringing nor in a call -
TelephonyManager.CALL_STATE_RINGING—When the phone is ringing -
TelephonyManager.CALL_STATE_OFFHOOK—When the phone is currently in a call
Note that as soon as the state changes to
CALL_STATE_RINGING
, the system will display the incoming call screen or notification, asking users if they want to answer the call.
Using Intent Receivers to Monitor Incoming Phone Calls
The Phone State Listener in the previous section is only active while your Activity is running. If you wish to monitor all incoming calls, you can use an Intent Receiver.
When the phone state changes as a result of an incoming, accepted, or terminated phone call, the Telephony Manager will broadcast an
ACTION_PHONE_STATE_CHANGED
Intent.
By registering a manifest Intent Receiver that listens for this Broadcast Intent, as shown in the snippet below, you can listen for incoming phone calls at any time, even if your application isn’t running. Note that your application needs to request the
READ_PHONE_STATE
permission in the manifest, and again at runtime, before it can receive the phone state Broadcast Intent.
<receiver android:name="PhoneStateChangedReceiver"><intent-filter><action android:name="android.intent.action.PHONE_STATE"/></intent-filter></receiver>
The Phone State Changed Broadcast Intent includes up to two extras. All such broadcasts will include the
EXTRA_STATE
extra, whose value will be one of the
TelephonyManager.CALL_STATE_
actions described earlier to indicate the new phone state. If the state is ringing, the Broadcast Intent will also include the
EXTRA_INCOMING_NUMBER
extra, whose value represents the incoming call number.
The following skeleton code can be used to extract the current phone state and incoming call number where it exists:
public class PhoneStateChangedReceiver extends BroadcastReceiver {@Overridepublic void onReceive(Context context, Intent intent) {String phoneState = intent.getStringExtra(TelephonyManager.EXTRA_STATE);if (phoneState.equals(TelephonyManager.EXTRA_STATE_RINGING)) {String phoneNumber =intent.getStringExtra(TelephonyManager.EXTRA_INCOMING_NUMBER);Toast.makeText(context,"Incoming Call From: " + phoneNumber,Toast.LENGTH_LONG).show();}}}
Sending and Receiving SMS Messages
SMS technology is designed to send short text messages between mobile phones via the carrier network. It provides support for sending both text messages (designed to be read by people) and data messages (meant to be consumed by applications). Multimedia messaging service (MMS) messages allow users to send and receive messages that include multimedia attachments such as photos, videos, and audio.
Android introduced properly supported APIs for SMS messaging in Android 4.4 KitKat (API Level 19).
Because SMS and MMS are mature mobile technologies, there’s a lot of information out there that describes the technical details of how an SMS or MMS message is constructed and transmitted over the air. Rather than rehash that information here, the following sections focus on the practicalities of sending and receiving text messages from within Android applications.
Android provides support for sending both SMS messages using a messaging application installed on the device with the
SEND
and
SEND_TO
Broadcast Intents.
Android also supports full SMS functionality within your applications through the
SmsManager
class. Using the SMS Manager, you can replace the native SMS application to send text messages and react to incoming texts.
Android 5.0 Lollipop (API Level 22) added support for multiple telephony subscriptions (such as dual SIM devices that support multiple active SIM cards). As a result, you can choose which cell subscription to use when sending SMS messages. Refer to the earlier section, “Accessing Telephony Properties and Phone State” for details on determining the available subscriptions.
Sending SMS Messages Using Intents
It’s best practice to use an Intent to send SMS (and MMS) messages using another application—typically the native SMS application—rather than implementing a full SMS client yourself.
To do so, call
startActivity
with an
Intent.ACTION_SENDTO
action Intent, specifying a target number using
sms:
schema notation as the Intent data. Include the message you want to send within the Intent payload using an
sms_body
extra:
Intent smsIntent = new Intent(Intent.ACTION_SENDTO,Uri.parse("sms:55512345"));smsIntent.putExtra("sms_body", "Press send to send me");startActivity(smsIntent);
The currently selected default SMS app will receive this Intent and display a pre-populated Activity that will allow you to send the message you specify to the contact you indicated.
Creating a New Default SMS App to Send and Receive SMS Messages
On each Android device, only one app can be the default SMS App at any given time. Users can modify the default SMS app from the system settings, as shown in Figure 20-1 .

Only the current default SMS app receives the
SMS_DELIVER_ACTION
Intent when a new SMS message arrives, the
WAP_PUSH_DELIVER_ACTION
Intent when a new MMS arrives, and has the ability to write new SMS messages to the SMS Content Provider.
It’s also possible to for your app to send and receive SMS messages, and read the SMS Content Provider without being selected as the default SMS app as described in later sections. Note that in that case, the default SMS app (and any other app listening for the broadcast) will also still receive each message.
If you wish to create a new default SMS app, you must provide the same functionality as provided by the bundled SMS application. Specifically, that includes the following Manifest entries and associated components:
-
A Broadcast Receiver with an Intent Filter for the
android.provider.Telephony.SMS_DELIVERaction, and which requires theBROADCAST_SMSpermission. This Receiver will be triggered whenever a new SMS message is received:<receiver android:name=".MySmsReceiver"android:permission="android.permission.BROADCAST_SMS"><intent-filter><action android:name="android.provider.Telephony.SMS_DELIVER"/></intent-filter></receiver> -
A Broadcast Receiver with an Intent Filter for the
android.provider.Telephony.WAP_PUSH_DELIVERaction along with the MIME typeapplication/vnd.wap.mms-message, and which requires theBROADCAST_WAP_PUSHpermission. This Receiver will be triggered whenever a new MMS message is received:<receiver android:name=".MyMmsReceiver"android:permission="android.permission.BROADCAST_WAP_PUSH"><intent-filter><action android:name="android.provider.Telephony.WAP_PUSH_DELIVER"/><data android:mimeType="application/vnd.wap.mms-message"/></intent-filter></receiver> -
An Activity that allows users to send SMS and MMS messages, which includes an Intent Filter for the
android.intent.action.SENDandandroid.intent.action.SENDTOactions, supporting the schemessms:,smsto:,mms:, andmmsto:. Your Activity should listen for Intents of this form and fulfill any requests from other apps using the form described in the earlier section, “Sending SMS Messages Using Intents”:<activity android:name=".MySendSmsActivity" ><intent-filter><action android:name="android.intent.action.SEND" /><action android:name="android.intent.action.SENDTO" /><category android:name="android.intent.category.DEFAULT" /><category android:name="android.intent.category.BROWSABLE" /><data android:scheme="sms" /><data android:scheme="smsto" /><data android:scheme="mms" /><data android:scheme="mmsto" /></intent-filter></activity> -
A Service that includes an Intent Filter for the
android.intent.action.RESPOND_VIA_MESSAGEaction that supports the schemes,sms:,smsto:,mms:, andmmsto:, and which requires theSEND_RESPOND_VIA_MESSAGEpermission. This Service implementation should allow users to send SMS messages in response to incoming phone calls. The received Intent data contains a URI where the scheme describes the transport type, and the path contains the recipient’s phone number (Eg.smsto:3055551234). The message text is stored in theEXTRA_TEXTextra, and the message subject inEXTRA_SUBJECT.<service android:name=".MySmsResponseService"android:permission="android.permission.SEND_RESPOND_VIA_MESSAGE"android:exported="true" ><intent-filter><action android:name="android.intent.action.RESPOND_VIA_MESSAGE" /><category android:name="android.intent.category.DEFAULT" /><data android:scheme="sms" /><data android:scheme="smsto" /><data android:scheme="mms" /><data android:scheme="mmsto" /></intent-filter></service>
If your app is not set to the default SSM app, its functionality may be limited. You can check if your app is the default SMS app using the
Telephony.Sms.getDefaultSmsPackage
method, which returns the package name of the current default SMS app.
String myPackageName = getPackageName();boolean isDefault =Telephony.Sms.getDefaultSmsPackage(this).equals(myPackageName);
You can display a system dialog to prompt the user to select your app as the default SMS app using the
Telephony.Sms.Intents.ACTION_CHANGE_DEFAULT
Intent, including an extra with the
Sms.Intents.EXTRA_PACKAGE_NAME
key and your package name as the string value:
Intent intent = new Intent(Telephony.Sms.Intents.ACTION_CHANGE_DEFAULT);intent.putExtra(Telephony.Sms.Intents.EXTRA_PACKAGE_NAME, myPackageName);startActivity(intent);
The following sections describe how to send and receive SMS messages; note that much of this functionality is available to apps that don’t provide the full suite of functionality provided by an SMS app.
Sending SMS Messages
SMS messaging in Android is handled by the
SmsManager
class. You can get a reference to the SMS Manager using the static
SmsManager.getDefault
method:
SmsManager smsManager = SmsManager.getDefault();
To send SMS messages, your application must specify the
SEND_SMS
and
READ_PHONE_STATE
uses-permission in your manifest:
<uses-permission android:name="android.permission.SEND_SMS"/><uses-permission android:name="android.permission.READ_PHONE_STATE"/>
Note that the
SEND_SMS
is a dangerous permission, so you must also perform a runtime permission check before attempting to send an SMS message.
To send a text message, use
sendTextMessage
from the SMS Manager, passing in the address (phone number) of your recipient and the text message you want to send:
// Check runtime permissions.int send_sms_permission = ActivityCompat.checkSelfPermission(this,Manifest.permission.SEND_SMS);int phone_state_permission = ActivityCompat.checkSelfPermission(this,Manifest.permission.READ_PHONE_STATE);if (send_sms_permission == PackageManager.PERMISSION_GRANTED &&phone_state_permission == PackageManager.PERMISSION_GRANTED) {// Send the SMS MessageSmsManager smsManager = SmsManager.getDefault();String sendTo = "5551234";String myMessage = "Android supports programmatic SMS messaging!";smsManager.sendTextMessage(sendTo, null, myMessage, null, null);} else {if (ActivityCompat.shouldShowRequestPermissionRationale(this, Manifest.permission.SEND_SMS)) {// TODO Display additional rationale for the requested permission.}ActivityCompat.requestPermissions(this,new String[]{Manifest.permission.SEND_SMS,Manifest.permission.READ_PHONE_STATE},SMS_RECEIVE_PERMISSION_REQUEST);}
If your app is set to be the default SMS app, you must also write all sent messages to the SMS Content Provider:
ContentValues values = new ContentValues();values.put(Telephony.Sms.ADDRESS, sendTo);values.put(Telephony.Sms.BODY, myMessage);values.put(Telephony.Sms.READ, 1);values.put(Telephony.Sms.DATE, sentTime);values.put(Telephony.Sms.TYPE, Telephony.Sms.MESSAGE_TYPE_SENT);getContentResolver().insert(Telephony.Sms.Sent.CONTENT_URI, values);
Note that this requires the
WRITE_SMS
and
READ_SMS
manifest and runtime permissions:
<uses-permission android:name="android.permission.WRITE_SMS"/><uses-permission android:name="android.permission.READ_SMS"/>
Alternatively, if your app is not currently selected as the default SMS app, Android will automatically write any messages sent using the SMS Manager to the SMS Provider.
When sending an SMS using
sendTextMessage
, the second parameter can be used to specify the SMS service center to use. If you enter
null
, the default service center for the device’s carrier will be used.
The final two parameters let you specify Intents to track the transmission and successful delivery of your messages by implementing and registering Broadcast Receivers that listen for the actions you specify when creating the corresponding Pending Intents.
The first Pending Intent parameter is fired when the message is either successfully sent or fails to send. The result code for the Broadcast Receiver that receives this Intent will be one of the following:
-
Activity.RESULT_OK—To indicate a successful transmission -
SmsManager.RESULT_ERROR_GENERIC_FAILURE—To indicate a nonspecific failure -
SmsManager.RESULT_ERROR_RADIO_OFF—To indicate the phone radio is turned off -
SmsManager.RESULT_ERROR_NULL_PDU—To indicate a PDU (protocol description unit) failure -
SmsManager.RESULT_ERROR_NO_SERVICE—To indicate that no cellular service is currently available
The second Pending Intent parameter is fired only after the recipient receives your SMS message.
The following code snippet shows the typical pattern for sending an SMS and monitoring the success of its transmission and delivery. Note that if your app is the default SMS app, you should also add the message to the SMS Provider when it is first created, and modify its entry to reflect the success or failure of transmission:
String SENT_SMS_ACTION = "com.professionalandroid.SENT_SMS_ACTION";String DELIVERED_SMS_ACTION = " com.professionalandroid.DELIVERED_SMS_ACTION";// Create the sentIntent parameterIntent sentIntent = new Intent(SENT_SMS_ACTION);PendingIntent sentPI = PendingIntent.getBroadcast(getApplicationContext(),0,sentIntent,PendingIntent.FLAG_UPDATE_CURRENT);// Create the deliveryIntent parameterIntent deliveryIntent = new Intent(DELIVERED_SMS_ACTION);PendingIntent deliverPI =PendingIntent.getBroadcast(getApplicationContext(),0,deliveryIntent,PendingIntent.FLAG_UPDATE_CURRENT);// Register the Broadcast ReceiversregisterReceiver(new BroadcastReceiver() {@Overridepublic void onReceive(Context _context, Intent _intent){String resultText = "UNKNOWN";switch (getResultCode()) {case Activity.RESULT_OK:resultText = "Transmission successful"; break;case SmsManager.RESULT_ERROR_GENERIC_FAILURE:resultText = "Transmission failed"; break;case SmsManager.RESULT_ERROR_RADIO_OFF:resultText = "Transmission failed: Radio is off";break;case SmsManager.RESULT_ERROR_NULL_PDU:resultText = "Transmission Failed: No PDU specified";break;case SmsManager.RESULT_ERROR_NO_SERVICE:resultText = "Transmission Failed: No service";break;}Toast.makeText(_context, resultText,Toast.LENGTH_LONG).show();}},new IntentFilter(SENT_SMS_ACTION));registerReceiver(new BroadcastReceiver() {@Overridepublic void onReceive(Context _context, Intent _intent){Toast.makeText(_context, "SMS Delivered",Toast.LENGTH_LONG).show();}},new IntentFilter(DELIVERED_SMS_ACTION));// Send the messageSmsManager smsManager = SmsManager.getDefault();String sendTo = "5551234";String myMessage = "Android supports programmatic SMS messaging!";smsManager.sendTextMessage(sendTo, null, myMessage, sentPI, deliverPI);
The maximum length of each SMS text message can vary by carrier, but are typically limited to 160 characters. As a result longer messages need to be broken into a series of smaller parts. The SMS Manager includes the
divideMessage
method, which accepts a string as an input and breaks it into an Array List of messages, wherein each is less than the maximum allowable size.
You can then use the
sendMultipartTextMessage
method on the SMS Manager to transmit the array of messages:
ArrayList<String> messageArray = smsManager.divideMessage(myMessage);ArrayList<PendingIntent> sentIntents = new ArrayList<PendingIntent>();for (int i = 0; i < messageArray.size(); i++)sentIntents.add(sentPI);smsManager.sendMultipartTextMessage(sendTo,null,messageArray,sentIntents, null);
The
sentIntent
and
deliveryIntent
parameters in the
sendMultipartTextMessage
method are Array Lists that can be used to specify different Pending Intents to fire for each message part.
To send multimedia MMS messages, use the SMS Manager’s
sendMultimediaMessage
method, passing in multimedia to transmit. A fully worked example of sending multimedia MMS messages is beyond the scope of this book, but is available an Android API demo at:
android.googlesource.com/platform/development/+/69291d6/samples/ApiDemos/src/com/example/android/apis/os/MmsMessagingDemo.java
.
Handling Incoming SMS Messages
For an application to listen for any SMS Broadcast Intents, it needs to specify the
RECEIVE_SMS
manifest and runtime permission:
<uses-permissionandroid:name="android.permission.RECEIVE_SMS"/>
The
RECEIVE_SMS
permission is marked dangerous, so your app must also request this permission at runtime, otherwise the SMS Broadcast Intents will not be received:
ActivityCompat.requestPermissions(this,new String[]{Manifest.permission.RECEIVE_SMS},SMS_RECEIVE_PERMISSION_REQUEST);
When a device receives a new SMS message, the default SMS app will receive a new Broadcast Intent with the
android.provider.Telephony.SMS_DELIVER
action. If your app should still receive SMS messages when it isn’t the default SMS app—for example if you’re listening for confirmation SMS messages—you can listen for an
android.provider.Telephony
.
SMS_RECEIVED_ACTION Intent.
Both broadcast Intents include the incoming SMS details. To extract the array of
SmsMessage
objects packaged within the SMS Intent bundle, use the
getMessagesFromIntent
method:
Bundle bundle = intent.getExtras();if (bundle != null)SmsMessage[] messages = getMessagesFromIntent(intent);
Each
SmsMessage
contains the SMS message details, including the originating address (phone number), timestamp, and the message body, which can be extracted using the
getOriginatingAddress
,
getTimestampMillis
, and
getMessageBody
methods, respectively:
SmsMessage[] messages = getMessagesFromIntent(intent);for (SmsMessage message : messages) {String msg = message.getMessageBody();long when = message.getTimestampMillis();String from = message.getOriginatingAddress();}
As with outgoing messages, any messages you receive while your app is the default SMS app must be written to the SMS Provider:
ContentValues values = new ContentValues();values.put(Telephony.Sms.ADDRESS, message.getOriginatingAddress());values.put(Telephony.Sms.BODY, message.getMessageBody());values.put(Telephony.SMS.DATE, message.getTimestampMillis);values.put(Telephony.Sms.READ, 0);values.put(Telephony.Sms.TYPE, Telephony.Sms.MESSAGE_TYPE_INBOX);context.getApplicationContext().getContentResolver().insert(Telephony.Sms.Sent.CONTENT_URI, values);
Once created, remember to register your SMS Broadcast Receiver using the appropriate Intent Filter—either
SMS_DELIVER
if your app should function as a default SMS app, or
SMS_RECEIVED
if not:
<receiver android:name=".MySMSReceiver"><intent-filter><action android:name="android.provider.Telephony.SMS_RECEIVED"/></intent-filter></receiver>
Emergency Responder SMS Example
In this example, you’ll create an SMS application that turns an Android phone into an emergency response beacon. The robustness of SMS network infrastructure makes SMS an excellent option for applications like this, where reliability is critical.
-
Start by creating a new
EmergencyResponderproject that features a backward-compatible blankEmergencyResponderMainActivityActivity. Set the minimum API to 19 (the first Android release to fully support SMS APIs). -
Add permissions for sending and receiving incoming SMS messages and making phone calls, to the manifest:
<?xml version="1.0" encoding="utf-8"?><manifest xmlns_android="http://schemas.android.com/apk/res/android"package="com.professionalandroid.apps.emergencyresponder"><uses-permission android:name="android.permission.RECEIVE_SMS"/><uses-permission android:name="android.permission.SEND_SMS"/><uses-permission android:name="android.permission.READ_PHONE_STATE"/>[… Application Node …]</manifest> -
Update the
res/values/strings.xmlresource to include the text to display within the all clear and request help buttons, as well as their associated default response messages. You should also define an incoming message text that the application will use to detect requests for a status response:<resources><string name="app_name">EmergencyResponder</string><string name="allClearButtonText">Signal All Clear</string><string name="maydayButtonText">Request Help</string><string name="allClearText">I am safe and well. Worry not!</string><string name="maydayText">Tell my mother I love her.</string><string name="querystring">are you OK?</string><string name="querylistprompt">People who want to know if you\'re ok</string></resources> -
Add the Recycler View to the dependencies node within the app module
build.gradlefile:dependencies {[… Existing dependencies …]implementation 'com.android.support:recyclerview-v7:27.1.1'} -
Modify the
main_activity_responder_activity.xmllayout resource. Include aRecyclerViewto display the list of people requesting a status update, and a series of Buttons that will allow the user to send response SMS messages. The specific layout doesn’t matter, provided you include each of the Buttons and the Recycler View using the specified IDs:<?xml version="1.0" encoding="utf-8"?><android.support.constraint.ConstraintLayoutxmlns_android="http://schemas.android.com/apk/res/android"xmlns_app="http://schemas.android.com/apk/res-auto"xmlns_tools="http://schemas.android.com/tools"android:layout_width="match_parent"android:layout_height="match_parent"<TextViewandroid:id="@+id/textView"android:layout_width="wrap_content"android:layout_height="18dp"android:layout_marginEnd="8dp"android:layout_marginStart="8dp"android:layout_marginTop="16dp"android:text="@string/querylistprompt"app:layout_constraintEnd_toEndOf="parent"app:layout_constraintHorizontal_bias="0.063"app:layout_constraintLeft_toLeftOf="parent"app:layout_constraintStart_toStartOf="parent"app:layout_constraintTop_toTopOf="parent"/><Buttonandroid:id="@+id/okButton"android:layout_width="0dp"android:layout_height="wrap_content"android:layout_marginBottom="8dp"android:layout_marginEnd="8dp"android:layout_marginStart="8dp"android:text="@string/allClearButtonText"app:layout_constraintBottom_toTopOf="@+id/notOkButton"app:layout_constraintEnd_toEndOf="parent"app:layout_constraintHorizontal_bias="0.6"app:layout_constraintStart_toStartOf="parent"/><Buttonandroid:id="@+id/notOkButton"android:layout_width="0dp"android:layout_height="wrap_content"android:layout_marginBottom="8dp"android:layout_marginEnd="8dp"android:layout_marginStart="8dp"android:text="@string/maydayButtonText"app:layout_constraintBottom_toBottomOf="parent"app:layout_constraintEnd_toEndOf="parent"app:layout_constraintHorizontal_bias="0.53"app:layout_constraintStart_toStartOf="parent"/><android.support.v7.widget.RecyclerViewandroid:id="@+id/requesterRecyclerListView"android:layout_width="0dp"android:layout_height="0dp"android:layout_marginBottom="8dp"android:layout_marginEnd="8dp"android:layout_marginStart="8dp"android:layout_marginTop="8dp"app:layout_constraintBottom_toTopOf="@+id/okButton"app:layout_constraintEnd_toEndOf="parent"app:layout_constraintStart_toStartOf="parent"app:layout_constraintTop_toBottomOf="@+id/textView"/></android.support.constraint.ConstraintLayout>At this point, the GUI will be complete, so starting the application should show you the screen in Figure 20-2 .

-
Create a new Array List of Strings within the Activity to store the phone numbers of the incoming requests for your status, and create a new
ReentrantLockobject to support thread-safe handling of the Array List. Take this opportunity to get Click Listeners for each Button; both response Buttons should call therespondmethod.public class EmergencyResponderMainActivity extends AppCompatActivity {ReentrantLock lock;ArrayList<String> requesters = new ArrayList<String>();@Overrideprotected void onCreate(Bundle savedInstanceState) {super.onCreate(savedInstanceState);setContentView(R.layout.activity_emergency_responder_main);lock = new ReentrantLock();wireUpButtons();}private void wireUpButtons() {Button okButton = findViewById(R.id.okButton);okButton.setOnClickListener(new View.OnClickListener() {public void onClick(View view) {respond(true);}});Button notOkButton = findViewById(R.id.notOkButton);notOkButton.setOnClickListener(new View.OnClickListener() {public void onClick(View view) {respond(false);}});}public void respond(boolean ok) {}} -
Create a new
list_item_requester.xmllayout resource in theres/layoutfolder. This will be used to display each person who requests your status, within the Recycler View. You can use a simpleTextViewwith the Android framework’s list item text appearance:<?xml version="1.0" encoding="utf-8"?><FrameLayoutxmlns_android="http://schemas.android.com/apk/res/android"android:layout_width="match_parent"android:layout_height="wrap_content"><TextViewandroid:id="@+id/list_item_requester"android:layout_width="match_parent"android:layout_height="wrap_content"android:textAppearance="?attr/textAppearanceListItem"/></FrameLayout> -
Create a new
RequesterRecyclerViewAdapterclass that extendsRecyclerView.Adapter, and within it create a newViewHolderclass that extendsRecyclerView.ViewHolder. The Adapter should store a list of phone numbers requesting your status, and the View Holder should bind those numbers to the Recycler View List Item layout defined in Step 7:public class RequesterRecyclerViewAdapter extendsRecyclerView.Adapter<RequesterRecyclerViewAdapter.ViewHolder> {private List<String> mNumbers;public RequesterRecyclerViewAdapter(List<String> numbers ) {mNumbers = numbers;}@Overridepublic ViewHolder onCreateViewHolder(ViewGroup parent, int viewType) {View view = LayoutInflater.from(parent.getContext()).inflate(R.layout.list_item_requester,parent, false);return new ViewHolder(view);}@Overridepublic void onBindViewHolder(final ViewHolder holder, int position) {holder.number = mNumbers.get(position);holder.numberView.setText(mNumbers.get(position));}@Overridepublic int getItemCount() {if (mNumbers != null)return mNumbers.size();return 0;}public class ViewHolder extends RecyclerView.ViewHolder {public final TextView numberView;public String number;public ViewHolder(View view) {super(view);numberView = view.findViewById(R.id.list_item_requester);}@Overridepublic String toString() {return number;}}} -
Return to the Activity and update
onCreateto get a reference to the Recycler View, and assign the Adapter from Step 8 to it. Take this opportunity to request runtime permission for receiving and sending SMS messages:private static final int SMS_RECEIVE_PERMISSION_REQUEST = 1;privateRequesterRecyclerViewAdapter mRequesterAdapter =new RequesterRecyclerViewAdapter(requesters);@Overrideprotected void onCreate(Bundle savedInstanceState) {super.onCreate(savedInstanceState);setContentView(R.layout.activity_emergency_responder_main);lock = new ReentrantLock();wireUpButtons();ActivityCompat.requestPermissions(this,new String[]{Manifest.permission.RECEIVE_SMS,Manifest.permission.SEND_SMS,Manifest.permission.READ_PHONE_STATE},SMS_RECEIVE_PERMISSION_REQUEST);RecyclerView recyclerView =findViewById(R.id.requesterRecyclerListView);// Set the Recycler View adapterrecyclerView.setLayoutManager(new LinearLayoutManager(this));recyclerView.setAdapter(mRequesterAdapter);} -
Within your Activity, create a new Broadcast Receiver that will listen for incoming SMS messages. The receiver should listen for incoming SMS messages and call the
requestReceivedmethod when it sees SMS messages containing the incoming request String you defined in Step 3:BroadcastReceiver emergencyResponseRequestReceiver =new BroadcastReceiver() {@Overridepublic void onReceive(Context context, Intent intent) {if (intent.getAction().equals(Telephony.Sms.Intents.SMS_RECEIVED_ACTION )) {String queryString = getString(R.string.querystring).toLowerCase();Bundle bundle = intent.getExtras();if (bundle != null) {SmsMessage[] messages = getMessagesFromIntent(intent);for (SmsMessage message : messages) {if (message.getMessageBody().toLowerCase().contains(queryString))requestReceived(message.getOriginatingAddress());}}}}};public void requestReceived(String from) {} -
Override the Activity’s
onResumeandonPausemethods to register and unregister the Broadcast Receiver created in Step 10 when the Activity resumes and pauses, respectively:@Overridepublic void onResume() {super.onResume();IntentFilter filter =new IntentFilter(Telephony.Sms.Intents.SMS_RECEIVED_ACTION);registerReceiver(emergencyResponseRequestReceiver, filter);}@Overridepublic void onPause() {super.onPause();unregisterReceiver(emergencyResponseRequestReceiver);} -
Update the
requestReceivedmethod stub so that it adds the originating number of each status request’s SMS to the Array List:public void requestReceived(String from) {if (!requesters.contains(from)) {lock.lock();requesters.add(from);mRequesterAdapter.notifyDataSetChanged();lock.unlock();}} -
The Emergency Responder Activity should now be listening for status request SMS messages and adding them to the List View as they arrive. Start the application and send SMS messages to the device or emulator on which it’s running. When they’ve arrived, they should be displayed as shown in
Figure 20-3
. Note that the default SMS app will also receive these incoming messages and will likely display a corresponding Notification.

-
Update the Activity to let users respond to these status requests. Start by completing the
respondmethod stub you created in Step 6. It should iterate over the Array List of status requesters and send a new SMS message to each. The SMS message text should be based on the response strings you defined as resources in Step 3. Send the SMS using thesendResponsemethod (which you’ll complete in the next step):public void respond(boolean ok) {String okString = getString(R.string.allClearText);String notOkString = getString(R.string.maydayText);String outString = ok ? okString : notOkString;ArrayList<String> requestersCopy =(ArrayList<String>)requesters.clone();for (String to : requestersCopy)sendResponse(to, outString);}private void sendResponse(String to, String response) {} -
Complete the
sendResponsemethod to handle sending of each response SMS. Start by removing each potential recipient from the “requesters” Array List before sending the SMS:public void sendResponse(String to, String response) {// Check runtime permissions.int send_sms_permission = ActivityCompat.checkSelfPermission(this,Manifest.permission.SEND_SMS);int phone_state_permission = ActivityCompat.checkSelfPermission(this,Manifest.permission.READ_PHONE_STATE);if (send_sms_permission == PackageManager.PERMISSION_GRANTED &&phone_state_permission == PackageManager.PERMISSION_GRANTED) {// Remove the target from the list of people we// need to respond to.lock.lock();requesters.remove(to);mRequesterAdapter.notifyDataSetChanged();lock.unlock();// Send the messageSmsManager sms = SmsManager.getDefault();sms.sendTextMessage(to, null, response, null, null);} else {if (ActivityCompat.shouldShowRequestPermissionRationale(this, Manifest.permission.SEND_SMS)) {// TODO Display additional rationale for the requested permission.}ActivityCompat.requestPermissions(this,new String[]{Manifest.permission.SEND_SMS,Manifest.permission.READ_PHONE_STATE},SMS_RECEIVE_PERMISSION_REQUEST);}} -
In emergencies it’s important that messages get out. Improve the robustness of the application by including auto-retry functionality. Monitor the success of your SMS messaging so that you can resend a message if it isn’t successfully sent.
- 16.1 Start by creating a new public static String in the Activity to be used within Broadcast Intents to indicate the SMS has been sent.
public static final String SENT_SMS ="com.professionalandroid.emergencyresponder.SMS_SENT";-
16.2 Update the
sendResponsemethod to include a newPendingIntentthat broadcasts the action created in the previous step when the SMS transmission has completed. The packaged Intent should include the intended recipient’s number as an extra.
public void sendResponse(String to, String response) {// Check runtime permissions.int send_sms_permission = ActivityCompat.checkSelfPermission(this,Manifest.permission.SEND_SMS);int phone_state_permission = ActivityCompat.checkSelfPermission(this,Manifest.permission.READ_PHONE_STATE);if (send_sms_permission == PackageManager.PERMISSION_GRANTED &&phone_state_permission == PackageManager.PERMISSION_GRANTED) {// Remove the target from the list of people we// need to respond to.lock.lock();requesters.remove(to);mRequesterAdapter.notifyDataSetChanged();lock.unlock();Intent intent = new Intent(SENT_SMS);intent.putExtra("recipient", to);PendingIntent sentPI =PendingIntent.getBroadcast(getApplicationContext(),0, intent, 0);// Send the messageSmsManager sms = SmsManager.getDefault();sms.sendTextMessage(to, null, response,sentPI, null);} else {if (ActivityCompat.shouldShowRequestPermissionRationale(this, Manifest.permission.SEND_SMS)) {// TODO Display additional rationale for the requested permission.}ActivityCompat.requestPermissions(this,new String[]{Manifest.permission.SEND_SMS,Manifest.permission.READ_PHONE_STATE},SMS_RECEIVE_PERMISSION_REQUEST);}}-
16.3 Implement a new Broadcast Receiver to listen for this Broadcast Intent. Override its
onReceivehandler to confirm that the SMS was successfully delivered; if it wasn’t, put the intended recipient back onto the requester Array List.
private BroadcastReceiver attemptedSendReceiver= new BroadcastReceiver() {@Overridepublic void onReceive(Context context, Intent intent) {if (intent.getAction().equals(SENT_SMS)) {if (getResultCode() != Activity.RESULT_OK) {String recipient = intent.getStringExtra("recipient");requestReceived(recipient);}}}};-
16.4 Finally, register and unregister the new Broadcast Receiver by updating the
onResumeandonPausehandlers of the Activity:
@Overridepublic void onResume() {super.onResume();IntentFilter filter =new IntentFilter(Telephony.Sms.Intents.SMS_RECEIVED_ACTION);registerReceiver(emergencyResponseRequestReceiver, filter);IntentFilter attemptedDeliveryFilter = new IntentFilter(SENT_SMS);registerReceiver(attemptedSendReceiver, attemptedDeliveryFilter);}@Overridepublic void onPause() {super.onPause();unregisterReceiver(emergencyResponseRequestReceiver);unregisterReceiver(attemptedSendReceiver);}
The purpose of this example is to demonstrate the process of listening for SMS messages, and sending them from within your application. Keen-eyed observers should have noticed several areas where it could be improved:
- The list of people requesting a response needs to be persisted to a database.
- The Broadcast Receiver would be better registered within the manifest to allow the application to respond to incoming SMS messages even when it isn’t running.
- The parsing of the incoming SMS messages should be moved into Job Scheduler or Work Manager, and executed on a background thread, as should sending the response SMS messages.
- Adding the ability to send your current location using the location based services APIs would make the app much more useful in an emergency.
The implementation of these improvements is left as an exercise for the reader.
21
Releasing, Distributing, and Monitoring Applications
Having created a compelling new Android application, the next step is to share it with the world. In this final chapter, you learn how to prepare your app for release, and how to create and use a signing certificate to sign your applications before you distribute them.
You’ll be introduced to the Google Play Store, learn how to create a developer profile, and how to create your application listing. You’ll also learn how to use the Alpha and Beta release channels to test your app, before using staged rollouts to ensure updates are rolled out in a way to minimize the risk of distributing an update with critical bugs.
The Google Play Store includes a number of tools to monitor your apps in production. You’ll learn how to use the statistics, vitals, user acquisition, and user feedback pages to better understand how your app is performing on real devices for real users.
An introduction to the options for marketing, monetizing, and promoting your app will help ensure you have a successful launch.
Finally, an introduction to Firebase, and a deep dive into Firebase Analytics and Firebase Performance Monitoring will help you gain critical insight into the demographics of your users and the performance of your app in real-world scenarios.
PREPARING FOR RELEASE
Before building and publishing the production release of your application, you should take several steps to prepare your application for distribution.
These preparation steps apply to all applications, irrespective of how they are distributed, and can generally be divided into two halves: preparing support material related to publishing your application, and preparing your code for a release build.
Preparing Release Support Material
Start by reviewing your application’s launcher icon, and ensure it meets the recommended icon guidelines available at
material.io/guidelines/style/icons.html
.
Your icon should promote your brand and help users discover your app, both within app listings on Google Play and within the app launcher on Android devices.
The first impression of your app for potential users is through the app icon, so its quality is often considered a strong signal for the quality of your app. Great app icons are simple, unique, and memorable. They use a color scheme that’s consistent with your brand and avoid including text—particularly the application name.
Once your app is installed, its launcher icon will be used in many situations, so ensure it looks good on a wide variety of backgrounds and has a unique silhouette to make it easier to identify.
Within your project, include density-specific icons for all generalized screen densities, from low- through to xxx-high-density to ensure they look good and crisp across all possible devices.
In addition to the application resources, Google Play requires a high-resolution (512x512 pixel) variation of your launcher icon for use in application listings.
You should also consider preparing an End User License Agreement (EULA) to help protect you, your organization, and your intellectual property, and a Privacy Policy to describe your commitment to protecting user privacy and providing a safe and secure environment for your users. You can find more details regarding privacy and security at
play.google.com/about/privacy-security-deception
.
Finally, prepare promotional and marketing materials to publicize your app. At a minimum this will include an application name, summary, and description that will be used to describe your app on distribution platforms including the Google Play Store.
It’s important to provide high-quality, descriptive titles and application descriptions without spelling or grammatical errors to make it easy for users to find your application and make an informed choice on its suitability. Similar to your application icon, the quality of your descriptions are a strong signal for the quality of your application.
You should also create representative screen captures for each supported device type—such as phone, tablet, and TV—and videos to help describe and promote your app. More details on the particular promotional material required by Google Play are described later in this chapter.
Preparing Your Code for a Release Build
The following recommendations are optional, but they are considered good coding practice to ensure high-quality release builds prior to distribution:
- Choose a good package name —Once deployed your app’s package name cannot be changed, so take care to select a package name that will be suitable for the lifetime of your application. Be sure not to use other companies’ names or trademarks, and use language that reflects quality and professionalism.
-
Deactivate logging
—To improve efficiency, remove all calls to
Logand debug tracing calls such asstartMethodTracingandstopMethodTracing. -
Disable debugging
—Remove, or set to false, the
android:debuggableattribute in your application manifest. If your app uses a Web View to display paid-for content or is using JavaScript interfaces, use the Web View’ssetWebContentsDebuggingEnabledmethod to disable debugging. This is important because enabled debugging will allow users to inject scripts and extract content using Chrome DevTools. -
Review project code folder contents
—Check the
jni/andsrc/directories to ensure they contain only source files associated with your application, and that thelib/directory contains only third-party or private library files. Thesrc/directory should not contain any.jarfiles. - Review project resource folder contents —Double-check for any private or proprietary data files that aren’t required for deployment, review all the resource folders for files that you are no longer using, and check for asset and static files that should be updated or removed prior to release.
- Review your manifest file —Verify that your application manifest and Gradle build files are configured to define the correct app version, installation requirements, and permissions, as described in the following section.
UPDATING APPLICATION METADATA IN YOUR APPLICATION MANIFEST
Prior to publishing your application, it’s important to review your application’s metadata, as defined within your application manifest and Gradle build files and described in more detail in Chapter 4 .
In this section we will review some of the nodes unique to production builds and application distribution.
Reviewing Application Installation Restrictions
Review the
uses-permission
nodes within the application manifest. Ensure that only permissions that are relevant and required for your application to function are included. The required permissions will be displayed to users at installation time, so including over-broad or unnecessary permission requirements risks users choosing not to install your application.
Also within the application manifest, review the
uses-feature
nodes. As described in
Chapter 4
, these nodes are used to specify hardware and/or software features that are strictly required for your application to function.
The inclusion of any
uses-feature
nodes will prevent your application from being installed on any devices that do not support a specified feature. For example, an application that includes the following snippet can’t be installed on any Android device that doesn’t include NFC support (such as an Android TV):
<uses-feature android:name="android.hardware.nfc" />
Use this node
only
if you want to prevent your app being installed on devices that don’t include certain features. If your app can use particular hardware, but that hardware is not a strict requirement, check the host device for support at runtime rather than including a
uses-feature
node.
Within the Gradle app module, set your app’s configuration settings to define the minimum and target SDK versions:
defaultConfig {applicationId "com.professionalandroid.apps.earthquake"minSdkVersion 16targetSdkVersion 27versionCode 1versionName "1.0"testInstrumentationRunner "android.support.test.runner.AndroidJUnitRunner"}
Note that it’s possible to define different values for minimum and target SDKs using different build flavors within your Gradle builds:
defaultConfig {applicationId "com.professionalandroid.apps.earthquake"minSdkVersion 16targetSdkVersion 27versionCode 1versionName "1.0"testInstrumentationRunner "android.support.test.runner.AndroidJUnitRunner"}flavorDimensions "apilevel"productFlavors {legacy {applicationId "com.professionalandroid.apps.earthquake.legacy"minSdkVersion 14targetSdkVersion 15versionName "1.0 - Legacy"}}
This allows you to generate multiple SDKs with different requirements. More details on creating and using build flavors are available in Chapter 4 .
The minimum SDK value defines the lowest version of the Android framework onto which your application can be installed. The Android OS enforces system version compatibility, meaning that it will reject any attempt to install an app whose minimum SDK is higher than the current operating system.
The target SDK value indicates the Android platform version against which you did your development and testing. This is used by the system to determine which (if any) forward- or backward-compatibility changes to apply to support your app. It’s considered good practice to always target the latest platform release after you’ve tested your app on it.
Also within the Gradle build file, review the dependencies node to ensure that only relevant, required dependencies are included:
dependencies {implementation 'com.android.support:recyclerview-v7:27.1.1'implementation fileTree(dir: 'libs', include: ['*.jar'])implementation 'com.android.support:appcompat-v7:27.1.1'implementation 'com.android.support:support-v4:27.1.1'implementation 'com.android.support.constraint:constraint-layout:1.1.2'testImplementation 'junit:junit:4.12'androidTestImplementation 'com.android.support.test:runner:1.0.2'androidTestImplementation 'com.android.support.test.espresso:espresso-core:3.0.2'}
Application Versioning
Versioning is an important consideration when deploying your application, critical in ensuring an orderly app upgrade and maintenance strategy.
An orderly versioning system ensures users will find information specific to their app version, and publishing services such as Google Play can properly determine compatibility, and establish upgrade/downgrade relationships. On each device, the Android system uses your app’s version information to enforce protection against downgrades.
Your application version is defined within your Gradle build file using two values:
-
versionCode—An integer defining the current version number, which increases with each new released version. It’s used by Google Play and the Android OS to determine whether one version of your app is more recent than another. Typically your first release will be numbered 1, and with each subsequent release the version code is monotonically increased. Note that the highest allowed version code value is 2,100,000,000. -
versionName—A string displayed to users as the visible version number. As a string, you can choose to describe the app version as a <major>.<minor>.<point> string, or as any other type of absolute or relative version identifier. The version name has no purpose other than to be displayed to users.
You can define both version code and name in the
defaultconfig
, and override either value within a product flavor block:
defaultConfig {applicationId "com.professionalandroid.apps.earthquake"minSdkVersion 16targetSdkVersion 27versionCode 1versionName "1.0"testInstrumentationRunner "android.support.test.runner.AndroidJUnitRunner"}flavorDimensions "apilevel"productFlavors {bleedingedge {}legacy {applicationId "com.professionalandroid.apps.earthquake.legacy"versionName "1.0 - Legacy"}}
SIGNING PRODUCTION BUILDS OF YOUR APPLICATION
Android applications are distributed as Android package files (
.APK
). To be installed on a device or emulator, Android packages need to be signed.
During development, your applications will be signed using a debug key that is automatically generated by Android Studio. Before distributing your application beyond your testing environment, you must compile it as a release build and sign it using a private release key—typically using a self-signed certificate.
To apply an upgrade to an installed application, it must be signed with the same key, so you must always sign an application using the same release key.
The importance of maintaining the security of your signing certificate can’t be overstated. Android uses this certificate as the means of identifying the authenticity of application updates, and applying inter-process security boundaries between installed applications.
Using a stolen key, a third party could sign and distribute applications that maliciously replace your authentic applications.
Similarly, your key is the only way you can upgrade your applications. If you lose your certificate, it is impossible to perform a seamless update on a device or from within Google Play. In the latter case, you would need to create a new listing, losing all the reviews, ratings, and comments associated with your previous package, as well as making it impossible to provide updates to the existing users of your application.
The Android guidelines suggest that you sign all your applications using the same certificate, because applications signed with the same certificate can be configured to run in the same process, and signature-based permissions can be used to expose functionality between trusted applications signed with the same certificate.
The JDK includes the
Keytool
and
Jarsigner
command-line tools necessary to create a new keystore/signing certificate, and to sign your APK, respectively. Alternatively, you can use dialogs within Android Studio as described in the next section.
Creating a Keystore and Signing Key with Android Studio
To create a new keystore, and a
release
or
upload
signing key for your app, within Android Studio navigate to the Build
![]() Generate Signed APK menu item. The resulting dialog will prompt you to either select a new keystore or create one, as shown in
Figure 21-1
.
Generate Signed APK menu item. The resulting dialog will prompt you to either select a new keystore or create one, as shown in
Figure 21-1
.

Click the Create New button and enter a filename and location for your keystore along with a password to secure it. You should then create a new key, or signing certificate , by filling in the dialog shown in Figure 21-2 .

Applications published on Google Play require a certificate with a validity period ending after October 22, 2033. More generally, your certificate will be used through the lifetime of your application and is necessary to perform upgrades, so you should ensure your signing certificate will outlast your application.
The security of your keystore is extremely important, so be sure to use a strong password to secure it and ensure it is backed up securely.
Obtaining API Keys Based on Your Private Release Key
To prevent unauthorized use and quota theft many third-party libraries—including Google Play services—require you to generate an API key based on the release key used to sign your application.
These API keys will typically require your app’s unique package name, and the SHA-1 signing-certificate fingerprint from your release key.
If you are using your own release key, you can obtain its SHA-1 fingerprint using the following command-line command, where
mystore.keystore
represents the full path to your keystore as defined in the previous section:
keytool -list -v -keystore mystore.keystore
If you are managing your key using Google Play App Signing, as described later in this chapter, you won’t have local access to your app’s final signing certificate. However, you can obtain the SHA-1, SHA-256, or MD5 fingerprints on the Google Play Console at
play.google.com/apps/publish/
by selecting your app and navigating to the App Signing tab, as shown in
Figure 21-3
.

The Google Play console and Google Play App Signing are covered in more detail later in this chapter in the section, “Distributing Applications on Google Play.”
Building and Signing a Production Release
Once you have prepared your project for release, updated its metadata, and created a keystore and private signing key, you’re ready to build and sign your app for upload and distribution.
A release build contains the same components as a debug build, but it’s also optimized using zipalign and signed with your release certificate. To build your release APK, you can use a simple Android Studio wizard by selecting the Build
![]() Generate Signed APK menu item.
Generate Signed APK menu item.
In the resulting dialog, select your keystore, provide a password, and select a signing key and associated password, as shown in Figure 21-4 .

Click Next to continue to the final wizard dialog shown in Figure 21-5 .

Select an output location for the final signed APK and select “release” from the build-type drop-down. If you have defined different product flavors, select the flavors to build.
Note that you can choose to apply either of two APK signature schemes. Historically, all Android APKs are signed using v1 (JAR signature); however, Android 7.0 introduced v2 (full APK signature), which offers faster app install times and more protection against unauthorized alterations. Google Play requires at least v1 signing, and it’s generally recommended to also use the v2 signature schema if doing so doesn’t cause any issues when building your app.
Click Finish and your application will be built, zipaligned, and signed. The indicator shown in Figure 21-6 will notify you of completion, and offers a shortcut to the location of the resulting APK.

It’s also possible to configure the Gradle build files to perform the same actions performed by the wizard when called from the command line. For more details about using the Gradle build files, refer to
d.android.com/studio/build/build-variants.html#signing
.
DISTRIBUTING YOUR APPLICATION ON THE GOOGLE PLAY STORE
One of the advantages of Android’s open ecosystem is the freedom to publish and distribute your applications however, and wherever, you choose. The most common and popular distribution channel is Google Play; however, you are free to distribute your applications using alternative markets, your own website, e-mail, social media, or any other distribution channel.
When distributing your application, it’s important to note that application package names are used as unique identifiers for each application. As a result, each application—including variations that you plan to distribute separately—must each have a unique package name. Also note that the filename of your APK does not have to be unique—it will be discarded during the installation process (only the package name is used).
Introducing the Google Play Store
The Google Play Store is the largest and most popular Android application distribution platform. At the time of writing this book, it has been reported that in excess of 2.7 million applications are available, with more than 80 billion application downloads from users in over 145 countries.
The Google Play Store is a marketplace—that is, Google Play acts as a mechanism for you to sell and distribute your application rather than as a merchant reselling it on your behalf. That means far fewer controls restricting what you distribute and how you choose to promote, monetize, and distribute it. Those restrictions are detailed within the Google Play Developer Distribution Agreement (DDA) (
play.google.com/about/developer-distribution-agreement.html
) and the Google Play Developer Program Policies (DPP) (
play.google.com/about/developer-content-policy/
).
Applications that are suspected of breaching the DDA or DPP are reviewed, and if found to have breached those agreements and policies, are suspended and the developer notified. In extreme cases of malware, the Google Play Store can remotely uninstall malicious applications from devices.
Google Play provides all the tools and mechanisms required to handle application distribution, updates, sales (domestic and international), and promotion. Once listed, your application will begin to appear in search results and category lists, as well as potentially within promotional categories.
The full scope of features provided by the Google Play Store is beyond the scope of this book, however we will cover the core functionality that enables you to publish your application.
Getting Started with the Google Play Store
To publish on the Google Play Store, create a developer account at
play.google.com/apps/publish/signup
, as shown in
Figure 21-7
.

Ensure you’re signed in with the Google account you wish to associate with this developer account, and review and accept the developer distribution agreement before completing the registration process by paying a US $25.00 fee.
You’ll then have the opportunity to complete your developer profile. Provide a “Developer Name”—typically your company name—that will be used within Google Play to identify the developer of your applications. Note that it is not a requirement that the developer name used here represent the company or individual who actually wrote the code—it simply identifies the company or individual distributing it.
You should also provide contact details in the form of a physical address, e-mail address, website, and phone number. Note that by providing your e-mail or postal address information, you confirm that you consent to Google publicly displaying or disclosing that information in connection with your apps. Here again, it’s good practice to create an email account specifically for app feedback purposes, rather than sharing your personal email account.
Creating an Application on the Google Play Store
After creating your Android Developer Profile, you are ready to create a new application, upload your APK as an app release, and complete your store listing.
Before you begin the process of uploading and distributing your new application, you should thoroughly test the release version on at least one target handset device and one target tablet device.
When you’re ready to distribute, start by creating a new app listing on Google Play. Click the Create Application button on the main “All applications” tab, as shown in Figure 21-8 .

In the resulting dialog, select the default language, provide your application’s title as shown in Figure 21-9 , and click Create.

With your app created, you can now complete the store listing details and upload APKs to be used as App Releases, as described in the following sections.
You will create a new App Release each time you wish to distribute an updated APK, while the app listing will contain all the details necessary to promote your app on Google Play. It’s important that you supply all the possible content and assets—even those that may be listed as optional. Each asset is used throughout Google Play, including the website, Google Play Store clients, and promotional campaigns. Not including some assets may prevent your application from being featured or promoted.
Uploading a New App Release APK
To upload your APK, select the App Releases option on the sidebar to display the App Releases view, as shown in Figure 21-10 . You can choose to publish your application to Alpha, Beta, or Production.

The Alpha and Beta channels allow you to make the app available to a small group of testers prior to making your app generally available to all users, as described in detail in the “Publishing Your Application” section.
Click the “Manage [channel]” button for the release channel you wish to publish, and click the Create Release button.
You will then have the opportunity to enroll in Google Play App Signing, upload an APK, provide a release name, and complete the release notes.
The first section at the top of the page displays your Google Play App Signing selection—allowing you to enroll, as described in the following section, “Managing Your Private Release Key using Google Play App Signing.”
The next section is where you select or upload your signed release package, as shown in Figure 21-11 .

You must then enter a Release Name and a description of what’s new in this release, as shown in Figure 21-12 .

The release notes will be displayed with your application on Google Play, while the release name is an internal codename that will only ever be shown to you within the Google Play management console.
Note that it’s not yet possible to publish your APK. You must first complete the mandatory store listing details, content rating, and pricing/distribution details as described in the following sections.
Managing Your Private Release Key Using Google Play App Signing
Google Play App Signing is an optional program that exists to help you securely manage your signing key using the same secure infrastructure Google uses to store its own keys.
When you opt-in to Google Play App Signing, rather than signing each app with your key directly you sign your app with an upload key. Should you lose your upload key, you can request a copy from Google—decreasing the risk of losing your key.
When you upload new apps signed with your upload key to the Play Console, Google verifies and removes the upload key signature before re-signing the app with the original app signing key.
You can opt-in to Google Play App Signing when creating a new app release, by clicking the Continue button, as shown in Figure 21-13 .

Alternatively, you can reuse the same Google Play–managed key as your other applications by clicking Reuse Signing Key, as shown in Figure 21-14 . The Android guidelines suggest that you sign all your applications using the same certificate.

If you have an existing application being distributed on Google Play, it’s possible to opt-in to Google Play App Signing by uploading your existing signing certificate.
Creating a New Application Listing
With your signed APK uploaded, you must prepare your Google Play Store listing. Click the “Store listing” option on the sidebar to display the store listing options, the first of which is shown in Figure 21-15 .

Begin by providing a high-quality, descriptive title and description to make it easier for users to discover your application and make an informed choice on its suitability. Don’t engage in keyword stuffing or other SEO spam in your title or description, as doing so will likely result in your application being suspended. Refer to
play.google.com/about/storelisting-promotional/metadata/
for more details on Google Play’s metadata policy.
Within this section you can also provide video and graphic assets to be used within your application’s listing. That includes a link to a promotional video on YouTube, multiple representative screen shots for phone, tablet (7 and 10 inch), TV, and Wear devices, as well as specialized graphics used within Google Play including a high-res application icon, feature and promo graphics, a TV banner, and 360 degree stereoscopic banner for Daydream. You can find full details on the graphic assets and how they are used within Google Play at
support.google.com/googleplay/android-developer/answer/1078870
.
The application type allows you to indicate if your application is an “app” or a “game,” while the category drop-down allows you to specify which category your application should be displayed in within Google Play.
Each application must also receive a content rating, which will be used to inform consumers about the age appropriateness of your app, block or filter your content in certain territories or to specific users where legally required, and to evaluate your app’s eligibility for special developer programs.
To determine your app’s content rating, click the “Content rating” link—either on the “Store listing” page, or via the left navigation bar. This will display the content rating questionnaire, the start of which is shown in Figure 21-16 .

You must complete the questionnaire for each app, and whenever you distribute an update that changes the app content or features in a way that would affect your responses to the questionnaire.
Finally, you can supply application-specific contact details for users of your applications, as shown in Figure 21-17 .

These details will be published alongside your application’s listing in Google Play, so the e-mail and phone number provided should point to a managed support queue rather than to your personal e-mail address.
Specifying Pricing and Distribution
Click “Pricing & distribution” on the left navigation to select the countries and devices you wish to distribute to, as well as the cost (if any) to consumers who wish to use your app.
Start by determining if your app will be free or paid. Details on creating a merchant account and configuring your app for paid distribution is beyond the scope of this book; you can find details at
support.google.com/googleplay/android-developer/#topic=3452890
.
You can then select from which counties your app should be made available, including (in some cases) which carrier networks within those countries, as shown in Figure 21-18 .

The Google Play Store allows you to opt-in to a number of special programs designed to distribute your app to specific groups including “Designed for Families”—a program for apps and games designed specifically for kids and family audiences and “Google for Education.” The “Pricing & distribution” page provides details on the available programs and their requirements.
Similarly, you can submit your app for review for inclusion in special device categories, including Android Wear, Android TV, Android Auto, and Daydream. These device types require apps to adhere to specific app quality and distribution guidelines (linked to from the Store listing page) before the apps are made available for download to those devices.
Finally, you must confirm your app conforms to the Android Content Guidelines and acknowledge that your app may be subject to United States export laws.
When you have completed the “Pricing & distribution” section, be sure to click “Save Draft” button.
Publishing Your Application
When you have completed the creation of your store listing, defined the pricing and distribution, and uploaded your APK, you are ready to push your application to production and make it available to customers. This process is commonly known as release management .
Your application is ready for publishing when all the gray ticks in the left navigation of the Google Play console have turned green, as shown in Figure 21-19 .

When all issues have been resolved, navigate to “App releases” in the left navigation and select the release channel you wish to publish to. To make your application generally available, use the production channel. The Alpha and Beta channels are described in more detail in the following section.
Click the Review button to confirm that the release details are correct, and click the “Start rollout to production” button to make your app available to users.
You will later use the same process to distribute updates to your application; however, for updates you also have the ability to specify a proportion of your existing users who should receive the update—a process known as staged rollouts , which is described in more detail in the following sections.
Using the Alpha and Beta Channels
Publishing your application to production makes it available for download by any customer in a country you have selected for distribution, who’s using a supported device.
No matter how thoroughly you test your app prior to release, there’s no substitute for the testing performed by having real users download and try your application. With a potential audience in the billions, it’s good practice to use the Alpha and Beta release channels to make your application available to small, targeted groups to get early feedback and detect potential issues before making your app available to everyone.
This is particularly important because the ratings and reviews provided by your first users can have a dramatic impact on the overall success and popularity of your application. Users of Alpha or Beta releases can’t submit public reviews and are aware of, and accustomed to, potential issues in “pre-release” apps. As a result they are likely to provide you with constructive feedback to improve your app prior to general release.
As shown in Figure 21-20 , Google Play offers two pre-release channels: Alpha and Beta. There is no functional difference between them, but by convention an Alpha will be used first, and will generally be available to a smaller group than the Beta.

Either channel allows you to select between an open or closed pre-release. An open Beta (or Alpha) is visible on the Google Play Store, and is available as a download, or update, for anyone who wants to join—though you can restrict the total number of users who can enroll.
Alternatively, a closed Beta (or Alpha) isn’t visible in the Google Play Store, except to a restricted group of known users that you specify. You can define this group by e-mail addresses, or select the Alpha / Beta Testing Using Google Groups or Google+ Communities option to supply a corresponding URL; in the latter case, members of the Google Group or Google+ community will have access to the closed Beta (or Alpha). This option is a hybrid of open and closed, and while the listing won’t be visible in Google Play for all users, it’s possible to configure both Groups and Communities to allow people to join.
In all cases, you must specify a feedback channel that customers can use to provide constructive feedback during the Alpha/Beta testing period.
Once enabled and published, you’ll be provided with an opt-in link that you can share with your testers to enable them to join your testing program. Figure 21-21 shows the Manage Testers dialog for a closed Beta.

It’s good practice to run a closed Alpha with a known group of testers, followed by an open Beta to solicit feedback, prior to publishing to production. Note that if you run an open Alpha you can’t run a Beta test simultaneously.
After Alpha or Beta users follow your opt-in link, they will receive an explanation of what it means to be a tester and a link to opt-in
In addition to the link or e-mail address you provide for feedback, open Alpha or Beta tests allow your testers to provide you with private feedback through the Google Play Store.
The testing process assumes that new APKs will progress from Alpha, to Beta, and finally production; accordingly, your Alpha test APK should have the highest version code.
To join your Alpha or Beta test channel, potential users need a Google or G Suite account. Note that it may take a few hours for the link to your Alpha or Beta app to propagate across Google’s servers and become available for testers to use. The same is true for new APKs distributed through these channels.
Staged Rollouts
Alpha and Beta testing allows you to get feedback from a select group of real users prior to a production release. When you’re ready to push to production, you should consider a staged rollout—making the update available to a percentage of your existing and new users—to further minimize the chance of introducing significant bugs or crashes.
While the first production version of your application must be made available to all potential users at the same time, updates can be applied in stages, defined as a percentage of the total audience of existing and newly added users.
You can specify the percentage of users to receive the new APK in the “Manage production releases” form.
The target percentage is achieved from a random selection of new and existing users, meaning you can’t target specific users, devices, countries, or OS versions.
If you detect potential issues with a release, you can pause the rollout. While it’s not possible to revert to a previous release, if you perform a staged rollout for a new—updated—APK, it will first be offered to the users who received the previous update.
Once you’re happy with the results from a given percentage of users, you can increase the staged rollout percentage from the “Manage production releases” page. To minimize risk, it’s generally good practice to begin very small, targeting 1–2 percent of users, and gradually increasing that percentage over time—carefully monitoring feedback, analytics, and crash reports.
If your app update requires changes to the store listing, it’s good practice to update your store listing only when your release has been rolled out to 100 percent of users.
Monitoring Your Application in Production
Once your applications are published, your “All applications” page will list each application, along with the number of active users and installations, average rating and total number of ratings, the last update date, and each app’s status, as shown in Figure 21-22 .

Using the left navigation you can select the following pages to learn more about how your app is behaving in production. Each page is described in more detail within this section:
- Statistics —Provides access to a detailed breakdown of your application’s installation statistics, including a graph-based timeline of the application’s installs, ratings, and crashes.
- Android vitals —Provides technical performance details and anonymous error reports and stack traces received from users who have opted in to automatically share usage and diagnostics data.
- User acquisition —Provides a detailed breakdown of the acquisition channels used by customers installing your application from Google Play.
- User feedback —Provides rating trends and access to, and dynamic analysis of, user reviews.
Application Metrics with Google Play Statistics
The Google Play Statistics page allows you to generate reports that offer a detailed breakdown of your application’s installation statistics, including daily updated values for installs, uninstalls, and upgrades, average and cumulative average ratings, and the number of crashes and freezes.
These metrics can be measured across a number of dimensions to provide analytical insight into your users, including breakdowns based on:
- The app version
- Android platform release
- Hardware device
- Country and language
- Carrier
These reports can be downloaded or displayed as a timeline graph, as shown in Figure 21-23 .

This information can be extremely useful for deciding where to allocate your resources, which versions of the Android platform you want to support, and in which countries your application is underperforming.
Monitoring Your Application with Android Vitals
The Android Vitals page provides insights into app technical performance in terms of stability, battery, and render times, and anonymous error logging and stack traces collected from Android devices whose users have opted in to automatically share usage and diagnostics data.
The Overview page allows you to view time series graphs for daily rates of freezes, crashes, slow rendering, frozen frames, stuck wake locks, and excessive wakeups. These metrics can be measured across app version, device, or Android OS version.
The “ANRs & crashes” page shows you a summary of ANR (Application Not Responding) freezes and crashes, as shown in Figure 21-24 .

You can drill down into freezes/crashes to get further details on each error, as shown in Figure 21-25 . Each error is described in terms of the exception at the head of the stack, along with the class that threw it and the number/frequency of reports that match those criteria.

The same page displays a line graph displaying the frequency of reports for this error between a specified date range, along with the distribution of devices on which the errors occurred, and the full stack trace for each error.
These error reports are invaluable for debugging your application in the wild. With hundreds of different Android devices being used in dozens of countries and languages, it’s impossible to test every variation. These error reports make it possible for you to determine which edge cases you’ve missed and rectify them as quickly as possible.
User Acquisition Reports
The “User acquisition” page allows you to generate reports that provide insight into how users find and interact with your Google Play Store listing. By clicking the Retained Installers tab, you can see the unique users who visited your app’s store listing, then installed your app and kept your app installed for at least 30 days.
If your application offers in-app purchases or subscriptions, you can select the Buyers tab to generate reports on how your acquisition channels perform in terms of converting users to buyers and repeat buyers, split by country.
It’s possible to compare buyer data between acquisition channels or between countries, to investigate which channels/countries attract the highest value users.
Analyzing User Feedback
The User Feedback page allows you to analyze your app’s ratings and reviews.
The Ratings page displays your current average rating, the total number of ratings (and reviews), and a histogram of user ratings by number of stars given, as shown in Figure 21-26 .

A time series graph displays the trend in your app on a daily, weekly, or monthly basis either per period or cumulatively. You can also drill-down across a number of dimensions, including breakdowns based on:
- The app version
- Android platform release
- Hardware device
- Country and language
- Carrier
The Reviews page provides direct access to all user-provided reviews and allows you to compose replies. Each review includes contextual information about the device and user, including:
- Application version code
- Application version name
- Hardware device
- Hardware device manufacturer
- Device Type (phone, tablet, and so on)
- Language
- CPU make and model
- Native platform
- Device RAM
- Device screen size and density
- OpenGL ES version
- Android OS version.
You can search for specific text, or filter reviews based on the preceding criteria.
The Reviews Analysis page provides analytical insight into reader comments. The Updated Ratings section allows you to track ratings and reviews that have been changed, making it possible to see the impact of your replies or app updates.
The Benchmarks section shows your app’s ratings for a pre-determined set of topics for apps within the same category on the Google Play Store, and allows you to compare your ratings with similar apps in the same category.
Finally, the Topics section shows ratings for a dynamic set of words mentioned in your app’s reviews in English, Spanish, and Japanese.
Note that while direct feedback from users is invaluable, such feedback can be unreliable and contradictory. It’s good practice to also use app analytics to reconcile user comments with statistical analysis.
AN INTRODUCTION TO MONETIZING APPLICATIONS
As an open ecosystem, Android enables you to monetize your applications using whatever mechanism you choose. If you choose to distribute and monetize your applications using Google Play, four options typically are available:
- Paid applications —Charge users an upfront fee before they download and install your application.
- Free applications with In-App Billing (IAB) —Make the download and installation of the application free, but charge within the application for virtual goods, upgrades, and other value-adds.
- Free applications with Subscriptions —Make the download and installation of the application free, but charge within the application for a subscription to virtual goods, content, and other value-adds.
- Advertising-supported applications —Make the download and installation of the application free, and monetize it by displaying advertising.
If you choose to charge for your applications on Google Play, either through upfront charges or IAB/subscriptions, the revenue is split between you and Google Play in the form of a transaction fee. At the time of writing this book, that revenue split is set at 70 percent for the developer.
To use either approach, you must first create a Google Checkout Merchant Account—you can do this from your Android publisher account. Your application listings will then include the option to set a price for the application and the items sold using IAB.
In each case you are the application distributor and merchant of record, so you are responsible for any legal or taxation obligations associated with the sale of your application, subject to the terms described in the DDA.
You can also monetize your application using in-app advertising. The specific process required to set up advertising within your application will vary depending on the ads provider you choose.
It’s beyond the scope of this book to describe the setup process for any particular advertising API; however, the general process could be described as follows:
- Create a publisher account.
- Download and install the associated ads SDK.
- Update your Fragment or Activity layouts to include an ad banner.
It’s important to ensure that any ads included within your application are as unobtrusive as possible and don’t detract significantly from the user experience of your application. It’s also important to ensure that your user interaction model doesn’t encourage accidental clicks on the ad banner.
In many cases, developers have chosen to offer a paid alternative (either using upfront payment or IAB) to allow users to eliminate ad banners from their applications.
APPLICATION MARKETING, PROMOTION, AND DISTRIBUTION STRATEGIES
The first step in effectively marketing and promoting your application is ensuring that you provide the full set of high-quality assets for your Google Play Store listing.
Several promotional opportunities are available within Google Play; however, with more than 2.7 million other applications available, it’s important that you consider alternative avenues for marketing and promotion rather than simply launching your application and crossing your fingers.
While your marketing and promotion strategies will vary widely depending on your goals and budget, the following list details some of the most effective techniques to consider:
- Offline cross promotion —If you have a significant offline presence (such as stores or branches), or a large media presence (such as within newspapers, magazines, or on TV), cross promoting your application through those channels can be a particularly effective way to increase awareness and help to ensure users trust the download. Traditional advertising techniques such as TV and newspaper advertisements can be extremely effective in raising awareness of your application.
- Online cross promotion —If you have a significant web presence, promoting your application through direct links to Google Play can be an effective way to drive downloads. If your application provides a better user experience than your mobile website, you can detect browser visitors from Android devices and direct them to Google Play to download your native app.
- Third-party promotion —Distributing a promotional video on YouTube and leveraging social networks, blogs, press releases, and online review sites can help provide positive word of mouth.
- Online advertising —Online advertising using in-app ad networks (such as AdMob) or traditional search-based advertising (such as Google AdWords) can drive significant impressions and downloads for your application.
Application Launch Strategies
Ratings and reviews can have a significant impact on your application’s ranking in category lists and within Google Play search results. As a result, it can be difficult to recover from a poor launch. The following list describes some of the strategies you can use to ensure a successful launch:
- Use closed Alphas, open Betas, and Staged Rollouts —Make your application available to small, targeted groups to get early feedback and detect potential issues before making your app available to everyone. Users of Alpha or Beta releases can’t submit public reviews and are aware of, and accustomed to, potential issues in “pre-release” apps. As a result they are likely to provide you with constructive feedback to improve your app prior to general release.
- Iterate on features not quality —A poorly implemented but feature-rich application will receive worse reviews than a well-polished application that doesn’t do everything. If you are using an agile approach of releasing early and often, ensure each release is of the same high quality, adding new features as part of each release. Similarly, each release should be more polished and stable than the last.
- Create high-quality Google Play assets —The first impression your application makes is through its appearance in Google Play. Maximize the likelihood of that impression resulting in an installation by creating assets that represent the quality of your application.
- Be honest and descriptive —Disappointed users who find your application is not as it was described are likely to uninstall it, rate it poorly, and leave negative comments.
Internationalization
At the time of writing, Google Play was available in more than 190 countries. While the exact breakdown varies by application category, in most cases more than 50 percent of application installations are downloaded from countries outside the United States on devices whose language is set to non-English.
Japan and South Korea represent the two largest consumers of applications outside the United States, while on a per-capita basis South Korea, Taiwan, and Hong Kong represent the most voracious consumers of Android applications.
Externalizing all your application’s string (and where appropriate, image) resources, as described in Chapter 4 , makes it easy to localize your applications by providing alternative translated resources.
In addition to the application itself, Google Play provides support for adding local language titles and descriptions for your applications, as shown in Figure 21-27 .

While nonnative speakers may be able to use your applications, there is a very good chance that they’ll search and browse Google Play using their native language. To maximize the discoverability of your application, it’s good practice to invest in creating translations for at least the title and description of your application.
USING FIREBASE TO MONITOR YOUR APPLICATION
Google’s Firebase SDK includes a variety of tools that can help you monitor your application after launch to ensure you’re providing the best possible user experience, including:
- Firebase Analytics —Analyze users and user behavior to better understand who is using your application and how they are using it.
- Firebase Performance Monitoring —Provides tools to monitor app performance and diagnose performance issues.
- Firebase Crash Reporting —Allows you to receive detailed reports from app crashes, and to use the Firebase Crash dashboard to monitor your app’s overall health.
- Firebase Test Lab —Provides physical and virtual devices you can use to run tests that simulate actual usage environments.
The Firebase SDK interacts with the Google Play services application, and requires the Google Play services SDK to be installed. You can find more information on Google Play services, and how to install the SDK, in Chapter 15 , “Location, Contextual Awareness, and Mapping.”
Adding Firebase to Your Application
To add any of the Firebase monitoring tools described in this section, you must first install the Firebase SDK, which requires Android 4.0 Ice Cream Sandwich (API Level 14) and Google Play services version 10.2.6 or higher.
Android Studio includes a Firebase Assistant to simplify adding Firebase components to your app. To use it, select Tools
![]() Firebase to display the assistant window.
Firebase to display the assistant window.
Selecting any Firebase tool you wish to add to your application, such as Analytics, will display a wizard that allows you to “Connect to Firebase.”
If this is the first time you’ve added a Firebase component to an app in Android Studio, you’ll be prompted to select a Google account to connect to, and a series of permissions to accept.
Once you’re signed into Firebase, return to Android Studio and you’ll see a dialog that allows you to create a new Firebase project, or select an existing one to use for your app.
With your app connected, you can return to the wizard. The next step adds the relevant Firebase tool to your project, by adding Firebase Gradle build script dependency to your project-level
build.gradle
file, adding the Firebase plug-in for Gradle, and a dependency for the Firebase tool to your
build.gradle
file.
Using Firebase Analytics
Mobile application analytics packages, such as Firebase Analytics, are effective tools for better understanding who is using your application and how they are using it. Understanding this information can help you make objective decisions on where to focus your development resources.
While the statistics provided by the Google Play Console (described earlier in this chapter) offer valuable insight into your users’ language, country, and handsets, using detailed analytics can provide a much richer source of information, from which you can discover bugs, prioritize your feature list, and decide where best to allocate your development resources.
If you’re using the Firebase wizard in Android Studio, following the steps described in the previous section will add Firebase to your application and apply the necessary changes to you app module Gradle build file. Note that Firebase Analytics requires only the Firebase-core library as a dependency:
compile 'com.google.firebase:firebase-core:10.0.1'
To start tracking app analytics, open the launch Activity and declare the
com.google.firebase.analytics.FirebaseAnalytics
object as a member variable, and initialize it within the
onCreate
handler:
private FirebaseAnalytics mFirebaseAnalytics;@Overrideprotected void onCreate(Bundle savedInstanceState) {super.onCreate(savedInstanceState);// Obtain the FirebaseAnalytics instance.mFirebaseAnalytics = FirebaseAnalytics.getInstance(this);}
Once you’ve added and initialized the Firebase SDK, you will automatically begin receiving a number of user properties and events.
The user properties available include your users’ age, gender, country, language, and interests; the device category, brand, model, and OS version; the store from which the app was installed; the current app version; if the user is new or established; and when the user first opened the app.
The automatically recorded events include the first time the app is launched after installation, the completion of any in-app purchases, user engagement, session starts, app updates, app removal, OS updates, exceptions, and app data resets.
You can learn more about the automatically collected user properties and events here:
support.google.com/firebase/answer/6317485
.
You can also use the
FirebaseAnalytics
instance to log predefined or custom events using the
logEvent
method. Pass in the type of event that occurred using a static constant from the
FirebaseAnalytics.Event
class, or a custom event, and a Bundle that uses
FirebaseAnalytics.Param
constants to provide the relevant parameters for that type:
Bundle bundle = new Bundle();bundle.putString(FirebaseAnalytics.Param.SEARCH_TERM, searchTermString);mFirebaseAnalytics.logEvent(FirebaseAnalytics.Event.SEARCH, bundle);
Standard event types include joining a group, logging in, presenting an offer, searching, selecting content, sharing, signing up, spending virtual currency, and beginning and ending a tutorial.
A full list of the predefined events appropriate for all apps, and links to event types for apps in the retail/e-commerce; jobs, education, local deals, and real estate; travel; and games categories are available at
support.google.com/firebase/answer/6317498?ref_topic=6317484
.
You can see the corresponding predefined parameters at
firebase.google.com/docs/reference/android/com/google/firebase/analytics/FirebaseAnalytics.Param
.
Alternatively, you can generate custom events with custom parameters:
Bundle bundle = new Bundle();bundle.putString(MISSILE_NAME, name);bundle.putInt(MISSILE_RANGE, range);mFirebaseAnalytics.logEvent(LAUNCHED_MISSILE, bundle);
Integrating analytics into your app is critical to understanding the way your application is being used, and will help you to optimize your workflows in the same way you would a website. As such, it can be useful to log events that move users from one Activity to another.
Taken one step further, you can record any action—which options were changed, which menu items or Action Bar actions were selected, which popup menus were displayed, if a Widget was added, and which buttons were pressed. Using this information, you can determine exactly how your application is being used, allowing you to better understand how well the assumptions you made during design match actual usage.
When building games, you can use the same process to gain insight into players’ progress though the game. You can track how far people progress before quitting, identify levels that are more difficult (or easier) than you expected, and then modify your game accordingly.
Perhaps most usefully, if your app has a commerce component—such as purchasing goods or booking hotels—you can track the paths that led to successful purchases and bookings.
To view and analyze the analytics recorded from your application, navigate to the Firebase console at
console.firebase.google.com
. Select your app, and then choose the Analytics option from the left menu to be presented with the Analytics dashboard shown in part in
Figure 21-28
.

If you upgrade your Firebase account to the paid “Blaze” plan it’s possible to link your Firebase analytics to Google BigQuery, a serverless, petabyte-scale data warehousing and analytics engine. Using BigQuery you can use SQL queries to access your raw, unsampled event data along with all of your parameters and user properties.
Once your Firebase app is linked to a BigQuery project, your event data will be exported to the selected BigQuery dataset each day. You can then query, export, or join your analytics dataset with data from external sources to perform custom analysis.
To join Firebase Analytics to BigQuery, click the cog icon from the left navigation of the Firebase console and click Project Settings. Then click the Account Linking tab followed by the Upgrade Project and Link on the BigQuery card, and then follow the instructions to create a BigQuery dataset.
BigQuery provides 10Gb of free storage and 1Tb of free queries each month, and doesn’t charge for ingesting data. You can find more information on BigQuery and its pricing model at
cloud.google.com/bigquery/pricing
.
Firebase Performance Monitoring
Firebase Performance Monitoring (FPM) enables you to gain insight into the performance characteristics of your apps. Performance issues are a significant factor in the user experience, but to fix performance issues it’s first necessary to understand where and when those issues arise for real users in real-world usage environments.
Firebase Performance Monitoring works by reporting traces —reports of performance data captured between two points in time. This includes a number of automatic traces including app startup time, background time, and foreground time, as well as any custom traces you define.
At the time of writing, Firebase Performance Monitoring is in Beta, and is not available within the Android Studio Firebase assistant. Use the technique described in the previous section to connect your app to Firebase, and then use the following steps to add Performance Monitoring to your app.
Within the project-level Gradle build file, ensure
jcenter()
is included in the
buildscript
repositories, and add the
com.google.firebase:firebase-plugins
classpath to the
buildscript
dependencies:
buildscript {repositories {google()jcenter()}dependencies {classpath 'com.android.tools.build:gradle:2.3.3'classpath 'com.google.gms:google-services:3.0.0'classpath ('com.google.firebase:firebase-plugins:1.1.5') {exclude group: 'com.google.guava', module: 'guava-jdk5'}}}
Open the app-level Gradle build file and apply the
com.google.firebase.firebase-perf
plug-in:
apply plugin: 'com.android.application'apply plugin: 'com.google.firebase.firebase-perf'
Finally, add the
com.google.firebase:firebase-perf
dependency:
dependencies {implementation 'com.google.firebase:firebase-core:11.8.0'implementation 'com.google.firebase:firebase-perf:11.8.0'}
Once installed, Firebase Performance Monitoring automatically collects traces that measure:
- Application startup —The time between when the user opens the app and when the app is responsive.
-
Time in foreground
—The time between when the first foreground Activity calls
onResumeuntil the last foreground Activity callsonStop. -
Time in background
—The time between the last foreground Activity calls
onStopuntil the next Activity to reach the foreground callsonResume.
Firebase Performance Metrics will also produce a report on all HTTP/S network requests that captures the response time, payload size, and success rate of each request.
In addition to the automated tracing and monitoring, it’s also possible to create your own custom traces, allowing you to measure performance metrics in specific areas of your app.
The simplest way to trace the performance of a given method is to use the
@AddTrace
annotation, providing a string to identify the resulting trace:
@AddTrace(name = "onReticulateSplinesTrace", enabled = true)protected void reticulateSplines() {// TODO Method implementation}
This will result in a trace that begins when the method is called, and stops when the method completes.
Alternatively, you can create a custom trace, which allows you to specify traces that include counters, and which span across multiple methods. You can have multiple custom traces in your app, potentially running concurrently.
To create a custom trace, create a new
Trace
object by calling the static
getInstance
method on the
FirebasePerformance
class to return the
FirebasePerformance
instance, then call
newTrace
—specifying a string identifier—to create a new
Trace
object:
Trace splineTrace =FirebasePerformance.getInstance().newTrace("spline_trace");
To begin the trace, call
start
on the
Trace
object:
splineTrace.start();
While the trace is running, you can add counters for performance-related events using the
incrementCounter
method, specifying a string identifier:
if (cacheExpired) {splineTrace.incrementCounter("item_cache_expired");} else {splineTrace.incrementCounter("item_cache_hit");}
When the process you’re tracing completes, stop the trace by calling its
stop
method:
splineTrace.stop();
To view the results of Firebase Performance Monitoring, navigate to your app within the Firebase Developer Console, and click the Performance option from the Stability section within the left navigation. The performance page shows each of the tracked performance metrics, all of which can be broken down by dimensions including app version, country, device, and OS version.
INDEX
- Accessibility APIs, 168 –169
- ACTION_DELETE Activity Intent, 184
- ACTION_DIAL Activity Intent, 185
- ACTION_EDIT Activity Intent, 185
- ACTION_INSERT Activity Intent, 185
- ACTION_INSTALL_TTS_DATA, 503
- ACTION_PICK Activity Intent, 185
- ACTION_SEARCH Activity Intent, 185
- ACTION_SEND Activity Intent, 185
- ACTION_SENDTO Activity Intent, 185
- ACTION_VIEW Activity Intent, 185
- ACTION_WEB_SEARCH Activity Intent, 185
-
Activities,
30
,
58
,
61
,
64
–71,
246
- ACTION_INSTALL_TTS_DATA, 503
- creating, 62 –63
- Earthquake Monitor settings, 261 –267
- Fragments, callback interfaces, 85 –86
- Intents and
- launching
- layouts, Fragments and, 82 –83
- lifetimes, 66 –67
- LRU list, 64 –65
- manifest file, 100
- Maps API, 585
- menus, 468 –469
- results, 181 –184
- skeleton code, 62
- stacks, 64 –65
- starting, explicitly, 179
- states
- sub-Activities
-
toolbars,
472
–473
- scrolling, 473 –476
- transactions, shared, 451 –452
- UIs
- widget configuration, 756 –757
- Activity class, 30 , 58
- Activity Intents
-
Activity Manager,
11
- responsiveness and, 44
- Activity Recognition APIs, 620 , 662 –664
- ActivityCompat class, 340
- Adapter, 146 –149
- Adapter View class, 763 –764
- ADB (Android Debug Bridge), 48 , 54
- ADT (Android Development Tools), 17
- AIDL (Android Interface Definition Language), 427
- Alarm Manager, 378
- alarms, 422 –423
- Amazon Web Services, 243
- Android
- Android Media Store, 342 –344
- Android Project Wizard, 16
- Android Run Time, 15
- Android SDK. See SDK (software development kit)
-
Android Studio
- ADB (Android Debug Bridge), 54
- Android Project Wizard, 16
- Android Virtual Device manager, 16
- APK Analyzer, 48 , 54 –55
- autocomplete, 51
- AVD Manager, 48
- build performance, 49
- Canary, 20
- coding, 16
- console outputs, 17
- debugging, 17
- editors, 16
- Emulator, 14 , 17 , 51 –52
- Espresso, 56
- frameworks, 16
- GitHub, 16
- Gradle, 48 , 56
- IDE, 16
- installation
- Instant Run, 50
- Lint, 48 , 55
- Live Templates, 51
- logging, 17
- memory requirements, 16
- Monkey, 55
- Monkey Runner, 55
- OpenJDK, 14 , 17 –18
- operating systems supported, 15 –16
- postfix code completion, 51
- Profiler, 14 , 17 , 48 , 52 –53
- project building automation, 16
- SDK Manager, 48
- searches, 50
- statistic analysis, 16
- Subversion, 16
- testing, 16
- updates, 19 –20
- Vector Asset Studio, 48
- version control, 16
- Android Vitals, 850 –851
- animations
- AnimatorInflator.loadAnimator method, 512
- AnimatorSet class, 513
- ANR dialog box, 44 –45
- anti-aliasing, 520
- API keys, 833
- APIs (application programming interfaces), 15
-
APK (Android Package Files),
830
–831
- uploading new, 838 –840
- APK Analyzer, 48 , 54 –55
- app bar, 452 –455
- App Shortcuts, 781 –782
- App Widgets, 744
- AppCompat API, 464 –465
- AppCompatActivity class, 30 , 63 –64
- Application class, 61
- application layer, software stack, 9
-
applications
- Activities, 58
- architecture, 11
- Broadcast Receivers, 59
- Content Providers, 59
- debugging, 29 –30
- development, 1 –2
- distribution
- Earthquake Viewer, See Earthquake Viewer
- framework, 4
- immersive, 508 –509
- Intents, 58 –59
- internationalization, 855 –856
- Internet, native, 212 –213
- launch strategies, 854 –855
- life cycle, 59 –61
- lifecycle, processes, 60 –61
- manifest file, 99 –100
- marketing, 854
- monetizing, 853 –854
- Notifications, 59
- preinstalled, 4 –5
- promotion, 854
-
publishing,
845
–848
- staged rollouts, 848
- releasing
- running, 29 –30
- Services, 58
- AppWidgetProvider class, 748 –749
- Architecture Components, Work Manager, 385
-
ART (Android Run Time),
4
,
7
–8,
10
–11,
59
–61
- NDK (native development kit), 10
- Async Tasks, 379 –380
- asynchronous queries, Loaders, 333 –336
- Asynchrous Tasks, 215 –216
-
AsyncTask class,
215
–216,
379
–383
- executeOnExecutor method, 382
- audio, 666 –667. See also Media Player
- authorities tag, 321
- Auto Backup, 254 –256
- autocomplete, 51
- AVD (Android Virtual Device) Manager, 16 , 48 , 51
-
AVDs (Android Virtual Devices),
15
- creating, 24 –26
- Awareness API, 542 , 609 –610
- B
- back stack, Fragments and, 83 –84
- background tasks, 378
- background Threads, 379
- backward compatibility, 22 –23, 88 –89, 795
- bandwidth, 213
-
barometer,
654
–655
- weather station, 655 –659
- battery, 206 –207
- Beam, 738 –739
- Beam APIs, 713
- Behaviors, Views, Coordinator Layout, 473 –474
- binding, runtime, 179 –180
- BLE (Bluetooth Low Energy), 726
- Bluetooth, 713
- Bluetooth Adapter
- Bluetooth LE, 714
- Bluetooth Server Socket, 720 –722
- Bluetooth stack, 713 –714
- BluetoothAdapter class, 714 –716
- body sensors, 623 , 659 –662
- bottom navigation bar, 482 –485
- broadcast Intents, 178
- Broadcast Receivers, 178 , 202 –203. See also Receivers
- builds, performance, 49
-
Bundles,
246
,
247
- instance-state Bundles, 246
- Button control, 143
- C
- Calendar
- Call Log, 341 –342
- callbacks, Fragments, 85 –86
- camera
- CameraManager, 700
- CancellationSignal parameter, 322 –323
- Canvas
- Canvas class, 514 –515
- cards, display, 456 –460
- Cast, 682 –686
- Cast Application Framework, 682 –684
- CDD (Compatibility Definition Document), 4
- CheckBox control, 144
- checkLocationSettings method, 560 –561
- CHECK_VOICE_DATA_PASS, 503
-
classes
- Activity, 30 , 58
- ActivityCompat, 340
- AnimatorSet, 513
- AppCompatActivity, 30 , 63 –64
- Application, 61
- AppWidgetProvider, 748 –749
- AsyncTask, 215 –216
- BluetoothAdapter class, 714 –716
- CameraCharacteristics, 700 –701
- Canvas, 514 –515
- ClearableEditText, 160
- ClipData, 539
- Criteria, 573
- Cursor, 300
- Environment, 270 –271
- Fragment, 73 –74
- Geocoder, 580 –581
- GoogleApiAvailability, 546
- Handler, 379
- HandlerThread, 379
- JobService, 392
- LayerDrawable, 537
- layouts, 132
- LocationManager, 572 –573
- MaskFilter, 518
- MediaPlayer, 667 –668
- Message, 384
- NavigationView, 486 –487
- Object Animator, 510 –513
- PreferenceFragment, 256 –257
- R, 119 –120
- RecognizerIntent, 505 –506
- Resources, 119 –120
- RotateDrawable, 536
- ScaleDrawable, 536
- Sensor, 620 –621
- SmsManager, 809 –810
- SQLiteQueryBuilder, 322 –323
- SurfaceView, 162
- TextToSpeech.Engine, 503 –504
- ThreadPolicy, 797
- TimeInterpolator, 512
- TypeEvaluator, 511
- View, 131
- ViewGroup, 131
- VmPolicy, 797
- ClearableEditText class, 160
- clipboard
- ClipData class, 539
- Clock, 424
- cloud computing, Google Cloud Platform, 243
- Cloud Messaging (Firebase), 378
- code
- Collection View Widgets
-
color,
111
- material design and, 447 –448
- Color Drawables, 439
- Color Filters, 518
- communication software, manifest file, 98
-
Compass View,
521
–530
- device orientation and, 650 –654
- compatibility, backward-compatibility, 795
- composite Drawables, 536 –539
-
compound controls,
159
–161
- as layout, 161 –162
- console outputs, 17
- Constraint Layouts, 138 –139
- ConstraintLayout class, 133
- Contacts, 344 –348
- content display, cards, 456 –460
-
Content Providers,
11
,
59
,
318
- authorities, 321
- Calendar, 351 –354
- Call Log, 341 –342
- Contacts, 344 –351
- Content Resolvers and, queries, 330 –336
- creating, 319 –320
- databases, creating, 320 –321
- deleting content, 337
- file access, 338 –339
- file sharing, 327 –328
- inserting content, 336 –337
- Media Store, 342 –344
- permissions
- queries
- reading files, 338 –339
- reasons to use, 318
- registering, 321
- transactions, 325 –327
- updating content, 337 –338
- URI address, publishing, 321 –322
- values, extracting, 332
- writing files, 338 –339
- Content Resolver, 322 –323
- controls, 131
- Coordinator Layout, Behaviors and Views, 473 –474
- copying, to clipboard, 539
- Criteria class, 573
- CTS (Compatibility Test Suite), 4
- Cursor class, 300
- D
- data authority, 188
- Data Binding, 150
- data connectivity, changes, 206 –207
- databases
- datasets, transitions, 148 –149
- debugging, 17
- deceleration, 640 –642
- delete method, 337
- density-independent design, 130 –131
- design, 130
- development
- device hardware UI, manifest file, 97
- device management software, manifest file, 98
- device movement sensors, 622 –623
- device orientation, 637 –639
- device-independent UIs, layouts, 136 –139
- devices
- Dialogs, initiation, 497 –498
- dimensions, 111 –112
- directories, public, scoped directory access, 270 –274
- discovery, Bluetooth devices
- display
- distributing applications
- divideMessage method, 813
- Do Not Disturb, 410
- doInBackground event handler, 381
- Download Manager
- downloads, battery saving and, 241 –242
- dp (density-independent pixels), 131
- draw method, 514 –515
- Draw9patch, 49
- Drawables, 112 –113, 434
- drawArc method, 514
- drawARGB method, 514
- drawBitmap method, 514
- drawBitmapMesh method, 514
- drawCircle method, 514
- drawColor method, 514
- Drawer Layout, 487 –488
-
drawing
- best practices, 520 –521
- Canvas class, 514 –515
- Color Filters, 518
- Compass View, 521 –530
- drawLine method, 514
- drawOval method, 514
- drawPaint method, 515
- drawPath method, 515
- drawPicture method, 515
- drawRect method, 515
- drawRGB method, 514
- drawRoundRect method, 515
- drawText method, 515
- drawTextOnPath method, 515
- drawVertices method, 515
- MaskFilter class, 518
- Path Effects, 519
- shaders, 516
- transfer mode, 519
- translucency, 515 –516
- Dx, 49
- dynamic sensors, 624 –625
- E
-
Earthquake Viewer,
87
–94
- app bar, 477 –470
- Collection View Widgets, 770 –777
- Data Binding, 153 –155
- data persistence, Room, 294 –298
- Internet connection, 220 –227
- Job Dispatcher, 396 –400
- layout, 149 –150
- mapping, 605 –609
- material design and, 455 –461
- Notification Manager, 414 –417
- Search View, 366 –376
- settings, Activities, 261 –267
- tabs, 492 –496
- widgets, creating, 757 –763
- Eclipse, ADT (Android Development Tools), 17
- editors, 16
- EditText control, 143
- emergency responder SMS example, 814 –824
-
Emulator,
8
,
14
,
17
,
51
–52
- location-based functionality, 548 –549
- Environment class, 270 –271
- Environmental Sensors, 621 –622
- Espresso, 56
- EULA (End User License Agreement), 827
- evaluate method, 511
- event handlers
- exercise sensors, 623
- EXIF (Exchangeable Image File Format), 706
- ExoPlayer, video playback, 672 –674
- external storage, application specific, 268 –270
- F
-
FABs (Floating Action Buttons),
434
- Earthquake Viewer, 460 –461
- FCM (Firebase Cloud Messaging)
- File Provider
- file-management tools, 267 –268
- files
- filters
- fingerprint, manifest file, 97
- Fingerprint Manager, 792 –793
- Firebase, 9
- Firebase Test Lab, 16
- folders
- foreground dispatch system, NFC and, 736 –738
- foreground services, audio, 691 –692
- form factors, design and, 40 –41
- FPM (Firebase Performance Monitoring), 860 –862
- Fragment API, 58 , 247
- Fragment class, 73 –74
- Fragment Manager, 11
- Fragment Pager Adapter, 480 –481
- Fragments, 73 , 246
- frame animations, 114 , 118
- FrameLayout class, 133
- functions, Cursor class, 300
- Fused Location, 571
- G
- gamepad, manifest file, 97
- GATT (Generic Attribute Profiles), 727
- GCM (Google Cloud Messaging), 418
- Geocoder, 580 –581
- Geofencing API, 560 , 567 –571
- getDefaultAdapter, 714 –715
- getDefaultSensor method, 623 –624
- getDynamicSensor, 625
- getItemAt method, 540
- getLastKnownLocation, 574 –575
- getLastLocation method, 549 –550
- getPrimaryClipDescription method, 539
- getRotationMatrixFromVector method, 646 –647
- getSettingsClient method, 560 –561
- getSystemService, 620
- getType method, 324
- GForceMeter, 642 –645
- GitHub, sample projects, 34
- Google Cloud Platform Compute services, 243
- Google Cloud Platform Storage and BigQuery, 243
- Google Machine Learning APIs, 243
- Google Maps API, 542
- Google Play, 9
- GoogleApiAvailability class, 546
- Gradle, 48 , 56
- graphics, scalable
- gyroscope, orientation and, 647 –649
- H
- HAL (Hardware Abstraction Layer), 9 , 10
- Handler class, 379
-
HandlerThread class,
379
- Looper class, 383
- hardware
- Hardware sensors, 621
- HCI (human computer interaction), 130
- headless Fragments, 251 –252
- heart rate monitor, 661 –662
- Hello World
- helper classes, SQLite, 300
- home screen, Widgets, 744 –745
- Hprof-conv, 49
-
hyperlinks,
198
- Linkify class, 198 –200
- I
-
IDE (integrated development environment),
14
- Android Studio, 16
- ImageButton control, 143
- ImageView control, 143
- immersive applications, 508 –509
- implicit Intents, runtime binding and, 179 –180
- Import Sample Wizard, 34
- inflate method, 160 –161
- infrared, manifest file, 97
- insert method, 336 –337
- installation, Android Studio
- instance-state Bundles, 246
- Instant Run, 50
- IntelliJ IDEA, 16
- Intent Filters
- Intent Receivers, 187
- Intent resolution, 179 , 187 –188
-
Intents,
11
,
58
–59
- Activities, launching, 178 –185
- Activity Intents
- Broadcast Intents, 178 , 200 –201
- Broadcast Receivers, 202 –203
- device state changes, 205 –207
- implicit, runtime binding and, 179 –180
- manifest Receivers, 202 , 204 –205
- Pending Intents, 208 –210
- pictures, 697 –699
- resolving, 180 –181
- telephony
- uses, 178
- video recording, 707
- Intents API
- interactive controls
- internal storage, application specific, 268
- internationalization, 855 –856
- Internet resources
- Internet services, 242
- interruptions, 496
- isGooglePlayServicesAvailable method, 546
- L
- L2CAP (Logical Link Control and Adaption Protocol), 720
- languages, resources, 122 –126
- latency, design and, 41 –42
- launch strategies, 855
- Layer Drawables, 537
- Layout Manager
-
layouts
- attributes, 134
- classes, 132
- in code, 33
- compound controls as, 161 –162
- Constraint, 138 –139
- Data Binding and, 150
- defining, 134 –135
- device-independent UIs, 136 –139
- dimensions, 111 –112
- Earthquake Viewer, 149 –150
- Linear, 136 –137
- Lint tool and, 142 –143
- nesting, 140 –141
- optimizing, 139 –143
- redundant, 140 –141
- Relative, 137
- resources, 121
- UIs (user interfaces), 113 –114
- views, number of, 141 –142
- Views and, 132
- Widgets, 745 –746
- LBS (location-based services), 542
- Level List Drawables, 538 –539
- libraries
- linear acceleration, 639
- Linear Layouts, 136 –137
- LinearLayout class, 133 , 136 –137
- Linkify, 198
-
Lint,
48
,
55
- layouts, 142 –143
- Linux
-
Live Data,
216
,
249
- queries, result change monitoring, 292 –294
- Live Templates, 51
- Live Wallpaper, 777
- Loaders/Loader Manager
- Local Broadcast Manager, 207 –208
- local files, 246
- location, manifest file, 98
-
Location Manager,
571
,
572
- location changes, 575 –577
- Location Providers, 571 , 572
- Location Services, 542
- LocationManager class, 572 –573
- Logcat, 49
- logging, 17
- LRU (least-recently used) list, 71 –73
- M
- MacOS, Android Studio, installation, 17
- magnetometer, orientation and, 647 –649
- MainActivity.java file, 30
- manifest file, 96 –97
- Maps API
- MaskFilter class, 518
- Match Filter, 200
- material design, 446
-
Media Browser,
688
–690
- service lifecycle, 690 –691
- Media Controller, 681
- Media Player, 667 –668
- Media Recorder, 695
- Media Router APIs, Cast, 682 –686
- Media Session APIs, 666
- media software, manifest file, 98
- Media Store, 342 –344
- Media Style Notifications, 666 , 693 –695
- MediaButtonReceiver, 694 –695
- MediaPlayer class, 667 –668
- memory
- menus
- Message class, 384
- metadata, manifest file, 96 –100
-
methods
- AnimatorInflator.loadAnimator, 512
- checkLocationSettings, 560 –561
- delete, 337
- divideMessage, 813
- draw, 514 –515
- drawArc, 514
- drawARGB, 514
- drawBitmap, 514
- drawBitmapMesh, 514
- drawCircle, 514
- drawColor, 514
- drawLine, 514
- drawOval, 514
- drawPaint, 515
- drawPath, 515
- drawPicture, 515
- drawRect, 515
- drawRGB, 514
- drawRoundRect, 515
- drawText, 515
- drawTextOnPath, 515
- drawVertices, 515
- evaluate, 511
- executeOnExecutor, 382
- getDefaultSensor, 623 –624
- getItemAt, 540
- getLastLocation, 549 –550
- getPrimaryClipDescription, 539
- getSettingsClient check, 560 –561
- getType, 324
- inflate, 160 –161
- insert, 336 –337
- isGooglePlayServicesAvailable, 546
- notifyChange, 325 –327
- ofObject, 511
- onCrerate, 31 –32, 320 –321
- onDraw, 164 –165
- OnKeyListener, 535
- onMeasure, 165 –166
- onStartJob, 392
- onStopJob, 392
- OnSuccessListener, 550
- openFileHelper, 327 –328
- requestLocationUpdates, 555 –560
- requestPermissions, 547 –548
- sendMultipartTextMessage, 813
- setAudioSource, 696
- setDuration, 511
- setInterpolator, 512
- setLanguage, 504
- setPitch, 504
- setRepeatCount, 511
- setRepeatMode, 511
- setSpeechRate, 504
- setSystemVisibility, 508 –509
- speak, 504
- startActivity, 179
- startActivityForResult, 182
- update, 337 –338
- metrics, Google Play Store, 849 –850
- MIDlets (Java), 3
- MIME types, Content Provider, 324 –325
- mipmap resource folder, 108
- MipMaps, 113
- MMS (multimedia messaging service), 806
- mobile Internet, 212
- monetizing applications, 853 –854
- Monkey, 49 , 55
- Monkey Runner, 49 , 55
- movement sensors, 637 –638
- Mutable Live Data, 249
-
My Location layer,
596
- interaction markers, 596 –599
- N
- native Internet apps, 212 –213
- native libraries, 9
- navigation
- NavigationView class, 486 –487
- NDK (native development kit), 10
- nesting, layouts, 140 –141
- New Project Wizard, 20 –24
- NFC, manifest file, 98
- NFC (Near Field Communication), 713 , 714
- NinePatch Drawables, 445
- Notification Builder
- Notification Manager, 11 , 401
- Notifications, 59
- notifyChange method, 325 –327
- O
- Object Animator class, 510 –513
- Observers, 249
- ofObject method, 511
- On Shared Preferences Listeners, 254
- onActivityResult event handler, 181 –184, 503 –504
- onCancelListener handler, 324
- onCreate method, 31 –32, 320 –321
- onDraw method, 164 –165
- OnInitListener, 503 –504
- onKeyDown event handler, 167
- OnKeyListener method, 535
- onKeyUp event handler, 167
- onMeasure method, 165 –166
- onPostExecute event handler, 381
- onPreExecute event handler, 381
- onProgressUpdate event handler, 381
- onSensorChanged, 631
- onStartJob method, 392
- onStopJob method, 392
- OnSuccessListener method, 550
- onTouchEvent event handler, 167
- OnTouchListener, 534
- onTrimMemory handler, 71 –73
- open source development platform, 3
- open source libraries, 4
- open source operating system, 3
- openFileHelper method, 327 –328
- OpenGL, 4
- OpenGL ES hardware, manifest file, 98
- OpenJDK, 14 , 16 , 17 –18
- operating system
- OperationCanceledException, 324
- orientation sensors, 622 –623, 637 –639
- ORM (object-relational mapping), 282 –283
- OS (operating system), 14
- P
- Package Manager, Activities, launching, 181
- Paint
- painter's algorithm, 164
- parameters, CancellationSignal, 322 –323
- parsing
- pasting clipboard data, 539 –540
- Path Effects, 519
- Pending Intents, 208 –210
- permissions
- Phone State Listener, 803 –805
- pixels
- platforms, 6
- plug-ins, Intent Filters, 194 –198
- postfix code completion, 51
- Preference Fragments, 260 –261
- Preference Screens
- Preference Support Library, 256 –257
- PreferenceFragment class, 256 –257
- preferences
- preinstalled applications, 4 –5
- processes
- processors, design and, 40
- production builds, signing, 830 –835
- Profiler, 14 , 17 , 48 , 52 –53
- ProgressBar control, 143
- ProGuard, 49
- projects
- property animations, 114 , 115 –116, 510 –513
- public directories, scoped directory access, 270 –274
-
publishing applications,
845
–848
- staged rollouts, 848
- Pull Parser (XML), 219 –220
- R
- R class, 119 –120
- RadioButton control, 144
- RDBMS (relational database management system), SQLite, 298
- Receivers, 59
- RecognizerIntent class, 505 –506
- RECORD_AUDIO permission, 506
- recording video, 706
-
RecyclerView control,
143
,
144
- Adapters, 146 –147
- redundant layers, 140 –141
- Relative Layouts, 137
- RelativeLayout class, 133
- release management, 845 –848
- release signing key, 832 –833
- releasing applications
- RemoteViews, 744
- RemoteViews Service
- requestLocationUpdates method, 555 –560
- requestPermissions method, 547 –548
- requestTriggerSensor, 630
- res folder, 32 , 108 –118
- resolution, pixels
- Resource Manager, 11
-
resources
- animations, 114 –118
- application termination, 71 –73
- in code, 119 –120
- colors, 111
- creating, 108 –118
- dimensions, 111 –112
- drawables, 112 –113
- externalizing, 107 –127
- hardware, 122 –126
- languages, 122 –126
- layouts, 113 –114, 121
- MipMaps, 113
- referencing, 120 –121
- runtime configuration, 126 –127
- strings, 110 –111
- styles, 112 , 122
- system resources, 121 –122
- themes, 112
-
values,
109
–110
- qualifiers, 123 –124
- Resources class, 119 –120
- RFCOMM
- Room, 282 –283
- RotateDrawable class, 536
- rotation vector sensors, 646 –647
- Rubin, Andy, 1 –2
- run time, 4
- runtime
- S
- SaaS (Software as a Service), 242
- sample projects, 34
- scalable graphics
- ScaleDrawable class, 536
- scheduling, background tasks, 385 –386
- scoped directory access, 270 –274
- screens
- scrolling toolbar, 473 –476
- SDK (software development kit), 4
- SDK Manager, 14 , 48
- SDK Platforms, 18
-
SDK Tools,
18
- Google Play services, 543 –545
- search, speech recognition, 507
- Search View, 354
- searches, 50
-
security,
46
–47,
788
- Linux, 788
- sendMultipartTextMessage method, 813
- sendTextMessage, 810 –811
- Sensor class, 620 –621
- Sensor Listener, acceleration, 641
- Sensor Manager, 620
- Sensor objects, 620 –621
- SensorEvent parameter, 628
- SensorEventCallback, 630 –631
- SensorEventListener, 627 –629
-
Sensors
- best practices, 637
- body, 623
- body sensors, 659 –662
- capabilities, 625 –626
- device movement, 622 –623
- discovery, 623 –625
- Environmental, 621 –622
- exercise, 623
- Hardware, 621
- identifying, 623 –625
- manifest file, 98
- movement, 637 –638
- non-wakeup, 627
- onSensorChanged, 631
- orientation, 622 –623, 637 –639
- reporting modes, 626
- requestTriggerSensor, 630
- return values, 632 –635
- testing
- Trigger Event Listener, 629 –630
- Virtual, 621
- wakeup, 627
- Sensor.TYPE_ACCELEROMETER, 622
- Sensor.TYPE_AMBIENT_TEMPERATURE, 621
- Sensor.TYPE_GEOMAGNETIC_ROTATION_VECTOR, 622
- Sensor.TYPE_GRAVITY, 621
- Sensor.TYPE_GYROSCOPE, 622
- Sensor.TYPE_HEART_BEAT, 623
- Sensor.TYPE_HEART_RATE, 623
- Sensor.TYPE_LIGHT, 621
- Sensor.TYPE_LINEAR_ACCELERATION, 622
- Sensor.TYPE_LOW_LATENCY_OFFBODY_DETECT, 623
- Sensor.TYPE_MAGNETIC_FIELD, 621
- Sensor.TYPE_MOTION_DETECT, 622
- Sensor.TYPE_POSE_6DOF, 622
- Sensor.TYPE_PRESSURE, 621
- Sensor.TYPE_PROXIMITY, 622
- Sensor.TYPE_RELATIVE_HUMIDITY, 622
- Sensor.TYPE_ROTATION_VECTOR, 622
- Sensor.TYPE_SIGNIFICANT_MOTION, 623
- Sensor.TYPE_STATIONERY_DETECT, 623
- Sensor.TYPE_STEP_COUNTER, 623
- Sensor.TYPE_STEP_DETECTOR, 623
- Services, 58 , 424 –425
- SessionManagerListener, 685
- setAudioSource method, 696
- setDuration method, 511
- setInterpolator method, 512
- setLanguage method, 504
- setPitch method, 504
- setRepeatCount method, 511
- setRepeatMode method, 511
- setSpeechRate method, 504
- setSystemVisibility method, 508 –509
- SettingsClient, 560 –561
- Shape Drawables, 439 –440
- Shared Preferences, 246
- sharing files, Content Providers, 327 –328
- signing certificates, 832 –833
- simple values, 109 –110
-
skeleton code,
62
- Fragments, 73 –74
- SMS, 788 , 798 , 806
- SMS_DELIVER_ACTION, 807
- SmsManager class, 809 –810
- software, availability, 793 –794
- software stack, 8 –9
- sp (scalable pixel), 131
- speak methods, 504
- speech recognition
- speech synthesis, 503
- speed, design and, 41 –42
- SQLite, 4
- SQLite Open Helper, implementing, 301 –302
- SQLite3, 49
- SQLiteQueryBuilder class, 322 –323
- startActivity method, 179
- startActivityForResult method, 182
- started Services, 427 –428
- State List Drawables, 537 –538
- states, saving, 246
- storage
- Storage Access Framework, 246 , 275 –276
- storage capacity, design and, 40
- streaming
- Strict Mode APIs, 797 –798
-
strings,
110
–111
- Linkify, 199
- styles, 112
- support libraries, 9
- Support Library, 36 –38
- SurfaceView class, 162
- system resources, 121 –122
- SYSTEM_UI_FLAG_IMMERSIVE flag, 509
- SYSTEM_UI_FLAG_IMMERSIVE_STICKY flag, 509
- T
- Tabs
- telephony, 798
-
Telephony Manager,
801
–802
- READ_PHONE_STATE, 802
- templates, Live Templates, 51
- testing, device configuration, 26 –29
- TextToSpeech.Engine class, 503 –504
- textual descriptions of views, 503
- textures, manifest file, 99
-
TextView control,
143
- extending, 156 –157
- themes, 112
- ThreadPolicy class, 797
- Threads, 214 –216, 379
- TimeInterpolator class, 512
- T-Mobile G1, 6
- Toast messages, 498 –499
- toolbar
- touchscreen
- transactions, Content Providers, 325 –327
- transfer mode, 519
- Transform Filter, 200
- translucency, 515 –516
- Trigger Event Listener, 629 –630
- TTS (text-to-speech), 503 –505
- TypeEvaluator class, 511
- U
- UIs (user interfaces), 130 –131, 464
- update method, 337 –338
- upload signing key, 832 –833
- URI-based permissions, 278 –279
- UriMatcher, 322
- URIs, UriMatcher, 322
- USB (universal serial bus)
- user interface framework, 4
-
UX (user experience),
130
,
502
- navigation, without touch screen, 502 –503
- V
- values, simple values, 109 –110
- variables, Data Binding, 152 –153
-
Vector Asset Studio,
48
- Vector Drawables, 442
- Vector Drawables, 131 , 434 , 441 –445
- vibration control, 508
- Vibrator Service, 508
- video, 666 –667. See also Media Player
- VideoView control, 144
- view animations, 114 , 116 –118
-
View class,
131
- creating, 162 –164
-
View Groups,
131
- compound controls, 159 –161
-
View Holder,
91
–92
- Adapter and, 146
- View Models, 216 –218, 248 –249
- View Pager, 480 –481
- ViewModels, 249 –251
- ViewPager control, 144
-
Views,
11
,
31
–32,
131
,
246
- accessibility, 168 –169
- Adapter View class, 763 –764
- attributes, custom, 157 –159
- Behaviors, Coordinator Layout and, 473 –474
- Compass View, 169 –175
- controls
- creating, 155
- custom, 162 –175
- enhancing, 513 –514
- event handling, 167 –168
- hierarchy, Fragments, 73 –74
-
layouts and,
132
- number of, 141 –142
- measurements, 166 –167
- SurfaceView class, 162
- TextView, extending, 156 –157
- Widgets
- views, textual descriptions, 503
- Virtual Device, Sensor testing, 635 –637
- Virtual Device Configuration dialog box, 24 –26
- Virtual sensors, 621
- VmPolicy class, 797
- voice input, speech recognition and, 506 –507
- volume, 677 –678
- W
- wakeup sensors, 627
- Wallpaper Service, 780 –781
- weather station, 655 –659
- WebKit, 4
- WhereAmIActivity, 551 –555
- Widgets, 131 , 744 –745
-
Wi-Fi,
212
- manifest file, 98
- Wi-Fi Peer-to-Peer, 713 , 714 , 728 –729
- Window Manager, responsiveness and, 44
- Windows, Android Studio, installation, 17
- wizards
-
Work Manager,
385
- scheduling background tasks, 393 –396
Professional Android ® , Fourth Edition
Published by
John Wiley & Sons, Inc.
10475 Crosspoint Boulevard
Indianapolis, IN 46256
Copyright © 2018 by John Wiley & Sons, Inc., Indianapolis, Indiana
Published simultaneously in Canada
ISBN: 978-1-118-94952-8
ISBN: 978-1-118-94954-2 (ebk)
ISBN: 978-1-118-94953-5 (ebk)
Manufactured in the United States of America
10 9 8 7 6 5 4 3 2 1
No part of this publication may be reproduced, stored in a retrieval system or transmitted in any form or by any means, electronic, mechanical, photocopying, recording, scanning or otherwise, except as permitted under Sections 107 or 108 of the 1976 United States Copyright Act, without either the prior written permission of the Publisher, or authorization through payment of the appropriate per-copy fee to the Copyright Clearance Center, 222 Rosewood Drive, Danvers, MA 01923, (978) 750-8400, fax (978) 646-8600. Requests to the Publisher for permission should be addressed to the Permissions Department, John Wiley & Sons, Inc., 111 River Street, Hoboken, NJ 07030, (201) 748-6011, fax (201) 748-6008, or online at
http://www.wiley.com/go/permissions
.
Limit of Liability/Disclaimer of Warranty: The publisher and the author make no representations or warranties with respect to the accuracy or completeness of the contents of this work and specifically disclaim all warranties, including without limitation warranties of fitness for a particular purpose. No warranty may be created or extended by sales or promotional materials. The advice and strategies contained herein may not be suitable for every situation. This work is sold with the understanding that the publisher is not engaged in rendering legal, accounting, or other professional services. If professional assistance is required, the services of a competent professional person should be sought. Neither the publisher nor the author shall be liable for damages arising herefrom. The fact that an organization or Web site is referred to in this work as a citation and/or a potential source of further information does not mean that the author or the publisher endorses the information the organization or Web site may provide or recommendations it may make. Further, readers should be aware that Internet Web sites listed in this work may have changed or disappeared between when this work was written and when it is read.
For general information on our other products and services please contact our Customer Care Department within the United States at (877) 762-2974, outside the United States at (317) 572-3993 or fax (317) 572-4002.
Wiley publishes in a variety of print and electronic formats and by print-on-demand. Some material included with standard print versions of this book may not be included in e-books or in print-on-demand. If this book refers to media such as a CD or DVD that is not included in the version you purchased, you may download this material at
http://booksupport.wiley.com
. For more information about Wiley products, visit
www.wiley.com
.
Library of Congress Control Number: 2018951986
Trademarks: Wiley, the Wiley logo, Wrox, the Wrox logo, Programmer to Programmer, and related trade dress are trademarks or registered trademarks of John Wiley & Sons, Inc. and/or its affiliates, in the United States and other countries, and may not be used without written permission. Android is a registered trademark of Google, LLC All other trademarks are the property of their respective owners. John Wiley & Sons, Inc., is not associated with any product or vendor mentioned in this book.
To Kris.
— RETO
To Andrea and Hannah.
— IAN
ABOUT THE AUTHORS
RETO MEIER has been working to help Android developers create the best applications possible for their users since the initial Android release in 2007. Reto grew up in Perth, Western Australia, and then spent “the next 18 months” in London for a total of 6 years, before settling in the San Francisco Bay Area with his wife in 2011.
Reto has spent 10 years as a Developer Advocate at Google, contributing articles, online training, conference talks, and YouTube videos to the developer community.
Before smartphones were invented, Reto spent over 10 years as a software developer in various industries, including offshore oil and gas and finance.
You can learn more about Reto’s thoughts on Android development, ask him questions, and see pictures of his cats on Twitter at
www.twitter.com/retomeier
, where he shares more than he probably should, and read longer thoughts on Medium at
medium.com/@retomeier
.
IAN LAKE has lived in nine states across the United States before settling in the San Francisco Bay Area in 2013.
Ian is a member of the Android Toolkit team at Google, focused on providing the libraries and APIs needed for modern Android development. His prior experience includes that as an Android Developer Advocate, Android app developer, and enterprise application developer back when Android wasn’t even an option.
You can connect with Ian on Google+ (
plus.google.com/+IanLake
) or Twitter (
www.twitter.com/ianhlake
) to learn more about his wonderful family, hobbies (mostly Android development), and interests.
While Reto and Ian work at Google, the views and opinions expressed in this book are theirs alone and do not necessarily represent those of their employer.
ABOUT THE TECHNICAL EDITORS
DANIEL ULERY is a Senior Software Engineer who lives near Lewiston, Idaho. His experience includes software engineering projects using technologies such as Java Enterprise, C# WinForms, SQL Server, Raspberry Pi, and Android. Dan received his Bachelor of Science in Computer Science from the University of Idaho in 2004. When he’s not working on software projects, he’s likely working on one of many DIY projects.
ED WOODWARD is a Senior Development Manager and Android Developer for OpenStax at Rice University. He currently manages the Devops team and is tech lead on the Business Intelligence team along with developing OpenStax’s Android app. Prior to joining OpenStax, Ed was a Vice President/Application Architect at JPMorganChase. Ed was a Band Director at the high school and middle school level for several years before transitioning to programming.
CHAIM KRAUSE is an expert computer programmer with more than 30 years of experience to prove it. He has worked as a lead tech support engineer for ISPs as early as 1995, as a senior developer support engineer with Borland for Delphi, and has worked in Silicon Valley for over a decade in various roles, including technical support engineer and developer support engineer. He is currently a military simulation specialist for the US Army’s Command and General Staff College, working on projects such as developing serious games for use in training exercises. He has also authored several video training courses on Linux topics, and has been a technical reviewer for over 20 books, including Amazon Web Services for Mobile Developers (Sybex, 2017) and Professional Swift (Wrox, 2015). It seems only natural then that he would be an avid gamer and have his own electronics lab and server room in his basement. He currently resides in Leavenworth, Kansas, with his beautiful partner Ivana and a menagerie of four-legged companions: their two dogs, Dasher and Minnie, and their three cats, Pudems, Talyn, and Alaska.
MURAT YENER is a code geek, open source committer, Java Champion, and ex-Google Developer Expert on Android, who is working at Google. He is the author of Expert Android Studio (Wiley, 2016) and Professional Java EE Design Patterns (Wiley, 2015). He has extensive experience with developing Android, Java, web, JavaEE, and OSGi applications, in addition to teaching courses and mentoring. Murat was an Eclipse committer and one of the initial committers of the Eclipse Libra project. Murat had been a user group leader at GDG Istanbul and in GDG San Francisco, organizing, participating, and speaking at events. He is also a regular speaker at major conferences, such as DroidCon, JavaOne, and Devoxx.
CREDITS
-
PROJECT EDITOR
John Sleeva -
TECHNICAL EDITORS
Daniel Ulery
Ed Woodward
Chaim Krause
Murat Yener -
PRODUCTION EDITOR
Barath Kumar Rajasekaran -
COPY EDITOR
Kimberly A. Cofer -
PRODUCTION MANAGER
Kathleen Wisor -
CONTENT ENABLEMENT AND OPERATIONS MANAGER
Pete Gaughan -
MARKETING MANAGER
Christie Hilbrich -
EXECUTIVE EDITOR
Jim Minatel -
PROJECT COORDINATOR, COVER
Brent Savage -
PROOFREADER
Nancy Bell -
INDEXER
Johnna VanHoose Dinse -
COVER DESIGNER
Wiley -
COVER IMAGE
© 1971yes/iStock.com
ACKNOWLEDGMENTS
FIRST, I’D LIKE TO THANK MY WIFE KRISTY, whose love and support makes everything I do possible.
A big thank you to my friends and colleagues at Google, particularly all the amazing people in the Android team, without whom I’d have nothing to write about, and the developer relations team who inspire me every day.
I also thank our army of technical editors, including Dan Ulery, Ed Woodward, Chaim Krause, Murat Yener, James Harmon, and Chad Darby, without whom this book would contain far more errors than it does. Those that remain are entirely my fault. Thank you to the whole team at Wrox, especially John Sleeva and Jim Minatel, whose patience and support in getting this book completed was non-trivial.
An extra big thank you goes out to the incredible Android community, made up of passionate, generous, and hard working developers who seem to spend as much time helping each other as they do building amazing apps. Your efforts have been critical in making Android the huge success that it is. Thank you.
—RETO
MY FAMILY, ANDREA AND HANNAH, are what make everything worth it. Without their support, I wouldn’t be able to do much of anything, much less write this book.
I’d like to echo Reto’s thanks for everyone involved in publishing and making this book a reality, the Android team for giving us plenty to talk about, and the Android developer community for sharing our passion around building better apps.
—IAN
WILEY END USER LICENSE AGREEMENT
Go to www.wiley.com/go/eula to access Wiley’s ebook EULA.